Decoupage is gluing cut paper onto an object and sealing it under clear coats so it looks painted on. Boxes, trays, jars, frames and old furniture are all fair game. Here's which glue to start with, why napkins and rice paper work so well, how to get rid of wrinkles and bubbles, and how to seal a piece so it holds up to daily use.
By Colin B. · Published November 19, 2026 · Last reviewed November 19, 2026
A jar of matte decoupage glue, a pack of foam brushes and an unfinished wood box cost about $20. Add a brayer, detail scissors, rice paper or printed napkins, a craft knife and a clear spray sealer for about $55.
We earn commission when you buy through links on this page, including
Amazon. See our affiliate disclosure.
Price tiers and budget totals shown above are editorial estimates;
actual prices vary.
At a glance
Our top pick in each category
The fastest path through this guide — each best-starter pick by category.
Scroll for the budget and upgrade alternatives.
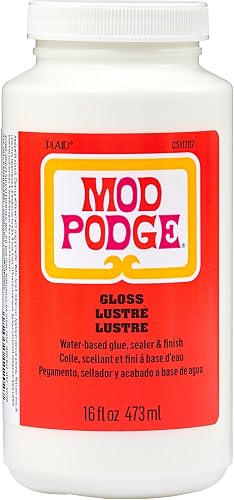
Start with one jar of Mod Podge in matte. It's the glue, the sealer and the finish all in one. Gloss looks shinier but shows brush marks more. Special formulas like dishwasher safe or outdoor are for later, once you know what you're making.
Thin paper is easiest. Paper napkins, tissue paper and decoupage rice paper wrap around curves and lie flat with almost no wrinkles. Thick paper like scrapbook paper and magazine pages works on flat surfaces, but needs a brayer to press out bubbles.
Start flat and cheap. An unfinished wood box, a tray or a plaque from a craft store is the easiest first project. Glass jars and curved surfaces come next. Save furniture for when you've done a few small pieces.
Give it time. Each coat needs 15 to 20 minutes to dry before the next. Mod Podge needs about four weeks to fully cure, and until then it can feel tacky or stick to things set on it.
The gear
What you actually need
Decoupage glue
Decoupage medium glues the paper down and seals it on top. Mod Podge is the one most people use. Matte is the easiest to start with because it hides brush marks. Gloss is shinier. Special versions handle outdoor pieces and the outside of mugs and plates. Use thin coats and let each dry 15 to 20 minutes. Full cure takes about four weeks.
Best starter
Plaid
Matte Sealer, Glue and Finish
$3.99 as of Nov 19, 2026
★★★★★Our rating· In Stock
The decoupage glue almost every tutorial uses. It glues paper down, seals over it and dries to a soft matte finish that hides brush strokes. One jar covers many small projects. Sold by Amazon. About $3.99, 4.8 stars from 25,527 ratings.
The same formula with a shiny finish, for boxes, trays and anything you want to look lacquered. Use a foam brush to keep streaks down. Sold by Amazon. About $7.99, 4.8 stars from 60,213 ratings.
A heat-cured formula for the outside of glass and ceramic mugs, plates and jars. Let it dry, then cure it for 28 days and it holds up to the top rack of a dishwasher. Sold by Amazon. About $14.99, 4.7 stars from 10,234 ratings.
Foam brushes lay down thin, even coats with no bristle marks and are cheap enough to throw away. A soft synthetic flat brush is better for napkins and rice paper, which can tear under foam. A rubber brayer rolls paper flat from the center out and pushes out the air bubbles and extra glue that cause most wrinkles.
Best starter
Jen Manufacturing
Poly-Brush Foam Brushes, 1 Inch, 48 Pack
$19.99 as of Nov 19, 2026
★★★★★Our rating· In Stock
Dense foam brushes on wood handles that spread Mod Podge in thin, even coats with no streaks. Buy a multipack and toss them when the glue builds up. Wash them once or twice to stretch the pack. Sold by BPJ Limited. About $19.99, 4.7 stars from 280 ratings.
A printmaking roller that's just as useful for decoupage. Roll from the center out to flatten paper and push out bubbles. Especially useful with thicker scrapbook and magazine paper. Sold by Speedball Art Products. About $22, 4.8 stars from 3,258 ratings.
Soft flat synthetic brushes for dabbing glue over napkins and rice paper without tearing them. Rinse in warm water right after use and they last for many projects. Sold by BIGFLY. About $12.99, 4.7 stars from 974 ratings.
The thinner the paper, the easier it is to get a smooth, painted-on look. Decoupage rice paper is thin but strong and comes printed with florals, vintage labels and patterns. Paper napkins work the same way once you peel off the backing plies. Thicker scrapbook paper suits flat surfaces. Inkjet prints smear under glue, so seal them with a clear spray first.
Best starter
Generic
Antique Decoupage Paper, 200 Pieces
$12.49 as of Nov 19, 2026
★★★★★Our rating· In Stock
A big pack of thin printed papers with vintage flowers, labels and botanicals, made for decoupage and journals. Thin paper wraps around curves and lies flat with few wrinkles. Plenty for practice pieces. Sold by Siblymona. About $12.49, 4.5 stars from 188 ratings.
Printed paper napkins in twenty floral designs. Peel off the back plies and the printed layer glues down like a painted design. A cheap way to try napkin decoupage. Sold by whiteysk. About $4.99, 4.6 stars from 1,237 ratings.
Unfinished wood boxes, trays and plaques are the easiest first surfaces. Sand them lightly with 220 grit and paint a base coat. Sharp detail scissors cut around flowers and small shapes cleanly. A craft knife trims paper flush with the edge of a lid or tray once the glue is dry. Change knife blades often, since a dull blade tears damp paper.
Best starter
Creative Hobbies
Unfinished Wood Craft Box with Clasp
$7.99 as of Nov 19, 2026
★★★★★Our rating· In Stock
A plain wood box with a hinged lid and clasp, sold for crafts. Flat sides and a lid make it the easiest first decoupage project, and it becomes a keepsake or jewelry box when done. Sold by Wholesale Crafts. About $7.99, 4.4 stars from 262 ratings.
Small spring-loaded scissors with fine tips that cut into tight curves around petals and leaves. Much cleaner than regular scissors for cutting out printed motifs. Sold by Amazon. About $14.99, 4.8 stars from 4,393 ratings.
The standard craft knife for trimming paper flush with an edge after the glue dries. Cheap replacement blades mean you can always work with a sharp one, which keeps edges clean. Sold by JA Wholesale LLC. About $9.99, 4.7 stars from 3,746 ratings.
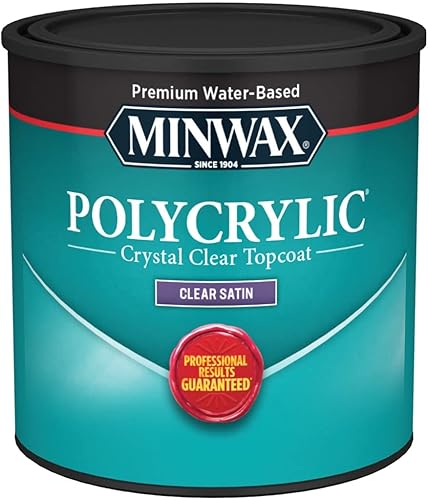
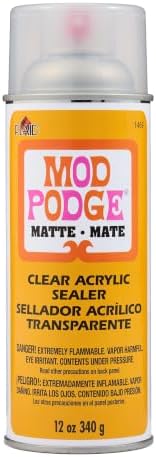
Mod Podge alone isn't waterproof and can stay tacky. A clear top coat over finished work makes it tougher and less sticky. Clear acrylic spray is fast and leaves no brush marks. Water-based polycrylic brushes on and holds up to cups and wiping on trays and furniture. Avoid oil-based polyurethane over white or light papers, since it yellows over time.
Best starter
Minwax
Polycrylic Protective Finish, Clear Satin, Pint
$12.78 as of Nov 19, 2026
★★★★★Our rating· In Stock
A water-based clear coat that brushes on over dry decoupage and dries hard enough for trays, tables and boxes that get handled. It doesn't yellow like oil-based finishes. Sold by Amazon. About $12.78, 4.6 stars from 3,794 ratings.
A quick spray coat that cuts the tackiness of Mod Podge and adds light protection. Also good for sealing inkjet prints before gluing so the ink doesn't run. Sold by Amazon. About $10.18, 4.6 stars from 2,375 ratings.
Decoupage is mostly about thin coats and smooth paper. In a month you can go from a test board to a sealed box, a jar and a small tray you'd actually use. Here's a week-by-week plan.
The biggest beginner mistake in decoupage is using too much glue. Thin coats, patience between them, and smoothing from the center out fix most problems.
Week 1: A test board and a box
Cut a scrap of plywood or use the bottom of a cheap box. Try three papers on it: a napkin, a piece of tissue paper and a magazine page. Brush a thin coat of Mod Podge on the wood, lay the paper down, and smooth it from the center out. Let it dry 20 minutes and add a thin coat on top. Note which paper wrinkled least.
Sand an unfinished wood box with 220 grit and wipe off the dust. Paint the sides a color that matches your paper and let it dry. Cut your paper slightly bigger than the lid, glue it down, and trim the edges with a craft knife once it’s dry. Add three thin top coats, letting each dry before the next.
Try a clean glass jar. Wipe it with rubbing alcohol first so the glue grips. Tear napkin or rice paper into pieces instead of cutting, since torn edges blend better on curves. Overlap the pieces a little and press each one flat. Keep the inside of anything that holds food or drinks free of glue.
Pick a flat wood tray. Decoupage the inside with one large print or a pattern of cutouts. When it’s dry, add four or five thin top coats, then two coats of a water-based polycrylic or a clear acrylic spray so it can handle cups and wiping. Let it cure for a few weeks before heavy use.
Decoupage the lid of your box and add three thin top coats. · Action
FAQ
Common questions
What glue do you use for decoupage?
Mod Podge is the standard. It works as glue under the paper and as a clear sealer on top. Matte is the easiest to start with. Watered down white glue works in a pinch, but it stays cloudy and can stay sticky.
How do I stop wrinkles and bubbles?
Use thin paper, put a thin coat of glue on the surface rather than the paper, and smooth from the center out with a brayer or a plastic card. With thick paper, brush a coat of Mod Podge on both sides and let it dry first so it doesn't swell.
How do you decoupage with napkins?
Peel off the white backing plies so only the thin printed layer is left. Brush Mod Podge on the surface, lay the napkin down, and dab more glue on top with a soft brush or your fingertip. It will wrinkle a little, which looks natural on most pieces.
Why is my decoupage still sticky?
Mod Podge takes about four weeks to fully cure, and humid weather slows it down. Thin coats cure faster than thick ones. A clear acrylic spray sealer over the top removes most of the tackiness.
Can decoupaged items be washed?
Regular Mod Podge isn't waterproof. Wipe pieces with a damp cloth only. For mugs and plates use the dishwasher safe formula on the outside only, and keep food away from decoupaged surfaces.
JustBeginning earns commission from affiliate programs. As an Amazon
Associate, we earn from qualifying purchases. This costs you nothing
extra and doesn't change our recommendations.
Prices and availability are accurate as of the date and time
shown and can change; the price on Amazon when you buy is what
applies.
How this works.

 Best starter