Furniture flipping is one of the few hobbies where you can profit while you learn. Buy a beat-up dresser for $30, spend a weekend sanding and painting, and sell it for $200. The gear that matters most is less than you'd think, and the biggest beginner mistake isn't buying the wrong things — it's buying everything at once before you've finished a single piece.
By Colin B. · Published June 3, 2026 · Last reviewed June 3, 2026
Rust-Oleum Chalked Paint Wax
— A good chalk paint wax is the difference between a piece that looks finished and one that looks amateur.
Budget total
$120
Typical total
$250
Your first flip can easily cost more in supplies than you sell for — that's normal. By piece three you'll know which supplies you actually use.
We earn commission on qualifying Amazon purchases — see our
affiliate disclosure.
Price tiers and budget totals shown above are editorial estimates;
actual Amazon prices vary.
At a glance
Our top pick in each category
The fastest path through this guide — each best-starter pick by category.
Scroll for the budget and upgrade alternatives.
Find your first piece before buying anything. A thrift store dresser or Marketplace score for $20-40 is your classroom. Having the piece in front of you tells you what prep it actually needs — some want heavy sanding, some just need cleaning and paint.
Chalk paint is not the only option, but it's the right starting point. It sticks to most surfaces without heavy sanding, it's forgiving, and the matte finish hides imperfections. Learn with chalk paint before you try latex or milk paint.
Your sander is the tool that earns back its cost on piece one. Don't skip it or try to do everything by hand. A $50 random orbit sander will save you four hours of elbow grease on a single dresser.
Prep is 70% of a good flip. You don't need to strip a piece to bare wood — most chalk paint just needs scuff-sanding to give it something to grip. A random orbital sander handles that in minutes. For pieces with layers of old paint, you'll want to go deeper. The right sander for beginners is a 5-inch random orbit — it's fast, hard to mess up, and works on flat and slightly curved surfaces. Budget for a pack of 80-grit and 120-grit discs.
Sanders & Prep — what's the difference?
A few common shapes, each making a different trade.
Random Orbital (5-inch)
The right starting sander. Fast on flat surfaces, won't gouge.
Orbit size
5/32" throw
Best for
Flat panels, tabletops, drawer fronts
Speed
Fast (12,000 OPM)
Best for First piece, most pieces — the default choice
No tool needed. Slow but fine for small touch-ups.
Cost
~$5
Best for
Final scuff-sand, distressing edges
Speed
Slow
Best for Distressing edges intentionally, final 220-grit pass
Tradeoff Exhausting on anything larger than a small nightstand
Best starter
BLACK+DECKER
Random Orbit Sander BDERO100
$39.99 as of Jun 22, 2026
★★★★★Our rating· In Stock
The standard entry sander for furniture flipping — 5-inch pad, random orbit action that won't leave swirl marks, and a dust bag that actually catches something. Lightweight enough to run for an hour without fatigue. It's what most beginners buy, use for years, and never feel the need to upgrade.
What we like
5-inch random orbit pattern won't leave swirl marks on wood
Lightweight at 3.5 lbs — comfortable for a full dresser session
Hook-and-loop pad accepts generic 5-inch discs, not proprietary
What to know
Dust bag fills quickly on heavy paint removal — empty often
Vibration becomes noticeable after 45+ minutes of continuous use
When you're doing multiple pieces a week, the DEWALT earns its premium. Better dust collection, more consistent speed control, and a more comfortable grip for extended sessions. The build quality noticeably outlasts the BLACK+DECKER when you're putting in real hours.
For spindles, carved details, and tight inside corners where a 5-inch pad won't reach. The BDEMS600's triangular pad and narrow finger attachment sand places a large orbital can't touch. Most beginners start furniture with flat dressers and don't need this yet — but once you take on a chair or a decorative sideboard, you'll wish you had it.
What we like
Triangular pad reaches into corners orbital sanders can't touch
Finger attachment sands tight spindles and carved accents
What to know
Too slow for large flat surfaces — pair with orbital, not replace it
Specialty papers cost more per sheet than standard disc packs
Chalk paint is the standard for furniture flipping because it sticks to almost anything without stripping or priming — a light scuff-sand is usually enough. It dries fast, sands easily between coats, and the flat finish is forgiving of brush strokes. Two coats cover most pieces. Annie Sloan invented the category; Rust-Oleum made it accessible at half the price. Both work. Start with Rust-Oleum, move to Annie Sloan once you know what colors you actually want to stock.
Best starter
Rust-Oleum
Chalked Ultra Matte Paint
$20.44 as of Jun 22, 2026
★★★★★Our rating· In stock
Thirty-two ounces for under $15, available at every hardware store, and it behaves exactly the way chalk paint should. Sticks without primer on most surfaces, covers in two coats, and sands smooth between layers. The color range is limited but the neutrals are good. Start here — you'll use up a quart figuring out your technique before committing to pricier paint.
What we like
Under $15 per quart — test colors without expensive commitment
Available at any hardware store for same-day starts
Covers most furniture in two coats without primer
What to know
Color range narrower than Annie Sloan — limited custom mixing
Dries fast; overworking the brush lifts the layer beneath
The original chalk paint, and still the benchmark. The coverage is exceptional — most pieces take one heavy coat or two light ones — and the pigment quality means colors stay true after waxing. More importantly, the range of colors is wider and more curated. Once you're selling regularly and want your pieces to look consistent and premium, Annie Sloan is where you go.
What we like
Best color depth in chalk paint — neutrals and deep tones stay rich
Coverage rate beats Rust-Oleum — often one coat on raw wood
Widely trusted by resellers; buyers recognize the name
What to know
$45+ per liter makes experimentation expensive
Only available online or at specialty stockists — no hardware store
Eight ounces for around $5 — cheap enough to test a color before committing to a full quart. Good for small accent pieces or testing a new color on a board first. Coverage is thin, so plan on three coats on anything porous, but for small projects and color testing it's the right way in.
What we like
Cheapest per-ounce entry into chalk paint — ideal for color testing
Wide color range at craft stores for easy in-person comparisons
What to know
Thinner consistency needs 3 coats on porous surfaces
8-oz size is too small for anything bigger than a nightstand
Chalk paint brushes aren't special — they're stiff, natural or synthetic bristle brushes that hold a good load of paint. A 2-3 inch angled brush gets into most furniture details. A foam roller cuts application time on flat panel doors and drawer fronts in half and gives a smoother finish with fewer brush marks. You do not need expensive brushes to start — a $10 chip brush set will get you through your first three pieces.
Best starter
Wooster
Shortcut Angle Sash Paintbrush 2-Inch
$7.42 as of Jun 22, 2026
★★★★★Our rating
Professional-grade brush that holds more paint than cheap chip brushes and leaves fewer bristle marks. The angled tip gets into corners and under drawer lips without dripping. Painters have trusted Wooster for decades — this is the brush you use on one piece, clean immediately, and it lasts through 20 more.
What we like
Holds more paint load than chip brushes — fewer reloads per stroke
Angled tip reaches under drawer lips and into frame corners
Professional grade at a price you won't mind replacing
What to know
Must be cleaned within 30 minutes — chalk paint dries in the bristles
Angle shape takes a few strokes to get used to if you're new to it
A foam roller on flat drawer fronts or cabinet doors cuts your painting time in half and produces a noticeably smoother finish than a brush. Use a brush for edges and details, roll the flat surfaces. The technique flip that pros use on cabinet jobs translates directly to furniture flipping.
What we like
Smoother finish on flat panels than any brush technique
Cuts application time in half on drawer fronts and cabinet doors
What to know
Useless on curved or detailed surfaces — still need a brush for those
Rollers soak up more paint than brushes — waste adds up on small jobs
Chalk paint needs a topcoat — it's porous and will absorb every fingerprint and water ring without one. Wax is the traditional finish: you apply it with a brush or rag, buff it out, and it gives a beautiful, soft sheen. The downside is that wax isn't waterproof and needs reapplication every couple of years. For pieces that will see hard use — a dining table, a kitchen cabinet — a water-based polycrylic gives more durable protection with a slight sheen. Match the topcoat to what the buyer will actually do with the piece.
Best starter
Rust-Oleum
Chalked Paint Wax
$
★★★★★Our rating
Designed to work with Rust-Oleum Chalked Paint but works fine over any chalk paint. Easy to apply with a brush or lint-free rag, buff out to a soft matte sheen in minutes. Comes in clear, dark, and white — the dark wax antiqued into crevices and edges is a signature furniture-flipping look. Start clear, experiment with dark once you're comfortable.
What we like
Clear and dark wax options — dark antiqued into details is a signature look
Easy to apply and buff — forgives amateur technique
Available at hardware stores for same-day finishing
What to know
Not waterproof — unsuitable for dining tables or high-use surfaces
Won't bond over poly or sealed finishes — surface must be chalk paint
A softer, more workable wax that buffs out to a gorgeous depth. The consistency lets you work it into carved details and get a very even finish without drag marks. Pairs with the Annie Sloan paint system for a result that photographs and sells at a premium. Worth it once you're pricing pieces above $300.
What we like
Softer than Rust-Oleum wax — works into carved details without drag
Finished look photographs beautifully — a premium resale signal
What to know
Expensive at $30+ for a small tin — get more coverage from Rust-Oleum
Overkill for utility pieces or anything under $150 resale
When wax isn't durable enough — dining tables, bar carts, anything that will see daily use and spills — switch to polycrylic. Water-based so it won't yellow like oil-based poly. Apply with a foam brush in thin coats. Not the chalk-paint aesthetic, but the right answer for practical furniture.
What we like
Water-resistant and durable — right for tables, bar carts, nightstands
Water-based formula won't yellow over light chalk paint colors
What to know
Requires light sanding between coats — more steps than wax
Slightly more sheen than wax — less characteristic of the chalk look
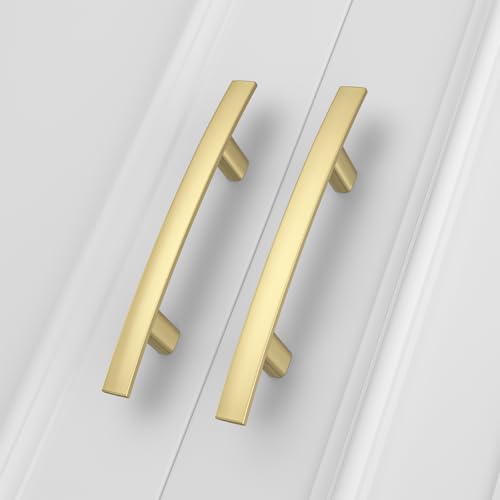
New hardware is the detail that takes a piece from 'painted furniture' to 'styled furniture.' Pull the drawer knobs on any thrift store piece and you'll usually find stamped brass or plastic from the 1990s. Replacing them with matte black, brushed gold, or ceramic hardware costs $15-40 and adds $50-100 to the perceived value of the piece. Buy a measuring tape and know your hole spacing before you order — center-to-center measurements matter.
Best starter
Amerock
Everyday Heritage Matte Black Knobs (10-pack)
$
★★★★★Our rating
Matte black knobs are the single most versatile hardware choice for painted furniture — they read modern without being trendy and photograph well. Amerock is the house brand at most hardware stores, which means consistent quality and easy returns if the hole spacing doesn't match. Buy a pack of 10 and you'll have enough for a full 6-drawer dresser with spares.
What we like
Matte black reads modern — photographs well in resale listings
Standard 1.25-inch screw fits most furniture without drilling
Available at hardware stores — easy to exchange the wrong size
What to know
Knobs only — drawer pulls (two-hole) need a separate search
Matte black shows fingerprints more than brushed finishes
Brushed gold pulls on a navy or forest green painted dresser is the look all over furniture-flipping TikTok right now — and for good reason, it sells. These Homdiy pulls are sturdy, the finish holds up, and at $20 for 10 you can put a full set on a dresser without agonizing over the spend.
What we like
Gold on dark paint is the trending look that sells quickly on Marketplace
3-inch center-to-center fits most mid-century dresser pull holes
What to know
Brushed gold finish chips on heavy use — not for high-traffic drawers
Trendy now; consider whether it'll still read well in 12 months
Chalk paint is water-based and relatively low-hazard, but sanding generates real dust — especially on older furniture that may have lead paint if it's pre-1978. A P100 half-face respirator is the correct protection for sanding anything old. Nitrile gloves keep wax and paint off your hands. A canvas drop cloth protects your workspace. None of this is expensive, and skipping it is how you ruin a floor or inhale something you shouldn't.
Best starter
3M
Half Facepiece Respirator 6502QL
$$
★★★★★Our rating
A P100 half-face respirator for sanding furniture — especially anything pre-1978 — is the purchase you'll be glad you made. The 6502QL uses push-button cartridge attachment so you can swap filters in seconds. Sanding dust from old furniture isn't a minor irritant; wear the respirator.
What we like
P100 cartridges block sanding dust and lead paint particles
Quick-release cartridges swap in seconds without tools
What to know
Cartridges sold separately — budget another $10-15 for filters
Hot and foggy in warm weather — take breaks in fresh air
Canvas catches sanding dust and paint drips without slipping across the floor like plastic sheeting. A 9x12 drop cloth protects your entire workspace and folds up to nothing when stored. Buy one and you'll use it every single flip.
What we like
Canvas stays put — won't slide under furniture the way plastic does
Catches sanding dust and paint drips in one reusable cloth
What to know
Soaks up paint spills rather than containing them — wash before reuse
Heavier than plastic sheeting — takes more space to store
Most people overthink it. Here's what the first flip actually looks like — from finding the piece to posting the listing — with the mistakes that cost you time and money explained before you make them.
Furniture flipping has a reputation for being easy. Sand it, paint it, sell it for triple. The gap between that sentence and your first piece sitting unsold in the garage for three weeks is where most beginners live temporarily. The learning curve is real, and it’s worth knowing what it actually looks like before you start.
The good news: the curve is short. By your third piece, you’ll have a process. By your fifth, you’ll know what sells in your area, what prep you actually need, and which supplies you’re wasting money on. This guide is about getting through piece one without learning the expensive lessons the hard way.
Friday evening: finding the right first piece
Don’t buy supplies before you have a piece. Having a specific dresser in front of you tells you what it needs — some pieces are solid wood and just need cleaning and paint, others have water damage and delaminating veneer that will telegraph through any topcoat. Start with the piece.
Where to look:
Facebook Marketplace (search “dresser,” sort by price low-to-high, filter under $50)
Craigslist Free section (refresh it often, especially on Sunday nights before trash pickup)
Estate sales (Estatesales.net — good pieces, reasonable prices, and they’re already staged so you can see what the style is worth)
Thrift stores (Goodwill and Habitat for Humanity ReStores usually have furniture — prices vary wildly by location)
What to look for in a first piece:
Choose a solid-wood dresser or side table with flat, accessible surfaces. Avoid:
Pieces with missing drawers or broken hardware slides (more repair than painting)
Particle board — it swells, warps, and doesn’t hold chalk paint well on edges
Chairs (high labor, complex prep, harder to photograph well)
Anything with visible mold or a persistent smell
Your goal is a $20-40 dresser with good bones. You’ll pay that and come out ahead on your first sale once you have technique.
Clean the piece before anything else. Grease, polish, and decades of grime prevent paint from bonding. A spray bottle of TSP substitute or a simple dish soap and water scrub, let dry completely. Don’t rush this step — paint over a greasy surface and you’ll have adhesion failures in week two of the buyer’s ownership.
The sanding question:
With chalk paint, you do not need to strip to bare wood. You need to scuff the surface — roughen whatever finish is there so paint has texture to grip. A pass with 120-grit sandpaper on a random orbital sander takes about 20 minutes on a full dresser. Pay attention to the vertical sides and drawer fronts, which often have a heavier old finish.
What does require more sanding or stripping:
High-gloss lacquer (wipe with liquid deglosser instead of heavy sanding)
Multiple thick coats of old paint that are chipping — remove loose paint so you’re not painting over flaking layers
Raw wood with raised grain — sand with 80-grit first, then 120-grit
After sanding, wipe with a tack cloth or barely-damp rag to remove dust. Sanding dust under the paint coat is the main cause of a gritty, rough finish.
Safety note on old furniture: If the piece might be pre-1978, pick up a $3 lead test swab at the hardware store. If it tests positive, don’t sand dry — either wet-sand with a respirator and contained workspace, or simply paint over it without sanding (chalk paint will still adhere on intact lead paint surfaces with a liquid deglosser wipe).
Saturday afternoon: painting
Two coats covers almost everything. Apply the first coat and don’t try to get full coverage — a slightly uneven first coat is fine, it’s what the second coat is for. Let the first coat dry for at least one hour (two in humid conditions) before the second.
Brush technique for chalk paint:
Load your brush generously but not dripping. Work in the direction of the grain where possible. Use long, confident strokes — don’t overwork the paint by going back and forth over the same spot more than twice, especially after the first five minutes of drying time. Chalk paint starts setting up fast; if you keep brushing into a section that’s already tacking, you’ll pull up the surface.
The finish won’t be perfectly smooth after two brush coats. That’s normal and actually part of the look. If you want smoother, lightly sand with 220-grit between the first and second coat (takes 5 minutes and makes a noticeable difference).
For drawer fronts and flat panel doors, a 4-inch foam roller produces a noticeably smoother finish than a brush and cuts application time significantly. Roll the flat areas, use the brush for edges, inside corners, and any raised detail. This combo is how cabinet painters get the smooth finish that photos well.
Saturday evening: wax or topcoat
Let the second paint coat dry 2-3 hours before applying wax. Rushing this step results in wax pulling the paint off in patches.
Applying clear wax:
Scoop a small amount of wax onto a lint-free rag or wax brush. Work it into the surface in small circular sections, then wipe off the excess with a clean cloth. You don’t need much — you’re not spreading butter on toast. A thin, even layer is what you want. Work systematically across the piece so you don’t lose track of where you’ve been.
Let the wax cure 20-30 minutes, then buff with a clean cloth to a soft sheen. The piece will feel slightly dry and chalky until it’s buffed.
Dark wax as an accent:
A thin layer of dark wax rubbed into carved details, corners, and edges and then wiped back gives an aged, antiqued look that’s become the signature furniture-flipping aesthetic. The technique: apply clear wax first, let it tack up for 10 minutes, then apply dark wax sparingly into the recesses and wipe back from the raised surfaces with a clean cloth. The dark stays in the low spots and wipes off the high spots.
When to use polycrylic instead of wax:
Any surface that will see regular use — dining tables, bar carts, desktop surfaces — needs a more durable topcoat. Water-based polycrylic (Minwax makes the standard) goes on with a foam brush in thin coats, dries clear, and doesn’t need buffing. Let it cure 24-48 hours before the piece sees heavy use. More steps, but your buyer won’t have water rings on the surface in month two.
Sunday: hardware and photos
New hardware is your biggest lever for perceived value on painted furniture. A set of matte black knobs or brushed gold pulls costs $15-35 and adds $75+ to the price you can justify. Most thrift store furniture has gold-tone or white plastic hardware from decades past — replacing it signals “this was intentionally styled,” not just “this was painted.”
Before you order hardware:
Measure the existing hole — standard knobs are 1.25-inch, and most furniture uses that. For drawer pulls (two holes), measure center-to-center. Standard is 3-inch, 3.75-inch, or 4-inch. If the holes don’t line up, you’ll be drilling — which is easy, but adds 30 minutes.
Photography matters as much as the finish:
A $400 flip photographed badly sells for $250. A $150 piece photographed well gets seen. Natural light, clean background (a plain wall or a light wood floor), remove everything that doesn’t belong in the shot. Style it simply — a small plant, a book, a lamp. This is what separates a scroll-past listing from an “I need this” listing.
Facebook Marketplace is the primary market for furniture flips. Price at 2-3x what you paid for the piece plus supplies. If the piece cost $30 and supplies were $30, your floor is $120 — but a styled, quality finish can support $180-250.
Listing tips that actually move pieces:
Lead with what the piece is, not that it was painted: “Refinished mid-century dresser in Aged Linen chalk paint with matte black hardware” sells better than “Flipped dresser”
State the dimensions clearly — buyers will ask, and including them upfront filters out the wrong inquiries
Mention any known imperfections honestly (a small paint drip, a chip on the back corner) — it builds trust and prevents returns
Respond within an hour during the first day — the Marketplace algorithm rewards fast responders with more visibility
Don’t get attached to your first piece. Price it to move, collect the feedback, and use it on piece two.
Save your money
What you don't need yet
Beginners get pressured to buy a lot of stuff that doesn't help them play
better. Here's what we'd skip on day one.
A paint sprayer — HVLP sprayers produce beautiful results but require thinning the paint correctly, cleaning the gun between uses, and a well-ventilated space. Master brush and roller technique first on five pieces minimum.
A heat gun or chemical stripper — Most pieces painted with chalk paint don't need to be stripped to bare wood. Scuff-sand and paint. Save the stripping tools for heavily damaged or lacquered pieces.
An air compressor nailer — For repairing loose joints and backs, hand tools handle your first pieces. A nailer makes sense when you're doing structural repairs on every flip.
Fancy chalk paint palettes — Pick two or three neutral colors you'll actually use — white, off-white, and a dark tone. Twelve colors sounds strategic but you'll use three and the rest will dry out in the tin.
Professional-grade wood filler — A $6 tube of DAP spackling compound handles most nicks, scratches, and small gouges on painted pieces. The pro products matter when you're doing structural repairs.
A drum sander — Belt and drum sanders are aggressive tools that can ruin a piece of furniture in seconds. A random orbital sander is the correct starting point for 95% of flipping work.
First week
Your first seven days
A short, real plan to get from gear-on-doorstep to actually playing.
Find your first piece. Facebook Marketplace, Craigslist free section, or a thrift store. Target: solid wood dresser or side table for under $40. · Action
Facebook Marketplace · Best source for $20-50 starter pieces — search 'dresser' and filter by price
Pick up sander, sandpaper (80-grit and 120-grit), chalk paint, wax, and a brush from any hardware store. · Buy
Clean the piece thoroughly. TSP substitute or a degreaser. Paint won't stick well to grimy furniture. · Action
Sand the whole piece lightly with 120-grit to scuff the surface. You're not stripping — just roughening the sheen. · Action
Apply two coats of chalk paint, letting it dry 1-2 hours between coats. Don't overwork the brush. · Action
Apply wax with a lint-free rag or brush, work in sections, buff with a clean cloth. Let cure 24 hours. · Action
Replace the hardware. New drawer pulls instantly elevate the finished piece — this step photographs better than it seems. · Buy
List it on Facebook Marketplace. Take photos in natural light against a clean wall. Price it at 2-3x what you paid for the piece plus supplies. · Action
FAQ
Common questions
Do I need to strip furniture before painting it with chalk paint?
No — that's the point of chalk paint. A light scuff-sand with 120-grit gives it something to grip, and it adheres to most surfaces without stripping or priming. The exception: lacquered finishes and glossy polyurethane sometimes need a wipe-down with liquid deglosser before chalk paint will stick.
Can you actually make money flipping furniture?
Yes, but not on your first piece. Most beginners break even or lose $20-30 on piece one while they figure out technique, timing, and pricing. By piece three or four you'll have a process and a better eye for what pieces sell. Regular flippers with volume do $200-600 per month as a side income. It compounds with sourcing skill.
What kind of furniture sells best when flipped?
Dressers and nightstands consistently move fastest — every household needs them, they're abundant at thrift stores, and paint transforms them dramatically. Dining tables sell well but require more prep and sturdier topcoats. Chairs are harder to flip profitably because of labor — skip them to start.
What's the difference between chalk paint and regular latex paint?
Chalk paint is specifically formulated to adhere without priming on most surfaces and dries to a flat, chalky matte finish that's easy to distress and wax. Latex paint needs more surface prep, dries harder, and requires more coats. For furniture flipping, chalk paint saves you the prep steps that make latex work on non-porous surfaces.
How long does a furniture flip actually take?
Most dressers or side tables take 4-6 active hours spread over two days — half a day for cleaning and sanding, then paint coats with drying time in between, then wax and hardware on day two. Don't try to rush it into one day; letting coats dry properly is what separates a good finish from a scratchy one.
Is it safe to sand old furniture? What about lead paint?
Furniture made before 1978 may have lead paint. Don't sand it dry without a P100 respirator. A lead test kit from any hardware store costs $3 and takes 30 seconds — worth doing on anything old. If it tests positive, either paint over it without sanding or take the piece to a professional stripper.
Furniture Flip on TikTok — The real-time pulse of what's selling and what techniques people are using. Filter by 'most liked' to see what finishes photograph and list well.
r/furnitureflipping — Active community with before/after posts, pricing questions, and sourcing tips. Search 'first flip' to read what beginners actually struggled with.
Annie Sloan Blog — Technique-focused content from the chalk paint inventor. The how-to videos on distressing, dark wax application, and color layering are genuinely useful.
Salvaged Inspirations (YouTube) — One of the most-watched furniture flipping channels. Step-by-step technique videos with real before/after pricing. Start with any dresser makeover video.
Facebook Marketplace — Your primary sourcing and selling platform. Set saved searches for 'dresser', 'nightstand', and 'furniture free' in your zip code.
EPA Lead Paint Safety — If you're sanding pre-1978 furniture, read this. Lead paint safety is the most underemphasized hazard in furniture flipping content.
As an Amazon Associate, JustBeginning earns from qualifying purchases.
We may also earn commission from other affiliate programs linked on this
page. Editorial recommendations are independent; we don't choose
products based on commission rates.
Product prices and availability are accurate as of the date and time
indicated and are subject to change. Any price and availability
information shown on Amazon at the time of purchase will apply.
Our top pickBLACK+DECKER Random Orbit Sander BDERO100


 Best starter