Scrapbooking has a dedicated ecosystem of gear — and most of it you don't need to start. An album, some cardstock, a trimmer, and a pack of embellishments will get you making real pages this weekend. The craft store will try to sell you a cart full of tools. Here's what actually matters, and what can wait until you've filled your first few spreads.
By Colin B. · Published May 24, 2026 · Last reviewed June 18, 2026
A complete starter kit — album, cardstock, trimmer, adhesive, and embellishments — runs $80–150. Tools last for years; paper and embellishments replenish as you use them.
We earn commission on qualifying Amazon purchases — see our
affiliate disclosure.
Price tiers and budget totals shown above are editorial estimates;
actual Amazon prices vary.
At a glance
Our top pick in each category
The fastest path through this guide — each best-starter pick by category.
Scroll for the budget and upgrade alternatives.
Don't buy a Cricut yet. Machine cutting is powerful, but hand punches and a trimmer get you through your first 30 pages easily. Learn what layouts you enjoy before investing $200-300 in a cutting machine.
Choose your album format before buying paper. 12×12 is the industry standard with the most paper selection; 8.5×11 is smaller and easier to store. Every paper pack, page protector, and storage solution you buy should match this decision.
Acid-free matters more than it sounds. Standard craft glue and non-archival paper will yellow and degrade your photos over time. Spend $10 on a proper adhesive runner — it protects everything else on the page.
Your album format is your first and most important decision — paper packs, page protectors, and storage all follow it. The industry standard is 12×12 inches: the widest selection, the most tutorials, and the most room to tell a story. 8.5×11 works well if you prefer a smaller footprint. Both use a D-ring or three-ring binder so you can add pages freely. Avoid albums with sewn bindings — you'll run out of space before you've finished the first event.
Albums — what's the difference?
A few common shapes, each making a different trade.
12×12 Standard
The industry default. Widest paper and page-protector selection.
Page size
12×12 inches
Paper selection
Widest available
Best for Full storytelling layouts, events, travel albums — most tutorials target this size
Tradeoff Larger footprint on your shelf; needs more table space while you work
Portable and gift-friendly. Perfect for single-theme projects.
Page size
6×6 inches
Paper selection
Limited — cut down from larger packs
Best for Baby albums, travel, single-event gifts — fast projects with minimal supplies
Tradeoff Tiny page area limits storytelling; specialty packs are harder to find
Best starter
Pioneer Photo Albums
12x12 Padded Scrapbook
$19.99 as of Jun 22, 2026
★★★★★Our rating· Only 12 left in stock - order soon.
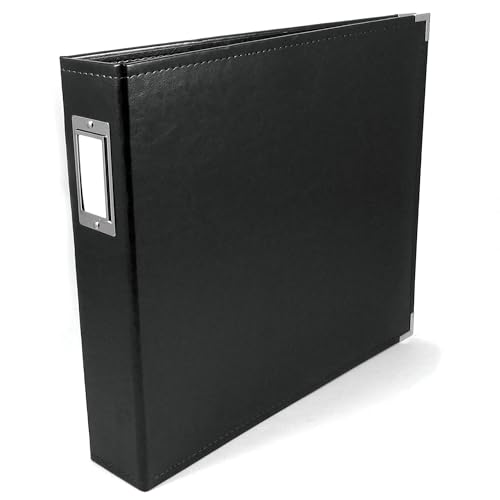
Pioneer has been the most recommended scrapbook album brand in hobbyist communities for decades. The 12×12 padded album has a finished-looking cover, a sturdy D-ring binder, and enough capacity for a full event or theme. 12×12 is the format the whole industry builds for — paper packs, page protectors, and storage all target this size.
What we like
12×12 D-ring binder holds 20-30 finished pages with room to expand
Padded cover looks finished before you've added a single decoration
Available in colors and patterns to match any album theme
What to know
Page protectors sold separately — budget $8-12 extra for a starter pack
D-ring can gap if overstuffed — keep pages under 30 per album
★★★★☆Our rating· Only 14 left in stock (more on the way).
Pioneer makes the 8.5×11 format too, and their fabric-frame 3-ring design is solid — a finished-looking cover, standard 3-ring binder for easy page adding, and a price that makes sense for a starter album. The smaller format stores on a regular bookshelf and works with letter-size supplies.
What we like
Standard 3-ring binder — add pages from any office or craft store
Smaller footprint stores on a regular bookshelf without a dedicated shelf
What to know
Fewer patterned-paper options at craft stores compared to 12×12
Smaller page means tighter layouts — fewer embellishments fit
We R Memory Keepers makes albums for serious hobbyists — their D-ring systems hold up to repeated page rearrangement and the cover hardware feels noticeably more premium. Worth the extra $15-20 once you're making multiple albums a year and want something that holds up to frequent handling.
What we like
Premium hardware holds up to years of adding and rearranging pages
Wide cover variety including linen and faux-leather finishes
What to know
Costs 2x as much as a Pioneer album — hard to justify on your first album
Premium weight makes the album noticeably heavier once full
Every page starts with a background sheet of heavyweight cardstock — 12×12, 65-80 lb, in a color that anchors the layout. Start with a pack of solid colors: solids are more versatile than patterned paper while you're learning, and they're easier to layer without clashing. One 60-sheet solid pack gets you through 15-20 pages. Add one patterned paper pad once you've made a few pages and know what style you're building toward.
Best starter
American Crafts
12x12 Cardstock Pack
$
★★★★★Our rating
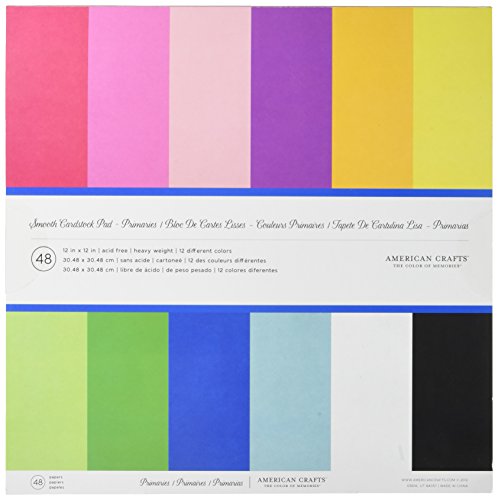
American Crafts cardstock is the community standard — coordinated color palettes, consistent 65 lb weight that layers cleanly, and under $20 for 60 sheets. The solid-color packs come in a dozen palette themes, so pick one that fits the memories you're planning to scrapbook first.
What we like
65 lb weight layers without buckling under adhesive or embellishments
Coordinated palettes mean every color in the pack works together
Under $20 for 60 sheets — enough to finish 15-20 complete pages
What to know
Solid only — you'll want patterned paper eventually for visual interest
Some palette packs include only 2-3 sheets of accent colors
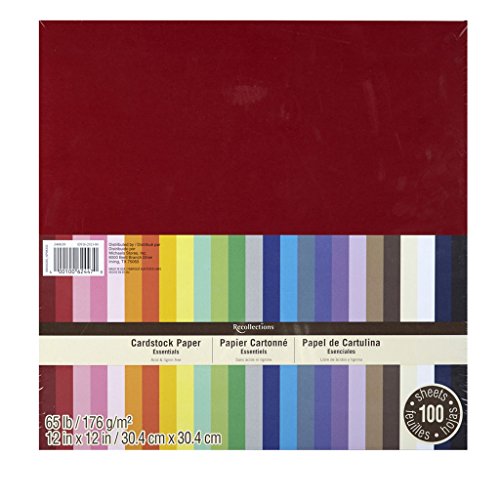
Recollections (Michaels' house brand) costs half what American Crafts does and is perfectly adequate for your first layouts. Great for practicing cuts and compositions before committing your nicer paper to a finished page.
What we like
Half the price of branded cardstock — ideal for practice layouts
Available at Michaels stores for same-day pickup
What to know
Lighter weight — heavier embellishments can buckle the page
Color selection varies by store — online ordering is more reliable
A coordinated patterned paper kit pulls a whole album together — the Fresh Air collection has neutral outdoor tones that work across travel, family, and everyday photos. Simple Stories pre-matches all the prints so every combination works. Buy a themed kit once you know your album's main subject.
What we like
Pre-coordinated prints mean every pattern in the pad works together
Patterns are photo-forward — they don't compete with the images
What to know
One design theme per pad — buy after you know your album subject
Some designs are one-sided only; check before purchasing
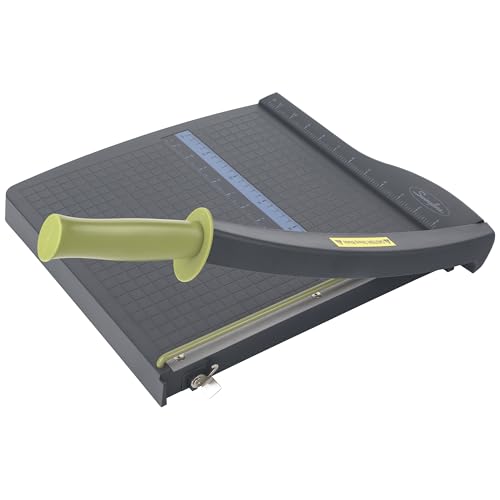
A paper trimmer is the tool you'll use on every single page — cutting backgrounds, matting photos, trimming embellishments. Scissors leave ragged edges; a trimmer makes clean, straight cuts in one motion. Get a 12-inch model so you can cut a full 12×12 sheet in one pass. The Fiskars SureCut is the standard recommendation in every beginner community: accurate, sturdy, and the rails don't flex after years of use the way cheap plastic trimmers do.
Best starter
Fiskars
12-Inch SureCut Deluxe Paper Trimmer
$36.96 as of Jun 22, 2026
★★★★★Our rating· In Stock
The Fiskars SureCut is the most recommended paper trimmer in scrapbooking communities, and for good reason — the measurements are accurate, the blade stays sharp, and the steel rails don't flex under pressure. Most serious scrapbookers still use this exact trimmer after a decade of regular use.
What we like
Self-sharpening blade stays accurate through years of heavy use
Steel rails don't flex — straight cuts even on thick double-sided cardstock
12-inch capacity handles a full 12×12 sheet in one pass
What to know
Blade cartridge wears out — buy a spare at purchase
Heavier than compact trimmers — not the pick for on-the-go crafting
Available at any office supply store for under $20 and gets the job done for occasional cutting. Plastic rails mean it won't handle heavy cardstock as cleanly as the Fiskars, but it's the right answer if you want to try trimming before committing to a better tool.
What we like
Under $20 and available at any office supply store for same-day pickup
Light and compact — easy to store when table space is limited
What to know
Plastic rails flex under pressure — measurements drift on long cuts
Struggles on heavy cardstock; multiple light passes needed
Professional guillotine action squares each sheet automatically, giving zero-drift cuts on even the heaviest cardstock. Serious scrapbookers upgrade here when consistent precision across hundreds of cuts matters more than price. Overkill for beginners — but the last trimmer you'll ever buy.
What we like
Guillotine action squares each sheet automatically — zero drift
Handles heavy chipboard and multiple sheet thicknesses without skip
What to know
High price ($60+) is overkill until you're making pages weekly
Bulkier than sliding-blade trimmers — needs a dedicated table spot
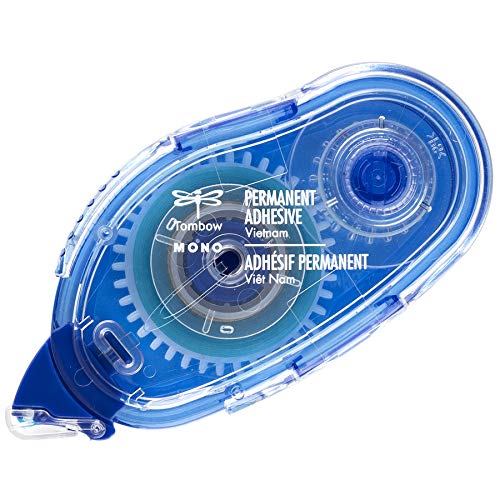
Adhesive is where beginners make the most expensive mistakes — standard glue sticks yellow over time, buckle cardstock, and peel photos away from pages. You need two things: an acid-free adhesive runner for mounting flat items, and foam squares for adding 3D dimension. Spend $15 here; it protects everything else on the page. The Tombow Mono adhesive runner is the community standard for good reason.
Best starter
Tombow
Mono Adhesive Tape Runner
$8.53 as of Jun 22, 2026
★★★★★Our rating· In Stock
The Tombow Mono is the single most-recommended adhesive in every scrapbooking community — acid-free, permanent, smooth-glide application, and it won't warp your cardstock or yellow over decades. The refillable version cuts long-term cost in half once you go through your first cartridge.
What we like
Acid-free formula won't yellow paper or photos over decades
Smooth glide covers large areas quickly without cardstock buckling
Available at any office supply or drug store and acid-free enough for casual scrapbooking. Not as smooth as the Tombow, but gets the job done when you need adhesive today and can't wait for shipping.
What we like
Available at any office supply or drug store — no waiting for shipping
Acid-free formula safe for photos and long-term page storage
What to know
Disposable cartridge adds up faster than refillable options over time
Not as smooth as the Tombow — more likely to buckle thin paper
★★★★☆Our rating· Only 9 left in stock - order soon.
Foam squares lift a photo, die cut, or title element 1/16-3/16 inch off the page, creating real shadow and depth that flat layouts can't replicate. Every scrapbooker uses them eventually, and the mixed-size packs cover most applications. A $6 pack goes a very long way.
What we like
Instantly adds visual depth to flat layouts — no skill required
Mixed-size packs handle photos, die cuts, and title elements
What to know
Not rated for heavy chipboard — use stronger 3D tape on thick pieces
Peel-and-stick backing is permanent — plan placement before committing
Embellishments are where scrapbooking gets creative — and where beginners overspend before they know their style. Start with one large premium sticker book (American Crafts makes the best-value ones) and a small washi tape assortment. That's enough to finish 10-15 pages. Once you've made your first layouts, you'll know whether you lean minimal or layered, and you can buy accordingly.
Best starter
American Crafts
2064 Piece Sticker Book
$16.50 as of Jun 22, 2026
★★★★★Our rating· Only 5 left in stock - order soon.
American Crafts premium sticker books pack 12+ coordinated sheets — alpha stickers, icons, puffy stickers, and accent elements — into one $15 notebook. More variety per dollar than individual packs, and the coordinated palette means everything works together from page one.
What we like
12+ coordinated sheets of stickers, alphas, and icons in one purchase
Pre-matched palette means every element works with the others
Puffy stickers add texture without needing foam squares
What to know
Theme-specific — buy after you know your album subject, not before
Alpha sets have limited repeat letters — plan short captions
Simple Stories makes clean, readable sticker sets at budget prices — their alpha stickers and date labels are especially useful for captioning photos. A single book carries your first several layouts without the commitment of a full premium sticker collection.
What we like
Clean, readable designs that don't compete with your photos
Budget price makes it low-risk for testing whether stickers suit your style
What to know
Smaller set — may run short on a large layout-heavy album
Washi tape borders photos, masks sections, creates pattern, and — unlike most adhesives — peels off cleanly when you change your mind. LotFancy's 30-roll assortment covers neutrals, patterns, and accent colors for under $15. Once you see how versatile it is, you'll use it on every page.
What we like
Repositionable until pressed down — the most forgiving embellishment there is
Works as border, mask, pattern, and photo anchor in one roll
What to know
Shiny finishes photograph with glare — matte washi works better for display
30 rolls sounds like a lot until you find three favorites you always use
Paper stacks grow fast. Within a few months you'll have enough cardstock, patterned paper, and embellishments to need real organization. The scrapbooking community has settled on 12×12 flat-storage boxes for full sheets and stackable drawer units for tools and small embellishments. Buy storage before your second paper haul — sorting a pile after the fact takes twice as long.
Best starter
IRIS USA
12x12 Scrapbook Paper Storage Box
$39.94 as of Jun 22, 2026
★★★★★Our rating· In Stock
The IRIS 12×12 paper storage box is the most recommended paper organization solution in scrapbooking communities. Holds 200+ sheets flat, latches securely, stacks with other IRIS units as your collection grows, and the snap-lock lid keeps dust and humidity out. Buy two — one for cardstock, one for patterned paper.
What we like
Holds 200+ sheets of 12×12 paper flat without warping or bending
Snap-lock lid keeps dust out and stacks cleanly with additional units
What to know
Not airtight — don't rely on it alone in damp or humid storage areas
Buy two minimum: one for cardstock, one for patterned paper
For tools and small embellishments — stamps, ink pads, punches, sticker books, washi tape — a multi-compartment desktop organizer beats individual bags and boxes. Deflecto's stackable cubes are clear (you can see everything at a glance), durable, and under $20. Stack two for a full small-parts system.
What we like
Clear compartments let you see every embellishment at a glance
Stackable design grows with your collection without taking more desk space
What to know
Too small for paper packs — supplements, not replaces, flat storage
Plastic edges can snag washi tape rolls — wrap tape before storing
The first page is the hardest. Here's what to expect — from choosing your format to finishing your first real spread — and why most beginners overcomplicate the start.
Scrapbooking has a reputation for being complicated — all those tools, all those embellishments, all those color theory decisions. That reputation is mostly wrong. The core of the hobby is simple: you have photos, you have paper, and you want them to exist in the same place in a way that looks good. Everything else is optional.
Most beginners stall not because the craft is hard, but because they spend the first two weeks researching instead of making. This guide skips the research phase and gets you to your first finished page.
Week one: Choose a format and gather three things
Before you touch a single embellishment, make one decision: what size album are you using?
This matters because every supply you buy from here follows from it. 12×12 is the industry standard — most tutorials, most paper packs, most page protectors are designed for it. 8.5×11 is smaller, cheaper per page, and fits on a regular bookshelf. Either works. Just pick one and stick with it for your first album.
Once you’ve decided, you need exactly three things to make your first page:
Cardstock — a solid-color sheet in a color that works with your photos
A trimmer — not scissors; a paper trimmer for clean, straight cuts
An adhesive runner — not a glue stick; an acid-free tape runner that won’t yellow
That’s it. No stamps, no Cricut, no fancy punches. You can do more with these three things than most beginners realize.
A layout is one or two pages featuring photos from the same event or moment. Your first one will be imperfect. That’s not a problem — that’s the assignment.
Here’s a simple structure that works every time:
The 60-30-10 rule. Fill 60% of your page with your dominant cardstock color, 30% with a complementary color or patterned paper strip, and 10% with accent colors from embellishments or titles. You don’t need to measure. Just keep this proportion in your head and your page will look balanced.
Photo placement first. Put your photos on the page before you adhere anything. Move them around. Try landscape orientation, portrait, a cluster of three. Commit to a placement only when it feels right. Adhering is permanent — arrangement is free.
The title goes last. Beginners often write the title first and then design around it. Do it in reverse: fill the page with photos and embellishments, then find the natural empty space for the title. Titles are labels, not designs. Let the photos be the design.
Your first page won’t look like the ones in tutorials. That’s because tutorials feature layouts made by people who’ve made hundreds. You’re on page one. Make it anyway.
Week three: Build a small embellishment vocabulary
Once you’ve made two or three pages, you’ll notice which kinds of embellishments you actually reach for. Most beginners end up using about four things regularly:
Alpha stickers for titles and captions
A few coordinating stickers from a themed pack
Washi tape for borders, masks, and quick accents
Foam squares for lifting a key photo or element off the page
The foam squares are worth calling out specifically. Nothing upgrades a flat page faster than adding dimension — one photo on foam squares creates shadow and depth that makes the whole layout look more intentional. It takes five seconds.
What you probably won’t use much: decorative scissors, inking the edges of everything, corner rounders, stamps (until you’ve developed a specific stamping habit). These are real tools, but not beginner essentials.
The biggest predictor of whether scrapbooking sticks is not talent or skill — it’s whether you create a regular time to work on it.
Scrapbooking has a high startup cost per session: you have to get out your supplies, choose photos, and decide on a theme. If you only sit down when you feel inspired, you’ll go months between sessions and forget where you left off. Schedule one hour a week, even if you only finish a single title or trim a few photos.
Two habits that help enormously:
Print photos before you need them. Upload a batch to a photo lab every couple of months and keep a small stack of 4×6 prints on hand. The limiting factor in most beginner scrapbooks isn’t creativity — it’s not having photos ready when you’re ready to create.
Finish a page even if it’s not perfect. The urge to keep adjusting is the enemy of finished pages. Pick a cutoff: once a page has photos, a title, and at least three embellishments, it’s done. Move on.
Save your money
What you don't need yet
Beginners get pressured to buy a lot of stuff that doesn't help them play
better. Here's what we'd skip on day one.
A Cricut or Silhouette cutting machine — Powerful eventually, but hand punches and scissors carry you through your first 30 pages. Learn what you enjoy first — machine cutting is a $200-300 decision that deserves a committed hobby.
A full stamp and ink pad collection — One neutral ink pad and two stamps are enough to start. Stamp collections grow fast and cost real money; wait until you've seen your style before buying into it.
Dozens of patterned paper packs — One or two coordinated packs teach you more than fifteen random ones. Constraint early on produces better layouts, not worse.
Fancy decorative trimmer blade cartridges — Scallop, wave, and deckle-edge blades are fun novelties. Straight cuts are all you'll use for your first year of layouts.
First week
Your first seven days
A short, real plan to get from gear-on-doorstep to actually playing.
Decide on your page format — 12×12 for the widest selection, 8.5×11 for a smaller footprint. Every supply you buy follows this decision. · Action
Order your album and matching page protectors together so you're not waiting on two separate deliveries. · Buy
Print or gather 10-15 photos to work from before you start. Scrapbooking without photos to lay out is harder than it sounds — photos give you color cues and a sense of scale. · Action
Watch one layout tutorial on YouTube before your first page — not to copy it, but to see how a finished page comes together. · Learn
Make your first page — cut your cardstock to fit, mount one photo, add a title. Don't overthink it. Getting something on the page is the entire goal of week one. · Action
FAQ
Common questions
How much does scrapbooking cost to start?
A solid starter kit — 12×12 album, cardstock pack, trimmer, adhesive runner, and a sticker book — runs $80-150 depending on brand. Tools last for years; paper and embellishments are ongoing. The hobby scales from $10/month to unlimited, depending on your tastes.
Do I need a Cricut or cutting machine to scrapbook?
No. Cricut and Silhouette machines are excellent tools for serious crafters, but beginners get further faster with a good trimmer, hand punches, and simple embellishments. Learn the craft first — machine cutting is a decision for month six, not day one.
What's the difference between cardstock and patterned paper?
Cardstock is the solid-color, heavyweight background sheet every page is built on. Patterned paper has printed designs (florals, stripes, text) and is layered on top of or alongside cardstock. Start with cardstock; add patterned paper once you've built a few pages.
Should I print photos or work digitally?
Traditional scrapbooking uses printed photos — 4×6 or 5×7 prints from a photo lab or home printer. Digital (hybrid) scrapbooking uses the same techniques in software. Start traditional: it's tangible, forgiving, and teaches the composition skills digital scrapbooking requires anyway.
What does acid-free mean, and does it matter?
Acid-free paper and adhesives are chemically stable — they won't yellow, degrade, or transfer acids to your photos over time. For a scrapbook meant to last decades, it absolutely matters. Most scrapbooking-specific supplies are acid-free by default; avoid generic craft glue and newsprint.
What page size should I use?
12×12 is the industry standard — widest paper selection, most tutorials, most community templates. 8.5×11 is smaller, easier to store, and works well if you already own letter-size supplies. Pick one and commit — every supply purchase follows from that decision.
Scrapbook.com — The largest scrapbooking retailer online — also hosts hundreds of free tutorials, product reviews, and a large community forum. Good first stop for layout ideas and technique videos.
Two Peas in a Bucket — One of the oldest scrapbooking communities online. Forum threads and inspiration galleries spanning two decades — especially good for finding established layout styles.
r/Scrapbooking — Active subreddit with beginner help threads, layout sharing, and product recommendations from current hobbyists. Good for 'is this product worth it?' questions.
Jennifer McGuire Ink (YouTube) — One of the most-watched cardmaking and scrapbooking channels. Clear, patient instruction. Good for learning stamping and embellishment techniques.
Creative Memories — The oldest direct-sales scrapbooking brand — albums and products are well-made, and their site has beginner guides and layout templates worth browsing early on.
As an Amazon Associate, JustBeginning earns from qualifying purchases.
We may also earn commission from other affiliate programs linked on this
page. Editorial recommendations are independent; we don't choose
products based on commission rates.
Product prices and availability are accurate as of the date and time
indicated and are subject to change. Any price and availability
information shown on Amazon at the time of purchase will apply.
Our top pickFiskars 12-Inch SureCut Deluxe Paper Trimmer


 Best starter