Gravel cycling is where road meets dirt: a drop-bar bike built to wander wherever curiosity takes you. The gear story is simpler than the mountain bike crowd will tell you: one bike, the right tires, a few pieces of kit. Here's everything you need to start riding gravel, and what to skip until year two.
By Colin B. · Published May 23, 2026 · Last reviewed June 3, 2026
The bike is 70–80% of your total cost. A solid aluminum gravel bike runs $800–1,100, and the remaining gear (helmet, bib shorts, tires, GPS) adds $300–500. Gravel bikes hold value well; if cycling doesn't stick, you can sell for close to what you paid.
We earn commission on qualifying Amazon purchases — see our
affiliate disclosure.
Price tiers and budget totals shown above are editorial estimates;
actual Amazon prices vary.
At a glance
Our top pick in each category
The fastest path through this guide — each best-starter pick by category.
Scroll for the budget and upgrade alternatives.
Tire width is the first real decision: 38–42mm handles 90% of gravel riding. Narrower (28–32mm) is faster on pavement but punishing on rough terrain; wider (45mm+) is cushier but sluggish on road miles. Most beginners are happiest in the 38–40mm range, enough cushion for chunky stuff without slowing you down getting there.
Don't overthink 1x vs. 2x drivetrains. Most modern gravel bikes ship with a single front chainring (1x), which is simpler to maintain and has a wide enough gear range for most terrain. You'll only notice the gap on extended mountain climbs with fully loaded bikepacking gear, which isn't where you're starting.
Don't clip in immediately. The same advice applies here as road cycling: spend your first few weeks on flat pedals. Get comfortable with the bike before you add the complexity of clipping out at every stop. Falling sideways at a trailhead because you forgot to unclip is a rite of passage you can skip.
The bike is the whole ballgame, and the gravel category has genuinely good options at every price. What you're looking for: aluminum or steel frame, 1x drivetrain with a Shimano GRX or SRAM Apex groupset, clearance for 40mm+ tires, and a geometry labeled 'endurance' or 'adventure', meaning a slightly upright position that's comfortable before your core builds up to holding a long tuck. Avoid anything with a carbon frame under $2,000; the manufacturing tradeoffs at that price point undermine the whole point of carbon. An aluminum bike in the $800–1,200 range will outride a budget carbon bike every time.
Bikes — what's the difference?
A few common shapes, each making a different trade.
Aluminum
Durable, stiff, great value. The right choice for most beginners.
Weight
~22–26 lbs
Ride feel
Stiff, efficient
Entry price
$600–1,200
Best for First-time gravel riders, anyone unsure how much they'll ride
Tradeoff Transmits more vibration than steel or carbon on rough terrain
Best for Riders who prioritize comfort over weight; bikepacking and loaded touring
Tradeoff Heavier than aluminum at equivalent price; boutique brands mean fewer Amazon options
Carbon
Light, fast, expensive. Buy after you're sure.
Weight
~17–20 lbs
Ride feel
Light, vibration-damping
Entry price
$2,000+
Best for Committed riders doing 100+ miles per week who want every advantage
Tradeoff Meaningful quality improvement only above $2,500; below that, aluminum often wins
Best starter
Tommaso
Sentiero Sport Performance Gravel Bike
$699.99 as of Jun 22, 2026
★★★★★Our rating
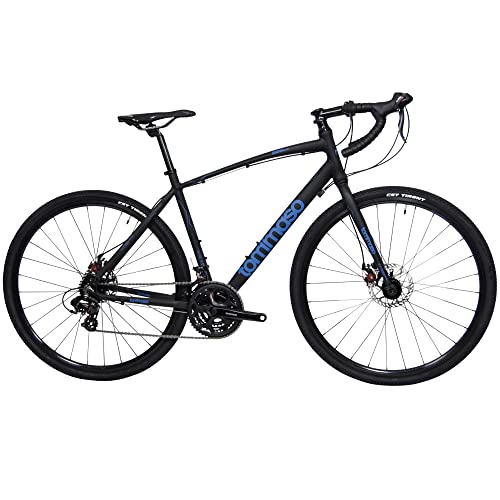
Tommaso has been making bikes for 50+ years and sells them direct on Amazon with real support. The Sentiero is their entry aluminum gravel bike: 1x Shimano drivetrain, 700c wheels with clearance for 40mm tires, and an endurance geometry that won’t wreck your back on a 40-mile route. Ships 85% assembled; plan 30 minutes to finish. Size using the manufacturer’s chart and your inseam measurement.
What we like
1x Shimano drivetrain is simple and easy to maintain
Endurance geometry stays comfortable on 40-mile rides
Real customer support from a brand making bikes 50+ years
What to know
Size-sensitive: measure inseam carefully before ordering
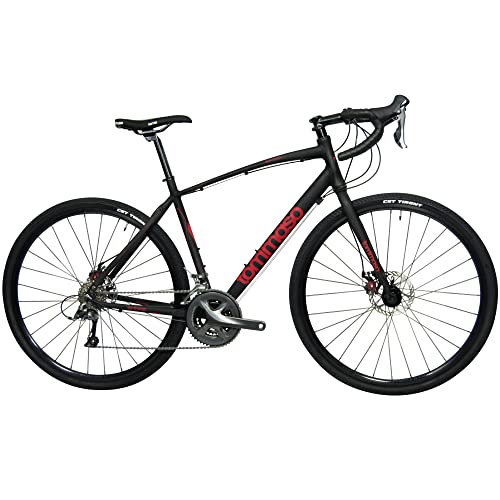
The Siena is Tommaso's most accessible gravel bike, with an aluminum frame, Shimano Tourney drivetrain, clearance for wider tires, and a brand that actually stands behind their product. Components are a step down from the Sentiero, but it rides like a real drop-bar bike and gives you a legitimate gravel experience without the higher price of entry.
What we like
Most accessible aluminum gravel bike with name-brand backing
Real drop-bar geometry for a genuine gravel experience
Clearance for wider tires gives terrain flexibility
What to know
Shimano Tourney drivetrain is entry-level; shifting feels notchy
If gravel cycling is sticking, the carbon fork version of the Grecia is the right step up. A carbon fork does one thing very well: it damps road and trail vibration that an aluminum fork transmits straight to your hands and shoulders. On rides over 50 miles, the difference is real and cumulative. Same reliable frame, meaningfully more comfortable.
What we like
Carbon fork absorbs vibration noticeably on rides over 50 miles
Cumulative comfort difference is real on long days in the saddle
Same reliable aluminum frame as the entry-level Tommaso models
What to know
Carbon fork benefit only apparent on longer, rougher rides
Step up in price is significant for a single component change
Gravel tires are where gravel cycling actually lives. Your bike probably comes with tires, but they're often mediocre, and the one upgrade that costs $80 and immediately transforms the ride. The main choice is width: 35–38mm for fast, mixed terrain; 40–45mm for rougher stuff and more comfort. Tread pattern matters for traction, but the width choice matters more. Most beginners going 40mm with a semi-slick center tread and lightly knobbed shoulder: fast on road, grippy when it gets loose.
Best starter
Panaracer
GravelKing SK+ Gravel Tire 700x38c (2-pack)
$$
★★★★★Our rating
The GravelKing SK is the tire most gravel riders have on their bike right now, and for good reason: the semi-slick center rolls fast on pavement, the shoulder knobs grip when you turn or brake on loose stuff, and the supple casing cushions the rough sections. Available in 35, 38, 40, 43, and 50mm widths. Start at 38 or 40mm. It threads the needle between road speed and gravel comfort perfectly.
What we like
Semi-slick center tread rolls fast on pavement sections
Available in 35-50mm widths to fit almost any frame clearance
Widely trusted by gravel riders across terrain types
What to know
Check frame clearance first: width specs are literal
Shoulder knobs wear faster on primarily paved commuting routes
When you want more cushion and traction for rough, loose, or wet terrain, the Riddler 45c is the call. More pronounced knobs than the GravelKing SK, 45mm of width for serious cushion, and WTB's TCS tubeless-ready casing. If your local gravel is chunky forest roads or washed-out terrain rather than packed dirt, this is your tire.
What we like
45mm width delivers serious cushion on rough and loose terrain
Pronounced knobs grip wet and loose gravel where semi-slicks slip
TCS casing is tubeless-ready for a future sealant conversion
What to know
Noticeably slower on pavement than semi-slick alternatives
45mm width exceeds clearance on some bikes: check specs first
Gravel helmets exist on a spectrum between road helmets (ultra-ventilated, aggressive fit, no visor) and mountain bike helmets (full coverage, visor standard). Most gravel riders land closer to the road end of that spectrum: you want ventilation for summer riding and a sun visor if you're doing big days in the open. MIPS is the one safety feature worth paying for across all price points; it's a liner that reduces rotational forces in an angled impact, which is how most bike crashes work.
Best starter
Giro
Syntax MIPS Road/Gravel Helmet
$$
★★★★★Our rating
The Syntax is Giro’s midrange helmet and the one most gravel riders point to as the sweet spot. Excellent ventilation (19 vents), Roc Loc 5 fit system that holds steady on rough terrain, MIPS liner, and a weight (270g) that disappears within ten minutes. Not quite as aero as a pure road helmet, with better upright coverage for all-day gravel riding.
What we like
19 vents deliver strong airflow on hot summer rides
MIPS liner reduces rotational force in angled impacts
Roc Loc 5 fit system stays secure on rough terrain
What to know
Runs slightly narrow: wide heads should try before buying
No integrated visor for riders on exposed, sunny routes
Register MIPS II Adult Recreational Bike Helmet - Matte Black/Charcoal - Size UA (54–61 cm)
$
★★★★☆Our rating
If you want MIPS protection at the lowest sensible price, the Register is your helmet. Same fit system as the Syntax, fewer vents, a bit heavier, but safe, comfortable, and certified. A perfectly legitimate first helmet if you're unsure how much you'll ride.
What we like
MIPS protection at the lowest reasonable price point
Same reliable Roc Loc fit system as pricier Giro helmets
Certified and safe for all-day riding right out of the box
What to know
Fewer vents than the Syntax; noticeably warmer in summer heat
Heavier than midrange options; felt on sustained climbs
★★★★☆Our rating· Only 1 left in stock - order soon.
The Aether is what Giro's sponsored pros actually wear: the lightest, most ventilated helmet in their road lineup, with MIPS Spherical technology built into the shell itself rather than as an add-on liner. You feel it on a four-hour day in summer heat, with dramatically better airflow than anything at lower price points. Buy this when you're riding three or more times a week.
What we like
MIPS Spherical is built into the shell, not bolted on as a liner
Best airflow in Giro's road lineup by a meaningful margin
Dramatically lighter than helmets at lower price points
What to know
Premium price only justified if you're riding three or more times a week
No visor option for riders who want sun protection on gravel
Bib shorts are the single piece of clothing that will change how you feel about gravel cycling. The chamois pad (the padded liner) means the difference between wanting to ride for three hours and wanting to stop after one. Wear them with nothing underneath. They look absurd and feel transformative. Beyond that, a cycling jersey with back pockets lets you carry food and a phone without a bag, essential on longer rides. Gloves are optional at first but become important on rough terrain, where the vibration exhausts your hands over time.
Best starter
Pearl Izumi
Men's 9" Quest Bib Shorts, Breathable with Reflective Fabric
$90.00 as of Jun 22, 2026
★★★★★Our rating
The Quest is Pearl Izumi's mid-range bib and the honest recommendation for most gravel riders. The 3D chamois is thick where it needs to be without being so bulky it shifts around, the leg grippers hold without cutting circulation, and the straps are comfortable enough to forget about on a four-hour ride. Fit runs true to size.
What we like
3D chamois stays in place and is thick where it needs to be
Leg grippers hold without cutting circulation on long rides
Straps comfortable enough to forget about for four-hour rides
What to know
Takes a ride or two to break in; don't judge after the first 30 minutes
Sizing runs true with no stretch; order carefully between sizes
If you're not ready to spend $90 on bib shorts before you know cycling will stick, Sponeed makes a legitimately decent budget bib. The chamois isn't as refined as Pearl Izumi's, but it's leagues better than riding in regular shorts. A fair test drive before you upgrade.
What we like
Much cheaper than Pearl Izumi for basic chamois protection
Chamois is far better than riding in regular shorts
A fair test drive before committing to premium bibs
What to know
Chamois less refined than Pearl Izumi; longer rides feel the gap
Materials and stitching don't last as long as midrange options
DND Mens Mountain Cycling Gloves - Black Spark (2023), Large
$17.17 as of Jun 22, 2026
★★★★☆Our rating· In Stock
Padded cycling gloves aren't mandatory for short rides, but on gravel they become necessary by hour two. Vibration from loose terrain transmits straight to your palms and exhausts your grip. Gloves with gel padding absorb it. The Giro DND is the most popular option in the category because it fits well, lasts, and doesn't overheat in summer.
What we like
Gel padding absorbs hours of vibration from rough terrain
Proven fit and durability: the most popular option in the category
Doesn't overheat in summer unlike heavier padded gloves
What to know
Not needed for short rides on smoother gravel surfaces
Fingerless design means cold hands on cool morning starts
On a road bike, navigation is simple: you're following roads you can look up on your phone. On gravel, you're often navigating fire roads, doubletrack, and trails where your phone's map won't load and your battery won't last. A dedicated GPS computer is the answer: it shows your route on a screen you can glance at mid-ride, tracks your speed and distance, and lasts 10–15 hours on a charge. Not essential on your first few rides, but once you're doing routes over 30 miles in unfamiliar terrain, it's indispensable.
Best starter
Garmin
Edge 130 Plus
$$$
★★★★★Our rating
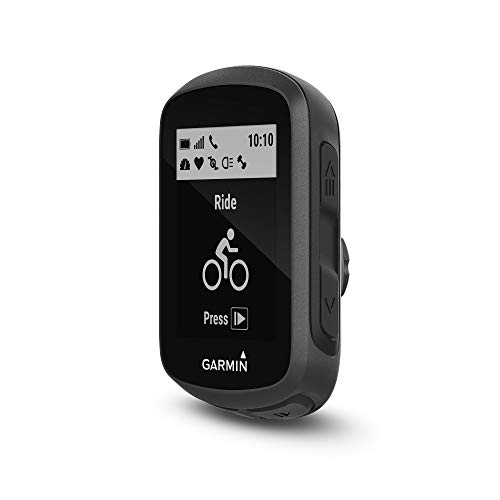
The Edge 130 Plus is the right first cycling computer for most gravel riders. Compact (fits in a jersey pocket), 12-hour battery, turn-by-turn navigation from Garmin Connect routes, and Garmin's reliable GPS that doesn't lose signal in tree cover. At under $200, it's the floor for a GPS that actually works for navigation. Anything cheaper is a simple cycle computer, not a navigator.
What we like
Compact and light enough to slip into a jersey pocket
12-hour battery handles full-day routes without anxiety
Reliable GPS that holds signal in tree cover
What to know
Small screen limits map detail for off-plan exploration
If you want a larger screen, cleaner interface, and better third-party app integration (Strava Live Segments, TrainingPeaks), the ELEMNT BOLT V2 is what many experienced gravel riders prefer over Garmin. Excellent Komoot integration: load a route from your phone in seconds. Battery lasts 15 hours and the screen is dramatically easier to read at a glance than the Edge 130.
What we like
Larger screen is dramatically easier to read at riding speed
Komoot integration loads routes from your phone in seconds
15-hour battery outlasts full-day epics without issue
What to know
Costs significantly more than the Garmin Edge 130 Plus
Wahoo ecosystem is smaller than Garmin's breadth of third-party support
The rule for gravel: carry more than you think you need. You'll be miles from the nearest shop, often without cell service. At minimum, leave every ride with a multi-tool, a way to inflate a tire, and a spare tube. Flats happen; a 5-minute repair is an inconvenience. A flat with no tube and no pump is an hour-long hike back to the car. The kit listed here fits in a small saddle bag and weighs about half a pound.
Best starter
Crankbrothers
Multi Tool M 19 Nickel
$
★★★★★Our rating
19 functions, under 4 oz, and the tool most gravel riders carry because it actually covers everything you'll need to fix mid-ride: hex keys for saddle, stem, and brake adjustments; torx bits for modern components; a chain breaker. The chain breaker is the tool that matters most: a dropped or broken chain 20 miles in is the emergency this tool is built for.
What we like
19 functions cover every mid-ride fix including chain breaks
Under 4 oz adds nothing noticeable to kit weight
Chain breaker handles the most serious trailside emergency
What to know
Small bits require patience threading onto small bolts
CO2 canisters are faster but you only get one shot. The Road Morph G is a mini pump with a fold-out foot peg that turns it into a floor-pump-style inflator, much easier to actually get to pressure than a standard mini pump. Enough to inflate a 40mm gravel tire to riding pressure in about 90 strokes. The gauge is included. Get this and a CO2 canister as backup.
What we like
Fold-out foot peg makes inflating to real pressure far easier
Built-in gauge removes guesswork on gravel tire pressure
Handles both Presta and Schrader valves
What to know
90 strokes to fill a 40mm tire; takes real effort
Longer than standard mini pumps; trickier to mount cleanly
CO2 inflates a flat in 10 seconds flat: three pumping sessions' worth of work in one click. Carry this alongside your pump as the emergency option: when you're cold, tired, and losing daylight, you want the fast option available. Two cartridges means one mistake is recoverable.
What we like
Inflates a flat in 10 seconds when conditions are bad
Two cartridges mean one misfire doesn't strand you
Compatible with both Presta and Schrader valves
What to know
One shot per cartridge: waste it and you're out of fast inflation
CO2 leaks through butyl tubes faster than air; top off at home
Gravel riding feels chaotic at first: your tires are searching, your arms are tense, and nothing quite like road cycling. That loosens up fast. Here's what the first month actually looks like, and how to build confidence on terrain that doesn't stay smooth.
The first thing gravel riding teaches you is that you’ve been white-knuckling the handlebars. On pavement, a stiff grip is fine: the road is predictable and your bike tracks straight. On gravel, the loose surface pushes back through the tires, and a tight grip amplifies every input into a wobble. The fix is counterintuitive: relax. Let the bike move. Your hands should feel the bars rather than squeeze them.
That adjustment, learning to trust the bike on rough terrain, is the central skill of gravel cycling’s first month. Everything else builds on it.
Week one: getting acquainted with dirt
Your first gravel route should be short and easy. Not because you can’t handle more, but because you’re learning several things simultaneously: how wide tires handle differently, how to read terrain at speed, how your gearing performs on rolling dirt roads, where your bike’s limits are. A 15–25 mile route with 1,000–1,500 feet of climbing and a mix of pavement and packed gravel is ideal.
The most common first-week mistake is treating gravel like road riding with a slightly bumpier surface. It isn’t. A few things change:
Cornering. On pavement you lean into corners and trust the grip. On gravel, you carry less speed into corners and let the bike drift slightly (fighting the drift causes falls). The mantra is “wide in, wide out”: take a line that gives you the most traction on the outside of the turn where the gravel is more packed.
Braking. Road instincts say to brake hard and late. Gravel instincts say to brake early and progressively. Hard braking on loose stuff washes out the front wheel. Instead, modulate both brakes together and start slowing before you think you need to.
Body position. Stand slightly out of the saddle on rough sections, letting your legs act as suspension. If you’re seated and rigid through a chunk of loose rock, the bike is trying to shake you off. A soft bend in the elbows and slightly raised hips absorb a lot.
By week two, the terrain starts looking different. You begin to read the road surface ahead, seeing the loose gravel patches before you’re in them, finding the packed tire track on the outside of corners, choosing lines that don’t exist on road cycling.
This is when you start to feel the distinctive rhythm of gravel riding: alternating between pavement efficiency and trail-reading focus, adjusting pace to surface. Long smooth dirt road sections become almost meditative. Chunky sections demand full attention and feel almost like a game.
A few skills to develop deliberately during weeks two and three:
Climbing technique. Gravel climbs are harder than road climbs of the same gradient because the surface doesn’t give you traction for free. Seated and spinning is usually better than standing and mashing. Standing shifts weight to the rear wheel, which can spin out on loose terrain. Reduce gear early and keep your cadence smooth.
Descending. This is where most beginners are too cautious early and then too aggressive too fast. Speed on gravel descents is manageable if your weight is centered and back, neutral-to-slightly-rearward on long loose descents. Trust the tires. Modern 38-42mm gravel tires have more traction than you expect. Let the bike run.
Nutrition. Gravel rides are longer and more physically demanding per mile than road riding because the terrain variation spikes your effort. Start eating 45 minutes in: a gel, half a bar, whatever you’re carrying. Repeat every 45–60 minutes. The wall comes fast on rough terrain. Your jersey’s back pockets hold three or four bars; this is why you wear a cycling jersey.
Week four: you’re actually gravel cycling now
Something shifts around week four. The chaotic feeling of loose terrain becomes a familiar challenge rather than a stressful one. You stop tensing up on fast descents. You start looking farther ahead and planning lines instead of reacting to each bump.
This is also when you discover what kind of gravel cyclist you are. Some people love the long, steady dirt-road rides where you cover ground and think. Some people gravitate toward mixed-surface routes with technical sections that demand full concentration. Some people start eyeing longer bikepacking routes. The terrain shapes the rider.
A few things worth doing deliberately in week four:
Try a new route type. If you’ve been doing packed-gravel fire roads, find a chunk of technical doubletrack or a route with a sustained climb on loose terrain. Push the edge of your comfort zone slightly. You’ll be surprised how much you’ve already adapted.
Ride with other people. Gravel cycling is sociable in a way that’s different from road riding. Groups tend to spread out more on mixed terrain, which reduces the pressure to hold wheels and lets you ride at your own pace on technical sections. Find a local gravel ride or a cycling club with a mixed-terrain group.
Start thinking about route planning. Komoot and Strava’s surface data let you build routes that stay on gravel as much as you want. Planning a 40–50 mile route that you’ll actually ride next month is the right goal for the end of month one.
Every beginner hits the same walls. Here’s what to expect:
Arm and shoulder fatigue. Gravel transmits vibration through the handlebars for hours. Your arms aren’t used to constant low-level absorption. This improves with time and better technique (relaxed grip, bent elbows), but week one will leave your shoulders sore in a new way.
Getting lost. Dirt roads look alike. A wrong turn on gravel can add 15 miles of unfamiliar terrain and drain your phone battery while you figure out where you are. Load routes onto a GPS computer before you go. Do not rely on a phone signal.
Flats. You will flat on gravel. Wide tires at lower pressure are more resilient, but eventually a sharp rock finds its way through. This is why you carry a pump, a spare tube, and tire levers on every ride. Practice changing a tube at home before you need to do it at the side of a fire road.
Going too hard too early. Gravel rides have a way of feeling easier than they are: the slow-looking terrain doesn’t feel like real effort while you’re doing it. Then the last 20% of the ride falls apart. Use easy perceived effort for the first half and build from there. Eat earlier than you think you need to.
What month two looks like
By the end of your first month you’ll have the fundamentals: terrain reading, cornering, climbing, nutrition, flat repair. Month two is about building fitness, exploring longer routes, and starting to develop your actual style.
Two things change the slope of improvement fastest:
Longer rides. Extend your long ride gradually: 30, then 40, then 50 miles over the next few weeks. Gravel fitness is largely about time in the saddle and terrain adaptation. More miles per week accelerates everything.
Tubeless conversion. Once you’ve got a season’s riding behind you, converting your wheels to tubeless (sealant replaces the inner tube) is the single best upgrade. Tubeless lets you run lower pressure for better grip and traction, and small punctures seal automatically. It’s a little messy to set up and requires fresh sealant every few months, which is why it’s month-two advice, not month-one.
Save your money
What you don't need yet
Beginners get pressured to buy a lot of stuff that doesn't help them play
better. Here's what we'd skip on day one.
A full carbon gravel bike — The ride quality improvement over good aluminum is real, but only meaningful after you've logged enough hours to feel it. Spend $1,000 less and use the first season to figure out your riding style.
Bikepacking bags — Frame bags, handlebar rolls, and seat packs are for multi-day routes. For day rides, a jersey pocket and a small saddle bag cover everything. Add bags when you plan your first overnight.
A power meter — Power meters transform training, but only once you know how to train with one. For your first season, ride by feel. You'll learn more about your body that way than from numbers you can't yet interpret.
Tubeless setup — Tubeless tires seal small punctures automatically and let you run lower pressure for better traction, genuinely better than tubes. But converting is messy and requires new sealant every few months. Start with tubes, add tubeless once you've got a season of riding behind you.
Gravel-specific shoes — Road cycling shoes work on gravel. Mountain bike shoes work on gravel. Flat pedal sneakers work for your first month. Don't buy new shoes until you know whether you want clipless and what style of riding you actually do.
First week
Your first seven days
A short, real plan to get from gear-on-doorstep to actually playing.
Find your first gravel route: 15–30 miles with a mix of pavement and dirt is the ideal introduction. · Action
Komoot · Best route planner specifically for gravel and off-road. Has a free gravel filter.
Strava Routes · Surface data shows where roads turn to gravel. Heatmaps show where other cyclists ride.
Order bib shorts before your first long ride, not after. · Buy
Assemble your saddle bag repair kit: multi-tool, spare tube (the right size for your wheels), tire levers, and a pump. Do this before you ride, not when you need it. · Buy
Do a 1–2 hour shakedown ride on pavement or light gravel to get comfortable with the fit and shifting before you go far from the car. · Action
Ride your first proper gravel route. Go slower than you think you should on the rough sections. Let the bike move underneath you instead of fighting it. · Action
Check saddle height after your first ride. If your hips rock side to side, the saddle is too high. If your knees are coming up past your hips at the top of the pedal stroke, it's too low. A good starting point: with your heel on the pedal, your leg should be straight at the bottom. · Action
FAQ
Common questions
How much does it cost to get into gravel cycling?
A real starting setup: aluminum gravel bike, helmet, bib shorts, and a basic repair kit, which runs $900–1,100 with budget picks and $1,400–1,600 with our recommended picks. The bike is 70–80% of the total. GPS and upgraded tires can add $200–400 if you want them, but neither is required to start.
What tire width should I start with for gravel?
38–42mm covers most beginner gravel riding comfortably. Narrower (32–35mm) is faster on pavement but punishing on rough terrain. Wider (45mm+) is cushier but slows you down on road miles. Most beginners land happiest at 38 or 40mm, enough cushion without killing your momentum.
Can I use my road bike for gravel?
Depends on your road bike. Most modern road bikes have clearance for 28–32mm tires, fine for light gravel and packed dirt, but limiting on anything rougher. If your road bike can fit 35mm+ tires, try it first before buying a dedicated gravel bike. If it maxes out at 25–28mm, the ride on loose terrain will be miserable.
What's the difference between gravel and mountain biking?
Drop bars vs. flat bars is the biggest physical difference. Gravel bikes are faster on road and light terrain; mountain bikes handle technical singletrack and steep descents better. Most gravel riding is fire roads, dirt roads, and doubletrack, not technical trails. If your local 'gravel' is actually rooty, rocky singletrack, you want a mountain bike.
Is 1x or 2x better for beginners?
1x is fine for most beginners. A 1x drivetrain (one chainring up front) is simpler to operate (no front shifter) and covers 90% of terrain well. The only gap is extremely varied climbing on long routes; a 2x system gives you a wider gear range. Most gravel bikes under $2,000 ship 1x, and you'll be happy with it.
Do I really need a GPS, or can I use my phone?
Your phone works for local rides where you have signal and know the route. For unfamiliar terrain, your phone's battery will die, signal will drop, and the screen is hard to read at speed. A dedicated GPS is the right answer once you're riding routes over 30 miles or exploring areas you don't know. It's a quality-of-life upgrade that becomes essential fast.
Gravel Cyclist — Long-running gravel-specific site with gear reviews, route reports, and how-tos. One of the first media outlets dedicated to the category.
Riding Gravel — Thorough gear reviews with long-term testing focus. Good for equipment decisions after you've ridden a few months and know what you want.
Komoot — The best route-planning app for gravel cycling. Filter for surface type, see elevation profiles, and follow other riders' highlighted routes in your area.
Unbound Gravel — The marquee event in gravel cycling (200 miles across Kansas each June). The livestream and rider tracking make for great viewing once you've ridden enough to appreciate the effort.
r/gravelcycling — Active community. Good for bike-fit questions, route recommendations, and gear troubleshooting. More beginner-friendly than r/cycling.
Dylan Johnson (YouTube) — Evidence-based cycling coaching with a strong gravel focus. Best channel for understanding training, not gear. Watch after month two, not before.
GravelCycling.club (Strava Club) — Large Strava club where members share routes and segment data. Useful for discovering what other gravel cyclists ride near you.
As an Amazon Associate, JustBeginning earns from qualifying purchases.
We may also earn commission from other affiliate programs linked on this
page. Editorial recommendations are independent; we don't choose
products based on commission rates.
Product prices and availability are accurate as of the date and time
indicated and are subject to change. Any price and availability
information shown on Amazon at the time of purchase will apply.
Our top pickTommaso Sentiero Sport Performance Gravel Bike


 Best starter