Backpacking is camping, but you carry everything on your back and sleep somewhere you had to earn. The gear can seem overwhelming (a full kit runs $400–600), but the actual list of things you need for a safe first trip is shorter than you think. Here's exactly what matters and what can wait.
By Colin B. · Published May 15, 2026 · Last reviewed July 18, 2026
A real backpacking kit costs money. The Big Three (pack, shelter, sleep system) account for most of it. Done right, this gear lasts a decade.
We earn commission on qualifying Amazon purchases — see our
affiliate disclosure.
Price tiers and budget totals shown above are editorial estimates;
actual Amazon prices vary.
At a glance
Our top pick in each category
The fastest path through this guide — each best-starter pick by category.
Scroll for the budget and upgrade alternatives.
Rent before you buy the Big Three. REI, outdoor outfitters, and many gear libraries rent packs, tents, and sleeping bags. A 2-night trip with rented gear will tell you more about what you want than 10 hours of YouTube reviews. Your first purchase after renting should be whatever caused you the most misery.
Get fitted for your pack in person if you possibly can. Pack fit is not like shoe fit: it's about torso length and hip measurement, not height or waist size. A pack that fits well carries 40 lbs like it's nothing; a pack that fits wrong makes 20 lbs feel brutal. Most outdoor shops will size you for free. It's worth the trip.
Don't go ultralight on your first trip. Ultralight gear is more expensive, more fragile, and requires you to know exactly what you're doing. A 35-lb starter kit is fine. You'll naturally go lighter as you figure out what you actually use and what stays in the bottom of your pack every time.
Your pack is the most important piece of gear and the hardest to buy online without trying first. For 2–4 night trips, you want 45–55 liters of capacity. Beyond size, fit matters more than any feature: the hip belt should sit on your hip bones (not your waist), and the shoulder straps should follow the curve of your shoulders without gaps. Almost every major brand makes a solid entry-level pack in the $150–200 range. The differences between them are real but small. The right size for your torso is not negotiable.
Backpack — what's the difference?
A few common shapes, each making a different trade.
40–45L (Weekend Pack)
Right-sized for 1–2 nights. Forces discipline with what you carry.
Capacity
40–45 liters
Trip length
1–2 nights
Pack weight
2.0–2.5 lbs
Best for Minimalist packers, warm-weather trips, experienced beginners
Tradeoff No room for error; every item has to earn its spot
50–55L (Standard Starter)
Enough room to learn without cramming. The default first pack.
Capacity
50–55 liters
Trip length
2–4 nights
Pack weight
2.5–3.5 lbs
Best for Most beginners, 3-season trips up to 4 nights
Tradeoff Slightly heavier than 40L packs; tempts you to overpack
For trips 5+ nights or cold-weather camping with bulkier gear.
Capacity
60–75 liters
Trip length
5+ nights
Pack weight
3.5–5 lbs
Best for Multi-week trips, winter backpacking, thru-hiking sections
Tradeoff Heavy when full; not what you want for your first trip
Best starter
Osprey
Atmos AG 50 (Men's) / Aura AG 50 (Women's)
$350.00 as of Jun 22, 2026
★★★★★Our rating· Only 10 left in stock (more on the way).
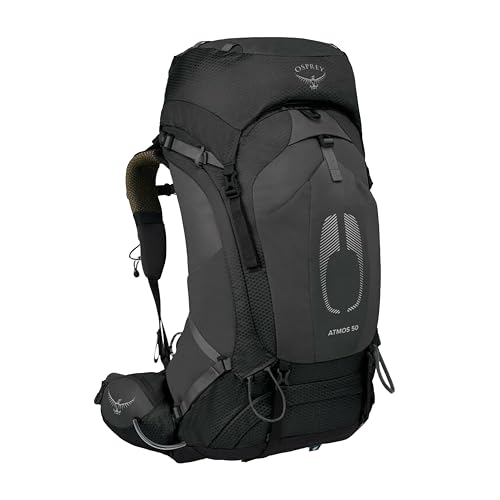
Osprey's Anti-Gravity suspension system genuinely works: the tensioned mesh back panel keeps air between you and the pack, which matters on day two when your back is tired. The Atmos/Aura comes in multiple torso sizes, fits a wide range of bodies well, and at around $270 it's a serious pack that will last you a decade. The most recommended beginner pack among trip leaders for a reason.
What we like
Anti-Gravity suspension keeps your back cool and moves weight to your hips
Available in multiple torso sizes for a genuinely personalized fit
Osprey's lifetime warranty makes this a true buy-once purchase
What to know
At $270 it's a serious investment before you know backpacking will stick
Heavier than ultralight alternatives at 4.6 lbs, especially on longer trips
Teton 85L Explorer Internal Frame Backpack for Hiking, Camping, Backpacking, Rain Cover Included, Buck Brown
$129.99 as of Jun 22, 2026
★★★★☆Our rating· In Stock
At around $80, this is the pack for someone who's not sure backpacking will stick. It fits most bodies reasonably well, holds enough for a 2-night trip, and won't devastate you if you decide it's not your thing. Not as comfortable over 10+ miles as the Osprey, but it gets you on trail without a $300 commitment.
What we like
Under $80 keeps the stakes low while you figure out if backpacking sticks
Fits most bodies well enough for a 2-night beginner trip without drama
What to know
Hip belt doesn't transfer weight efficiently; shoulders feel it after mile 8
Not designed to handle loads over 30 lbs comfortably
★★★★☆Our rating· Only 9 left in stock (more on the way).
When you're ready to go lighter (usually after a few trips when you know what you're doing), the Exos/Eja cuts about a pound off the Atmos/Aura while keeping the same excellent fit. At around 2.5 lbs, it's the pack most serious 3-season backpackers land on before going full ultralight. Worth it once you've logged 5–6 nights out.
What we like
Cuts nearly a pound off the Atmos while keeping the same excellent fit
2.5 lbs is the smart stopping point before full ultralight spending begins
What to know
Smaller pockets and top lid; requires disciplined packing to use well
Not worth buying until you've done 5–6 trips and know your exact kit
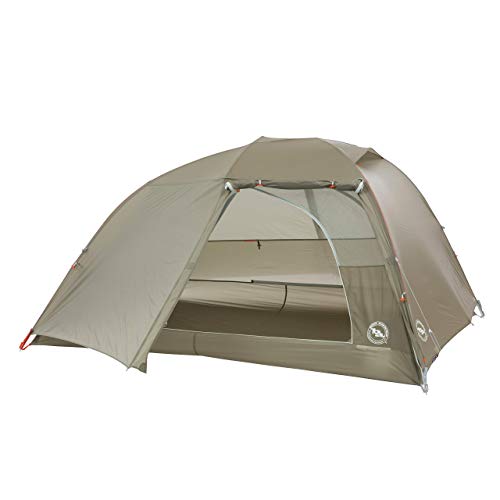
A backpacking tent does not need to be fancy. It needs to keep you dry and stand up in wind. For 3-season trips (spring through fall, not winter), you want a double-wall tent: an inner mesh body for ventilation and a separate rainfly that keeps precipitation off. Single-wall tents and tarps are lighter but less forgiving and not where you want to start. Budget $150–250 for a tent that will be comfortable, reliable, and not humiliating to set up in the dark.
Best starter
Kelty
Wireless 2 Person Tent
$$
★★★★★Our rating
Kelty has made reliable gear for decades, and the Wireless 2 is built for first trips: a true double-wall tent with mesh inner, separate rainfly, two doors, and two vestibules for wet gear. Color-coded poles make setup intuitive even after dark. It'll keep you dry in real rain and stand up in wind. At around $150, it's a genuine tent at a fair price.
What we like
Color-coded poles make setup fast even in the dark after a long day on trail
Two doors and two vestibules; each person gets their own entrance and storage
True double-wall construction keeps condensation off you in cold, wet weather
What to know
5 lbs is heavy for a backpacking tent; expect to upgrade once weight starts to matter
Interior is cozy for two with full gear; functions better as a solo tent
At around $100, the Naturehike Mongar is the value pick for someone not ready to commit to a $150+ tent. Double-wall construction, freestanding, easy Y-frame setup, and legitimately weatherproof for 3-season conditions. It's a no-frills tent that gets the job done, which is exactly what you need your first year.
What we like
True double-wall tent under $100, legitimately weatherproof for 3-season use
Y-frame freestanding design is one of the quickest and easiest to pitch
What to know
Interior is snug for two with full gear; best treated as a roomy solo tent
Lighter pole construction means less wind rigidity than pricier options
Once you've logged a few trips and weight starts to matter, the Copper Spur is where most serious backpackers land. Under 3 lbs for a 2-person tent, genuinely comfortable inside, and built to last. You'll pay around $500 for it, but you'll carry it for years. Wait until you know backpacking is your thing before pulling the trigger.
What we like
Under 3 lbs for a true 2-person tent; the weight savings are immediately felt
Near-vertical walls and high volume design make the interior feel genuinely roomy
What to know
~$500 is only justified after you've committed to backpacking long-term
Lighter materials require careful site selection and handling to avoid damage
Your sleep system is two things: a sleeping bag (or quilt) and a sleeping pad. Most beginners focus on the bag and underweight the pad. This is a mistake. Half your insulation comes from below you, and a thin pad lets cold ground steal your warmth no matter how good your bag is. For 3-season conditions (down to about 25°F at night), a 20°F rated bag and a pad with an R-value of 3 or higher is the standard starting point.
Best starter
TETON Sports
LEEF 0°F Ultralight Mummy Sleeping Bag
$$
★★★★★Our rating
Rated to 0°F but genuinely comfortable in 3-season conditions, this bag hits the sweet spot for new backpackers: warm enough to cover nearly any trip you'll take your first year, light enough to not be a burden, and priced around $120. The mummy shape is the right call for warmth: the extra fabric of a rectangular bag is wasted weight.
What we like
Rated to 0°F covers nearly every 3-season condition a beginner will encounter
Mummy shape maximizes warmth efficiency with no dead-space fabric wasting weight
Around $120 is strong value for a bag that handles a full first year of trips
What to know
Synthetic fill packs noticeably larger than an equivalent down bag
Heavier than down options at the same temperature rating
Trail Scout Self-Inflating Camping and Backpacking Sleeping Pad, Regular - 72 x 20 Inches
$89.95 as of Jun 22, 2026
★★★★☆Our rating· In Stock
R-value of 3.4, self-inflating, and around $70. Not the lightest pad on the market, but it's comfortable enough to actually sleep on and durable enough to last years of trips. Therm-a-Rest has been making sleeping pads since the 1970s and they know what they're doing. Don't underestimate how much your pad matters. This one earns its place in your kit.
What we like
R-value 3.4 handles 3-season temps including cold desert nights reliably
Self-inflating: open the valve, unroll, and add a few topping breaths
What to know
Heavier and bulkier than inflatable pads at comparable R-values
Takes several minutes to fully self-inflate without manual top-off effort
Backcountry cooking does not have to be complicated. The standard beginner setup is a canister stove, a titanium pot, and a lighter. Total weight under a pound, total cost around $50–70. You don't need a multi-burner setup, a cast iron skillet, or a French press (yes, people bring French presses). Boil water, rehydrate meals, make coffee. That's it for the first dozen trips.
Best starter
MSR
PocketRocket 2 Stove
$49.95 as of Jun 22, 2026
★★★★★Our rating· In Stock
The PocketRocket 2 is the standard canister stove for a reason: 73 grams, boils a liter in 3.5 minutes, fits on any isobutane canister, and costs around $45. It's reliable in cold and windy conditions, packs into a stuff sack smaller than your fist, and works exactly as advertised. Buy this, buy a 110g fuel canister, and stop thinking about stoves.
What we like
73 grams, boils a liter in 3.5 minutes, the benchmark other stoves chase
Works with any standard isobutane canister available in every outdoor shop
What to know
Efficiency drops in very cold temps; carry an extra canister below freezing
No windscreen included; a foil one costs $3 and makes a real difference
★★★★☆Our rating· Only 7 left in stock - order soon.
A titanium pot is overkill until it isn't. At 4.4 oz it saves you half a pound versus an aluminum pot, and on a long trip that difference is real. The 0.85L size is right for one person boiling water for a freeze-dried meal; pair it with the PocketRocket and you have a complete cook kit under 6 oz.
What we like
4.4 oz titanium saves real weight without sacrificing durability over years
Nests the PocketRocket stove inside for a compact all-in-one cook kit
What to know
0.85L is right for one person; two people will need a larger pot
No insulation; food cools quickly so eat straight from the bag on cold nights
At around $15, the BRS-3000T is the budget cult classic: 25 grams and a reliable flame on a calm day. The tradeoff is that it's less wind-resistant than the PocketRocket and the pot supports are narrower. Fine for a beginner who wants to test backcountry cooking without spending $45 on a stove first.
What we like
25 grams and $15, the lightest and cheapest entry to canister stove cooking
Surprisingly reliable on calm days for a stove that costs less than lunch
What to know
Narrow pot supports and poor wind resistance; use a windscreen or stay sheltered
Build quality reflects the price; inspect O-rings before every trip
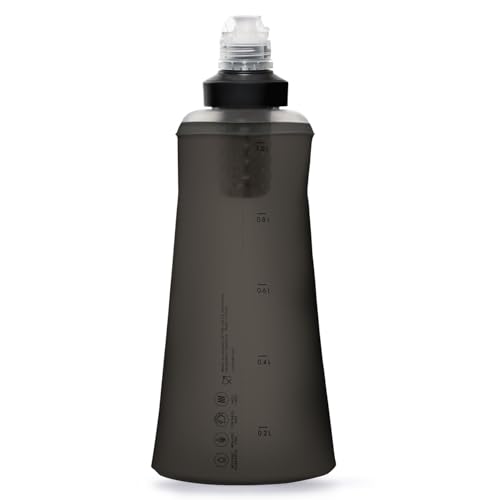
You cannot drink untreated backcountry water without risking Giardia, and Giardia will ruin your life for a few weeks. There are three good options: a filter (Sawyer Squeeze is the standard), chemical treatment (Aquatabs are the lightest backup), or a UV pen (SteriPen works great but needs batteries). Most backpackers carry a filter as their primary method and a few Aquatabs as an emergency backup. This is not optional gear.
Best starter
Sawyer
Products MINI Water Filtration System
$
★★★★★Our rating
The Sawyer Squeeze and Mini are the most popular backcountry filters in the world, and for good reason: 2 oz, filters 100,000 gallons, removes 99.99999% of bacteria and protozoa including Giardia, and costs around $30. Nothing simpler exists at this weight. Squeeze water from a dirty source bag through the filter directly into your mouth or bottle. That's it. Every serious backpacker has one.
What we like
2 oz and 100,000-gallon capacity, best weight-to-value ratio in water treatment
99.99999% bacteria and protozoa removal; handles Giardia with no chemicals
What to know
Freezing destroys the membrane permanently; can't live in a cold pack pocket
Flow rate slows with use; backflush after every trip to maintain performance
The BeFree integrates the filter and bottle into one system. Fill from any source, screw on the cap, drink. No separate bags, no threading parts together when you're tired. Around $45 and barely heavier than the Sawyer. If you want the simplest possible setup and don't mind the slightly higher price, this is it.
What we like
Filter and bottle in one: fill from source, cap, drink, no assembly needed
Fast flow rate and no separate dirty water bags to manage or lose
What to know
Glass fiber filter is more delicate than Sawyer's; handle with care
Proprietary bottle means a cracked reservoir takes the whole system out
Every backpacker needs to know where they are and how to call for help. For navigation, you need a downloaded offline map (AllTrails Pro or Gaia GPS), a printed backup, and a compass on any route with real exposure. For emergencies, a whistle and a basic first aid kit are non-negotiable. A personal locator beacon (PLB) or satellite communicator like a Garmin inReach is worth serious consideration once you're going into remote terrain.
Best starter
Suunto
A-10 Field Compass
$24.00 as of Jun 22, 2026
★★★★★Our rating
A basic baseplate compass for under $20. Suunto makes reliable compasses and the A-10 does everything a beginner needs: orient a map, take a bearing, follow it. You don't need a $60 compass to start. Learn to use this one first.
What we like
Reliable baseplate compass from a brand with 85 years of compass-making history
Under $20 teaches real navigation skills without the cost barrier
What to know
No declination adjustment; you'll need to calculate magnetic declination manually
No mirror or clinometer for more advanced orienteering techniques
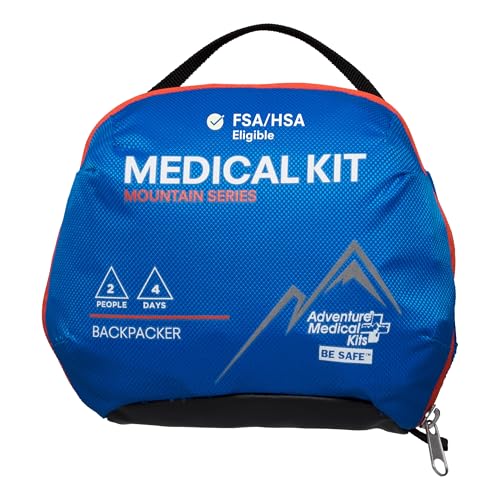
A real wilderness first aid kit, not a car kit with bandages and aspirin. This one has blister care, moleskin, irrigation syringe, SAM splint, and enough supplies for a multi-day trip. At around $35 it weighs under 9 oz. Add your personal medications and ibuprofen and you're set.
What we like
Wilderness-specific kit with blister care, SAM splint, and irrigation syringe
Under 9 oz covers a full multi-day trip, not a stripped-down car first aid kit
What to know
No OTC medications included; add ibuprofen and personal meds yourself
No tourniquet; add a CAT tourniquet if heading into serious remote terrain
Most people overthink the preparation and underthink the fundamentals. Here's what actually happens — day by day — between loading your pack and cooking breakfast at a backcountry campsite.
Backpacking has a reputation problem. Most people’s mental model is thru-hikers grinding 25-mile days through the Sierra Nevada, or some survivalist thing involving emergency bivouacs and foraging. The reality of a first trip is far more approachable: a 5-mile hike in, two nights at a designated campsite, dinner cooked on a stove the size of a hockey puck, and waking up to a view you didn’t share with anyone who drove to it.
This is what a first backpacking weekend actually looks like — the decisions that matter, the mistakes you’ll make anyway, and the moment somewhere around 6 AM on day two when you understand why people do this.
Before the trip: the two things that actually matter
Every beginner’s first instinct is to obsess over gear — and the gear list for backpacking is genuinely long. But there are two pre-trip decisions that affect your experience more than any piece of equipment.
Pick the right trail. Your first trip should be on a popular, well-marked trail with established campsites. Not remote. Not off-trail. Not anything that requires navigation beyond “follow the trail markers.” You want a route with 4–8 miles to camp (not 12), a clear water source, and campsites that other people have clearly used before. AllTrails filter settings: backpacking, beginner, and whatever your starting state is. Look at recent trip reports — not the trail description, which was written to sound appealing, but actual user reviews from the last month.
Do a shakedown night. Pack everything, put it on your back, and sleep in it — in your backyard, at a drive-up campground, wherever. Cook on the stove. Inflate the pad. Sleep in the bag. The point is to discover problems at home, not at mile 6. Every experienced backpacker has a story about a stove that didn’t work, a tent pole they forgot to pack, or a sleeping bag they hadn’t actually tested. The shakedown catches all of it.
Day 1: Loading up and the first mile
The first thing you’ll notice on the trailhead is that your pack feels wrong. This is normal. Every backpacker’s pack feels wrong for the first 20–30 minutes until your body acclimates to the weight distribution.
Before you start hiking, spend five minutes dialing the fit:
Hipbelt first. The hipbelt should sit on your hip bones, not your waist, with the buckle centered. Cinch it so it feels snug — you should be able to fit two fingers under it, but not four.
Load lifters. The small straps above the shoulder straps that connect to the top of the pack. Pull them forward until the pack tilts slightly toward you. You should feel the weight shift onto your hips.
Shoulder straps. Should follow the curve of your shoulders with no gaps. Snug but not digging.
If the fit is correct, about 70–80% of the pack’s weight should be on your hips, not your shoulders. If your shoulders are screaming after 10 minutes, something is wrong with the fit.
Start slow. This is the single most common beginner mistake. The trail feels good and you’re excited and you hike the first two miles at a pace that leaves you gassed before you reach camp. A sustainable backpacking pace is slower than you expect — roughly 2 miles per hour on moderate terrain, less on anything with significant elevation gain. The old hikers’ wisdom “hike your own hike” means: slow down and eat something.
Stop at water sources. Drink. Your body needs more water under load than it does on a day hike, and dehydration on day one ruins day two.
Arrive at camp with at least 90 minutes of daylight left. That’s not a suggestion. Setting up an unfamiliar tent in the dark is miserable, cooking in the dark is hazardous, and rushing camp setup is how people make decisions they regret.
Tent first. Do this while you still have energy. Even if you did the shakedown, actually do it. The tent pegs go in before anything else, and you want to verify the rainfly is on correctly before you need it to actually be on correctly.
Water before dinner. Filter enough water for dinner and breakfast in one go — you don’t want to walk to the creek in the dark.
Food storage. Where your food sleeps is not where you sleep. If there are bear boxes at your campsite, use them. If not, your food goes in a bag hung at least 10 feet off the ground and 4 feet from the trunk — the PCT hang. Do this before it gets dark. Do not put it off. Do not sleep with food in your tent. This is the rule beginners are most tempted to skip on their first trip, and it’s the most important one.
Dinner on your first night should be the easiest thing you packed. Freeze-dried meals are the right call — boil water, pour, wait 10 minutes, eat. You’re tired and this is not the moment to impress yourself with backcountry cooking. Simple is good.
Day 2: Why people do this
You will probably sleep badly the first night. This is almost universal among beginners. The ground feels harder than you expected even with the pad, the sleeping bag feels constricting, something outside made a noise, your hips are a little sore. This is normal and it gets better on subsequent trips as your body learns what it’s doing.
Wake up before the sun if you can.
This is the moment the whole thing clicks. You’re sitting with hot coffee (or instant, no judgment) watching the light change on whatever view your campsite has, and there is absolutely nobody around, and you’re warm and fed and you got yourself here and it cost you nothing but the walk. This is why people backpack.
The morning hike on day 2 is usually the best of the trip. Your legs are loose, the trail is quieter because day hikers haven’t arrived yet, and you’ve stopped noticing the pack weight. Take the long way if there is one.
Every first-time backpacker makes the same handful of mistakes. Here are yours, in advance:
You’ll pack too much. The average beginner pack is 10–15 lbs heavier than it needs to be. Common culprits: an extra pair of shoes, a full-size towel, way too much food, a book instead of an e-reader or nothing, duplicate tools. After your first trip, lay out everything you brought and look at what you actually used. That stack of things you didn’t touch is your next trip’s weight savings.
You’ll underestimate the elevation. A 5-mile hike with 1,500 feet of gain is not a casual 5-mile hike. AllTrails shows elevation in the trail stats — look at it before you choose the route, not when you’re already struggling on the switchbacks.
You’ll start too late in the day. The standard advice is to start as early as you can stand. 7 AM is better than 10 AM. Afternoon thunderstorms are a real hazard in the mountains and you want to be at or below treeline before 2 PM.
Your feet will get wet. Waterproof trail runners or boots help; so does not wading into the middle of a stream to cross. But at some point your feet will get wet. Merino wool socks dry faster than cotton and don’t feel as miserable when damp. Pack an extra pair.
You’ll forget something. The most forgotten items are: sunscreen, toilet paper, a lighter, and the tent stakes (usually because they were packed separately for the shakedown). A written pre-trip checklist prevents most of this.
Building from here
A first backpacking trip is almost always followed by a second one. Here’s what the arc looks like:
Trips 2–4: You figure out what’s actually in your pack. The shakedown becomes habit. Your base weight drops naturally as you ditch things you didn’t use. You start having opinions about your gear.
After 5–6 trips: Your system is established. You know what your body needs, what your sleep system actually handles, and which gear you wish you’d bought differently. This is when it makes sense to start thinking about going lighter — which often means spending more money, but on the right things.
The community: r/ultralight and r/backpacking are both excellent. Trip reports are as useful as gear reviews. The Ten Essentials list and Leave No Trace principles are worth knowing cold before you’re in terrain where they matter.
The actual barrier to entry is lower than the gear lists suggest. A 2-night trip on a beginner trail doesn’t require perfect kit — it requires appropriate kit, enough water, enough food, and enough daylight to make camp before dark. The rest is learned by doing it.
Save your money
What you don't need yet
Beginners get pressured to buy a lot of stuff that doesn't help them play
better. Here's what we'd skip on day one.
An ultralight quilt — Quilts are lighter than sleeping bags but require you to manage your insulation actively. Learn to sleep warm in a mummy bag first. When your bag starts to feel heavy, that's when to look at quilts.
Trekking poles — A lot of backpackers swear by them, and they do reduce knee strain on descents. But for your first few trips, they're optional gear that takes up headspace. Get the Big Three sorted first.
A personal locator beacon (PLB) — Important for remote or serious terrain, unnecessary for popular established trails. Plan your first trips on well-traveled routes, tell someone your itinerary, and add a PLB when you graduate to more remote areas.
A bear canister — Required in some wilderness areas (check regulations for your specific destination), but not a day-one purchase everywhere. Hang your food with the PCT hang method until you know where you're going and what's required.
Freeze-dried meal variety packs — They're expensive. For your first trip, bring a few Mountain House pouches to try, but also know that instant oatmeal, tortillas, peanut butter, and ramen are just as easy and cost a third as much.
First week
Your first seven days
A short, real plan to get from gear-on-doorstep to actually playing.
Plan a 2-night trip on a well-traveled trail within a few hours of home. AllTrails is the easiest starting point: filter by 'backpacking' and look for beginner-rated routes with established campsites. · Action
Do a shakedown overnight in your backyard or at a car campsite before your first trail trip. Set up your tent, cook on the stove, sleep in the bag. Discovering your stove leaks at home beats discovering it 8 miles in. · Action
Print your trail map or download it offline: phone batteries die, and cell service doesn't exist in most wilderness areas. · Learn
Realistically $350–600 if you're buying all the core gear new: pack ($150–270), tent ($130–220), sleeping bag ($80–130), sleeping pad ($50–90), stove and pot ($60), water filter ($30). You can shave significantly by renting the Big Three first, buying used, or borrowing from friends.
How fit do I need to be to start backpacking?
More fit than a casual hiker, less fit than you probably think. If you can hike 8–10 miles in a day without stopping constantly, you can backpack. The weight on your back is the variable. Start with lighter loads (under 30 lbs) and shorter distances (5–8 miles per day) while you build strength.
What's the difference between hiking and backpacking?
Hiking is a day activity: you return to your car and a bed. Backpacking is multi-day travel carrying everything you need: shelter, sleep system, food, water treatment, and safety gear. The essential skills overlap, but backpacking adds camp craft, navigation, and leave-no-trace considerations.
Do I need a permit for my first backpacking trip?
Depends entirely on where you go. Many popular wilderness areas (Yosemite, Rocky Mountain NP, Olympic) require permits that book weeks or months in advance. Less-trafficked national forests often have no permit requirement. Check recreation.gov and the specific ranger district website for your destination before you plan dates.
How do I handle food and wildlife?
Proper food storage is a safety issue, not just a courtesy. In bear country, you need a bear canister (required in some areas) or a proper hang (PCT method). In most established campgrounds, use provided bear boxes. Never store food in your tent. Check the specific regulations for wherever you're going.
Is backpacking safe for a complete beginner?
Yes, on appropriate terrain with appropriate preparation. Start on well-traveled trails with established campsites, tell someone your plan and expected return, carry the Ten Essentials, and don't push mileage goals on your first trip. The risks are real but manageable. Most backpacking accidents happen when people go too far too fast.
Leave No Trace Center — The foundational ethics and practices of backcountry travel. Read the 7 Principles before your first trip.
Recreation.gov — Federal lands permit booking. Check here first for any trip to a National Park or designated wilderness area.
AllTrails — The largest trail database. Crowdsourced reviews, photos, and offline maps. The Pro subscription is worth it for downloaded offline maps.
Gaia GPS — More powerful topo mapping tool used by serious backpackers and search and rescue. Free tier is useful; the paid tier adds downloadable offline maps.
REI Expert Advice: Backpacking — REI's beginner guides are genuinely good: honest about what you need and when. Not a sales pitch dressed as content.
The Trek — Community site focused on long-distance hiking and backpacking. Trip reports, gear reviews, and honest accounts of what it's actually like to walk for days. Skews toward thru-hiking but the gear content applies to all backpackers.
r/ultralight — Not for your first kit, but invaluable once you've got a few trips under your belt and want to understand gear tradeoffs. The wiki is excellent.
r/backpacking — More beginner-friendly than r/ultralight. Good trip planning advice and gear questions answered quickly.
Yosemite Decimal System — Understanding trail ratings before you pick your first route. The difference between Class 1 and Class 3 matters a lot.
As an Amazon Associate, JustBeginning earns from qualifying purchases.
We may also earn commission from other affiliate programs linked on this
page. Editorial recommendations are independent; we don't choose
products based on commission rates.
Product prices and availability are accurate as of the date and time
indicated and are subject to change. Any price and availability
information shown on Amazon at the time of purchase will apply.
Our top pickOsprey Atmos AG 50 (Men's) / Aura AG 50 (Women's)


 Best starter