Road cycling looks intimidating from the outside, the Lycra, the carbon frames, the clip-on shoes. It's more approachable than it looks. A solid beginner setup runs $1,000–1,500, and most of that is the bike. Here's exactly what to buy, what to skip, and what nobody tells you before your first ride.
By Colin B. · Published May 15, 2026 · Last reviewed August 7, 2026
The bike is 70–80% of the total cost, budget $700–1,000 for the frame and you'll have $200–300 left for a helmet, shorts, shoes, and accessories. Road bikes hold their value well; if cycling doesn't stick, you can sell for close to what you paid.
We earn commission on qualifying Amazon purchases — see our
affiliate disclosure.
Price tiers and budget totals shown above are editorial estimates;
actual Amazon prices vary.
At a glance
Our top pick in each category
The fastest path through this guide — each best-starter pick by category.
Scroll for the budget and upgrade alternatives.
Buy a bike that fits. Road cycling is more fit-sensitive than almost any other sport, a bike 2cm too large will be uncomfortable on rides longer than 30 minutes. If you're ordering online, use the manufacturer's size chart and measure your inseam. When in doubt between two sizes, go smaller: you can raise the saddle, but a frame that's too tall can't be made to fit.
Get bib shorts before your second ride, not after. Most beginners decide 'I'll see if I like it first' and discover the hard way why they matter. Your sit bones take time to toughen up, and a good chamois pad is the difference between wanting to ride again tomorrow and never wanting to sit on a bike again. The $35 pair from Amazon is fine. Just get some.
Don't start with clipless pedals. The classic beginner move is to buy clip-in shoes with the bike, clip in for the first time in a parking lot, forget how to unclip at a stop, and fall over in slow motion. Spend 2–4 weeks on flat pedals first. Get comfortable with the bike, the gears, the brakes. The efficiency gain from clipless is real, it just isn't going anywhere.
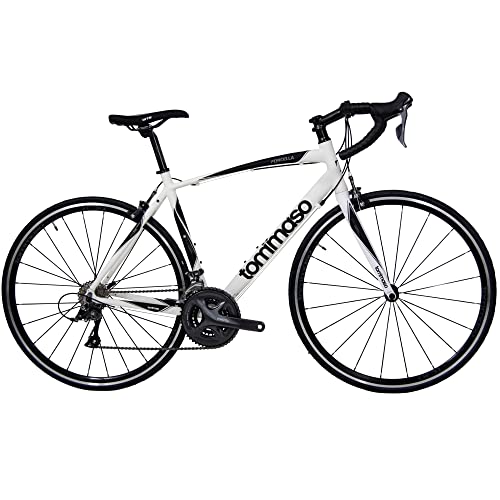
This is the one purchase where you can't cut corners, and also the one where it's easy to overspend. A $300 bike from a department store is heavier, handles worse, and breaks in frustrating ways. But you also don't need a $3,000 carbon frame. The sweet spot for beginners is an aluminum frame with a Shimano Claris or Sora groupset, 700c wheels, and a geometry labeled 'endurance' or 'sportive', meaning a slightly more upright position that's comfortable before your core builds up to holding an aggressive tuck for hours. If you have a local bike shop, buying there is worth it: you get a professional build and a fitting included. If you're buying online, plan to do a basic brake and derailleur tune-up on arrival.
Bikes — what's the difference?
A few common shapes, each making a different trade.
Aluminum Endurance
Relaxed geometry, comfortable position. The right choice for most beginners.
Geometry
Endurance / relaxed
Material
Aluminum
Tire clearance
28–32mm
Best for Beginners, long rides, riders who prioritize comfort over speed
Tradeoff 5–10% slower than race geometry, you won't notice until after year one
Aggressive position, narrow tires, built for speed. Hard to hold until you build core strength.
Geometry
Race / aggressive
Material
Aluminum
Tire clearance
23–25mm
Best for Fit riders with a cycling base who want to go fast from day one
Tradeoff Much less comfortable for beginners, especially on rides over 45 minutes
Entry Gravel
Disc brakes, wider tires, handles pavement and dirt. The most versatile pick for beginners.
Geometry
Versatile / relaxed
Material
Aluminum
Tire clearance
35–45mm
Brakes
Disc
Best for Riders who want to explore beyond pavement, commuters, or anyone unsure about road-only riding
Tradeoff 5–10% heavier and slower on pure road than a dedicated road bike, but far more flexible
Best starter
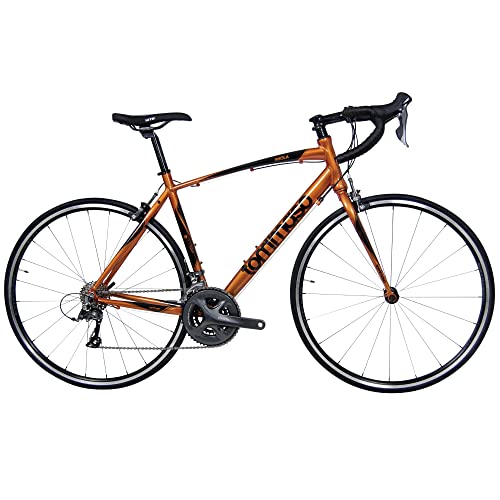
Tommaso
Imola Road Bike, Shimano Claris 24 Speeds
$$$
★★★★★Our rating
The best value in the 'real drop-bar road bike on Amazon' category. Aluminum frame, Shimano Claris 24-speed, endurance geometry that's comfortable before your body adapts to the drops. Tommaso has made bikes for 50+ years and stands behind their products. Ships 85% assembled, plan 30 minutes to complete setup.
What we like
Shimano Claris 24-speed shifts reliably from day one
Endurance geometry is comfortable before your core adapts
Tommaso warranty support is solid for an online-only brand
What to know
Ships 85% assembled, plan 30 minutes to finish setup and tune brakes
Heavier than equivalent LBS bikes; you'll feel it on long climbs
If your budget is under $500 and you want a genuine road bike before committing to a bigger number, the Vilano Shadow 3.0 delivers. Aluminum frame, Shimano drivetrain, 700c wheels, all the fundamentals, at a price that makes sense for someone still deciding. Component quality is a step down from the Tommaso, but the bike rides and shifts like a road bike should.
What we like
Aluminum frame and Shimano drivetrain for under $500, hard to beat
700c wheels and road geometry teach the right habits early
What to know
Component quality is noticeably lower than the Tommaso
Minimal resale value; worth it only if you're still undecided
If road cycling is sticking, the Forcella is the right step up from the Imola. The carbon fork is the key upgrade: it damps road vibration noticeably better than aluminum, cutting fatigue on long rides. Same Shimano Claris drivetrain, but the frame is lighter and more compliant, the difference you'll feel most on rides over 40 miles.
What we like
Carbon fork damps road vibration meaningfully on 40+ mile rides
Lighter and more compliant than the Imola without a steep relearning curve
What to know
Only worth the upgrade if you're already riding 3+ times a week
Same Claris drivetrain as the Imola, a comfort jump, not a performance one
All helmets from real brands on Amazon meet CPSC safety certification. The meaningful upgrade to pay for is MIPS, a slip-plane insert that reduces rotational forces in a crash. The evidence for it is solid and it costs $10–20 more than a non-MIPS equivalent. Beyond that, the main variables are ventilation (matters on climbs and in heat), fit system (dial vs. fixed), and weight. Start cheap, get MIPS, and upgrade once you know you'll be riding in summer heat.
Best starter
Giro
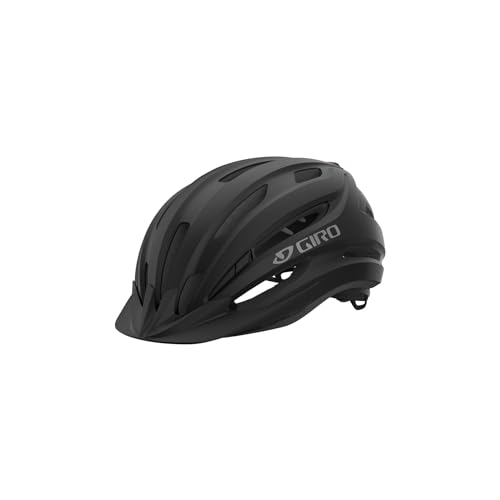
Register MIPS II Adult Cycling Helmet
$$
★★★★★Our rating
Giro has spent 35 years making bike helmets and the Register MIPS II is the correct first helmet for most road cyclists. The Roc Loc dial adjustment system fits a wide range of head shapes, the MIPS integration is clean, and the price is honest. Decent ventilation for casual riding, not great on long climbs in summer, but fine for the first season.
What we like
MIPS integration is clean and doesn't add bulk to the fit
Roc Loc dial adjusts to a wide range of head shapes quickly
What to know
Ventilation is adequate for casual rides but struggles on hot summer climbs
If Giro runs slightly narrow on your head shape (some riders find this), Bell's fit system works better for rounder heads. The Traverse MIPS is under $50, MIPS-equipped, and from a brand with 60+ years of helmet history. Less ventilation than the Giro, but perfectly adequate for rides under 20 miles or cooler weather.
What we like
Under $50 with MIPS, safety standard at the lowest price point
Bell's fit system works better for rounder heads than the Giro
What to know
Less ventilation than comparable Giro models
Feels a touch plasticky compared to Giro's build quality
When you're doing 50+ mile rides and heat starts to matter, the Agilis is where most road cyclists land. Twenty vents versus six on the Register, a premium fit system with a wider adjustment range, and a 50g weight savings. The difference in airflow on a long summer climb is genuinely noticeable. Worth it once you're riding more than three times per week.
What we like
Twenty vents versus six on the Register, noticeable on summer climbs
Premium fit system adjusts through a wider range than entry models
What to know
Only worth the premium once you're regularly doing long summer rides
50g lighter than the Register, but you won't feel it until 3+ hours in
Bib shorts are the most important piece of cycling clothing and the item beginners most consistently underestimate. The bibs, shoulder straps like overalls, keep the chamois (the padded insert) exactly where it needs to be throughout a ride without shifting. The chamois protects your sit bones from saddle pressure. You wear nothing underneath, which sounds wrong until you ride 40 miles in a pair and realize you'd never go back to regular shorts. Get a pair before your second ride. The cheapest pair you can find is better than no pair.
Best starter
PEARL IZUMI
Men's 9" Quest Bib Shorts, Breathable with Reflective Fabric
$90.00 as of Jun 22, 2026
★★★★★Our rating
Pearl Izumi has been making cycling-specific clothing for 40 years and the Quest is their honest entry-level bib. Adequate chamois for rides up to 60 miles, shoulder straps that don't dig in, and a cut that fits a wide range of body types. Available in men's and women's specific versions. This is the safe, no-regret choice for a first bib, not flashy, just functional.
What we like
Chamois holds position through 60-mile rides without shifting
Available in both men's and women's specific versions
40 years of Pearl Izumi cycling-specific design behind it
What to know
Not flashy, you're paying for function, not Italian cut
May feel short for taller riders with longer inseams
Under $40 and the chamois is genuinely adequate for rides up to 30 miles. If you're not sure road cycling will stick, these let you test the bib-shorts concept without a full financial commitment. The shoulder straps are slightly less comfortable than the Pearl Izumi but nothing you'd notice on a one-hour first ride. Start here, upgrade when you're riding regularly.
What we like
Under $40 with a chamois that handles rides up to 30 miles fine
Good for testing bib shorts before committing to a full-price pair
What to know
Shoulder straps are less comfortable than the Pearl Izumi on longer rides
Chamois quality shows its limits past 45 minutes in the saddle
When you're doing 70+ mile rides and your chamois starts to matter more, Castelli's Entrata 2 is the step up most cyclists make around the 50–100 hour mark. Better chamois padding, tighter construction, and Castelli's Italian fit is excellent for longer saddle time. The price jump is real, wait until you've confirmed road cycling is a habit before spending it.
What we like
Italian cut and construction is noticeably better for 70+ mile rides
Chamois quality is a real step up, fewer pressure points over long saddle time
What to know
Wait until road cycling is a confirmed habit before spending this much
Castelli sizing runs European, size up if you're between sizes
Clipless pedals, the confusing name for the clip-in system that attaches your shoe to the pedal, are road cycling's most polarizing beginner gear decision. The efficiency gain is real: clipping in lets you push and pull through the pedal stroke, which adds 10–15% more power. The learning curve is also real: the classic beginner move is to forget how to unclip at a red light and fall over in slow motion. Our recommendation: start on flat pedals for 2–4 weeks. When you're ready for clipless, SPD pedals (two-bolt, mountain-bike-style cleat) are far more beginner-friendly than SPD-SL (three-bolt road cleat that's nearly impossible to walk in).
Best starter
Shimano
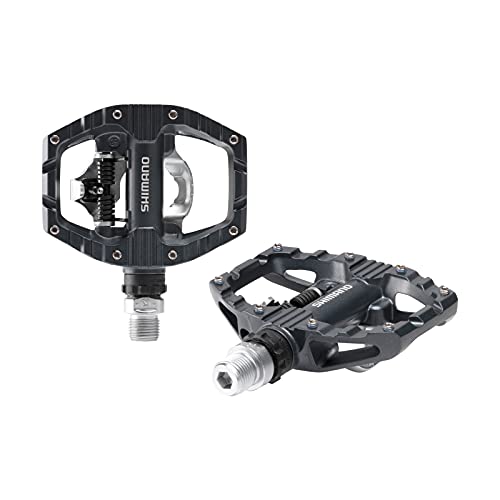
PD-EH500 SPD Dual Platform Pedals
$73.99 as of Jun 22, 2026
★★★★★Our rating· Only 11 left in stock - order soon.
The EH500 is the smartest entry into clipless: one side is SPD clipless, the other is a flat platform. Ride clipped in on open roads, flip to platform in traffic. The SPD cleat is a two-bolt mountain-bike-style system, walkable, forgiving, and far easier to enter and exit than road SPD-SL. Pair with any SPD-compatible cycling shoe.
What we like
One side SPD clipless, one side platform, flip to platform in traffic
SPD two-bolt cleat is walkable and far more forgiving than road SPD-SL
What to know
SPD cleats sold separately, add SM-SH51 cleats to your cart
Not compatible with road SPD-SL shoes when you eventually upgrade pedals
The natural shoe to pair with the EH500 pedals above. These are SPD-compatible (two-bolt cleat) with a stiff composite sole that transfers power noticeably better than any sneaker. Walkable enough for coffee stops and commuting. A significant grip improvement on longer rides without locking you into the inflexible road-cycling ecosystem before you're ready.
What we like
Stiff composite sole transfers power better than any sneaker
Walkable enough for coffee stops; two-bolt cleat doesn't lock you to road system
What to know
Less stiff than dedicated road shoes, marginal efficiency vs. SPD-SL
Recessed cleat isn't compatible with road SPD-SL pedals
When you're ready for dedicated road pedals, the RS500 is Shimano's entry-level SPD-SL, the three-bolt road system used by most serious cyclists. Lighter than SPD, optimized for the single-plane road pedaling motion, and compatible with any road cycling shoe. You'll need SPD-SL compatible road shoes to use these; the Shimano SH-RC300 is the natural starting point.
What we like
Lighter and more efficient than SPD for the road pedaling motion
Entry point to the SPD-SL system used by most serious road cyclists
What to know
Large, slick cleats are nearly impossible to walk in, not for commuting
Requires SPD-SL compatible road shoes; nothing else you own will clip in
Four things belong on every road bike before you ride alone: a saddle bag with a spare tube, tire levers, and a CO2 inflator; a front light; a rear light; and a water bottle with a cage. Front and rear lights aren't just for night riding, they're for visibility in daylight. A driver who can see you is one who might not hit you. Total cost for all of this is under $80. Everything else (computer, multi-tool, chain lube) comes once you're servicing the bike yourself.
Best starter
Topeak
Aero Wedge Pack, w/ Fixer F25, Medium, Black
$
★★★★★Our rating
A saddle bag with a spare tube, two tire levers, and a CO2 inflator is non-negotiable for solo rides. Running out of air 15 miles from your car is the fastest way to hate road cycling. The Topeak Aero Wedge attaches securely without rattling, fits all three essentials, and doesn't flap in crosswinds. Pair it with a 700c spare tube and a CO2 inflator, both cheap on Amazon.
What we like
Attaches without rattling; fits spare tube, levers, and CO2 inflator
Topeak buckle system is quick to remove for mid-ride access
What to know
Doesn't include tube, levers, or CO2, you have to stock it yourself
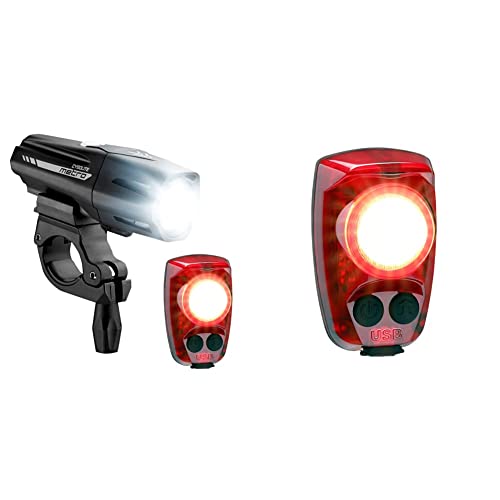
Metro Plus 800 & Hotshot Pro 150 Bicycle Light Combo Set
$122.24 as of Jun 22, 2026
★★★★☆Our rating
Front and rear in one purchase, both USB rechargeable, and bright enough to be visible in broad daylight. Run both on every ride, not just at night. The Metro Plus 800 front light has 5 night modes and 3 daytime modes; the Hotshot Pro 150 rear is one of the most visible taillights on the road. This is the combo we'd hand to anyone starting from zero.
What we like
Both lights USB-rechargeable, one charging cable for a complete setup
Metro Plus 800 is visible in broad daylight; Hotshot Pro tail is iconic
What to know
Not the cheapest option, but both lights genuinely earn their place
Metro Plus 800 battery lasts ~3 hours on highest setting; recharge often
Hydration is the most underestimated performance variable on any ride over 45 minutes. The Podium Chill's squeeze-and-flow valve is the road cycling standard, easy to drink while riding without spilling, and the insulation keeps water cold on hot days. Buy two (most bikes have two cage mounts) plus inexpensive aluminum bottle cages ($6–8 each). Drink before you're thirsty.
What we like
Squeeze-and-flow valve works one-handed at speed without spilling
Insulation keeps water cold for 2+ hours on summer rides
What to know
Doesn't fit all bottle cages, check cage inner diameter before ordering
21oz empties fast on hot rides over 90 minutes; buy two
The first month on a road bike is less about fitness than most people expect, and more about technique than most anticipate. Here's what actually happens — week by week — between unboxing the bike and being someone who actually rides.
Road cycling has a reputation for a steep learning curve — unfamiliar equipment, an awkward position, a whole vocabulary to acquire before you feel like you belong. Most of that is reputation, not reality. The first month is mostly about getting comfortable on the bike. The fitness comes automatically.
This is what your first month actually looks like, week by week, with the things that matter and the things you’ll be tempted to worry about that don’t.
Week 1: Getting on the bike
The first thing most beginners underestimate is how different a road bike feels compared to any other bike they’ve ridden. The drops (the curved lower part of the handlebars) feel aggressive. The saddle feels narrow. The gears shift differently. This is normal and temporary — your body adapts within a few rides.
Here’s what to focus on in week one, in order of importance:
Saddle height. This is the most consequential fit variable and the easiest to get wrong out of the box. Stand next to your bike and set the saddle so it’s roughly at hip height. When you’re pedaling, your knee should have a slight bend at the bottom of the stroke — not fully extended, not cramped. An inch too low and you’ll lose power; an inch too high and your hips will rock, straining your back. The Park Tool saddle height guide has the exact method. Do this before your first ride.
Gearing. Road bikes have more gears than most people have ever used — often 20 or 22. You don’t need to understand all of them. You need one rule: shift before you need to. Shift down before a hill gets steep, not while you’re grinding up it. Shifting under load wears your chain faster and occasionally drops it. Practice on flat ground until shifting feels automatic.
Your first route. 15–20 miles, flat, minimal traffic. Not a group ride. Not a climb. A loop that lets you focus on the bike — the handling, the brakes, the gears — without external pressure. Roads you already know by car are ideal: you know where the intersections are, where the gravel is, where the traffic peaks.
Ride three times in week one if you can. The bike clicks faster with repetition than with study.
Weeks 2–3: The clipless transition
If you started on flat pedals (and you should have), weeks 2–3 are when you add clipless. Don’t rush this. You’re ready when the bike itself no longer requires conscious thought — when you can shift, brake, look over your shoulder, and drink from your water bottle without any of it feeling like a crisis.
When you’re ready, here’s the safest way to transition:
Practice in a doorway first. Clip in while holding the doorframe, then practice unclipping. Do this twenty times on each foot. The motion becomes muscle memory quickly. The mistake that causes the slow-motion fall is the brain going blank at a stop sign, not the physics of the pedal.
Your first clipless ride should be a solo loop you’ve done before. No new terrain, no traffic stress. Pick a route where you know every intersection. Stop at every one, clip out well before you reach it, and restart deliberately. This sounds paranoid. It’s exactly paranoid enough.
SPD vs. SPD-SL. If you went with the Shimano EH500 dual-platform pedals (our recommendation), you’re on SPD — a two-bolt system with a smaller cleat that’s relatively walkable and easy to clip in and out of. Road SPD-SL is a three-bolt system with a much larger, slicker cleat that’s notoriously hard to walk in. Most cyclists eventually move to SPD-SL for the efficiency advantage, but SPD is completely legitimate for recreational riding and much more forgiving for beginners.
This is also the week to find a group ride. Check local cycling clubs on Strava or Meetup — most post a weekly “no drop” ride where the faster riders wait at intersections so nobody gets stranded. Riding in a group teaches you things no amount of solo miles does: how to hold a line, when to brake (as little as possible, as late as reasonable), and how to communicate in traffic. It’s also considerably more fun.
By week four, the bike stops feeling like a foreign object. This is when road cycling becomes genuinely enjoyable rather than just manageable.
A few things to pay attention to at this stage:
Cadence. Experienced cyclists pedal at a higher cadence than beginners — 85–95 RPM versus the 60–70 RPM most beginners default to. Low cadence means more muscular effort per revolution and more fatigue on longer rides. High cadence shifts the effort to your cardiovascular system, which recovers faster. To train this, shift to an easier gear than feels necessary and spin faster — it’ll feel weird for a week and then feel right.
Nutrition on longer rides. On any ride over 75 minutes, you need calories — not after the ride, during it. Cyclists call running out of fuel “bonking,” and it’s a sudden, complete collapse of energy and motivation that happens with no warning. The rule of thumb: eat 40–60g of carbohydrates per hour starting at the 45-minute mark. A banana, an energy gel, or a small handful of gummy bears all work. Drink every 20 minutes whether you’re thirsty or not.
Descending. Road cycling descents scare beginners because they move faster than they’ve ever traveled on a bicycle. Two things help: look where you want to go (not at the thing you’re trying to avoid), and brake before the corner, not in it. Braking while turning destabilizes the bike. Carry speed into a corner only if you’re confident in your line. When in doubt, slow down before the turn.
Every beginner makes the same handful of errors. Knowing them in advance doesn’t prevent them — but it makes them less alarming when they happen:
Overtraining in week one. The legs feel fine after the first ride. The sit bones do not. Give yourself a day off between rides for the first two weeks, regardless of how energetic you feel.
Trying to keep up with faster riders before you’re ready. Getting dropped in a group ride feels bad. Getting dropped and stranded 15 miles from your car feels worse. Be honest about your level when you pick your first group rides.
Forgetting to eat and drink. Water and calories feel unnecessary until they’re urgently necessary. Set a timer on your phone if you have to. Drink every 20 minutes. Eat after 45.
Standing at stops without unclipping first. This is the clipless fall. The fix is pure habit: as you approach a stop, clip out your dominant foot and put it down first. Every single stop, every single time.
What to do at the end of month one
By now, you have a feel for the bike and some opinions about what to work on next. A few decisions that shape the next phase:
Find a regular training partner or club. Consistency is the main variable in improvement, and riding with someone else is the main variable in consistency.
Consider a bike fit at 200–300 miles. By this point, your body has adapted enough that subtle fit issues (hip rock, knee tracking, hand numbness) become apparent. A 60-minute professional fit addresses these systematically. Not before 200 miles — before that, you don’t have the muscle memory to feel what needs adjusting.
Read The Cyclist’s Training Bible if you want structured improvement. Joe Friel’s book is the road cyclist’s equivalent of a coach. Skip it until you’ve got a few months in your legs; before that, just ride.
You’re not a beginner at the end of month one. You’re a cyclist with fresh legs and a long road ahead — which is a much better thing to be.
Save your money
What you don't need yet
Beginners get pressured to buy a lot of stuff that doesn't help them play
better. Here's what we'd skip on day one.
A carbon frame — Aluminum is more than adequate for 2–3 years of serious riding. A carbon frame saves 500g and smooths road vibration, perceptible differences you won't feel until you've logged 500+ miles on any road bike. Wait.
A power meter — Cyclists use power meters to train with precision. You don't have the training-load awareness in your first 3–6 months for the data to mean anything. Add one after you've developed a feel for effort (RPE).
Aero equipment — Aero wheels, helmets, and skinsuits save minutes in races. At beginner speeds and distances, the benefit is genuinely zero. The biggest drag is your upright position, no equipment fixes that.
A GPS cycling computer — Your phone and the free Strava app do everything a Garmin Edge 130 does for the first 6 months. A dedicated GPS is nice once you're building structured training and navigating long routes from memory.
Aerobars — Clip-on aerobars are for triathletes and time trialists who've built years of flexibility to hold that position. On a beginner bike, they're dangerous, you can't reach the brakes from an aerobar tuck.
First week
Your first seven days
A short, real plan to get from gear-on-doorstep to actually playing.
Set your saddle height before your first ride, a correct saddle height is the single biggest fit variable for beginners. · Action
Komoot · Better for finding scenic cycling routes with turn-by-turn navigation
Practice clipping in and out of clipless pedals in your living room or driveway before your first real ride with them. · Action
Pack a flat kit under your saddle before every ride: spare tube, tire levers, CO2 inflator. · Buy
Find a group ride in week two. Local cycling clubs post rides on Strava and Meetup, riding with people slightly faster than you is the most efficient way to improve. · Action
Use the manufacturer's size chart, most give recommendations based on height and inseam. When in doubt between two sizes, go smaller: you can raise the saddle, but a frame that's too tall can't be adjusted to fit. If you're anywhere near a local bike shop, walk in and ask them to pull a size for you to sit on.
Do I need clipless pedals right away?
No. Start on flat pedals for 2–4 weeks. Clipless adds efficiency, you can push and pull through the pedal stroke, but the learning curve includes at least one embarrassing slow-motion fall. Get comfortable with the bike first. SPD pedals (two-bolt, walkable, mountain-bike style) are far more beginner-friendly than road SPD-SL when you're ready to switch.
Are bib shorts actually necessary?
Yes, for anything over 30 minutes. Bib shorts have a chamois pad that protects your sit bones from saddle pressure, and the shoulder straps keep it exactly in place. You wear nothing underneath. This sounds odd until you ride 40 miles in a pair and realize you'd never go back to gym shorts.
What's the difference between a road bike and a gravel bike for a beginner?
A road bike is faster and more efficient on pavement, with narrower tires and a more aggressive position. A gravel bike handles more terrain (dirt roads, gravel, light trails), has disc brakes, and wider tire clearance. Road bikes are faster on tarmac; gravel bikes are more versatile. If you're unsure whether you'll stay on pavement, a gravel bike with 32mm tires gives you most of the road performance with far more flexibility.
How dangerous is road cycling?
More dangerous than hiking, less than motorcycling. The main risks are cars and falling. Wear your helmet every time, MIPS matters in a crash. Run front and rear lights even in daylight. Avoid high-traffic roads until you're confident. Riding in a group is both safer and more enjoyable than riding alone on busy roads.
What's a realistic first ride distance for a beginner?
15–25 miles is the right starting range, 60 to 120 minutes depending on terrain and fitness. Most beginners can do this without any specific training, though you'll feel it the next day. Start flat, add hills gradually. Don't join a group ride you're not sure you can keep up with; getting dropped 10 miles from your car is a rough introduction to the sport.
Bicycling Magazine — The main road cycling publication. Gear reviews, training plans, beginner guides. A reliable first stop for any question.
Global Cycling Network (YouTube) — The best free cycling video resource. How-to, training, route inspiration, gear comparisons. Search 'GCN beginner' for a month's worth of content.
Park Tool Repair Help — The authoritative reference for bike maintenance. Every repair job you'll ever do is here with clear step-by-step instructions. Bookmark it.
Strava — The social network for cyclists. Track rides, find local clubs, discover routes, and measure progress over time. Free tier is enough to start.
VeloNews — In-depth gear reviews and pro racing coverage. More useful for gear buying decisions than for beginner how-to, but excellent for the shopping phase.
r/cycling — Active community. Good for specific questions, route recommendations, and local knowledge. Skip the brand flame wars; search for technique threads.
League of American Bicyclists — National advocacy organization. Useful for finding local cycling clubs, group rides, and safety education resources in your area.
As an Amazon Associate, JustBeginning earns from qualifying purchases.
We may also earn commission from other affiliate programs linked on this
page. Editorial recommendations are independent; we don't choose
products based on commission rates.
Product prices and availability are accurate as of the date and time
indicated and are subject to change. Any price and availability
information shown on Amazon at the time of purchase will apply.
Our top pickTommaso Imola Road Bike, Shimano Claris 24 Speeds


 Best starter