Welcome to roped climbing. Unlike bouldering, sport climbing adds a rope, a harness, and a partner who holds your life — which sounds scarier than it is. Within a month at a climbing gym, you'll be moving up routes that looked impossible on day one. Here's exactly what to buy, what the gym provides, and what to skip until you're climbing outdoors.
By Colin B. · Published May 22, 2026 · Last reviewed June 3, 2026
La Sportiva Tarantulace
— The neutral shoe to start on — comfortable enough for long sessions, flat enough to build footwork right.
Black Diamond Momentum
— The most popular beginner harness in any gym — breathable, comfortable, belay-cert approved by thousands.
Petzl GriGri
— The GriGri's auto-assist catches falls automatically — the standard gym belay device once you're past month one.
Budget total
$150
Typical total
$280
Rent everything for your first 2-3 sessions — about $10-15 per day. Once you know it'll stick, expect to spend $150-280 buying your own shoes, harness, and belay device.
We earn commission on qualifying Amazon purchases — see our
affiliate disclosure.
Price tiers and budget totals shown above are editorial estimates;
actual Amazon prices vary.
At a glance
Our top pick in each category
The fastest path through this guide — each best-starter pick by category.
Scroll for the budget and upgrade alternatives.
Rent first, always. Almost every climbing gym rents shoes, harness, and belay device for $10-15 total. You need 2-3 sessions before you'll know what fit and features matter to you. Buying gear before you've touched a real wall is how you end up with a $90 shoe that fits wrong and never leaves the closet.
Get your belay certification before buying gear. Most gyms offer a belay class on the same day you pay — usually $30-50 including the entrance fee. Once certified, you can climb with a partner any time the gym is open. Skipping this means you can only use auto-belay walls, which cuts your route options in half.
Don't confuse sport climbing with bouldering. Bouldering is unroped, low problems (under 15 feet), no partner needed. Sport climbing is roped routes on tall walls, always with a belayer, and the gear is completely different. Try both in your first few gym sessions before you decide which one you want to pursue.
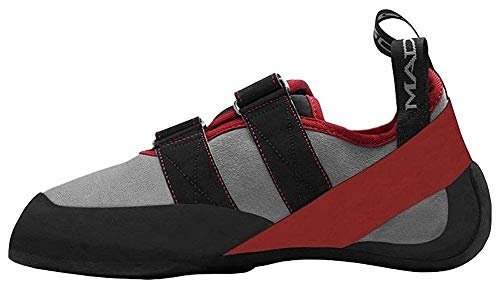
Climbing shoes are the most personal piece of gear you'll buy, and the most common first-timer mistake is going too tight or too aggressive. For your first 6 months, you want a neutral (flat) shoe that fits snugly but doesn't cause pain — not the sharply downturned performance shoes you see on intermediate climbers. Size down from your street shoe by about half a size, and prioritize fit over brand or looks.
Climbing Shoes — what's the difference?
A few common shapes, each making a different trade.
Neutral (flat sole)
All-day comfort, forgiving fit. The right starter shoe — full stop.
Downturn
None
Fit
Snug, not painful
Best for
0–12 months
Best for Beginners, slab routes, gym top-rope, long sessions
Tradeoff Less precise on steep overhangs once your technique improves
Performance tool. Not for beginners, and painful by design.
Downturn
Heavy
Fit
Painful — intentionally
Best for
12+ months, steep routes
Best for Experienced climbers on overhangs, comp climbing, hard outdoor sport routes
Tradeoff Agony after 1-2 routes. No footwork benefit until your technique is already solid.
Best starter
La Sportiva
Tarantulace
$$
★★★★★Our rating
The default beginner shoe recommendation from gym staff worldwide, for good reason. Flat sole, generous fit, and a lace closure that lets you dial in comfort as your foot swells through a long session. La Sportiva's rubber is excellent and the shoe holds up to the abuse beginners dish out.
What we like
La Sportiva rubber grips plastic and real rock equally well
Lace closure dials in fit as your foot swells through long sessions
Holds up to the scraping and smearing beginners dish out
What to know
European sizing runs slightly large — order a half size down
Under $60 and a legitimate shoe — not a cheap knockoff. The rubber quality is below La Sportiva, but you won't notice for the first 4 months. The right call if you're not sure climbing will stick and don't want to spend $90 on session two.
What we like
Under $60 — genuinely decent rubber, not a cheap knockoff
Right call if you're not sure climbing sticks before investing more
What to know
Rubber quality noticeably worse than La Sportiva after 4-5 months
At 6-12 months in, the Instinct VS is where serious gym climbers land before spending $200+ on full competition shoes. Slight downturn, Vibram XS Grip rubber, and a Velcro closure built for high-volume sessions. The bridge between beginner and intermediate.
What we like
Vibram XS Grip rubber outperforms most entry-level shoes on real holds
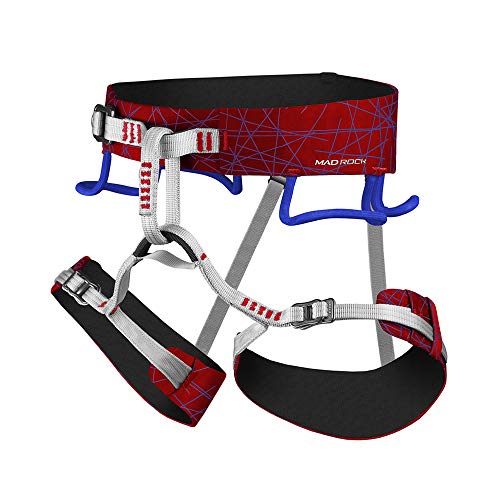
Your harness is what the rope clips to, so fit matters more than brand. It should sit snug on your hips — not your waist — with leg loops comfortably tight. Two fingers should fit under each loop, no more. Most gyms rent harnesses for $5-10; rental harnesses are safe. Buy your own once you know you'll climb more than once a month.
Best starter
Black Diamond
Momentum
$$
★★★★★Our rating
The most popular harness at any climbing gym, and deservedly so. The Kinetic Core construction is light and breathable, the buckles are simple, and the sizing covers a wide range of body types. If you don't know where to start on a harness, start here.
What we like
Kinetic Core construction is light and breathable for long sessions
Sizing covers a wide range of body types reliably
Buckles are simple — easy to put on correctly in your first week
What to know
Gear loops are minimal; not ideal once you start leading outside
UIAA-certified and around $40. An honest beginner harness at an honest price — four adjustable points, simple buckles, and enough padding for gym sessions. Not as breathable as the Black Diamond, but perfectly safe and the right pick if you're testing the waters on a tight budget.
What we like
UIAA-certified and under $40 — safe and honest about what it is
Four adjustable points fit a wide range of body shapes
What to know
Less breathable than Black Diamond; noticeable on long sessions
When you're spending 3+ hours at the gym in a single session, the Hirundos's lighter construction and Wireframe buckles become a real quality-of-life upgrade. Still gym-friendly, significantly more comfortable on long outdoor routes.
What we like
Significantly lighter and more comfortable on multi-hour outdoor routes
Wireframe buckles thread faster than standard double-back buckles
What to know
Upgrade-price for gym-only climbers who won't notice the difference
Your belay device feeds rope to your climbing partner and catches their falls. Two main types: tube devices (Black Diamond ATC) are cheap, manual, and teach proper technique; assisted-braking devices (Petzl GriGri) lock automatically under load, making fall-catching easier and less fatiguing. Most gyms accept either; some require a GriGri for lead belaying. Always pair your device with a locking carabiner — you need both.
Best starter
Petzl
GriGri
$103.00 as of Jun 22, 2026
★★★★★Our rating· Only 4 left in stock - order soon.
More expensive than an ATC but worth it from day one for most gym climbers. The cam mechanism catches falls automatically, so you can focus on your climber instead of fighting your arms. Standard at climbing gyms worldwide and the device you'll use for the next decade.
At $13, the ATC is what many instructors use to teach belay courses — manual braking builds better fundamentals before you rely on auto-assist. Works with all gym ropes and single-pitch outdoor routes. Buy the ATC if your instructor recommends starting here, then upgrade to a GriGri later.
What we like
At $13, teaches cleaner manual belay fundamentals from day one
Works with all gym ropes and single-pitch outdoor routes
What to know
No auto-assist means more arm fatigue catching multiple falls per session
The locking carabiner that clips to your harness belay loop and holds your belay device. Every belay setup requires one — this is not optional. The oval shape keeps your ATC or GriGri centered and prevents the gate from cross-loading. Buy this alongside whichever device you choose.
What we like
Oval shape keeps your belay device centered and prevents cross-loading
Screwgate lock is simple and audibly clicks closed
What to know
Heavier than pear-shaped belay biners, though weight rarely matters here
Chalk keeps your hands dry so you can grip holds better. You don't strictly need it in your first month, but it helps more than you'd expect once your hands start sweating. The chalk bag holds the chalk; loose chalk is cheaper and messier, chalk balls are neater (and required at some indoor gyms). Buy both together — the bag and chalk together run under $25.
Best starter
Black Diamond
Mojo Chalk Bag
$
★★★★★Our rating
Wide enough to actually get your hand in, stiff rim that stays open between routes, brushed interior that coats your fingers evenly. Comes with a waist belt. A boring choice and the right one.
What we like
Wide enough to get your hand in fully; stiff rim stays open between routes
Brushed interior coats fingers evenly with each dip
What to know
The included waist belt is functional but not adjustable mid-session
The loose chalk that almost everyone buys in bulk. Fine magnesium carbonate, better friction than the cheap chalk balls that come bundled with starter kits. The 1 lb bag lasts 6-12 months of regular climbing.
What we like
Fine magnesium carbonate — better friction than cheap bundled chalk balls
1 lb bag lasts 6-12 months of regular climbing
What to know
Loose chalk can be messy; some indoor gyms require chalk balls instead
Inside a gym, you don't need a helmet — falling rock isn't a factor on plastic holds. The moment you climb outside, you need one. Rockfall is real on outdoor sport routes, and a bad fall that swings you into the wall can mean your head hits rock. Most sport climbers skip helmets outdoors in their first year. Don't be one of those people.
Best starter
Black Diamond
Half Dome
$$
★★★★★Our rating
The beginner helmet recommendation from virtually every climbing shop. Foam-and-shell construction is heavier than top-end options but covers more of your head and handles direct impacts better. Under $65 and UIAA-certified. If you're outdoors occasionally, this is the right helmet.
What we like
Foam-and-shell construction covers more of your head than lighter alternatives
Under $65 and UIAA-certified — the right price-to-protection ratio
What to know
Heavier than top-end options; noticeable on long outdoor days
At 160g, the Sirocco is so light you forget you're wearing it — which means you'll actually keep it on between routes instead of setting it on the ground. The right upgrade when you're climbing outdoors weekly.
What we like
160g — light enough that you'll actually wear it between routes
In-mold construction is more comfortable in warmer climbing conditions
What to know
Slightly less direct-impact protection than foam-shell designs
Roped climbing front-loads its learning curve. Get through the first month — belay cert, basic movement, a few dozen routes — and the next twelve months click into place faster than you'd expect.
The first thing you’ll notice about sport climbing is how much it asks of you before you’ve done anything — a belay certification, a jargon-laden grading system, and the quiet terror of clipping into a harness and stepping onto a wall 30 feet high. The second thing you’ll notice is how quickly all of that stops being scary.
Most people who try climbing in a gym are reasonably competent on beginner routes within their first month. The learning is fast because the feedback is immediate. You fall, you understand why, you try differently. Here’s what that first month actually looks like.
Week 1: Get certified and just climb
Don’t buy gear before your first session. Rent everything — shoes, harness, belay device — and spend $10-15 to find out whether the feeling of being on a wall agrees with you. Most gyms have rentals at the front desk.
Book an intro class if your gym offers one. The class usually covers the belay certification in 1-2 hours: how to tie in with a figure-eight knot, how to use a belay device, what “on belay,” “climbing,” “take,” and “lower” mean, and how to catch a fall. That last part is always the most anxious moment for new climbers — and always the one that reveals how safe the whole system is.
Once you’re certified, you can top-rope with a partner anytime the gym is open. Before that, you can only use auto-belay walls, which limits you to a handful of routes. Get certified in week one. It’s the unlock.
On the wall: Grab every hold that looks useful. Move your feet constantly. The single instinct beginners fight hardest is the urge to muscle through everything with their arms — climbing is mostly legs, hips, and weight transfer. Your arms are for balance, not for pulling. Your feet are where the power comes from.
When you fall — and you will fall, on purpose eventually — notice how the belay catches you and how little it hurts. Getting comfortable with falling is a real skill that takes a few weeks. Most beginner falls are controlled drops of an inch or two on top-rope.
Week 2-3: Grades, movement, and your first plateaus
Climbing gyms use a grade system to mark difficulty. In North America, the standard is the Yosemite Decimal System (YDS), where beginner gym routes run 5.5-5.9 and intermediate routes start around 5.10. Don’t fixate on grades. Climb everything you can reach and notice what stops you.
Two things will stop you most often in weeks 2-3:
You’ll hit a route that’s physically too hard. Your fingers will be the first thing that fatigues — the tendons and pulleys in your hands take months to condition. Climbers who push through hand fatigue in the early weeks are the ones who get pulley injuries. When your fingers feel pumped (swollen, clumsy, tired), stop. The training effect from one more route on destroyed hands is negative.
You’ll hit a route that’s mentally hard. There’s a specific feeling around 25-30 feet — high enough to matter, low enough that you’re still making decisions — where the sequence suddenly requires committing to a move you’re not sure will work. This is the good part of climbing. It’s problem-solving with your whole body. The move you’re avoiding is usually the right move.
By week three, you’ll start recognizing route types: slabs (low-angle walls where balance and footwork matter most), vertical faces (balanced arm-foot coordination), and overhangs (steep and physical, strength-dependent). Beginners tend to be better on slabs and vertical than on overhangs. This evens out with time.
By the end of week one you can top-rope. By the end of month one, you might be curious about lead climbing — where you’re climbing with the rope trailing below you and clipping it into bolts as you go. Lead climbing is a separate certification at most gyms, harder to pass, and appropriate to pursue once you’re solid on top-rope.
Don’t rush the lead cert. The certification exists because lead falls are genuinely different from top-rope falls — you drop further, you pick up more speed, and the psychological experience is harder. Climbers who lead too early often have a fall that scares them off the sport. Top-rope competently for 4-6 weeks first.
A few things that will shift your improvement curve in month two and beyond:
Climb with someone better than you. This is the single most effective way to improve. Watch how they place their feet. Notice how little upper body effort they seem to use. Ask them to watch a route you’re struggling with and tell you what they see. Climbers are almost universally happy to give this feedback.
Record yourself. Watching video of yourself climbing is uncomfortable and extremely useful. You will immediately see the arm-dominant movement that coaching can’t seem to fix through instruction alone. Video reveals footwork problems in a way that live feedback doesn’t.
Rest days matter. Climbing recruits tendons and pulleys that most exercise doesn’t touch. They adapt more slowly than muscles. Climbing three days in a row in your first month is a reliable path to an overuse injury. Two days on, one day off is a better early rhythm.
Things beginners get wrong, consistently
Every beginning climber makes the same set of mistakes. You will too:
Looking down instead of at the holds. Your next hold tells you where to go. The ground doesn’t.
Straight arms when resting. Hang with straight arms — bent arms fatigue instantly. The straight-arm hang is your rest position, not a sign of weakness.
Big steps instead of small ones. High steps waste energy and put your hips away from the wall. Lots of small steps, hips close to the wall, is almost always more efficient.
Rushing. Speed on a climbing wall comes from efficiency, not urgency. Beginners who move fast mostly fall faster.
Nobody watching cares. The experienced climbers on adjacent routes have all been exactly where you are. They’re watching their own next move, not yours.
When outdoor sport climbing enters the picture
Indoor top-rope to outdoor sport climbing is a bigger jump than most gym climbers expect. Outdoors, you’re on real rock with natural features instead of plastic holds on a predictable surface, routes require finding your own clipping positions, and falls — while still well-protected by bolts — are longer and more physical.
The standard path is: gym top-rope → gym lead cert → gym lead practice → first outdoor trip with an experienced mentor or guide. That process usually takes 3-6 months. Don’t skip the mentor step. Learning to assess anchors, read rock quality, and manage rope drag outdoors is best done alongside someone who’s done it a hundred times.
When you do go outside, bring a helmet. You probably won’t need it. You might.
Save your money
What you don't need yet
Beginners get pressured to buy a lot of stuff that doesn't help them play
better. Here's what we'd skip on day one.
Quickdraws — Gym sport routes have draws already clipped. You need your own set ($100-150) only when you're leading outdoor routes — not in your first 3 months.
A climbing rope — Gyms provide ropes. You need your own only for outdoor leading, and a 70m dry-treated rope runs $200-300. Way too early.
Aggressive downturned shoes — Every experienced climber has a stack of performance shoes bought too early and never used. Flat shoes teach proper footwork. Expensive aggressive shoes don't compensate for technique gaps — they just hurt.
A hangboard — Finger-strength training boards are excellent for intermediate climbers and actively dangerous for beginners. Connective tissue takes 18-24 months to adapt to climbing stress. Hangboarding too early is a reliable path to pulley injuries.
Tape and taping supplies — Veteran climbers tape their fingers to protect tendons and skin. In your first month, you're not training hard enough for this to matter, and proper taping technique takes practice to learn. Just climb barehanded.
First week
Your first seven days
A short, real plan to get from gear-on-doorstep to actually playing.
Find your nearest climbing gym and ask about intro classes — most run $30-50 and include the belay certification. · Action
Rent shoes, harness, and belay device for your first 2-3 sessions. The $10-15 rental cost teaches you more about fit preferences than any review. · Action
Complete your belay certification. Once certified, you can top-rope with a partner any time the gym is open — the single most important unlock in sport climbing. · Action
Order your own climbing shoes after 2-3 sessions. Rental shoes are communal and uncomfortable — your own pair is the first gear worth buying. · Buy
Try every grade on the wall in your first session. Don't worry about the grade names — just climb everything you can, and note which colors feel doable by the end of the session. · Action
FAQ
Common questions
Do I need to buy anything before my first time at a climbing gym?
No. Rent shoes, harness, and a belay device at the gym for your first 2-3 sessions — usually $10-15 total on top of the entry fee. Buy your own once you know you'll climb regularly. At minimum, get your own shoes after the second session; rental shoes are shared and genuinely uncomfortable.
What's the difference between top-rope and lead climbing?
Top-rope: the rope goes from you, up through an anchor at the top of the wall, and back down to your belayer. If you fall, you drop an inch or two. Lead climbing: you clip the rope into bolts as you go up, so a fall means dropping past the last bolt — potentially 6-10 feet. Top-rope is how beginners learn. Lead climbing requires a separate, harder certification and a few months of experience.
How tight should climbing shoes fit?
Snug but not painful. Toes should be lightly curved (not scrunched hard), with no dead space at the heel. A neutral beginner shoe should feel like a tight athletic shoe — a little uncomfortable at first, but wearable for a full session. If it's actively painful, it's too small. 'No pain, no gain' is not real climbing shoe advice.
ATC or GriGri — which belay device should I buy?
GriGri if your gym allows it. The auto-assist catches falls more reliably while you're learning technique, and it's what you'll use long-term anyway. Start with an ATC if your instructor specifically recommends it — it teaches cleaner manual fundamentals. Either is safe with proper certification and technique.
How long before I can climb outdoors?
Most people climb indoors for 3-6 months before their first outdoor sport climbing trip. You want solid top-rope technique, your lead certification, and ideally some mentorship from an experienced outdoor climber who can teach anchor assessment and outdoor-specific safety habits.
Is sport climbing dangerous for beginners?
The risks are real but manageable. Most gym injuries are overuse — finger tendons and shoulders — not falls. Gym falls are well-protected by modern auto-belay and certified partners. Serious risks are outdoors, where rockfall and anchor-building add complexity. Start in a gym, get certified, and find an experienced mentor before going outside.
Mountain Project — The definitive route database for outdoor climbing in North America. When you're ready to go outside, this is where you find routes, grade ratings, and beta from other climbers.
UKClimbing — Massive editorial archive on gear, technique, and safety. The long-form gear reviews are the most thorough in the sport.
American Alpine Club — Education resources, annual accident reports (genuinely useful safety reading), and rescue insurance worth having once you climb outdoors regularly.
Climbing Magazine — The sport's publication of record. Technique pieces and gear reviews skew intermediate-to-advanced, but the technique archive is useful after 6 months in.
r/climbing — Active community with a genuinely solid wiki. The gear advice is trustworthy. Search before posting — most beginner questions are answered in the FAQ.
Eric Hörst — Training for Climbing (YouTube) — The standard training resource for climbers at any level. The beginner movement drills are worth watching once you've been climbing 2-3 months.
Petzl Learning Center — Official instructional videos for GriGri and ATC use. Watch the GriGri lowering video before your first belay session. Short, clear, free.
As an Amazon Associate, JustBeginning earns from qualifying purchases.
We may also earn commission from other affiliate programs linked on this
page. Editorial recommendations are independent; we don't choose
products based on commission rates.
Product prices and availability are accurate as of the date and time
indicated and are subject to change. Any price and availability
information shown on Amazon at the time of purchase will apply.


 Best starter