The cello is one of the most rewarding instruments you can start as an adult, and one of the most confusing to buy into. The student market is flooded with cheap outfits with unplayable setups, and the rent-vs.-buy decision is genuinely complex. This guide cuts through it: what a real beginner cello costs, which brands you can trust, and exactly what you need on day one.
By Colin B. · Published May 24, 2026 · Last reviewed June 13, 2026
A playable student cello outfit (instrument + bow + case + rosin) runs $400–700. Budget $20–35/month if renting instead.
We earn commission on qualifying Amazon purchases — see our
affiliate disclosure.
Price tiers and budget totals shown above are editorial estimates;
actual Amazon prices vary.
At a glance
Our top pick in each category
The fastest path through this guide — each best-starter pick by category.
Scroll for the budget and upgrade alternatives.
Rent before you buy if you're in your first 3 months, especially as an adult. Standard cello rentals run $20–35/month, and most shops apply rental payments toward a purchase. If you know you're committed, a quality student outfit at $500–700 is usually cheaper than 18 months of rental.
Avoid Cecilio, Mendini, and anything under $300 on Amazon. These instruments are manufactured to a price point with unplayable setups, bridge heights that cause injury, fingerboards that buzz, strings that won't stay in tune. Many beginners quit cello because they struggled with one of these. They are not starter instruments.
Size matters. Most adults use a 4/4 full-size cello, but players shorter than about 5'3" may need a 3/4. Quick test: extend your left arm forward and see if your hand reaches the scroll without shoulder strain. A teacher or shop can confirm size in five minutes.
An 'outfit' means instrument + bow + case + rosin. Every brand on this page sells outfits, you're not buying four things separately. The rosin and case included with a $500 outfit are fine to start; the bow sometimes needs upgrading after 3–6 months.
This is where 80% of your budget goes, and where setup quality matters most. A poorly-set-up student cello fights you at every turn; a properly prepared one lets you focus on learning. Stick with Eastman, Stentor, or Yamaha. Avoid everything under $300, those instruments look like cellos but play like toys. Size before brand: confirm your arm length before ordering.
Instruments — what's the difference?
A few common shapes, each making a different trade.
4/4 Full Size
Standard for most adults and older teens.
Body length
~30"
Arm reach
26"+ (most adults)
Best for
Adults 5'3" and taller
Best for Most adult beginners, the default unless a teacher says otherwise
Tradeoff Too large for smaller adults; forcing it creates shoulder strain
3/4 Size
For smaller adults and students aged 10–13.
Body length
~27"
Arm reach
~23–26"
Best for
Adults under 5'3", older teens
Best for Smaller adults; also common for players with shoulder mobility issues
Tradeoff Fewer quality options at student price points than 4/4
1/2 Size
For children approximately 8–11 years old.
Body length
~24"
Arm reach
~20–23"
Best for
Children 8–11 years old
Best for Younger children starting lessons, teacher will confirm size
Tradeoff Kids outgrow these quickly; renting is usually smarter than buying
Best starter
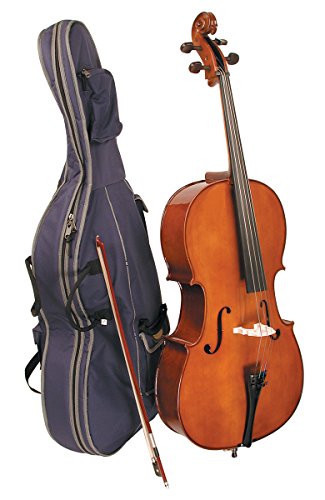
Eastman
Strings Samuel Model 100 Cello Outfit 4/4
$$$
★★★★★Our rating
Eastman is the most respected name in student strings in North America, and the Samuel Model 100 is why. It arrives properly set up, bridge fitted, nut spaced, strings seated, which sounds obvious but isn't at this price. The carved spruce top produces a real, usable sound, and most private teachers recommend Eastman outfits by name. When you upgrade, it holds its resale value.
What we like
The brand most private cello teachers recommend by name
Properly set up from the factory, not just shipped in a box
Solid carved spruce top produces noticeably better tone
What to know
Online purchase skips luthier check, inspect bridge on arrival
Included bow is adequate but not the instrument's best feature
Stentor is a UK company with 50+ years of student instrument history, a legitimate brand, not an Amazon trap. The Student I is their honest entry-level outfit at around $400. It's not as finely set-up as the Eastman, but it's a real cello that responds to technique. If you're on a tight budget and sure about buying over renting, this is the safe choice.
What we like
50-year UK reputation, not an Amazon house brand
Around $400, the honest budget entry point for a real cello
Widely available in local music shops for hands-on setup
What to know
Setup less refined than Eastman, may need professional adjustment
Laminate top limits the tone ceiling compared to carved instruments
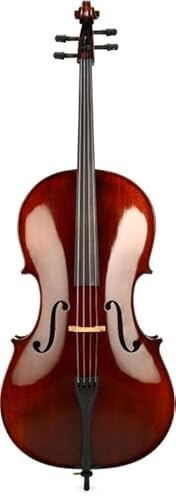
VC305 Andreas Eastman Intermediate Cello - 4/4 Size
$3,414.00 as of Jun 22, 2026
★★★★☆Our rating· Only 3 left in stock - order soon.
After 6–12 months of real study, the VC80's limitations become audible, thinner tone, less projection, strings that resist bow technique. The VC305 addresses this: fully carved top and back, better internal bracing, noticeably more responsive feel. This is the cello serious students play for years.
What we like
Fully carved top and back, tonal projection laminate can't match
Noticeably more responsive to bow technique changes
Students play this for years; holds resale value well
What to know
Only worth it after 6+ months of confirmed, regular practice
Comes with a better bow but still benefits from a CodaBow upgrade
The bow is half the instrument, you spend as much time learning bow technique as left-hand technique. The bow included with a budget outfit is typically fiberglass and does the job for the first few months. When you start working on tone production with a teacher (usually around month 3–4), bow quality becomes audible. The sweet spot for a first upgrade is $100–150 for a carbon fiber bow.
Best starter
Glasser
Fiberglass Cello Bow
$73.29 as of Jun 22, 2026
★★★★★Our rating· In Stock
The industry-standard entry bow, included with most quality student outfits. Virtually indestructible, won't warp in humidity swings, and has consistent camber. If the bow in your outfit is labelled Glasser, you already have it. Buy this only if you need a standalone replacement at the lowest possible price.
What we like
Virtually indestructible, won't warp in humidity changes
Consistent camber from stick to stick, no bad-lottery risk
Included in most quality student outfits; know what you have
What to know
Flat, undifferentiated tone; won't grow with your technique
CodaBow is the brand that made carbon fiber bows respectable, and the Luma is their best-value stick. Noticeably lighter and more responsive than the Glasser, once you've had a few months of lessons, the difference in tone production is real. Many teachers recommend this exact bow as the first meaningful upgrade. Most advancing students play it for a year or two.
What we like
CodaBow made carbon fiber bows respectable, trusted by teachers
Lighter and more responsive than student fiberglass; tone jumps
Holds its value, resell for nearly full price when upgrading
What to know
No point buying until month 3–4 when technique can use it
Slightly stiffer than traditional wood, different feel to adapt to
★★★★☆Our rating· Only 1 left in stock - order soon.
The Diamond GX is CodaBow's intermediate bow, a step above the Luma in responsiveness and tone clarity. At around $200, it's what advancing students buy when the Luma starts feeling like a ceiling. Faster bow speed, cleaner off-string work, and a tone that competes with entry-level brazilwood bows at twice the price.
What we like
CodaBow's highest-rated bow under $300, a real step above the Luma
Faster bow speed and cleaner off-string work than entry carbon fiber
What to know
Only audible difference after you've built consistent bow technique
At $200, don't buy before 12 months of serious practice
Every outfit comes with a basic nylon suspension case. For home-only practice it's fine, but if you're commuting to lessons or playing in an ensemble, a hard shell is worth the investment. Cellos are large and fragile, a side impact from a car door or heavy bag on a bus will crack a top. Hard cases are not optional for anyone who carries their instrument anywhere regularly.
Best starter
Bobelock
2000W Fiberglass Cello Case with Wheels
$$
★★★★★Our rating
Bobelock has made affordable professional-quality string cases for decades, and the 2000W is their standard full-size cello case. Fiberglass shell survives real impact, proper suspension system cushions the instrument, and built-in wheels make it manageable for transit. This is what serious hobbyists and college students actually use, under $200 and will outlast your first two instruments.
What we like
Decades-old brand making cases for working musicians, not an import
Fiberglass shell survives real impact without cracking
Proper suspension keeps the instrument floating during travel
What to know
15+ lbs when loaded, heavy for regular transit commuting
Wheels add bulk; awkward on bikes or in tight storage spaces
The honest budget hard case. Fiberglass shell for real protection, under $160, and the interior suspension is better than the soft bag in your outfit. Not as refined as the Bobelock, the latches and hinges are a notch below, but if you need hard-case protection on a student budget, this delivers it. Wheels help on longer walks.
What we like
Fiberglass shell on a budget, real protection under $130
Interior suspension keeps instrument from shifting in transit
What to know
Latches and hinges wear faster than premium cases, check regularly
Heavier than carbon fiber alternatives at similar price
★★★★☆Our rating· Only 1 left in stock - order soon.
BAM is the case brand conservatory students and young professionals use. The L'Etoile Hightech Slim is their entry-level model: notably lighter than fiberglass, dual-access zipper for bow and accessories, and backpack straps that actually work for commuting. If you're playing several times a week and carrying the instrument anywhere, the weight savings matter every day.
What we like
Notably lighter than fiberglass, daily quality-of-life win for commuters
Backpack straps actually fit an adult, not an afterthought
BAM is what conservatory students use; proven over years of use
What to know
ABS shell dents rather than resists hard impacts; skip for checked luggage
Pricier than Bobelock for similar at-home protection
Strings are a consumable, they lose their tone over months of playing and need replacing. The strings on most student outfits are the cheapest available; they're fine for learning but become a limitation within a few months. Upgrading strings is one of the most impactful and cheapest improvements you can make to any student cello. Budget $30–40 per set once or twice a year.
Best starter
D'Addario
Prelude Cello String Set
$71.99 as of Jun 22, 2026
★★★★★Our rating
Prelude strings are what teachers put on student instruments. Steel-core construction holds tune reliably while you're developing your ear, resists humidity, and has a clear, projecting tone. Most student cello outfits in the $400–700 range ship with these, if yours does, your first replacement set is just another Prelude.
What we like
The string most teachers put on student instruments, no surprises
Steel core holds tune reliably while your ear is still developing
Under $35 a set; replace once a year without guilt
What to know
Steel core sounds bright and slightly metallic vs. synthetics
Tone ceiling is real, advancing students outgrow them
Larsen is the professional standard, you'll see these on instruments in your teacher's hands and on stage. The Soloist version is their student/intermediate string: warm, full, and immediately noticeable compared to steel-core. Once you've been playing 6+ months, the tonal difference is real. Worth the upgrade if you're taking weekly lessons.
What we like
The professional string standard, used at every level above student
Warm, full synthetic-core tone that opens up the cello's voice
Larsen strings are the benchmark every other string is compared to
What to know
Synthetic core stretches for 1–2 weeks; expect constant retuning
3× the cost of Prelude, only worth it when your ear hears the gap
★★★★☆Our rating· Only 11 left in stock - order soon.
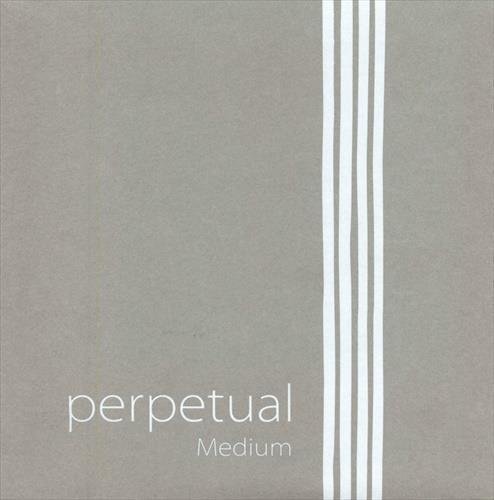
Pirastro's answer to Larsen, similar price tier, slightly brighter and more projecting character. Great for cellists who find Larsens a bit dark on their instrument. The Perpetual is what you try as your second string upgrade to find your preference. Pirastro has made fine strings for 200+ years.
What we like
200-year-old string maker, Pirastro is trusted by professionals worldwide
Brighter and more projecting than Larsen on darker-sounding cellos
What to know
Brightness feels harsh on instruments with an already bright character
Same price as Larsen, try Larsen first before branching out
Four small purchases that make an outsized difference in daily practice: good rosin (without it your bow produces no consistent sound), a clip-on tuner (you will go flat constantly as a beginner), an endpin anchor (keeps the instrument from sliding across floors), and a practice mute (for apartment sessions). Total cost under $60.
Best starter
Pirastro
Cello Rosin
$
★★★★★Our rating
The rosin included with budget outfits is often so soft or hard it produces a scratchy, inconsistent sound. Pirastro's entry-level rosin is what teachers use, medium hardness, smooth draw across the string, works in both cool and warm rooms. Costs $12 and lasts a year. Replace it when your bow skips even after fresh application.
What we like
The rosin teachers actually use, not the chunk in your outfit bag
Medium hardness works in cool and room-temperature conditions
Lasts a year of regular practice, $12 well spent
What to know
Easy to over-apply; 2 bow passes per session is the ceiling
Cake-style; breaks if dropped on hard floors, keep in the pouch
Tuning by ear takes months to develop, and practicing on an out-of-tune cello actively trains bad intonation habits. This clip tuner sits on the scroll, reads vibration rather than microphone input, and works in noisy rooms. Ten seconds per string before every practice. You need this.
What we like
Reads vibration not microphone, works in living rooms with TV on
Clips to the scroll; stays on during a full practice session
Prevents the worst intonation habit: practicing while flat
What to know
Defaults to guitar mode, must configure to cello on first use
The cello endpin will slide across hardwood or tile floors within 30 seconds of playing, pulling the instrument toward you and collapsing your posture. A rubber-backed Dycem mat stops this completely. Small, washable, and specifically sized for the purpose. The $15 fix for the most common beginner posture problem.
What we like
Solves endpin creep, the #1 beginner posture collapse, instantly
Washable, grippy, sized exactly for cello endpin use
What to know
Unnecessary on carpet, only buy if practicing on hard floors
Sharp endpin tips slowly puncture the material over years of use
A heavy rubber mute clips over the bridge and reduces volume by roughly 80%. Not for regular practice, it alters bow resistance enough to affect technique, but for 11pm apartment sessions or quiet-passage work, it's the difference between practicing and not practicing at all.
What we like
80% volume reduction, the only way to practice at 11pm in an apartment
Clips on and off in seconds without tools
What to know
Alters bow resistance, impedes technique if used for regular practice
Use only when volume is a necessity, not as the default setup
Cello is genuinely hard. Here's what the first 90 days actually look like, what clicks early, what stays frustrating for a while, and how to make the most of the time before it all opens up.
Nobody learns cello quickly. That’s not a discouragement, it’s the most useful thing you can know going in. The players who stick with it are the ones who understood the timeline upfront: the first month feels like managing an instrument that doesn’t want to cooperate. The second month, a few things start working. By month three, you’ll play something that sounds like music, and that moment is worth all the friction before it.
Here’s what those three months actually look like, and what to focus on at each stage.
Month 1: The bow arm is everything
The left hand gets all the attention, notes, fingering, positions. But in your first month, the bow arm is what determines whether anything sounds like a cello or like a cat in distress.
The bow has to move in a straight line, perpendicular to the string, at a consistent speed and pressure. This is harder than it sounds because your arm is not naturally disposed to this motion, and the first instinct is to rotate at the wrist rather than move from the shoulder. The result is a scratchy, uneven tone that beginners assume is their fault but is actually just physics.
Your teacher will spend most of your first month on this. The things to internalize early:
Bow hold. The bow hold for cello is relaxed and curved, not a grip, a contact point. Your thumb sits on the stick opposite your middle finger, slightly bent. The pinky sits on top. None of this should feel tight. Tight bow holds produce scratchy, unresponsive tone.
Straight bow lane. Draw a line on the floor perpendicular to where you’re sitting and imagine your bow staying on that line. Video yourself from above, almost every beginner pulls the bow at an angle without realizing it.
Open strings first. Your first week or two should be entirely on open strings, no left hand. Learn to produce a clean, resonant tone on just one string before adding any fingering. It’s not as boring as it sounds; it’s where the bow technique actually forms.
The cello is a physically demanding instrument to hold correctly. You’ll feel it in your right shoulder and forearm after a 20-minute session. That’s normal for the first month. The fatigue fades as the motion becomes natural.
Once your bow produces a consistent sound on open strings, your teacher will introduce left-hand fingering, usually starting in first position (the lowest register you’ll use) and working through a simple scale.
The defining challenge of cello left-hand technique is that there is no fretboard. You have to find the pitch, and finding it requires developing an internal sense of where your finger needs to land, which takes months to calibrate. This is called intonation, and it will be your main concern for the next year or two.
A few things that help during month two:
Use a tuner, not your ear, for practice feedback. Your ear can’t yet tell you reliably when you’re in tune, but a clip-on tuner can. When you’re working on a scale alone, watching the tuner tells you whether your fingers are landing correctly. Don’t rely on it exclusively (your ear needs to develop too), but in solo practice it accelerates the feedback loop.
First position scales before anything else. The C major scale on cello (starting on the open C string) is the first real assignment from most method books and most teachers. Don’t skip ahead. The four fingers of the left hand need to learn where they live on all four strings before you can play much of anything else.
Don’t press too hard. A common left-hand problem in month two is pressing the strings down with too much force, which pulls them slightly sharp and strains the hand. The string only needs to contact the fingerboard, not be pushed through it.
Around the eight-to-ten-week mark, something shifts. The bow arm starts feeling more natural. The left hand starts landing closer to in-tune. You play a simple melody, a folk song, a Bach minuet, something from your method book, and it sounds like a cello being played, not a construction accident.
This is the payoff moment, and it comes later for cello than for most instruments. It’s also when most students stop feeling like they’re fighting the instrument and start feeling like they’re learning it.
What month three looks like in practice:
Simple pieces in first position. Suzuki Book 1 or Essential Elements for Strings both have short, achievable melodies that feel rewarding to play. The goal isn’t virtuosity, it’s the experience of producing a musical phrase from beginning to end.
Dynamics and bow speed. Once basic tone production is established, your teacher will start introducing how bow speed and pressure change the character of the sound. This is where the cello starts to feel expressive rather than mechanical.
Sight-reading begins. Most teachers introduce basic note-reading alongside playing, and by month three, you’ll be able to follow written music in simple keys. If you’re an adult learner without a music reading background, this will feel slow at first. It’s worth the effort.
The things beginners get wrong
Every cello beginner struggles with the same handful of things. Knowing them in advance doesn’t make them disappear, but it makes the frustration less mysterious:
Practicing while out of tune. The cello goes flat as its strings stretch and as the temperature changes. Tune at the start of every practice, not just at lessons. Practicing out of tune trains the wrong muscle memory into your intonation.
Skipping open-string bow work. The urge to “play something” is strong in week one. Resist it long enough to establish a clean bow tone. An hour of open-string work in the first week is worth more than an hour of struggling through a melody with bad bow technique.
Not taking lessons. Cello bow technique forms with external feedback, a teacher watching your bow arm angle, your elbow height, your thumb position. These things are nearly impossible to self-assess accurately, and the habits you build without feedback in the first month are very hard to undo later.
Stopping practice when it sounds bad. Every practice session has sections that sound bad. Beginners often stop when this happens, which means they end practice on a bad note (literally and figuratively). Practice until you have one successful run-through of whatever you’re working on, then stop. It changes what you retain.
What to do at month four
By the end of month three, if you’ve been taking weekly lessons and practicing 20–30 minutes most days, you’ll be in a different place than where you started. Here’s what’s worth doing next:
Listen to professional cellists. Not to compare yourself, but to internalize what the instrument can sound like. Yo-Yo Ma’s recordings of the Bach Cello Suites are the obvious place to start. Jacqueline du Pré’s Elgar Cello Concerto is the recording that hooks many lifelong cello fans. Watch people play as well as listen, the physicality is part of the instrument.
Find an ensemble. Community orchestras and string groups exist for adult beginners in most cities. Playing with others changes how you hear yourself and creates a kind of accountability that solo practice doesn’t.
Consider a bow upgrade. If you’ve been playing on the fiberglass bow that came with your outfit, month 3–4 is when a carbon fiber upgrade (like the CodaBow Luma) first starts to make a noticeable difference. Your technique is developed enough that the better bow actually pays off.
The cello doesn’t get easier. It gets more rewarding, which is a different thing.
Save your money
What you don't need yet
Beginners get pressured to buy a lot of stuff that doesn't help them play
better. Here's what we'd skip on day one.
A carbon fiber endpin — The steel endpin on any student cello is fine. Aftermarket endpins are tone-chasing territory reserved for players a few years in.
Sheet music before your first lesson — Your teacher will assign the right method book (usually Suzuki or Essential Elements). Buying your own first is usually wasted money.
A case humidifier — Important in very dry climates, but not week-one gear. Once you're playing regularly, ask your teacher if your area warrants one.
A standalone metronome — Your phone's free metronome app is functionally identical. Buy a dedicated one only if your teacher specifically recommends it.
A pernambuco or brazilwood upgrade bow — Pernambuco is the professional wood for bows ($500–$5,000+). You won't feel the difference for at least 2–3 years of study.
First week
Your first seven days
A short, real plan to get from gear-on-doorstep to actually playing.
Find a cello teacher, lessons are not optional for this instrument. Self-teaching cello has a very high dropout rate. · Action
TakeLessons · Nationwide in-person and online cello teachers
Lessonface · Online cello lessons with vetted teachers
Decide: rent or buy? Rent if uncertain; buy if you're committed. Standard rentals apply toward purchase. · Action
Order or rent a cello sized for you, confirm arm length with a teacher or shop before purchasing. · Buy
Set up a consistent practice space: armless chair (no wheels), music stand, and your endpin anchor if practicing on hardwood floors. · Action
FAQ
Common questions
Should I rent or buy a cello as a beginner?
Rent for the first 3 months if you're not sure. A standard rental runs $20–35/month, and most shops credit those payments toward a purchase. If you're committed, especially as an adult who's planned this, buying a quality outfit at $500–700 is cheaper than 18 months of rental. Don't buy anything under $300.
Is cello hard to learn as an adult?
Genuinely hard, harder than guitar, comparable to violin. The left hand must find pitches by ear on an unfretted fingerboard, and bow technique requires months of dedicated work. Most adult beginners take 1–2 years before pieces sound musical. With weekly lessons and 20–30 minutes of daily practice, progress is steady and the instrument rewards patience.
Which cello brands should I avoid?
Avoid Cecilio, Mendini, and any cello under $300 on Amazon. These instruments have unplayable setups, bridge heights that cause injury, fingerboards that buzz, strings that won't hold tune. Many beginners quit because they assumed they were bad at cello; the instrument was just unplayable. Stick with Eastman, Stentor, or Yamaha.
What size cello do I need?
Most adults use a 4/4 full-size cello. Quick test: extend your left arm forward and see if your hand reaches the scroll without shoulder strain. If yes, 4/4. If not, you may need a 3/4. A teacher or local shop can confirm the right size in five minutes, always worth doing before ordering online.
Do I need lessons or can I learn from YouTube?
You need lessons. Cello bow technique requires external feedback to develop correctly, without a teacher watching your bow hold and arm angle, you'll build habits that cause pain and plateau early. YouTube is excellent supplemental material after a teacher establishes your foundation, but self-teaching cello from scratch has a very high dropout rate.
What does a cello outfit include?
A cello outfit includes the instrument, a bow, a case, and usually rosin. Every brand on this page sells outfits, you're not buying four things separately. The quality of the included bow and rosin varies: budget outfits include a usable fiberglass bow; mid-range outfits include brazilwood; premium outfits include carbon fiber.
American String Teachers Association — The professional organization for string teachers in the US. Use their teacher finder to locate vetted cello teachers in your area.
Strings Magazine — The main trade publication for string players. Gear reviews, technique articles, instrument buying guides. One of the most trusted sources for student instrument advice.
CelloOnline — Free sheet music, exercises, and technique resources specifically for cello. Good supplement to your lesson work.
r/Cello — Active beginner community. Good for specific questions about setups, teachers, and repertoire. Search before posting, most beginner questions have deep existing threads.
IMSLP (Petrucci Music Library) — Free public domain sheet music. Useful eventually for downloading etudes and easy pieces. Your teacher will assign what you need, don't start here.
As an Amazon Associate, JustBeginning earns from qualifying purchases.
We may also earn commission from other affiliate programs linked on this
page. Editorial recommendations are independent; we don't choose
products based on commission rates.
Product prices and availability are accurate as of the date and time
indicated and are subject to change. Any price and availability
information shown on Amazon at the time of purchase will apply.
Our top pickEastman Strings Samuel Model 100 Cello Outfit 4/4