Building your own guitar is one of the most rewarding things you can do as a musician or woodworker — and it's more achievable than it looks. Start with a kit: the body is routed, the neck is carved. Your job is to sand, finish, fret, and set it up. Here's what you actually need.
By Colin B. · Published May 30, 2026 · Last reviewed August 7, 2026
A solid electric kit plus essential tools runs $300–500. Add finishing supplies and you're at $450–600. Acoustic kits cost $50–100 more.
We earn commission on qualifying Amazon purchases — see our
affiliate disclosure.
Price tiers and budget totals shown above are editorial estimates;
actual Amazon prices vary.
At a glance
Our top pick in each category
The fastest path through this guide — each best-starter pick by category.
Scroll for the budget and upgrade alternatives.
Start with an electric kit, not acoustic. Electric body construction is simpler — no bracing, no bridge plate gluing, no worrying about top thickness. The wiring sounds intimidating but follows a simple diagram. Acoustic kits add real woodworking complexity that's better tackled on your second build.
Your finish will make or break the guitar's looks, but not its playability. If you want a simple, beautiful finish, Tru-Oil is almost impossible to mess up. If you want a glassy, spray-lacquer look, budget an extra weekend and a lot of sandpaper.
The nut is the hardest part for most kit builders. Pre-cut nuts are always too high, which makes the guitar hard to play in first position. Learn to file nut slots before your kit arrives — watch two StewMac videos on YouTube and practice on a spare nut blank.
The gear
What you actually need
Guitar Kit
The kit is the biggest decision you'll make. Electric kits are the right starting point — the body is already routed for pickups and electronics, the neck is fretted and shaped, and most hardware comes pre-fitted. Your build becomes: sand, stain, finish, wire, string, and set up. The most proven beginner brands are Saga and Grizzly. Acoustic kits are beautiful but add real woodworking complexity — save them for your second build.
Guitar Kit — what's the difference?
A few common shapes, each making a different trade.
Electric Kit
Easier build, needs basic wiring. Best first kit.
Body material
Basswood or alder
Neck
Pre-shaped, pre-fretted
Wiring
Required — simple diagram
Best for First-time builders, comfortable with a basic wiring diagram
Tradeoff Needs basic electronics knowledge for pickup wiring
★★★★★Our rating· Only 2 left in stock (more on the way).
The most recommended beginner kit in the luthiery community: basswood body pre-routed for three single-coils, maple neck with pre-installed frets, Strat-style hardware included. Nothing needs modifying out of the box. Finish it however you want — it'll play like a real guitar when you're done.
What we like
Most recommended first kit — huge online community and tutorials
Pre-routed, pre-fretted: no routing or fret-pressing skill needed
Strat wiring diagram is the simplest electric circuit to learn
What to know
Basswood isn't as resonant as alder or mahogany
Included nut needs slot-filing before the guitar plays in tune
An LP-style kit for under $100 if you want a humbucker sound and a carved top silhouette. Quality control is less consistent than Saga, so inspect the neck pocket fit before gluing anything. The wiring is slightly more complex than Strat but still follows a simple diagram.
What we like
Under $100 for a complete LP-style kit with humbucker routing
Carved maple top gives a premium look at a fraction of the price
What to know
Quality control is inconsistent — inspect every joint before finishing
LP wiring is more complex than Strat for absolute beginners
StewMac is the gold standard in luthiery supplies, and their dreadnought kit reflects it: sitka spruce top, mahogany back and sides, a pre-carved bolt-on neck, and detailed build instructions written by working luthiers. A step above generic kits in fit, finish tolerances, and the quality of included parts.
What we like
Solid spruce top — significantly better resonance than laminate
Deep support community and detailed included build instructions
What to know
Takes 2–3x longer than electric — more gluing, more clamping stages
Bracing and bridge-plate gluing is genuinely difficult for first builds
★★★★☆Our rating· Only 1 left in stock - order soon.
Same Saga quality as the ST-10 in a Telecaster body — two pickups, three-way switch, flat pickguard that's marginally easier to wire. If you want Telecaster twang and a slightly simpler build than the Strat, this is your kit.
What we like
Tele wiring is slightly simpler than Strat for first-time builders
Flat pickguard is easier to mount than the Strat's bent version
What to know
Budget saddles can be imprecise — intonation check is mandatory
The nut is the single most common reason a beginner's kit guitar plays poorly. Factory-installed nuts always have slots cut too high, making the first three frets stiff and out of tune. A set of gauged nut files lets you lower each slot to spec — one of the most impactful 30-minute jobs in guitar building. Fret leveling tools become relevant on your second or third build when you're doing refrets or fixing buzzy frets from a kit that shipped uneven.
Best starter
Hosco
TLNF3E Double Edge Nut File Set (Electric)
$82.49 as of Jun 22, 2026
★★★★★Our rating· In Stock
Hosco makes the nut files used in professional repair shops, and this electric set covers all six string gauges for standard tuning. Diamond-coated cutting edges, clearly labeled widths. The one set that'll handle every nut slot job you'll do across your first few builds.
What we like
Professional-grade diamond files used in real repair shops
Full set covers all six standard electric string gauges
Clearly labeled widths — no guessing which file to grab
What to know
Won't work for acoustic strings — you need the acoustic set for that
Pricier than knock-off files, but cheap files skip instead of cutting
If you want to skip plastic and slot-filing on your first build, Graph Tech's TUSQ XL pre-slotted nut is nearly drop-in on most Strat-style kits. TUSQ transmits vibration better than plastic, and the pre-cut slots are already close to spec — you'll do minor height adjustment, not full slot work from scratch.
What we like
TUSQ improves sustain and tone over the included plastic nut
Easier to file than bone — more forgiving for first-time nut work
What to know
Still needs full slot work — not a ready-to-install part
Width varies by model — verify your nut slot before ordering
★★★★☆Our rating· Only 8 left in stock - order soon.
After you level frets — or if your kit has one fret noticeably high — you need to restore the round crown on each fret top. This diamond-coated file cuts fast and leaves a consistent radius. It's a second-build tool, but once you've used one on a buzzy fret you'll understand why professionals don't use triangles.
What we like
Diamond coating cuts efficiently without clogging or skipping
Narrow profile reaches frets without touching the fretboard
What to know
A second-build tool — not needed until you're doing fret leveling
Requires a leveling step first — can't fix buzz on its own
The finish is what makes a kit look like your guitar instead of a factory product — and nothing in the build process varies as much by beginner preference. Tru-Oil is the easiest and most forgiving finish for a first build: wipe-on, no spray equipment, hard enough to handle daily playing. Nitrocellulose lacquer gives the glassy, classic look but requires spray equipment and patience. Whichever you choose, surface prep — sanding to 220, grain filling if needed — is 80% of the final result.
Best starter
Birchwood Casey
Tru-Oil Gun Stock Finish (8oz)
$19.50 as of Jun 22, 2026
★★★★★Our rating· In Stock
Tru-Oil is the beginner's cheat code for guitar finishing. Wipe it on with a cloth, let it dry for an hour, sand lightly with 0000 steel wool, repeat. After 5–8 coats you have a hard, hand-rubbed finish that looks intentional and holds up to years of playing. No spray equipment, no expensive setup — just cloths and patience.
What we like
No spray equipment needed — wipe on with a cloth
8-oz bottle handles a full guitar build with coats to spare
Hard, durable finish that won't lift or peel with normal use
What to know
Oil-finish rags are a fire hazard — lay flat to dry, never bundle
Won't achieve a glassy mirror finish; looks hand-rubbed by design
★★★★☆Our rating· Only 10 left in stock - order soon.
If you want to add a stain or burst color before finishing, Minwax conditioner prevents blotchy stain absorption on basswood — the default kit body wood. Pair it with any wipe-on poly for a hard, even clear coat. Not as traditional as lacquer, but completely beginner-safe and available at any hardware store.
What we like
Prevents blotchy stain absorption in porous basswood kit bodies
Hardware store staple — no specialty supplier required
What to know
Poly finishes yellow over time — less stable on light woods than lacquer
More coats needed than lacquer for equivalent build thickness
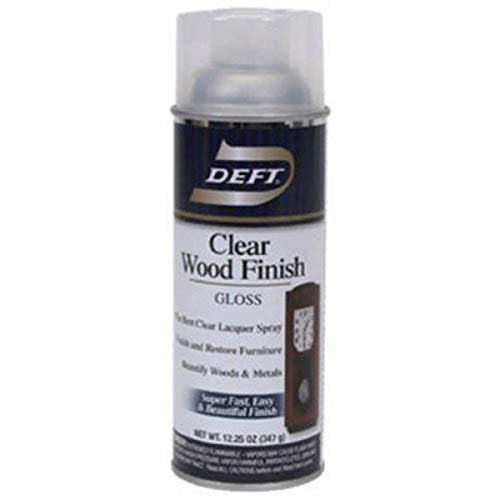
Deft is the most accessible nitrocellulose-style lacquer you can find at a hardware store. It lays flat, sands between coats easily, and builds up to a proper glossy finish in 6–8 sessions. You'll need a respirator and good ventilation — but if you want a classic guitar look, this is how you get it without a spray booth.
What we like
Available at hardware stores — no specialty ordering required
Lays flat and sands easily between coats for a smooth build
What to know
Requires ventilation and a respirator — not a kitchen-table finish
Fumes are flammable; no open flames or sparks in the work area
A guitar that isn't properly set up is unpleasant to play regardless of how good the finish looks. Setup means: nut slots at the right depth, neck relief dialed with the truss rod, saddle height set for comfortable action, and intonation tuned so it plays in tune up the neck. You can do all of this yourself with a few inexpensive tools — and you'll do it on every guitar you build from here on out.
Best starter
D'Addario
Guitar Accessory Kit (PW-EGMK-01)
$99.99 as of Jun 22, 2026
★★★★★Our rating· Only 11 left in stock (more on the way).
D'Addario's guitar accessory kit packs the everyday essentials for a first build in one box: a multi-tool with built-in string winder, bridge pin puller, and three hex wrenches, plus a cleaning cloth. It covers the repetitive tooling you'll reach for constantly — not a dedicated setup-measurement kit, but an indispensable everyday bundle that costs less than buying each piece separately.
What we like
Multi-tool consolidates string winder, pin puller, and hex wrenches in one
D'Addario quality — the tools are solid, not flimsy kit filler
Affordable bundle compared to buying each piece individually
What to know
Doesn't include an action gauge or radius gauges — those are separate
Hex wrenches cover common sizes; verify your kit's truss rod size first
Truss rod nuts come in different sizes and most kit builders don't know which one they have until the neck is in hand. MusicNomad's set covers all common sizes — 4mm, 5mm, hex, T-bar — with a padded fret protector built into the handle so you can't accidentally ding your headstock while adjusting.
What we like
Covers all common truss rod sizes in one set
Built-in fret protector prevents headstock dings during adjustment
What to know
Check what wrench your kit needs — a single correct wrench costs less
Guitar Neck Notched Straight Edge (24.75" and 25.5", Made in USA)
$19.99 as of Jun 22, 2026
★★★★☆Our rating· In Stock
This dual-scale notched straight edge covers both Gibson (24.75") and Fender (25.5") scale lengths — one tool for any kit you build. Sits on the frets and shows you neck relief under string tension in a way feeler gauges alone can't replicate. The professional standard for neck diagnosis in any serious shop.
What we like
Measures neck relief under string tension — feeler gauges can't do this
Professional-standard tool used in repair shops worldwide
What to know
Scale-length specific — must match your guitar's scale length exactly
Expensive for a one-build project; worth it once you're committed
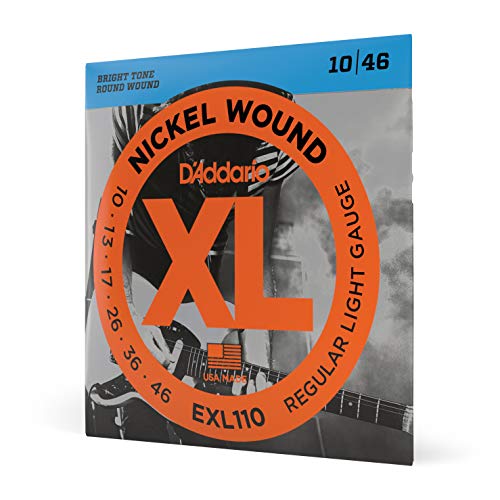
First strings matter more than most builders expect — cheap strings make even a great setup feel wrong. D'Addario 10s are the safe default for an electric build: forgiving of a beginner's imperfect nut slots and bright enough to hear your guitar clearly. The hardware included with most kits is serviceable, but locking tuners are the single upgrade that genuinely changes the experience: you'll stay in tune faster after string changes and more stably during bends.
Best starter
D'Addario
EXL110 Nickel Electric Guitar Strings (10-46)
$6.49 as of Jun 22, 2026
★★★★★Our rating· In Stock
The most commonly recommended first strings: medium gauge is forgiving of slightly-off nut slots, nickel winding sounds balanced across all pickups, and D'Addario's consistency means every pack plays like the last. Buy a 3-pack — your first kit will burn through a few sets while you dial in the setup.
What we like
Industry-standard strings — used by beginners and professionals alike
Consistent pack-to-pack quality; no setup surprises between packs
3-packs save money for the string-heavy first build and setup phase
What to know
10-46 can feel stiff for players used to 9s — compare before committing
Nickel winds corrode faster than coated strings; swap every 1–2 months
Locking tuners are the single highest-impact hardware upgrade for a kit guitar. Instead of wrapping strings three times around the post, you lock each string with a thumbscrew. Tuning stability improves dramatically, string changes drop from 15 minutes to under 3. The included tuners on most kits are functional but imprecise.
What we like
Dramatically improves tuning stability during bends and tremolo use
String changes drop from 15 minutes to under 3 minutes
What to know
Not drop-in for all headstocks — verify screw hole spacing before buying
Slightly heavier than standard tuners; may shift headstock balance
★★★★☆Our rating· Only 5 left in stock - order soon.
Graph Tech's TUSQ XL nut is impregnated with PTFE so strings move through the slots without binding during bends or tremolo use — the main cause of tuning instability on Strat-style kits. A bone nut sounds great; a TUSQ XL sounds great and stays in tune when you use the vibrato arm. Fits most Saga ST-10 builds.
What we like
PTFE-impregnated — strings don't bind during bends or tremolo use
Drop-in fit for most Strat-style kits including the Saga ST-10
What to know
Width is guitar-specific — verify Strat vs LP dimension before buying
Still needs slot height adjustment; not fully drop-in for all builds
A kit guitar goes from flat-packed wood to a playable instrument in four to six weekends. Here's what actually happens — and where beginners get stuck.
Luthiery has a reputation for being mysterious — all those hand tools, exotic tone woods, and expert finishes you see in workshop videos. The secret is that a kit guitar removes almost all of the mystery. The body is already shaped. The neck is carved and fretted. The hardware fits the pre-drilled holes. What’s left is sanding, finishing, wiring, and setup — four skills that are genuinely learnable in a month.
This is what your first month actually looks like: what to do, what to skip, and which moments will make or break the guitar.
Week 1: Unboxing and prep work
When your kit arrives, don’t grab a paintbrush. Resist the finish entirely.
First, let the wood acclimate. Leave the body and neck unboxed in your workspace for 48 hours. Wood moves with humidity, and a neck that arrived from a dry warehouse will behave differently in your home. Skipping this step can mean a neck that warps slightly after finishing — a small problem to prevent, a big problem to fix.
Then do the dry fit. Put the neck in the pocket, lay the hardware on the body, and hold it together without glue or screws. This tells you two things: whether everything fits, and what your guitar is going to look like. Most kit parts fit with minor variation — a neck pocket that needs a thin shim, bridge holes that are 1mm off center. Fix these before finishing, not after.
Now sand. Start at 80 grit on any rough surfaces, work through 120, and finish with 220 grit on everything. The body, the neck, the headstock — all of it. The quality of your final finish is almost entirely determined by the quality of your surface prep. Lacquer doesn’t hide scratches. Tru-Oil doesn’t fill gaps. Sand properly now, or you’ll see it forever on the finished guitar.
Week 2: Finishing — the most visible skill you’ll learn
Finishing is where most beginners either get excited or get frustrated. The key insight: there is no magic finish. Every finishing method works if you apply it patiently and sand between coats.
If you’re using Tru-Oil (recommended for first builds): wipe on a thin coat with a lint-free cloth. Thin is the word — thicker coats take longer to dry and look milky until they do. Let it dry for an hour, sand lightly with 0000 steel wool or 400-grit sandpaper, and apply another coat. Repeat five to eight times. The first few coats will look dull. Around coat five, it will start to glow. This is the process.
If you’re using lacquer: apply thin, even passes from about 12 inches away. Let each coat fully dry before sanding (usually overnight). Lacquer coats bond to each other chemically — unlike Tru-Oil, you can spray 3-4 coats in a session without waiting if you keep the coats thin. The downside is the fumes and the fire hazard: work outdoors or with serious ventilation, and use a real respirator, not a paper dust mask.
Set the neck aside while you finish the body. Most builders finish both separately, then assemble. The neck pocket and the pickup routes don’t need a full finish — keeping finish out of the neck pocket actually helps with a tight, resonant neck joint.
A word on timing: don’t rush back together. Finishes need time to cure beyond just feeling dry. Tru-Oil is hard in 48 hours; lacquer takes at least a week to fully cure before you can buff it without burning through. Assembly before curing means scratches.
Week 3: Wiring and hardware
Electric guitar wiring intimidates people before they’ve done it. After they’ve done it, they wonder what the fuss was about.
Get a wiring diagram for your specific configuration — Strat-style (three single-coils) or Tele-style (two pickups) are the two you’ll encounter in most beginner kits. Print it out. The internet has hundreds of clear diagrams for both, free.
The job is: connect pickups to the selector switch, selector switch to the volume pot, volume pot to the tone pot, tone pot to the output jack, and run a ground wire from the bridge back to the back of a pot. That’s it. Five connections. Every wire follows a diagram you can read before you start.
Soldering is the skill. If you haven’t done it, practice on a spare piece of wire first. A good solder joint is shiny and slightly rounded, not dull or blobby. Heat the joint with the iron for a second before adding solder — you’re heating the metal, not melting the solder onto a cold surface. Cold solder joints are the #1 cause of buzzing or dead signal on a beginner kit.
Hardware goes on after wiring: bridge, strap buttons, tuning machines, pickguard. Take your time with the pickguard screws — strip one, and you have a cosmetic problem that will bother you every time you look at it.
Week 4: Setup — this is what makes it play
A guitar with a bad setup plays badly regardless of how good it looks. Setup is the step that turns a beautiful object into a playable instrument, and it’s almost entirely within your control.
Nut slot depth is the first and most impactful adjustment. String the guitar and hold it at the first fret. The gap between the string and the first fret should be barely visible — about the thickness of a business card for the low E, slightly less for the high E. Most kit nuts come from the factory with slots too high, making the guitar exhausting to play in first position. Use your nut files to lower each slot a tiny amount at a time, recheck, and repeat. You can always take more material off; you can’t put it back.
Truss rod adjustment sets the neck relief — the slight forward bow that keeps strings from buzzing at the middle frets. Tighten the truss rod (clockwise) to reduce bow, loosen it to add bow. Adjust in small increments — an eighth of a turn — and wait 15 minutes for the neck to settle before checking again. This is a set-it-once task for a stable kit guitar.
Action at the saddle — the bridge saddles can usually be raised or lowered with a small hex wrench. Start with about 2mm at the 12th fret for the low E, 1.5mm for the high E. Lower is better until it buzzes; raise until it doesn’t.
Intonation is the last adjustment: check that the guitar plays in tune at the 12th fret compared to open. If the 12th fret note is sharp, the string is too short — move the saddle back (away from the neck). If it’s flat, move it forward. Tune to pitch, check, adjust, repeat.
When you play your first chord on a guitar you built and it rings clean and in tune, that’s the moment. Nobody forgets it.
The parts that trip people up
The nut is where most beginners lose the most time. Go slower than you think you need to. File a tiny amount, recheck under string tension, and file again. The nut slots need to be set while the guitar is strung and tuned — a slot that looks right while the neck is bare sits differently once string tension is applied.
Wiring shorts are the second most common problem. If your guitar hums louder than expected or has no output, check your solder joints first. Then check that your ground wire is actually grounded — the bridge ground wire often gets forgotten and causes an annoying, persistent hum when you touch the strings.
Rushing the finish produces a finish that looks rushed. Two more days of curing time changes the result more than any technique upgrade.
What comes after the first guitar
The most common thing that happens after finishing a kit guitar: you immediately want to build another one. That’s the point where luthiery becomes a real pursuit instead of a one-off project.
Second builds are where from-scratch becomes approachable — neck carving from a blank, routing your own body, choosing your own tone woods. The kit gives you the vocabulary. The scratch build gives you the grammar.
If you want to go further without jumping to a full scratch build, acoustic kits are a natural second step — more demanding, more woodworking, no wiring, and the satisfaction of a guitar that’s entirely wood and string.
Save your money
What you don't need yet
Beginners get pressured to buy a lot of stuff that doesn't help them play
better. Here's what we'd skip on day one.
A router and routing templates — Your kit guitar body is already routed. Save routing for scratch builds after you've finished two or three kits.
A spray booth or HVLP spray gun — Tru-Oil or rattle-can lacquer works beautifully for a first build. Professional spray equipment is for your fifth guitar, not your first.
Pickup winders or wax potting equipment — Winding your own pickups is a deep specialty. Start with off-the-shelf pickups — there are excellent options at every price point.
A CNC machine — CNC is for production, not learning. The hand-tool skills you build on a kit guitar are the foundation for everything that comes later.
Full neck-carving tools — Kit necks come pre-shaped and pre-fretted. Neck carving from a blank is a from-scratch skill — revisit after several builds.
Binding and purfling supplies — Binding looks beautiful but adds significant complexity. Electric kits don't require it; most acoustic kits have it pre-fitted.
First week
Your first seven days
A short, real plan to get from gear-on-doorstep to actually playing.
Order your kit and let it acclimate to your shop's humidity for 48 hours before doing anything else. · Buy
Join r/Luthier on Reddit — post in-progress photos and get feedback from builders who've built the same kit. · Action
r/Luthier · The most active and beginner-friendly luthiery community online
Set the nut slots under string tension — string it up first, then check and file. Dry fitting lies. · Action
FAQ
Common questions
How hard is it to build a kit guitar?
Harder than assembling IKEA furniture, easier than learning to play guitar from scratch. Most people finish a kit guitar in 4–8 weekends of a few hours each. The hardest parts are filing the nut slots (a genuinely new skill) and the finishing process (patience-intensive). The wiring is straightforward if you follow a diagram.
Does a kit guitar sound as good as a factory guitar at the same price?
Often better, because you can put better hardware on it for the same money. A $150 Saga kit with upgraded locking tuners and a TUSQ nut will outplay many $300 factory guitars. The wood quality on budget factory guitars and budget kits is similar — your assembly and setup quality determines the rest.
Should I build electric or acoustic first?
Electric, almost universally. Electric bodies are pre-routed, require no bracing or interior woodwork, and the wiring follows a simple diagram. Acoustic kits add real complexity — bracing, bridge plate gluing, binding — that's much better tackled on a second build once you understand how a guitar fits together.
What finish should I use on my first kit guitar?
Tru-Oil. It's a wipe-on oil finish that requires no spray equipment, is forgiving of beginner technique, and produces a beautiful hand-rubbed result after 5–8 coats. If you want a glassy factory finish, use rattle-can lacquer — but plan for more surface prep and more coats.
Can I build a guitar without a full woodshop?
Yes. A kit guitar needs a sturdy workbench, sandpaper in multiple grits, a few clamps, and hand tools. No router, no planer, no band saw required. The kit handles all the power-tool work in advance — that's the whole point.
How much does a complete first kit build cost?
Budget $300–500 total: $120–200 for the kit, $50–100 for finishing supplies, $50–100 for setup tools, $30–50 for strings and hardware upgrades. The tool cost amortizes across every guitar you build after this one.
Will my homemade guitar stay in tune?
Yes, if you set it up correctly. The two biggest tuning culprits are nut slots cut too wide (strings slip) and imprecise stock tuners. A TUSQ self-lubricating nut and a set of locking tuners will make almost any kit guitar as stable as a $600 factory guitar.
StewMac — The gold-standard supplier for luthiery tools, parts, and supplies. Their YouTube channel is the most authoritative how-to resource in the hobby — watch it before you start.
r/Luthier — Active subreddit for builders at all levels. Post in-progress photos for feedback — the community is genuinely beginner-friendly.
The Gear Page — Broad guitar forum with active luthiery and setup sections. Better for general tone and hardware questions than for step-by-step build guidance.
Frank Ford's Frets.com — Decades of detailed repair and building notes from a master luthier. Dense and invaluable — especially for acoustic build and setup reference.
Luthiers Forum (OLF) — The oldest and most technical English-language luthiery forum. Best for acoustic builds, tone wood discussions, and advanced bracing questions.
As an Amazon Associate, JustBeginning earns from qualifying purchases.
We may also earn commission from other affiliate programs linked on this
page. Editorial recommendations are independent; we don't choose
products based on commission rates.
Product prices and availability are accurate as of the date and time
indicated and are subject to change. Any price and availability
information shown on Amazon at the time of purchase will apply.
Our top pickSaga ST-10 Electric Guitar Kit (Strat Style)

 Best starter