Cold plunging exploded in popularity for good reason, and the evidence for recovery and mental benefits is real. But the gear ranges from $50 (ice + bathtub) to $3,000 (plug-and-play chilled tub). The honest breakdown: cheap setups work just as well. This guide tells you exactly which setup fits where you are right now.
By Colin B. · Published May 24, 2026 · Last reviewed June 12, 2026
A solid inflatable tub plus ice, thermometer, and recovery robe lands around $400. You can start for under $50 with just your bathtub and ice bags.
We earn commission on qualifying Amazon purchases — see our
affiliate disclosure.
Price tiers and budget totals shown above are editorial estimates;
actual Amazon prices vary.
At a glance
Our top pick in each category
The fastest path through this guide — each best-starter pick by category.
Scroll for the budget and upgrade alternatives.
Your bathtub plus ice bags is a legitimate cold plunge setup. Do two sessions there before buying anything. Cold tap water in winter, plus five pounds of ice, often hits 55°F without effort, which is the research-backed beginner target.
The most important spec is temperature, not design. A $150 inflatable tub at 55°F produces the same physiological response as a $3,000 chilled tub at 55°F. The expensive tubs buy you convenience and consistency, not better results.
Don't start below 55°F. The effective beginner range is 55–60°F for 2–4 minutes. Going colder isn't more effective. It just raises the risk of vasovagal response (feeling faint). Let your body adapt over weeks before chasing colder temps.
The gear
What you actually need
Cold Plunge Tub
Your tub choice shapes everything else. Three main approaches: inflatables are cheap, packable, and you supply ice (the beginner sweet spot). Stock tanks and hard barrels are semi-permanent step-ups. Plug-and-play chilled tubs eliminate ice shopping but cost 5–10x more. Start with inflatable unless you already know this is a lifelong daily habit.
Cold Plunge Tub — what's the difference?
A few common shapes, each making a different trade.
Inflatable Portable
Use ice, pack flat, apartment-friendly. Best beginner entry.
Cost
$150–$300
Setup
Inflate + fill + add ice
Temp control
Manual (ice)
Best for Beginners, renters, anyone testing the habit before committing
Tradeoff Ongoing ice cost ($10–20/session); temperature fluctuates over the session
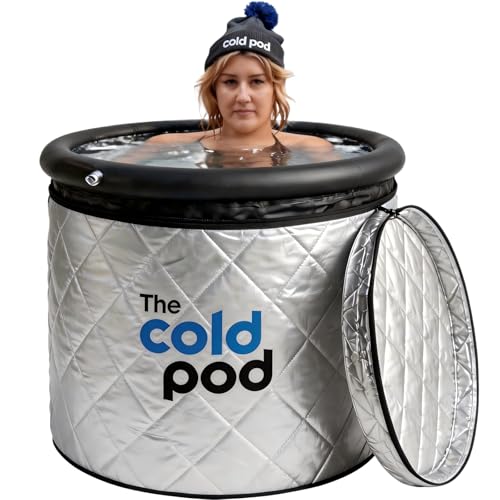
One of the best-reviewed inflatable cold plunge tubs on Amazon. Multiple insulated layers keep water cold through a full 10-minute session. Fits adults to 6'4", packs flat when deflated, essential if you don't have permanent outdoor space. The tub we'd hand a friend starting out who wants a real setup without a $1,000+ commitment.
What we like
Insulated walls hold temperature noticeably longer than cheap inflatables
Packs flat: stores in a closet, travels if needed
Purpose-built shape fits most adults comfortably upright
What to know
You still need ice: add $10–20 per session to your budget
Inflatable valves can wear after 12–18 months of regular use
The original cold plunge hack. A 150-gallon agricultural stock tank holds a full-body soak, costs around $130, and lasts for decades. Farmers use these for livestock. They survive outdoor winters without any special care. No assembly instructions, no marketing promises. Just a tub that works.
What we like
Under $150 and essentially indestructible, lasts for decades outdoors
150 gallons fits most adults with room to extend legs
Holds temperature well in cool weather without any insulation
What to know
Permanent once filled: does not move without emptying completely
No lid means faster heat gain in summer; you'll burn through more ice
The tub serious cold plungers graduate to: insulated hard plastic, vertical upright position, and a lid that keeps water cold for 48–72 hours between sessions. It's functional, not pretty. If you're committing to daily plunges for years, start here and skip the inflatable stage entirely.
What we like
Insulated hard shell keeps water cold 48–72 hours between sessions
Vertical position creates full-body immersion in a small footprint
Lid keeps debris out and temperature stable between uses
What to know
Still needs ice or a separate chiller (no built-in cooling)
Upright position feels claustrophobic for some; try before committing
If ice logistics are what's stopping you from plunging daily, a plug-and-play chilled tub kit solves it. Fill once, dial in your temperature, and the 1/3 HP chiller maintains it automatically. Includes built-in pump, filter, and lid. Only worth it if you're plunging five-plus days a week.
What we like
Fill once: built-in chiller maintains exact temp year-round, no ice needed
Precise temperature dial: hit your target within 1–2°F consistently
What to know
Chiller unit hums; outdoor or isolated room placement is important
High upfront cost; only worth it for near-daily committed plungers
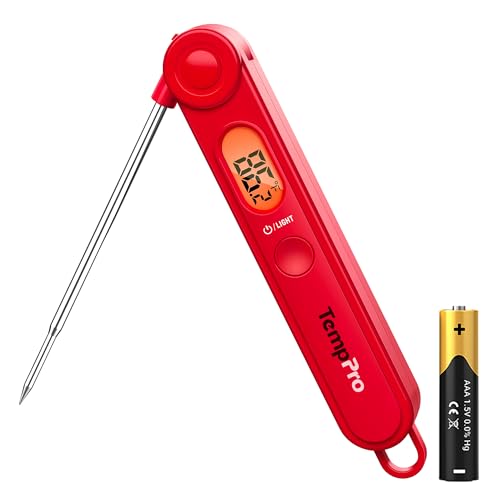
You need to know your water temperature. Guessing doesn't work: 50°F and 60°F feel completely different, and most beginners accidentally start too cold or don't hit cold enough. A $15 digital probe thermometer tells you exactly what you're stepping into. A simple timer keeps you honest: 3 minutes at 55°F is often longer than you expect.
Best starter
ThermoPro
TP03B Digital Instant Read Thermometer
$9.99 as of Jun 22, 2026
★★★★★Our rating· In Stock
A meat thermometer repurposed for cold plunge monitoring. This is what experienced plungers actually use. Waterproof probe, reads in 3 seconds, accurate within 1°F down to 14°F. Costs $15 and clips to the tub edge. No need to buy a purpose-built 'cold plunge thermometer' when this does the job perfectly.
What we like
Reads in 3 seconds, no guessing before you step in
Waterproof and accurate within 1°F at cold plunge temperatures
Works for cooking too, genuinely useful beyond the tub
What to know
One-shot reading: check before, not during your session
Clip-on hanger is flimsy; don't accidentally drop it in the water
If you want to track water temp trends over time (how fast ice melts, how outdoor temps affect your tub, whether your setup actually holds temp), the GoveeLife P1 logs continuous readings to an app over WiFi. Leave it floating in your tub and check your phone before a plunge. A genuine upgrade for data-oriented plungers.
What we like
Stays in the water continuously: check the app before you plunge
Logs temperature history: see patterns across days and seasons
What to know
Requires GoveeLife account, not for those who avoid data sharing
Accuracy drifts below 45°F; cross-check against a probe thermometer
Cold water doesn't kill bacteria. At 55°F, most pathogens just slow down. If you're reusing the same water multiple times per week, you need to treat it. The standard among home plungers is food-grade hydrogen peroxide: 1–2 cups per 100 gallons weekly. No chlorine smell, no skin irritation, breaks down into water and oxygen. Change the water fully every 2–4 weeks regardless.
Best starter
Essential Oxygen
Food Grade Hydrogen Peroxide 3%
$17.02 as of Jun 22, 2026
★★★★★Our rating· In Stock
The r/coldplunge community standard for water maintenance. Add about 2 cups per 100 gallons weekly and your water stays clean without chlorine odor or skin irritation. Food-grade 3% formula is safe to handle without protection and exactly what the community recommends. Simple, cheap, proven.
What we like
Community standard for cold plunge maintenance (widely proven)
No chlorine smell; breaks down harmlessly to water and oxygen
Food-grade formula is safe for skin without any protective gear
What to know
Weekly addition required, not a set-and-forget solution
Less effective in warm months when algae growth accelerates
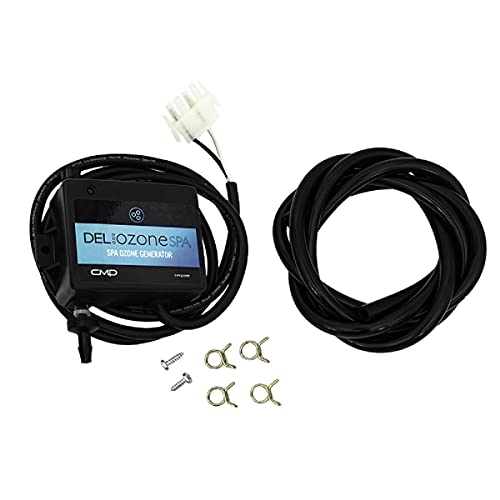
If you plunge daily and want hands-off water treatment, an ozone generator plugs in, runs between sessions, and kills bacteria without chemicals. DEL Ozone is the brand that commercial cold plunge manufacturers (including Plunge and Edge Theory) who spec into their premium tubs. Overkill for most beginners, right-sized for a serious daily setup.
What we like
Hands-off treatment: runs automatically between sessions
No chemical additions; ozone breaks down to harmless oxygen
What to know
Requires installation and constant power draw (add to setup cost)
Overkill for occasional plungers; worth it only for daily commitment
The post-plunge phase matters more than most people expect. When you exit cold water, skin temperature drops fast even in mild weather, so getting warm quickly protects the physiological benefit. A robe beats a towel: more coverage, faster absorption, no fumbling. Warm footwear on cold ground prevents the second-chill effect. Avoid jumping straight into a hot shower; let your body rewarm naturally for 5–10 minutes first.
Best starter
Superior
Long-Staple Cotton Waffle Weave Robe
$$
★★★★★Our rating
The waffle weave absorbs water faster than terry and dries in minutes between sessions. You want a robe the second you step out: it's the single accessory that most improves the daily ritual. This long-staple cotton robe runs true to size and holds up to daily use for years. The right first pick before anything else in this category.
What we like
Waffle weave dries 3x faster than terry: ready again the same morning
Absorbs quickly without feeling soaked and heavy post-plunge
Holds up to daily use for years without thinning or pilling
What to know
Lighter than terry; add a layer underneath in cold outdoor weather
Pricier than a basic robe, but you'll use it more than any you own
Oversized microfiber poncho originally designed for surfers, works beautifully as a cold plunge post-exit wrap. Extremely fast drying, packable to a fist-size, and a fraction of the price of a robe. If you're plunging outdoors and want something that travels, this is the answer.
What we like
Packs to fist-size: travels, lives in your bag, always ready
Dries in minutes; reusable the same morning without feeling damp
What to know
More functional than cozy: less of a ritual, more of a quick fix
Open bottom lets cold air hit legs if you move slowly post-plunge
Stepping barefoot onto cold, wet concrete after a plunge undercuts the rewarming effect you just worked for. OOFOS foam sandals are specifically engineered for recovery; the foam is softer and more responsive than standard shoe foam. Slip on in one motion, immediately warm underfoot. If you plunge indoors, skip this. Outdoors, it's worth it.
What we like
Recovery-engineered foam is noticeably softer underfoot than sandals
Slip-on in one motion, no fumbling with cold hands post-plunge
What to know
Complete overkill for indoor plunge setups
Runs half a size small: always order up if between sizes
Most people make it complicated. You just need to get in. Here's what actually happens in your first four weeks, and why week three is the week everything changes.
The internet has made cold plunging seem complicated. Wim Hof breathing protocols, ice bath timers, optimal temperature ranges, pre-plunge yoga: all of it is downstream of one simple thing: sitting in cold water.
You don’t need to earn this. You just need to get in.
This is what the first month actually looks like, week by week, with the things that matter and the things you’ll be tempted to overthink.
Week 1: The bathtub test
Before you buy anything, do this: fill your bathtub with the coldest tap water it’ll produce. Add one bag of ice. Wait five minutes. Get in.
That’s your baseline experience. You’ll learn three things in the first 90 seconds:
Your cold shock response is real. The first breath out of the water is involuntary and dramatic. This is normal; cold water triggers an autonomic response that gasps air in and then rushes it back out. The goal for your first session isn’t to tolerate the cold; it’s to slow your breathing down. Breathe in for four counts, out for four counts. When you can hold a rhythm, you’ve cleared the hardest part.
Temperature matters enormously. Cold tap water in winter might hit 50°F. In summer, it might only reach 65°F. The difference is dramatic. This is why a thermometer is the first thing you should buy, not to optimize, but to know what you’re working with. A session at 55°F is a real plunge. A session at 68°F is a cold shower in a tub.
2 minutes is longer than you think. Set a timer. Stay in until it goes off. Your first goal is two minutes at 55–60°F. Don’t make it more complicated than that.
If week one convinced you this is worth continuing (and it usually does), week two is when you set up your permanent (or semi-permanent) situation.
The tub decision comes down to one question: Do you have outdoor space and own your home? If yes, a stock tank is your cheapest and most durable option, and the ice logistics are easier outdoors. If you’re renting, or want flexibility, an inflatable tub is the right choice. If you know you’re committed to daily plunging for years, buy the Ice Barrel now and skip the intermediate step.
Temperature targets for week two: Aim for 55–58°F. This puts you solidly in the research-backed effective range for norepinephrine and dopamine release without hitting the territory where breathing control becomes genuinely difficult. It’s also cold enough that you’ll feel the mental clarity effect afterward (the real reason most regular plungers keep doing it).
Ice math: A 100-gallon tub filled with 60°F tap water takes roughly 30–40 pounds of ice to reach 55°F, and more in summer. A 150-gallon stock tank takes 45–60 pounds. Convenience store bag ice weighs about 10 pounds and costs $2–3, so figure $6–12 in ice per session until you figure out a better source. Many grocery stores have ice vending machines that sell 20 pounds for $1.50–2.00. That’s the move.
Session length for week two: Build to 3–4 minutes. The research-backed Huberman protocol targets 11 minutes per week spread across multiple sessions, which works out to roughly three 3–4 minute sessions. Don’t try to hit 10 minutes yet; you’re building the habit, not chasing a record.
Week 3: The mental shift
Week three is when it changes.
By this point, the cold shock response starts to feel familiar. Your breathing comes under control faster, sometimes within 20 seconds instead of 60. You stop dreading the entry and start noticing something strange: you want to get in.
This is the norepinephrine effect. Cold water exposure triggers a 200–300% increase in norepinephrine, the neurotransmitter responsible for focus, energy, and motivation. The effect is real, measurable, and lasts 2–3 hours post-plunge. Most regular plungers describe it as better than coffee without the crash.
A few things that help in week three:
Stop warming up with a hot shower first. It’s tempting, but it defeats the physiological response. If you need to take the edge off, warm up passively (get dressed, make tea, move around), not with hot water before a cold plunge.
The cold isn’t actually the hard part anymore. The hard part is the decision to walk outside in the morning and get in. Make that decision the night before. Put your robe by the door. Commit to a specific time, not “sometime this morning.”
Don’t skip a session because the water warmed up. A tub that drifted from 55°F to 62°F overnight is still worth getting into. The benefits drop off above 65°F, but anything below that is productive. Add ice, get in, don’t let perfectionism become an excuse.
Week 4: Dialing in the habit
By week four, you’re not a beginner anymore; you’re someone with a practice. The questions shift from “how do I do this?” to “how do I fit this sustainably into my life?”
Build in the recovery window. The 5–10 minutes after a plunge matter as much as the plunge itself. Don’t rush into a hot shower; the passive rewarming process is part of how your body activates brown fat thermogenesis, which is one of the longer-lasting metabolic benefits of regular cold exposure. Wrap up in your robe, drink something warm, let your body do the work.
Sauna or hot tub access? If you have it, the hot-cold contrast protocol is one of the most effective recovery tools available to non-athletes: 15–20 minutes of heat, then cold plunge, then passive rewarming. Finish on cold for best hormonal response. Finish on heat if relaxation is the goal. Both are valid.
Timing relative to workouts: Morning plunging (before training) is well-studied and generally positive for alertness and performance. Post-workout plunging is more complicated; there’s legitimate evidence that cold within two hours of strength training blunts the hypertrophic signaling response. If building muscle is a priority, plunge in the morning and train later, or wait 4–6 hours after training before plunging.
Water treatment routine: By week four, you’ve used the same water multiple times. This is when the hydrogen peroxide habit becomes important. Add 1–2 cups of 3% food-grade H2O2 per 100 gallons, weekly. Do a full water change every 2–4 weeks. It takes five minutes and the difference in water clarity (and smell) is obvious.
Most people who start cold plunging quit by week two for one of three reasons:
They make it too hard too fast. 50°F on day one, 10-minute sessions, elaborate breathing protocols. The body needs time to adapt. Starting at 58°F for 2 minutes is not weaker; it’s smarter. You can drop the temperature 2–3°F per week once your breathing control is solid.
They plunge alone and feel faint. Vasovagal response (feeling dizzy or faint from sudden cold shock) is real and mostly preventable. Enter slowly (feet first, wait 30 seconds, then lower yourself). Control your breathing from the first second. For your first month, don’t plunge alone if possible.
They make it a weather-dependent activity. If your setup is outdoors and you only plunge on nice days, you’ll plunge three times and quit. An insulated tub, a robe by the door, and a non-negotiable time slot. These are what separate the people who build a practice from the people who buy a tub and stop.
What month two looks like
By the end of your first month, the habit infrastructure is in place. Month two is just showing up to what you built. A few things that improve over months, not weeks:
Cold shock response continues to dampen: entry gets easier without the temperature changing
Mental clarity effect becomes more reliable and easier to identify
You’ll start experimenting with colder water (50–52°F) and longer sessions
The morning decision gets automatic; you’ll find you’re in the tub before you’ve consciously committed to it
One thing that doesn’t change: 55°F at 4 minutes is still a real plunge at month six. Don’t let anyone tell you that your practice isn’t legitimate because you’re not doing 10-minute ice baths in January.
Save your money
What you don't need yet
Beginners get pressured to buy a lot of stuff that doesn't help them play
better. Here's what we'd skip on day one.
A dedicated ice machine — Convenience upgrade for 5+ sessions per week. Until then, bag ice from a gas station or Costco is cheaper and simpler than maintaining a machine.
A water chiller unit — The Active Aqua and similar chillers are great, but they add $400+ to your setup cost. Start with ice; add a chiller when the logistics become a real daily friction point.
Cold plunge supplements or adaptogens — The benefits come from the cold exposure itself, not from anything you add to it. Supplement marketers have attached themselves to this trend aggressively.
Wim Hof Method training before you start — Breathing exercises are useful, but you learn them in the water, not in weeks of preparation beforehand. The most important thing is to just get in.
A recovery tracking device subscription — Your body's response is obvious without data for the first few months. Oura and Whoop are interesting tools eventually, not prerequisites for starting.
First week
Your first seven days
A short, real plan to get from gear-on-doorstep to actually playing.
Do your first plunge in your bathtub tonight. Fill with cold tap water, add one bag of ice, wait 5 minutes. Just get the baseline experience; no equipment needed. · Action
Order a thermometer first. You'll use it in the bathtub this week while your tub ships. Know what temperature you're actually hitting. · Buy
Choose your setup type based on your space: inflatable for renters or testers, stock tank for homeowners with a yard, chilled tub only if you're already committed to daily plunging. · Learn
Order your tub so it arrives by the weekend. · Buy
Watch Andrew Huberman's cold exposure episode (freely on YouTube), the most cited protocol in the community and a good beginner anchor for dosing. · Learn
The research-backed effective range is 50–59°F (10–15°C). Most beginners should start at 55–60°F and work colder over weeks. Below 50°F isn't meaningfully more effective. It just increases the risk of vasovagal response (feeling faint) before your body has adapted.
How long should I stay in?
2–4 minutes at 55°F is a complete beginner session. Andrew Huberman's protocol targets 11 minutes per week total spread across multiple sessions. Don't try to stay in 10 minutes on day one; your breathing and mindset are the limiting factors, not your cold tolerance, and that takes weeks to build.
Can I cold plunge every day?
Yes, many regular plungers do. Morning plunges raise norepinephrine and cortisol, which aids alertness and mood. One caveat: avoid plunging immediately after strength training if hypertrophy is a goal; there's evidence cold within two hours post-workout blunts the hypertrophic signaling response. Wait 4–6 hours if that's a concern.
Do I need a dedicated tub, or will my bathtub work?
Your bathtub is a perfectly valid setup for your first month. Standard tubs hold 25–50 gallons, less water means ice goes further. Cold tap water plus 5–10 pounds of ice often hits 55°F without much effort. Start there, build the habit, then invest in a dedicated tub once you know it's sticking.
Should I use sauna or hot tub before or after?
Hot-cold contrast therapy is well-researched and genuinely beneficial. For best results, finish on cold: 15–20 minutes of sauna or hot tub, then a cold plunge, then passive rewarming. If you only have the cold plunge, skip the hot shower for 5–10 minutes after and let your body rewarm on its own; that rewarming process is part of the physiological benefit.
Is cold plunging safe?
For healthy adults, yes. The main risks are vasovagal response from sudden cold shock; enter slowly, control your breathing, and don't plunge alone for your first few sessions. Anyone with heart conditions, Raynaud's syndrome, or who is pregnant should consult a doctor first. If you feel faint at any point, get out immediately.
Huberman Lab: Cold Exposure Protocol — Andrew Huberman's 2022 cold exposure episode is the most referenced protocol in the community. Research-backed dosing: 11 minutes per week at 50–59°F. Bookmark the episode notes.
r/coldplunge — Active community. Best for real-world setup questions, water treatment troubleshooting, and beginner temperature advice. Skip the supplement recommendation threads.
Examine.com: Cold Water Immersion — Research aggregator. Their cold water immersion summary cuts through the hype and explains what the actual evidence does and doesn't show, without supplement-company spin.
PubMed: Cold Water Immersion Research — Search 'cold water immersion' for primary sources. Most key papers are from 2014–2024 and freely available. Useful for verifying claims you hear in the community.
Rhonda Patrick: Cold Shock Response — Patrick's cold shock research summaries are dense but accurate. More granular than Huberman on the molecular mechanisms; worth reading once you've built a consistent practice.
As an Amazon Associate, JustBeginning earns from qualifying purchases.
We may also earn commission from other affiliate programs linked on this
page. Editorial recommendations are independent; we don't choose
products based on commission rates.
Product prices and availability are accurate as of the date and time
indicated and are subject to change. Any price and availability
information shown on Amazon at the time of purchase will apply.

 Best starter