Pole fitness combines real upper-body strength, core work, and flexibility into something genuinely enjoyable. The gear list is short but the decisions aren't obvious: freestanding or ceiling-mounted, 40mm or 45mm, static or spin. Here's what actually matters and what you can skip.
By Colin B. · Published June 1, 2026 · Last reviewed June 1, 2026
The pole is the big spend ($180–400). Add shorts ($20–50), grip aid ($15–25), and a crash mat ($40–80) for a complete setup.
We earn commission on qualifying Amazon purchases — see our
affiliate disclosure.
Price tiers and budget totals shown above are editorial estimates;
actual Amazon prices vary.
At a glance
Our top pick in each category
The fastest path through this guide — each best-starter pick by category.
Scroll for the budget and upgrade alternatives.
Measure your ceiling height before ordering a pole. Poles come in sizes for ceilings from 7'4" to 9'10" — ordering the wrong extension is a week's delay. Standard US 8-foot ceilings need an extension piece.
Skin contact is how you grip the pole — shorts that expose your thighs are not a fashion choice, they're functional. Bare arms and a sports bra give you more grip surface than sleeves.
Freestanding poles cost $100–200 more and are slightly less stable, but they're the only option if you rent. Ceiling-mount poles feel more solid and are better for learning if you can drill. Either works.
The gear
What you actually need
Dance Poles
The pole is your biggest spend and most consequential decision. For most beginners, a ceiling-mount pole in 45mm diameter is right — it's the studio standard, familiar if you ever take classes, and more stable than freestanding. Freestanding costs $100–200 more but is the answer for renters. Diameter matters: 45mm is easier to grip for beginners; 40mm feels faster for tricks but harder on smaller hands. Both come with static mode (pole locked — start here) and spin mode (pole rotates — for flow moves once you've built the basics).
Dance Poles — what's the difference?
A few common shapes, each making a different trade.
Ceiling-Mount
Most stable, lower cost, requires drilling.
Install
Drill required
Stability
Best
Price
$180–350
Best for Homeowners or anyone who can drill into a ceiling joist
Tradeoff Permanent install — 30 minutes and small holes in the ceiling
X-Pole is the brand you'll find in professional studios worldwide, and the XPERT Pro is their beginner-friendly flagship. The 45mm diameter grips well before your skin adapts, push-up installation takes 20 minutes, and the spin/static switch means you're not locked into one mode. Built to hold 440 lbs with TÜV certification.
Lupit is the other pro-grade pole brand worth trusting. The Diamond is their entry model — the same structural quality as X-Pole at a lower price. If the X-Pole is out of budget, this is the honest second choice, not a meaningful downgrade.
What we like
Pro-grade structural specs at a more accessible price point
Spin/static modes included — same core feature set as X-Pole
What to know
Install tutorial less polished than X-Pole — YouTube video required
Narrower size range than X-Pole for unusual ceiling heights
The only freestanding pole we'd actually recommend for serious training. The X-STAGE Lite has a wide base that doesn't tip, a steel frame that handles dynamic movement, and the same 45mm shaft as the ceiling-mount XPERT. Renters, this is your pole.
What we like
No installation required — sets up in 15 minutes, moves with you
Same 45mm diameter as ceiling-mount — consistent grip feel
What to know
Wide 4-foot base requires significant floor clearance in small rooms
$100–200 premium over ceiling-mount for the portability
This isn't optional. You grip the pole with skin — your legs, your thighs, your torso. Regular athletic shorts that cover your thighs slide on the pole and actively hurt your grip. You want shorts cut short enough to expose your upper thigh. For tops, a sports bra or fitted crop gives you the best arm and midriff contact. Once you understand that the clothing is a grip surface, the choices make sense.
Best starter
BodyZone
Women's Dragonfly Short
$$
★★★★★Our rating
BodyZone's Dragonfly Short has been a pole wear staple for years — cut short enough to expose the thigh for real grip, with a waistband that doesn't roll down mid-spin. The fabric doesn't bunch or ride up during leg hooks and knee hangs, which matters more than you'd expect.
What we like
Cut specifically for pole — thigh exposure is functional, not incidental
Non-rolling waistband stays put through inverts and spins
Durable seams built for repetitive pole contact
What to know
Shorter than most people are used to — feels exposed at first
Limited color selection compared to general athletic brands
A solid affordable option from a dedicated pole wear brand. These expose enough thigh for real grip, the high waist holds without rolling, and the price makes them a low-risk way to figure out what cut works for you before investing in premium shorts.
What we like
Under $20 — smart entry point before investing in specialty brands
Enough thigh exposure to practice leg hooks and fireman spins
What to know
Less durable than dedicated pole brands at this price
Waistband may roll during more advanced dynamic moves
Hand grip is the first thing beginners lose — palms sweat, the pole slips, confidence drops. A good grip aid changes this. Dry Hands is the industry standard: it creates a dry, slightly tacky barrier on your palms. iTac2 is the sticky-rosin version for when you need adhesion on body skin (inner arms, thighs) for advanced inversions. Don't use regular chalk — it dries out the pole and leaves residue that degrades everyone's grip.
Best starter
Dry Hands
Ultimate Grip Solution
$
★★★★★Our rating
The go-to grip aid in studios everywhere. Dry Hands creates a thin, dry, non-sticky film on your palms that dramatically improves your hold. A few drops go a long way — one bottle lasts months. Works best in air-conditioned rooms; slightly less effective when the room is very warm.
What we like
Studio standard — the grip aid you'll see in every pole class
Non-sticky formula means no residue buildup on the pole
One bottle lasts months — a few drops per session is enough
What to know
Less effective when the room is warm or humid — try iTac2 in hot weather
Too much application balls up on the pole — use 2–3 drops only
iTac2 is the choice when you need skin-to-pole adhesion for inverts and tricks that rely on leg, inner arm, or back contact. It's stickier than Dry Hands — that's the point. Use it on body contact points for advanced moves; it's too tacky for palm grip on cold poles.
What we like
Best for body-skin contact points — legs, arms, back for advanced tricks
Stronger adhesion than Dry Hands for high-slip situations
What to know
Too sticky for beginner palm grip — can cause jerky movements
Leaves more pole residue than Dry Hands — clean more frequently
★★★★☆Our rating· Only 19 left in stock - order soon.
A powder-based grip for those who find liquid aids greasy or messy. Works like athletic chalk but formulated for pole — less drying, better texture. Especially good for people with naturally very dry hands who find Dry Hands overcorrects.
What we like
Powder format is clean and easy to apply without messy liquid
Good for naturally dry hands where liquid grip aids feel excessive
What to know
Creates white residue on the pole — clean the pole regularly
Less effective than Dry Hands for most people in most conditions
Not optional. When you're learning to invert and spin, you will fall — not constantly, but enough that a hard floor is a real risk. A gymnastics mat on the floor below your pole removes the worst outcomes from a slip. Any folding gymnastics mat is far better than bare floor — for more coverage, pole-specific crash mats (ring or wide rectangular shapes) are designed to stay centered as you move.
Best starter
BalanceFrom
GoGym 4'x10' Gymnastics Mat
$$
★★★★★Our rating
The most widely purchased gymnastics mat on Amazon, and it earns the rating. Dense foam absorbs real impact, the non-slip bottom stays on hardwood, and it folds in half for storage. At 4' x 10', it covers the floor zone around your pole that matters. A straightforward, low-risk buy.
What we like
Dense anti-tear foam absorbs real impact — not just a yoga mat rebrand
Non-slip bottom stays anchored on hardwood and tile
Folds in half for under-bed or closet storage between sessions
What to know
Foam compresses over time — check it after 6 months of regular use
A mat specifically designed for pole — 5 feet wide and 3.5 inches thick, covering the impact zone on all sides. More expensive than a gymnastics mat but purpose-built: it stays centered around the pole, and the extra width catches diagonal falls that a narrow mat misses. The right upgrade once you're training inversions regularly.
What we like
5ft wide and 3.5" thick — purpose-built for pole falls in every direction
Stays put around the pole base without shifting during training
What to know
5-foot width requires floor clearance — measure your space first
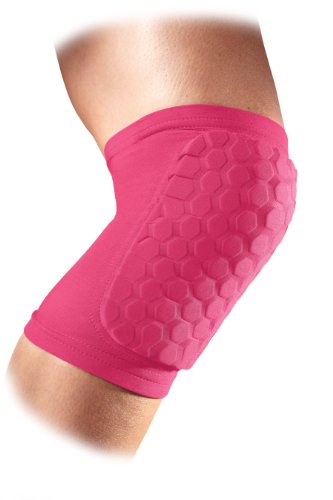
Floor work is a core part of pole fitness — transitions to the ground, floorwork combos, choreography sequences. Your knees take the most consistent impact. A good pair of volleyball-style knee pads makes floorwork comfortable enough that you focus on technique instead of bracing. Soft-shell pads (volleyball/dance style) are better than hard-shell (skateboard style) for pole — you want cushion you can move in, not a shell that catches on the pole.
Best starter
McDavid
Hex Pad Knee Pad
$
★★★★★Our rating
A dance and volleyball knee pad that works equally well for pole floorwork. Low-profile so it doesn't catch on the pole, padded enough that you stop bracing for impact, and sized to stay put through movement. Pole instructors routinely recommend the McDavid 6440 for beginners starting floorwork.
What we like
Soft-shell design won't catch on the pole during transitions
Stays put through dynamic pole floorwork — doesn't ride down
What to know
Elastic sleeve feels warm in long sessions — take short breaks
Thinner padding than skateboard pads — not for drops on hard concrete
Mighty Grip's tacky knee pads serve a dual purpose — they protect your knees during floorwork and provide grip assistance for knee holds and leg hangs. The tacky surface adds adhesion where the back of your knee contacts the pole, which is useful for students working on static holds. A step up from plain padding.
What we like
Tacky surface adds grip assistance for knee holds and leg hangs
Dual purpose: floorwork cushion plus pole grip in one pad
What to know
Tacky surface picks up lint — rinse before sessions to restore grip
More specialized than a standard volleyball pad for pure cushion
Here's how your first two months of pole fitness actually go — from your first spin to your first invert, the bruises, and the moment it stops feeling awkward and starts feeling like a superpower.
Nobody tells you the first thing pole fitness teaches you is your grip strength. Not dance technique, not flexibility — grip. Your hands will ache after your first session in a way that feels genuinely surprising. That’s normal. It means you’re using muscles that no other activity has asked you to use before.
The second thing nobody tells you: the bruises. Pole bruises on your inner arms and thighs — called “pole kisses” in the community — are completely normal and fade within days. They are the clearest sign you’re actually working the moves, not faking your way through them.
Here’s what your first eight weeks look like, honestly.
Weeks 1–2: Grip, spin, and the basics
Before you do anything flashy, you need to build pole familiarity. Spend your first two sessions on three moves that introduce the concepts everything else builds on:
The fireman spin. Walk around the pole, hook your inside knee, and let your outside leg extend. This is how you learn basic pole contact and momentum. It looks simple; it establishes the muscle memory for every spin that follows.
The front hook and back hook. Static grips where you bring your leg to the pole from the front and back. No spinning — just getting comfortable with your body pressing against the pole and holding the position. These teach you where your grip needs to be without the distraction of rotation.
The basic climb. Grip the pole with both hands, press your inner thigh and ankle against it, push with your feet, and pull yourself up. It sounds impossible if you’ve never done it. It works on your first or second try once someone shows you the contact points.
The contact points are the key insight of the first two weeks. You don’t hold on with your hands alone — you use your inner arms, thighs, back of the knee, ankle, and torso as contact surfaces. Each contact surface shares the load. Once you understand this, moves that looked like magic become logical.
By week three your grip endurance has improved noticeably, and you stop worrying about falling on every move. This is when you can start building a small repertoire.
The chair spin is the first real spin most instructors teach — both hands on the pole, knees tucked to the side, spinning around the pole in a seated position. It looks good, it’s achievable for most beginners in a few sessions, and it builds the pattern (approach, hook, extend, spin) you’ll use for almost every spin in pole.
Add the pole sit — a static hold where you sit on the pole using thigh-to-pole pressure — around week three or four. It feels impossible until you do it, then it feels obvious. The technique is to clamp with the soft inner thigh, not the outer thigh, and trust the friction. Most people get it wrong for a few sessions before it clicks.
Two important rules for this phase:
Don’t pole every day. Three times a week maximum while your skin is toughening and your grip strength is building. Daily pole in the early weeks leads to skin tears and overuse soreness in your hands and shoulders.
Warm up properly. Cold muscles grip less effectively and tear more easily. Fifteen minutes of light cardio, shoulder circles, and wrist mobility before you get on the pole. This is not optional.
Weeks 5–6: Static holds and combos
This is the phase where people start feeling like they actually know what they’re doing. You have four or five moves, you can link them into short combinations, and you’re doing something that looks unmistakably like pole fitness.
Focus now on static holds — positions where you’re holding your body on the pole without spinning. The inside leg hang (hanging by the back of one knee with arms extended down) is the first static inversion most people learn. It requires no upper body strength to hold, just correct leg placement, and it opens the door to thinking about inversions properly.
Inversions — moving your head below your hips — are a milestone most beginners reach between weeks five and ten depending on upper body strength and comfort. Don’t rush them. A full inversion (like a handspring or a deadlift to the pole) requires real shoulder strength and comfort with being upside down. Get an instructor or experienced friend to spot you the first time.
The pole body wave is a beautiful move to learn around week five that has nothing to do with strength — it’s all about body articulation and rhythm. It teaches you how to move with the pole instead of just holding on. This is when pole starts feeling like dance rather than just exercise.
By week eight most people have a legitimate warm-up flow, can string moves together smoothly, and have discovered what they actually enjoy about pole.
Some people love the aerial strength work — climbs, holds, inversions, the physical challenge of getting your body into positions that feel impossible. Others love the flow and dance aspects — spins, body waves, transitions, the expressiveness of moving around the pole with intention.
Both are pole fitness. Neither is wrong. Week eight is when you start to know which one you are.
A few things worth doing in weeks seven and eight:
Record yourself. What feels like a move that works and what actually works are often different. Video yourself, compare to the technique you’re trying to replicate, find the gap. This is the most efficient feedback loop available to a home practitioner.
Find your community. The pole fitness community online (especially r/poledancing) is unusually supportive. People post progress videos, ask technique questions, and get real answers. You don’t have to be advanced to participate — beginner posts are actively welcomed.
Consider one class. Even if you’ve been learning entirely from YouTube and home practice, a single in-person session with a qualified instructor will identify technique issues that are invisible on camera. Grip alignment problems, shoulder position, footwork — these are things an instructor can see in thirty seconds that you might self-teach wrong for months.
Pole fitness has a steeper learning curve than most cardio fitness activities and a shallower curve than most serious strength training. The moves that require real upper body strength take months to build the prerequisite for. The moves that are mostly technique can be learned quickly regardless of your current fitness level.
The bruising is real, fades quickly, and reduces significantly after two or three weeks of regular practice as your skin toughens. The grip strength gains are dramatic and visible. Most people are surprised how much their climbing strength improves in the first month.
The reason pole has such a passionate community is that the skill ceiling is genuinely high — there’s always a harder move, a cleaner line, a more complex combination. Eight weeks in, you’ll be nowhere near that ceiling. You’ll also be much better than you expected to be on day one.
Save your money
What you don't need yet
Beginners get pressured to buy a lot of stuff that doesn't help them play
better. Here's what we'd skip on day one.
Practice heels — Platform heels are for performance, not beginner training. They're harder to balance in and mask technique feedback. Start barefoot or in grip socks.
A stage-quality pole — Stage poles are built for performance venues, weigh 50+ lbs, and cost $800+. The XPERT Pro or Lupit Diamond gets you 95% of the way there at a fraction of the cost.
Pole grip gloves — They reduce wrist flexibility and don't build the actual hand strength you'll need. Grip aids work better and teach you the real skill.
A dedicated pole mirror — Your phone propped up recording video is a better first feedback tool — you can replay it, slow it down, and compare to tutorials side by side.
Online course subscriptions — Free YouTube resources (Veena Moves, Sarah Scott Pole Fitness) are excellent for the first six months. Subscribe when you've genuinely maxed out the free content.
Pole cleaning spray — Isopropyl alcohol on a paper towel is cheaper and equally effective. Buy the spray later if you want convenience.
First week
Your first seven days
A short, real plan to get from gear-on-doorstep to actually playing.
Measure your ceiling height to the nearest inch before ordering anything. · Action
Order your pole — X-Pole XPERT Pro for ceiling-mount, or X-STAGE Lite if you rent. · Buy
Watch Veena Moves on YouTube — she teaches the foundational body grip placements that everything else builds on. · Learn
Veena Moves · YouTube · best structured beginner resource
Your first session: learn the basic front hook, back hook, and fireman spin. These three moves introduce the grip concepts used in most beginner content. · Action
Join r/poledancing — the community answers gear questions, shares technique videos, and is unusually welcoming to beginners. · Action
A complete beginner setup runs $300–600: pole ($180–400), crash mat ($40–80), pole shorts ($20–50), and grip aid ($15–25). The pole is the main investment; everything else is modest.
Freestanding or ceiling-mount — which should I get?
Ceiling-mount if you can drill. It's more stable, costs less, and feels closer to a studio pole. Freestanding if you rent or can't drill — the X-Pole X-STAGE Lite is the one worth trusting.
What diameter pole should I buy — 40mm or 45mm?
45mm for most beginners. It's the global studio standard and easier to grip with developing hand strength. 40mm is popular with people who have smaller hands or prefer faster tricks. When in doubt, start at 45mm.
Do I need to take classes, or can I learn from YouTube?
YouTube works well for the first 6–12 months, especially Veena Moves and Sarah Scott Pole Fitness. An in-person class once or twice is worth it for corrections on grip and invert technique — some habits are invisible in a phone video.
Is pole dancing only for women?
No — men compete at the World Pole Sports Championship, and the sport's fastest-growing segments include athletic and artistic competitors of all genders. The community is overwhelmingly welcoming.
How dangerous is it for a beginner?
With a quality pole, proper installation, and a crash mat on the floor, the real risks are bruising (common) and minor grip burns. Serious injuries come from falls on hard floors, cheap poles that fail, or rushing inversions without baseline strength. Don't skip the mat.
World Pole Sports (WPS) — The international governing body for competitive pole sports. Rules, rankings, and the most current list of national federations.
Veena Moves (YouTube) — The most recommended beginner YouTube channel in the pole community. Structured progression, clear technique, no fluff.
Sarah Scott Pole Fitness (YouTube) — Strong follow-up to Veena for intermediate moves — clear breakdowns of inverts and spins once you have the basics.
r/poledancing — Active, inclusive subreddit with gear advice, progress posts, and technique help. Good place for beginner questions.
X-Pole Official (YouTube) — Official installation guides and technique videos from X-Pole. The installation walkthrough is the one to watch before you set up your pole.
Pole Dance Community — Forum-style community with technique discussions, studio finder, and tutorials. Deep archive of technique threads going back years.
As an Amazon Associate, JustBeginning earns from qualifying purchases.
We may also earn commission from other affiliate programs linked on this
page. Editorial recommendations are independent; we don't choose
products based on commission rates.
Product prices and availability are accurate as of the date and time
indicated and are subject to change. Any price and availability
information shown on Amazon at the time of purchase will apply.
Our top pickX-Pole XPERT Pro 45mm Spin/Static Pole