Camera drones went from Hollywood to your backpack in five years. The good news: DJI cracked beginner-friendly years ago, and the right setup costs less than you think. The confusing part: FAA registration, airspace rules, camera versus FPV, and there's real terminology between you and your first flight. Here's how to cut through it.
By Colin B. · Published May 23, 2026 · Last reviewed June 3, 2026
A budget camera drone with an extra battery runs $400–500. The recommended setup (DJI Mini 4 Pro plus accessories) lands around $850 total.
We earn commission on qualifying Amazon purchases — see our
affiliate disclosure.
Price tiers and budget totals shown above are editorial estimates;
actual Amazon prices vary.
At a glance
Our top pick in each category
The fastest path through this guide — each best-starter pick by category.
Scroll for the budget and upgrade alternatives.
Register your drone with the FAA before your first flight. It's $5 at FAADroneZone.faa.gov, takes five minutes, and is legally required for any drone weighing 0.55 lbs or more. That's almost every drone worth buying. The registration number gets a label on the aircraft. Flying unregistered is a federal violation, not just a fine risk.
Download B4UFLY before you go anywhere. This free FAA app shows real-time airspace restrictions: Class B airports, national parks, temporary flight restrictions, stadium no-fly windows. Flying near an airport without LAANC authorization isn't just a safety concern; it's a federal crime. B4UFLY removes the guesswork. Run it every single time before you launch.
Start with a camera drone, not an FPV drone. FPV is thrilling, but it requires 10–20 hours of simulator practice before you can reliably not crash on your first real flight. A GPS-assisted camera drone hovers in place, detects obstacles, and returns home automatically if it loses signal. Your first ten flights should be about learning the airspace and the controls, not rebuilding a frame.
The gear
What you actually need
Drones
The choice breaks down into weight class and feature set. Drones under 249g (the DJI Mini series) fall into a more accessible FAA category and are genuinely easier to travel with. For most beginners, the DJI Mini 4 Pro is the right answer: omnidirectional obstacle avoidance, a 1/1.3" sensor that shoots 4K/60fps, 34-minute flight time, and a footprint small enough for a jacket pocket. If the price is the issue, the Mini 2 SE at $299 sacrifices obstacle avoidance and sensor size but keeps GPS stabilization and auto-return: still a real drone, not a toy. The Air 3 is for photographers who've already worn out a Mini and know exactly what they're reaching for.
Drones — what's the difference?
A few common shapes, each making a different trade.
Camera Drone
GPS-stabilized, automated safety features, great footage from day one. The beginner default.
Learning curve
1–2 flights
Crash risk
Low with obstacle avoidance
Footage
4K cinematic, stabilized
Best for Beginners, travelers, photographers, anyone who wants usable footage fast
Tradeoff Less adrenaline; the drone handles a lot of the flying for you
First-person view through goggles, full manual control, acrobatic flying. Steep learning curve.
Learning curve
10–20 hrs simulator first
Crash risk
High; crashes are normal
Footage
Cinematic but raw and shaky
Best for Thrill-seekers, racing fans, cinematographers wanting dynamic motion shots
Tradeoff Plan to crash and rebuild before you can fly reliably
Best starter
DJI
Mini 4 Pro
$911.05 as of Jun 22, 2026
★★★★★Our rating
The best beginner camera drone. At 249g it stays in the lighter FAA registration tier while delivering omnidirectional obstacle avoidance, a 1/1.3" sensor shooting 4K/60fps, and ActiveTrack 360 that follows you hands-free. The three-axis gimbal means your footage looks stabilized, not shaky. Buy this if you're serious about aerial photography from day one and don't want to upgrade in six months.
What we like
Omnidirectional obstacle avoidance catches the crashes beginners never see coming
249g skips the FAA recreational registration threshold by a hair
ActiveTrack 360 follows subjects hands-free while you learn the controls
What to know
RC-N1 controller uses your phone as a screen, which washes out in direct sunlight
Premium price is a real commitment if you're not sure flying will stick
At $299, the Mini 2 SE is the right call if you're not yet sure flying will stick. GPS-stabilized, 2.7K video, auto-return-to-home, 31-minute flight time, and small enough for a coat pocket. What you lose: no obstacle avoidance (you're responsible for what you fly into) and a smaller sensor. Fly in open areas and you'll never miss those features. It's a real drone at a trial-run price.
What we like
GPS stabilization and auto-return at $299, a genuine trial-run price
Same 249g weight class and portability as the Mini 4 Pro at a fraction of the cost
What to know
No obstacle avoidance means crashes are entirely on the pilot, not the hardware
2.7K video is capable but noticeably softer than the Mini 4 Pro's 4K footage
When you know aerial photography is your thing and you want the jump in quality, the Air 3 delivers. Dual cameras (wide-angle and 3x medium tele on the same body), a 1/1.3" main sensor, 46-minute flight time, and obstacle avoidance in all directions. Buy it when you've finished your second Mini battery and you know exactly what you want more of, not as your first drone.
What we like
Dual cameras (wide and 3x tele) on one body cover shots the Mini physically can't
46-minute flight time is the longest in the consumer drone lineup
What to know
At 720g it crosses into stricter FAA weight categories and is harder to travel with
Accessories don't cross-over with Mini series gear, so budget for a fresh kit
Flight times of 31–46 minutes per charge sound generous until you factor in transit to your location, the learning curve on a first session, and the compulsion to reshoot. Most pilots carry two or three batteries. The rule here is simple: only buy OEM DJI batteries. Third-party packs have caused mid-flight shutdowns. The DJI battery management system talks to its own hardware in ways knockoffs can't replicate. Grab at least one extra battery when you order the drone.
Best starter
DJI
Mini 4 Pro Intelligent Flight Battery
$94.89 as of Jun 22, 2026
★★★★★Our rating· Only 18 left in stock - order soon.
OEM only for this. The Mini 4 Pro battery gives you 34 minutes per charge and integrates fully with DJI's power management: accurate battery estimates, safe storage discharge, and no surprise cutoffs. Buy two of these with the drone, fly both on your first session, and you'll understand exactly why the second one was necessary.
What we like
Full DJI power management integration: accurate estimates and no surprise cutoffs
34 minutes per charge gets you through two solid practice sessions
What to know
OEM-only pricing is noticeably higher than third-party alternatives
OEM only here too. The DJI Mini 2 Intelligent Flight Battery is officially compatible with the Mini 2, Mini SE, Mini 4K, and Mini 2 SE, with the same mount and management system. It gives you 31 minutes per charge. If you went the Mini 2 SE route, this is the first add-to-cart after the drone itself.
What we like
Compatible with Mini 2, Mini SE, Mini 4K, and Mini 2 SE: four models, one battery
31 minutes per charge in a compact, lightweight pack
What to know
OEM-only pricing; third-party alternatives aren't safe with DJI's power system
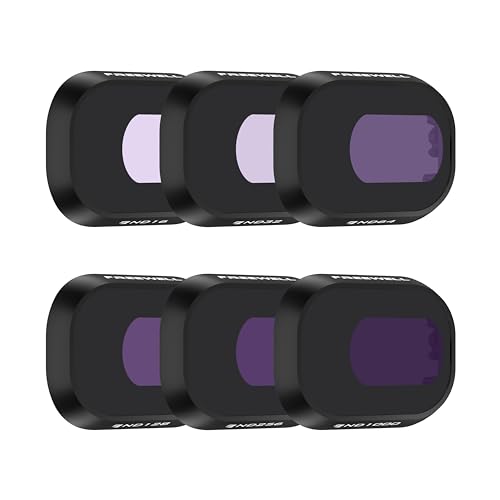
ND filters are the drone accessory most beginners skip and later regret skipping. They work like sunglasses for your camera lens, reducing incoming light so you can slow the shutter speed to twice the frame rate (the cinematography '180-degree shutter rule'). Without an ND filter on a sunny day, footage looks overly sharp and jittery. With an ND16 or ND64, motion blur is natural and cinematic. A four-pack costs $30–60 and produces an immediately visible difference on your second flight.
Best starter
Freewell
All Day 6-Pack ND Filters for DJI Mini 4 Pro
$69.99 as of Jun 22, 2026
★★★★★Our rating· In Stock
Freewell makes drone-specific filters for nearly every DJI model and the glass quality is genuinely good: sharp, minimal color cast, and secure mounts that don't shift in flight. The four-pack (ND8, ND16, ND64, ND256) covers overcast to bright midday sun. At around $60, it's the most cost-effective cinematography upgrade you can make on a camera drone.
What we like
Model-specific fit: no wobble or mount shift in flight
Minimal color cast keeps footage accurate without heavy post-correction
Four strengths cover overcast through full midday sun
What to know
More expensive than no-name packs, though the quality difference shows immediately
Budget-friendly 6-pack (CPL, UV, ND8, ND16, ND32, ND64) compatible with DJI Mini 2, Mini SE, and Mini 2 SE, all sharing the same lens mount. The glass is solid for the price and the CPL reduces glare on water and glass. Under $30, a real improvement over no filter at all.
What we like
Six filters including a CPL for under $30, the most complete budget kit available
Shared lens mount works across Mini 2, Mini SE, and Mini 2 SE
What to know
Glass quality shows next to Freewell on high-contrast scenes
Most drones ship in foam-lined boxes that are difficult to travel with and offer no quick-access organization. A dedicated shoulder bag or backpack holds the drone, controller, extra batteries, and filter set in padded compartments, protecting everything from the casual bumps that crack propellers and scratch gimbals. Not urgent on day one, but you'll want it by week two once you're taking it on trips.
Best starter
Lekufee
Waterproof Hard Case for DJI Mini 4 Pro
$49.99 as of Jun 22, 2026
★★★★★Our rating· In Stock
A rigid, foam-lined waterproof case that fits the Mini 4 Pro with its controller, up to 6 batteries, charging hub, and all the small accessories. It's IP67 waterproof, with a pressure-release valve and a tough ABS shell. It's compact enough to fit in a backpack or carry-on. Not a casual shoulder bag, but better protection for travel.
What we like
IP67 waterproof with pressure-release valve: survives rain and altitude changes
Rigid ABS shell protects gimbals from the bumps that matter most in transit
What to know
Hard-case format requires full unpacking to access anything; no quick-draw access
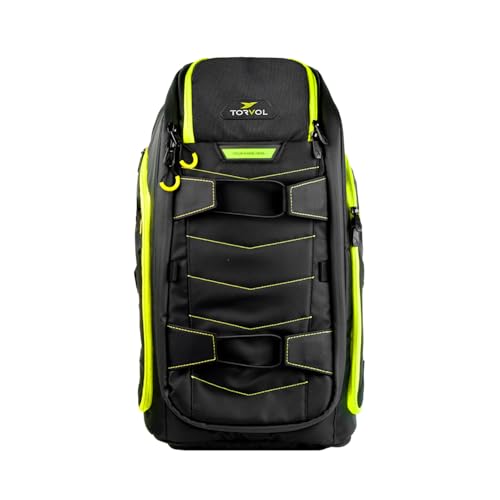
When you're carrying an Air 3, a controller, four batteries, and ND filters across a trail, you want a proper drone backpack. The TORVOL PITSTOP Pro V2 holds up to four drones plus gear in organized foam-lined compartments, includes a rain cover, and has a dedicated repair station built in. Overkill for a Mini setup; exactly right for serious pilots doing day trips.
What we like
Foam-lined compartments hold up to four drones plus a dedicated repair station
Built-in rain cover and load-bearing frame built for day trips on a trail
What to know
Cost and volume both exceed what most beginners with a single Mini setup need
Drone footage is 4K. A slow memory card creates buffering stutters mid-recording and in the worst cases corrupts your clips entirely. You need UHS-I Speed Class 3 (U3 / V30) at minimum, and UHS-II V60 if you plan to shoot 4K/60fps. Capacity: 64GB is the practical floor; 128GB is smarter when you're learning and shooting a lot. DJI explicitly recommends SanDisk for their drones; stick with it.
Best starter
SanDisk
Extreme 128GB microSDXC
$45.35 as of Jun 22, 2026
★★★★★Our rating· In Stock
V30-rated at 160MB/s read and 90MB/s write, priced around $20. DJI's own compatibility list recommends SanDisk for every Mini model. Handles 4K/30fps on both the Mini 4 Pro and Mini 2 SE without dropped frames. Buy two: one in the drone, one spare in your bag.
What we like
V30-rated at 160MB/s: handles 4K/30fps on any current DJI Mini without a stutter
DJI recommends SanDisk for every Mini model by name
What to know
Doesn't support 4K/60fps; step up to the Extreme PRO for high-frame-rate shooting
Step up to the Extreme PRO when you're shooting 4K/60fps on the Mini 4 Pro or Air 3. The V60 rating and 200MB/s write speed prevent buffering at high frame rates. At 256GB, a full day of heavy shooting fits on one card. If you're treating this seriously, don't compromise here.
What we like
V60 rating and 200MB/s write prevents buffer stutters at 4K/60fps
256GB holds a full day of heavy 4K shooting without swapping cards
What to know
Costs roughly 3x the standard Extreme for a use case most beginners don't hit yet
Most beginners spend their first week reading reviews and watching tutorials. That's backwards. Here's what you need to know — the legal basics, the controls, and the mistakes you'll definitely make — to go from unboxing to confident pilot in ten flights.
Drone flying has a reputation for being complicated. The FAA regulations, the airspace terminology, the camera settings; it sounds like homework. In practice, the first ten flights are about one thing: getting comfortable with how the drone moves, and trusting that the GPS will cover for you while you’re learning. Everything else can wait.
This is what those first ten flights actually look like, what trips up every beginner, and when it starts feeling natural.
Before flight one: the paperwork is fast
Two things are legally required before your first flight, and both take under 30 minutes combined:
FAA drone registration. Go to FAADroneZone.faa.gov, create an account, pay $5, and you’re registered for three years. The registration number goes on a label affixed to your drone (pen and masking tape works). If your drone weighs 0.55 lbs or more (most real drones do), this is not optional.
TRUST safety certificate. The FAA requires all recreational flyers to complete a free safety test. It takes about 20 minutes at trust.modelaircraft.org. You keep the certificate in your phone. There’s no failing grade, but you’ll learn a few things that matter.
Neither of these is a license. You’re not becoming a pilot. You’re just confirming you understand the basic rules — where you can fly, how high, and what to stay away from.
Download B4UFLY while you’re at it. This free FAA app shows real-time airspace restrictions for your exact location. Open it before every flight. Green means go; orange means read carefully; red means not today. Flying near an airport without LAANC authorization is not a gray area — it’s a federal violation.
Your first goal is simple: hover in place for thirty seconds without panicking.
That sounds trivial. On flight one, when the drone is fifteen feet in the air and a gust hits, it won’t feel trivial. GPS-stabilized drones like the DJI Mini series are remarkably forgiving, but they’re not on rails. The hover will drift. The key is not overcorrecting — small stick inputs, not big ones.
The controls you need to know:
Left stick (Throttle / Yaw): Up and down is altitude. Left and right rotates the nose.
Right stick (Pitch / Roll): Forward and back moves the drone forward and back. Left and right moves it sideways.
That’s it. The combinations are what produce interesting movement, but every flight for the first few sessions should be these two sticks, deliberately and slowly.
Do this on your first flight: Take off, hover for 30 seconds, move ten feet forward, pause, move ten feet back, land. Do it four times. You’ll feel the stick sensitivity drop dramatically by the fourth run.
Enable Beginner Mode. The DJI Fly app has a beginner mode that caps altitude (30m), limits speed, and keeps the drone within 30m of you. Turn it on. Leave it on for your first three or four sessions. The limits feel restrictive — they are restrictive — and that’s the entire point. Disorientation at 30m is recoverable. Disorientation at 100m is not.
Always keep the nose pointed away from you when learning. When the drone faces you, controls reverse — left is right and right is left. This is the most common beginner crash: the drone facing you, the pilot panicking, pushing the stick the wrong direction. Keep it pointing away. Always know which way the nose is facing.
Flights 4–6: making it look intentional
By flight four, hovering feels boring. Good — that’s when you start flying actual paths.
The basic moves worth practicing:
Slow orbit: Find a subject (a tree, a car, a building) and circle it slowly, keeping the subject in the center of frame. This requires coordinating yaw and roll at the same time. It feels hard. It becomes automatic in about four sessions.
Reveal shot: Start close to the ground near a subject, fly backward and upward simultaneously. This is the shot you see in every real estate video and every travel vlog. It looks professional and it’s not complicated once you’ve practiced it.
The straight-back pullback: Fly forward over something interesting, pause, then pull straight back while holding altitude. Simple, clean, usable footage.
These aren’t advanced cinematography. They’re the three moves that make up most beginner drone content, and practicing them is how you develop muscle memory for coordinating both sticks at once.
On ND filters: If you’ve installed your filter set (you should have), the right choice for most daylight is ND16 or ND64. On a clear day, ND16 is your starting point. If the footage still looks harsh or overly sharp, go to ND64. If it looks blurry or dark, step down to ND8. The goal is a shutter speed roughly twice your frame rate — if you’re shooting at 30fps, aim for 1/60 shutter.
Flights 7–10: reading the environment
Around flight seven, something shifts. You stop thinking about which stick to push and start thinking about what you want to show.
This is when the environment starts to matter. Wind is the biggest variable. The Mini 4 Pro can handle up to 28 mph wind (Level 6), but flying in 15 mph gusts as a beginner is miserable: your footage will be unstable and your battery will drain faster than normal. Fly on calm days while you’re learning. The DJI Fly app shows wind speed on the home screen.
Battery management becomes real. The drone auto-returns home at 10–15% battery. If you’re 400 meters out at 20% battery, the drone will calculate whether it has enough charge to return and may start coming back on its own. Let it. The first few times this happens, you’ll panic. After that, you’ll start tracking battery from the moment you launch. Build the habit: at 50%, start thinking about where you are relative to home. At 30%, start heading back.
Get a second location. Your first three or four sessions probably happened at the same safe open field. By flight seven, you’re ready for more complex environments: a beach, a hillside, a town square. The rules don’t change, but the spatial awareness you need goes up significantly. New locations are how you build the mental library of how the drone actually handles.
These will happen. The goal isn’t to avoid them — it’s to recognize them when they do.
Flying without checking the airspace. The first time you skip B4UFLY because you’re in a hurry, you’ll fly somewhere you shouldn’t. The app takes 15 seconds. Use it.
Losing orientation. The drone rotates away from you and suddenly pushing forward flies it sideways — or toward you. The fix: pause all stick inputs, identify the nose direction from the on-screen indicator, reorient mentally, then continue. Pausing is always the right move when confused.
Panic RTH (Return to Home). If you hit RTH in a panic, the drone will fly to a preset altitude (default 30m in the DJI app) and then fly home. If there’s a tree between you and the drone, it’s going up to 30m first — which may be fine, or may be inside a tree. Set your RTH altitude higher than any obstacle near your launch point before every flight.
Recording without an ND filter. Everything looks worse without one on a sunny day. Your footage will look like security camera footage. This is fixable in five seconds before launch.
What to do after flight ten
You have the basics. Here’s what separates pilots who plateau from pilots who keep improving:
Watch your own footage critically. What was too fast? Too jerky? What were you trying to show, and did you show it? The gap between what you intended and what you recorded closes quickly with self-critique.
Try one new shot type each session. The hyper-lapse, the top-down orbit, the low-and-fast forward pass. Each requires different control inputs. None are hard, but all require deliberate practice.
Learn to grade your footage in Lightroom or DaVinci Resolve. The drone captures good raw material. Basic color grading — adjusting highlights, shadows, saturation, and temperature — is what makes it look like the footage you see online. Most of the gap between “drone footage” and “cinematic drone footage” is post-processing.
The FAA rules are simple, the controls are learnable, and by flight ten you’ll have a real opinion about what you want to shoot next. That’s what flying becomes: a series of places and angles you’re curious about, plus the skills to actually reach them.
Save your money
What you don't need yet
Beginners get pressured to buy a lot of stuff that doesn't help them play
better. Here's what we'd skip on day one.
Part 107 certification — You don't need it for recreational flying. Part 107 is for commercial drone operations (selling footage, working for clients, filming for hire). As a hobbyist, the free TRUST safety certificate is all you need.
A landing pad — Nice on dusty or wet ground, but your driveway or grass is fine to start. Add one if you regularly fly in sandy, muddy, or rocky environments where debris can damage the gimbal on landing.
Propeller guards — They add weight, reduce flight time, and camera drones with obstacle avoidance rarely need them outdoors. Save them for tight indoor flying if you ever go there.
An FPV racing drone setup — Simulator first, drone second. The FPV rabbit hole is deep and the gear is specialized. Get 20+ hours on a camera drone before deciding whether FPV is where you want to go.
A second drone — The gear acquisition pull is strong in drone communities. Put 20 real flights on your first drone before even looking at a second one, and your buying instincts will be much better calibrated by then.
First week
Your first seven days
A short, real plan to get from gear-on-doorstep to actually playing.
Register your drone with the FAA before your first flight. It's $5 and legally required. · Action
FAA DroneZone · Official FAA registration: $5 per registration, valid 3 years
Complete the free TRUST recreational flyer safety test. Takes about 20 minutes and is legally required for US recreational pilots. · Action
TRUST Safety Test · Free, ~20 minutes, satisfies the FAA recreational certification requirement
Download B4UFLY and check your planned flying location before every single flight. · Action
Find an open field away from airports, people, and structures for your first session. Focus on learning the controls and how the drone responds, not on getting good footage. · Action
Enable Beginner Mode in the DJI Fly app for your first session. It limits altitude, speed, and range. Annoying in retrospect, genuinely smart the first time you feel disorientation. · Action
FAQ
Common questions
Do I need a license to fly a drone?
For recreational flying: no license, but two things are required: FAA drone registration ($5, for any drone over 0.55 lbs) and the TRUST safety certificate (free, about 20 minutes online). For commercial flying (selling footage, working for clients, any compensation) you need a Part 107 Remote Pilot Certificate from the FAA, which involves a $175 exam.
Where am I allowed to fly?
Most parks, open fields, and rural areas are fine. Not allowed without authorization: within the airspace of controlled airports, national parks, over crowds or moving vehicles, and above 400 feet AGL. Download the B4UFLY app; it shows real-time restrictions for your exact location before every flight. When in doubt, check LAANC authorization for controlled airspace.
Is the DJI Mini 4 Pro worth the price over the Mini 2 SE?
Yes, if you're serious about flying and care about footage quality. The Mini 4 Pro's obstacle avoidance and larger sensor are meaningful upgrades that change what you can do, not just how good it looks. If you're testing whether you'll even enjoy flying, the Mini 2 SE at $299 is the smarter trial run, still a capable GPS drone, not a toy.
How long does a battery actually last?
Advertised times (31–46 minutes depending on model) are in ideal conditions: calm wind, mild temperature, level flight. Real-world in moderate wind: 20–30 minutes. Always carry a second battery. A useful rule: bring the first battery to 30% before swapping, not to zero, which can trigger emergency landings at inconvenient moments.
What's the difference between a camera drone and an FPV drone?
Camera drones (DJI Mini series, Air 3) are GPS-stabilized, easy to fly from day one, and produce polished footage. FPV drones are flown through goggles in first-person view, typically lack GPS stabilization, and are manually controlled, thrilling but requiring significant simulator practice before you can fly safely. Most beginners should start with a camera drone.
How much does it cost to start?
Budget route: DJI Mini 2 SE plus an extra battery and a microSD card runs about $400. Recommended setup: DJI Mini 4 Pro with an extra battery, ND filter set, and a microSD card lands around $850. FAA registration is $5 either way. The drone is the biggest expense; accessories are modest.
FAA DroneZone — Official FAA registration portal. Register here before your first flight: $5, valid 3 years. Required by law.
B4UFLY App (FAA) — FAA's real-time airspace restriction app. Check it before every flight. iOS and Android, free.
TRUST Safety Certificate — Free 20-minute safety test required for all US recreational drone flyers. Takes about 20 minutes and you keep the certificate on your phone.
r/dji — The most active DJI community online. Best for model comparisons, firmware news, and troubleshooting. Read the stickied megathreads before posting basic questions; most have been answered.
DJI Official (YouTube) — Tutorial and QuickStart videos for every DJI drone. The product-specific QuickStart series is the fastest way to get airborne safely. Check here before your first flight.
AirMap — LAANC authorization platform for flying in controlled airspace near airports. If B4UFLY shows an orange advisory zone, AirMap is where you request the authorization to fly legally.
As an Amazon Associate, JustBeginning earns from qualifying purchases.
We may also earn commission from other affiliate programs linked on this
page. Editorial recommendations are independent; we don't choose
products based on commission rates.
Product prices and availability are accurate as of the date and time
indicated and are subject to change. Any price and availability
information shown on Amazon at the time of purchase will apply.

 Best starter