Bird photography turns a walk in the park into a hunt. Your quarry moves fast, spooks easily, and never waits. The telephoto lens that makes the shots possible costs real money, and the gimbal head, monopod, and autofocus system all matter more here than in any other genre. Here's what to buy first, and what to hold off on until you know what you're doing.
By Colin B. · Published May 24, 2026 · Last reviewed June 9, 2026
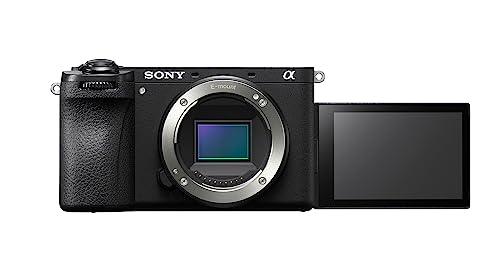
Canon EOS R50
— Canon's crop-sensor mirrorless with Bird Eye AF, the right starter body for anyone serious about bird photography.
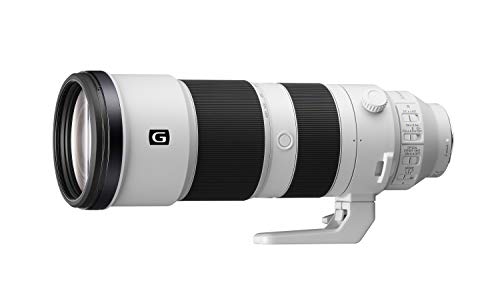
Canon RF 100-400mm f/5.6-8 IS USM
— The Canon RF 100-400mm makes the R50 sing for birds, compact, image-stabilized, and priced for beginners.
Benro GH2 Aluminum Gimbal Head
— The Benro GH2 gimbal makes a 400mm lens trackable, don't mount heavy glass on a standard ballhead.
Budget total
$450
Typical total
$1500
A bridge superzoom gets you started for $450. A mirrorless body plus a dedicated telephoto lens runs $1,200–1,600 and is where most bird photographers land within a year.
We earn commission on qualifying Amazon purchases — see our
affiliate disclosure.
Price tiers and budget totals shown above are editorial estimates;
actual Amazon prices vary.
At a glance
Our top pick in each category
The fastest path through this guide — each best-starter pick by category.
Scroll for the budget and upgrade alternatives.
Your camera system locks in your lens options. Canon RF lenses only fit Canon mirrorless bodies; Sony E lenses only fit Sony; Nikon Z only fits Nikon. Pick a system first, then buy glass for it, switching later means selling everything.
400mm is the practical minimum for bird photography. Shorter lenses leave songbirds as tiny specks in the frame. If a lens tops out at 200mm or 300mm, it's not a bird lens.
A gimbal head isn't optional once your lens reaches 300mm or more. A standard ballhead locks you in one direction and can't smoothly track a flying bird. The gimbal counterbalances the lens so it floats, that's what makes tracking possible.
The body choice sets your system, and your system sets which lenses you can buy. For bird photography, prioritize subject-detection autofocus (Bird AF or Animal Eye AF) over megapixels, and choose a crop-sensor (APS-C) body: the 1.5–1.6x crop multiplier gives you extra effective reach on any telephoto lens. A 400mm lens becomes the equivalent of 600mm on a crop sensor. That's free reach, and at this end of the price range it matters enormously.
Camera Bodies — what's the difference?
A few common shapes, each making a different trade.
Bridge / Superzoom
All-in-one: massive zoom built in, no lens buying required.
Zoom range
Up to 2000mm equivalent
AF speed
Slow–moderate
Entry cost
$350–500 total
Best for Beginners testing the hobby, birders who want simplicity
Tradeoff Fixed lens means no upgrades; slower AF misses more shots
Professional image quality, less crop-sensor reach advantage.
Crop factor
1x (none)
AF speed
Excellent
Entry cost
$2,000–4,000 body only
Best for Photographers who also shoot portraits, landscape, or print large
Tradeoff No crop bonus, need longer, heavier lenses to match APS-C reach
Best starter
Canon
EOS R50
$$
★★★★★Our rating
Canon's entry mirrorless has Bird Eye detection AF lifted from more expensive bodies, a 1.6x crop sensor that extends telephoto reach, and direct compatibility with Canon's affordable RF lens lineup. Pairs with the RF 100-400mm to make a cohesive starter system. At around $600 body-only, it's the most sensible on-ramp to serious bird photography without a multi-year commitment.
What we like
Bird Eye AF tracks birds in flight automatically, huge beginner win
1.6x crop sensor gives extra effective reach on any telephoto lens
Uses Canon RF lenses, the most affordable mirrorless mount ecosystem
What to know
No in-body image stabilization, rely on lens IS
Single card slot, bring a backup card on important outings
The bridge camera argument: instead of buying a body and a telephoto lens separately, the P950 bundles an 83x optical zoom (equivalent to 2000mm) into one package for around $400. Autofocus is slower than a mirrorless system, but you can be out photographing birds this weekend without any additional purchases. Right if you're not yet sure bird photography will stick.
What we like
2000mm equivalent reach built in, no separate lens needed
Under $400 total, the lowest cost entry into the hobby
Great for testing if bird photography is your thing before committing
What to know
Slower AF than mirrorless, misses more birds in flight
Fixed lens means no upgrades, you'll want a real system within a year
Sony's mid-range APS-C mirrorless is purpose-built for tracking fast subjects. AI-based Bird Recognition locks onto birds in flight and holds, burst rate hits 11 fps, and the 26MP sensor lets you crop hard and still keep feather detail. Pair it with the Sony 100-400mm GM or 200-600mm G for the best autofocus combo in this price class.
What we like
11 fps burst with subject-tracking, catches fast action reliably
26MP with generous crop latitude for tight framing in post
Sony's AI Bird Recognition is best-in-class across all systems
What to know
Sony telephoto lenses cost more than Canon RF equivalents
1,100+ body-only, commitment price, not a casual purchase
The telephoto lens is the defining purchase in bird photography, more impactful than the camera body. You need at least 400mm effective focal length, and most bird photographers want 500–600mm before long. These lenses must match your camera's mount (Canon RF, Sony E, Nikon Z, confirm before buying). The good news: 100–400mm zoom lenses have never been better or more affordable than they are now.
Best starter
Canon
RF 100-400mm f/5.6-8 IS USM
$698.99 as of Jun 22, 2026
★★★★★Our rating· In Stock
Canon's dedicated RF-mount bird lens is unusually compact for a 400mm telephoto, has outstanding optical image stabilization, and pairs seamlessly with the R50's Bird Eye AF. On the R50's crop sensor you get 160–640mm equivalent, serious reach for the price. At around $650 it's roughly half what comparable alternatives cost and should be the first lens a Canon R50 owner buys.
What we like
Compact and lightweight for a 400mm lens, handholdable for hours
Image stabilization handles shutter speeds you'd expect to need a monopod for
Full AF compatibility with R50 Bird Eye detection
What to know
Variable f/5.6–8 aperture means ISO climbs fast in dim morning light
Canon RF mount only, won't work with older Canon EF bodies
★★★★☆Our rating· Only 1 left in stock - order soon.
Sigma's mirrorless-native 100-400mm is available for Sony E and Leica L mounts and consistently outperforms its price class in sharpness tests. Excellent OS image stabilization, fast and quiet AF motor, and solid build quality. If you shoot Sony, this is your R50 + RF 100-400mm equivalent, and at around $799 it's the best value telephoto in the Sony ecosystem.
What we like
Optically sharper than its price suggests, consistent praise in reviews
Quiet, fast HSM autofocus, won't spook birds during AF hunting
Available for Sony E mount, the right lens for Sony A6700 users
What to know
Sony E and L-mount only, not available for Canon RF
★★★★☆Our rating· Only 1 left in stock - order soon.
When 400mm isn't enough, which happens faster than you'd think, the 200-600mm G is where most serious Sony bird photographers land. A genuine 600mm reach, Sony's best OSS image stabilization, and silent AF that integrates perfectly with Real-time Bird Eye AF on every Sony mirrorless body. Heavy (about 6 lbs) but designed for it. The benchmark consumer bird photography lens.
What we like
True 600mm reach, serious glass for small, distant songbirds
Sony OSS is the best image stabilization in a consumer telephoto
Silent AF motor integrates perfectly with Sony Bird Eye tracking
What to know
Nearly 6 lbs, you'll use a monopod or gimbal every session
For bird photography, a monopod beats a tripod almost every time. Birds don't stay still, you need to reposition quickly, pan across brush, and track moving subjects. A monopod gives you the stability to eliminate camera shake at 400mm while keeping you mobile enough to follow the action. Carbon fiber is worth the extra $30–50 over aluminum: lighter means you'll actually carry it.
Best starter
Manfrotto
XPRO Carbon Fiber Monopod
$202.36 as of Jun 22, 2026
★★★★★Our rating· In Stock
Manfrotto's XPRO carbon fiber monopod is light enough to carry all day (under 1 lb), extends to 67 inches for standing use, folds compact for the bag, and has a twist-lock system that's fast to deploy in the field. Carbon fiber dampens vibration better than aluminum and is worth the premium. Pairs with any standard 3/8" or 1/4" monopod head.
What we like
Carbon fiber keeps it under 1 lb, barely noticeable in the field
Twist locks are faster to deploy than flip locks in cold weather
67-inch max height, works for tall shooters standing or crouching
What to know
No head included, budget a tilt head or use with a gimbal
Twist locks require two hands to adjust, awkward mid-session
Aluminum instead of carbon fiber, but Vanguard's build quality is well above the Amazon-generic tier and this one includes an integrated ball head so you can aim without a separate purchase. A complete solution for under $80 that works well for lenses up to 500mm. The right call if you're not ready to commit to separate monopod + gimbal purchases yet.
What we like
Includes a ball head, complete solution, no extra purchase needed
Under $80 aluminum build with surprisingly solid fit and finish
Light enough to carry casually without feeling like a burden
What to know
Ball head isn't smooth enough for tracking flying birds
Heavier than carbon fiber alternatives, noticeable on long walks
A gimbal head counterbalances your telephoto lens so it floats in perfect neutral equilibrium, you can nudge it in any direction with a fingertip and it stays exactly where you point it. This is what makes tracking birds in flight possible on a monopod or tripod. If your lens weighs more than 2 lbs, a standard ballhead will constantly drift and fight you. The gimbal head solves the whole problem for under $130.
Best starter
Benro
GH2 Aluminum Gimbal Head
$$
★★★★★Our rating
The Benro GH2 is the standard recommendation for bird photographers who don't want to spend Wimberley money. Pan-tilt gimbal design for smooth tracking, rated to 17.6 lbs, and easy to balance any telephoto lens in the 300–600mm class. At around $100 it punches well above its price, the same gimbal geometry Wimberley uses at seven times the cost.
What we like
Fluid drag control, panning is smooth, not jerky
Rated to 17.6 lbs, handles any consumer telephoto with room to spare
Well under $130, fraction the cost of Wimberley with most of the function
What to know
Takes 10 minutes to balance on first setup, not plug-and-play
Heavier and bulkier than a ballhead when packed in a bag
The Wimberley is the professional standard for a reason: machined aluminum, silky-smooth Teflon-coated bearings, and a side-mount design that keeps the lens's center of gravity perfectly over the monopod tip. Once balanced, it requires zero effort to hold any position. Most serious bird photographers who try it refuse to go back to anything else. A long-term purchase, not a first purchase.
What we like
Machined aluminum with Teflon bearings, silky smooth in any direction
Side-mount keeps center of gravity directly over the support column
The benchmark wildlife gimbal, professionals don't use anything else
What to know
$699, a significant luxury upgrade over the Benro's near-equal function
Heavy at 2.5 lbs, meaningful addition to field kit weight
Bird photography gear is heavy and awkward: a camera body, a 400mm telephoto lens, a monopod, and accessories can exceed 10 lbs. A bag designed for photography has padded dividers sized for telephoto lenses, quick-access side panels so you can grab your camera mid-hike, and a rain cover for field conditions. A regular backpack will protect gear but cost you shots when you're digging.
Best starter
Lowepro
ProTactic BP 350 AW II
$$$
★★★★★Our rating
Lowepro's field-proven design fits a mirrorless body with a 400mm telephoto attached, has a left-side quick-access panel that opens without removing the bag, and includes an integrated rain cover. The padded dividers are modular, reconfigure for your kit. At around $150 it's the industry standard for hiking photographers and fits birds, wildlife, and travel without modification.
What we like
Side-access panel lets you grab the camera without removing the bag
Integrated rain cover, no extra purchase for wet field conditions
Modular dividers fit a mirrorless body + 100-400mm lens with room
What to know
Won't fit a 600mm telephoto with hood attached, pack hood separately
Heavy for an empty bag, the aluminum frame adds weight
Lowepro's budget field bag opens from the back (against your body) rather than the side, less grab-and-shoot convenience but much better theft deterrence for urban birding. It fits a mirrorless body with a shorter lens, includes a built-in rain cover, and comes in under $100. The right choice if budget matters and you prefer urban parks to wilderness.
What we like
Back-panel access deters theft, better for city parks and crowded trails
Under $100 with rain cover included
Same Lowepro build quality as the ProTactic at lower cost
What to know
Must put bag down to access camera, you'll miss some shots
Tighter fit than ProTactic 350, won't fit a full telephoto kit
Bird photography empties memory cards fast, a 10-second burst at 11 fps is 110 frames, and happens in rain, fog, and rough conditions. A fast card, weather protection for your lens, and a beanbag for car-window shooting will cover most situations you'll face in the first year. Budget around $70 for all three and keep them in your bag permanently.
Best starter
SanDisk
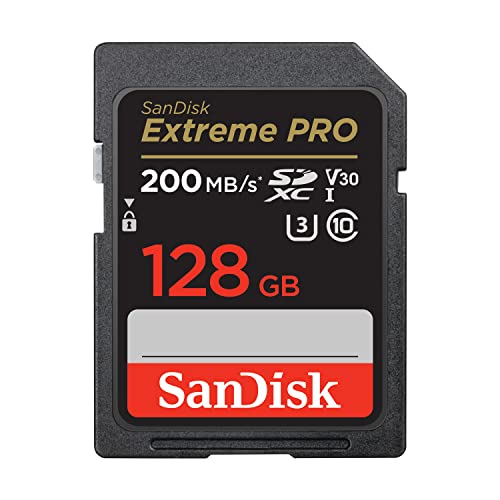
Extreme PRO SDXC UHS-I Card 128GB
$46.78 as of Jun 22, 2026
★★★★★Our rating· In Stock
Bird photography means long bursts at high frame rates, and a slow card creates a buffer backup that stops your shooting mid-action. The Extreme PRO writes at 90 MB/s, fast enough for any APS-C mirrorless camera's burst buffer. 128GB is the sweet spot: you won't fill it in a day, and it doesn't cost the premium of 256GB.
What we like
90 MB/s write speed handles any mirrorless burst buffer without stalling
128GB fits a full day of shooting, no mid-session card swaps
SanDisk's lifetime warranty and proven field reliability
What to know
UHS-I not UHS-II, fine for APS-C cameras, not for pro bodies that use UHS-II
Counterfeit risk if bought from third-party sellers, buy from Amazon direct
Birds are most active in the early morning, and mornings are often wet. The Rainsleeve is a clear polyethylene cover that slips over your camera and lens and keeps rain off while you keep shooting. At $12 for two, it's the cheapest insurance you can buy for $2,000 worth of camera equipment. Fits any camera and lens combination up to 400mm.
What we like
$12 for two, the most cost-effective insurance for your camera gear
Clear polyethylene lets you access all controls and see the LCD
Fits any camera + lens up to 400mm without modification
What to know
Disposable, pack several; they don't survive rough handling
Not rated for heavy rain, a light rain cover, not a storm cover
★★★★☆Our rating· Only 20 left in stock - order soon.
The car window is the best blind in bird photography, birds ignore cars completely. A filled beanbag rests on the window frame and supports your telephoto lens for car-window shooting, fence-top shooting, and low-angle ground work. The LensSack Jr fills with rice or beans, weighs almost nothing when empty, and replaces a monopod for the best shots you'll take all year.
What we like
Makes your car a portable blind, birds don't spook from vehicles
Ships empty, fill with rice at home, empty before flights
Works for fence tops, walls, and ground-level shooting too
What to know
Ships unfilled, requires filling before first use
Not a monopod replacement on open ground, needs a surface to rest on
You don't need to travel to a wildlife refuge or spend thousands on gear to get started. Here's what actually happens in your first month, the settings that matter, the mistakes everyone makes, and when it clicks.
Bird photography has a reputation for requiring a lot, a lot of money, a lot of patience, a lot of specialized gear. Some of that reputation is earned. But most beginners overcomplicate the start.
In your first month, you don’t need to be at a wildlife refuge at 4 a.m. with a $15,000 prime lens. You need to find birds you can actually get close to, learn a handful of camera settings that do most of the work, and take thousands of bad photos until the great ones start appearing. That’s it.
Here’s what your first month actually looks like.
Week 1: Start with easy birds
The biggest mistake new bird photographers make is chasing rare or difficult birds before they’ve learned to use their gear. Warblers flit through dense brush and move every 30 seconds. Raptors are distant specks. Shore birds sprint along the water faster than most autofocus systems can follow.
Easy birds are your training ground:
Ducks and geese in any park pond. They’re large, slow, unbothered by people, and often in good light near water. Perfect for learning how your camera tracks moving subjects.
Backyard birds at a feeder. If you set up a feeder, the birds come to you. You control the distance, the background, and the time of day. A filled suet cage 15 feet from your window is the best bird photography studio you’ll find in year one.
Herons and egrets near any water. They stand still for minutes at a time. Large, striking, and great for learning exposure and composition before you have to track anything.
Don’t worry about whether these birds are “impressive enough.” Your job in week one is learning your gear, not building a portfolio.
Getting your camera settings right
Camera settings for bird photography are different from landscape or portrait settings. You need speed.
Set your camera to shutter priority (Tv or S mode) and dial in 1/1000s minimum. This is the setting that eliminates blur from birds moving or twitching while perched. For birds in flight, you want 1/1600s to 1/2000s. Let your camera pick the aperture and let ISO go where it needs to, a sharp photo at ISO 3200 beats a blurry one at ISO 100.
Turn on your camera’s subject detection. On the Canon R50 it’s called “Bird AF,” on Sony bodies it’s “Real-time Bird Recognition AF.” Go into your camera’s AF settings and enable it, it typically isn’t on by default. Once enabled, the camera finds eyes and locks onto them automatically. This single setting is responsible for more of your keepers in month one than any other decision.
Shoot in RAW if your camera supports it. Exposure mistakes in JPEG are permanent. In RAW you can recover overexposed skies or underexposed shadows in post-processing. The files are larger but the flexibility is worth it from day one.
Burst mode is your friend. Birds move unpredictably. Set your camera to its fastest continuous shooting mode and hold the shutter through the bird’s behavior, you can delete 90% later, and the 10% you keep will include shots you couldn’t have planned.
A useful starting menu to configure:
AF mode: Continuous (AI Servo on Canon, AF-C on Sony/Nikon)
Subject detection: Bird / Animal Eye AF, ON
Drive mode: High-speed continuous
Image format: RAW (or RAW + JPEG if you want quick preview files)
Shutter priority: 1/1000s for perched birds, 1/1600s for flight
Week 2: Learn to get close
The biggest technical factor in bird photography after focal length is distance. A bird that’s 20 feet away fills the frame. A bird at 100 feet is a speck regardless of your lens.
Birds are more habituated than you think. Ducks in city parks, herons at fishing spots, songbirds near feeders, these birds have seen humans their entire lives. You can walk within 20-30 feet of most park waterfowl if you move slowly and don’t make sudden movements. Put your phone away. Approach at an angle, not directly head-on.
Your car is the best blind you own. Birds that would fly from a human standing 50 feet away will let a car drive to 20 feet and stop. This is why wildlife photographers often shoot from vehicles, the car silhouette doesn’t register as a threat. Pull slowly to the side of the road near a bird, rest your lens on the window frame (a beanbag helps enormously here), and wait.
Early morning is mandatory. The first hour after sunrise is when birds feed most actively, light is warmest, backgrounds go soft and golden, and, in summer, temperatures are tolerable. Showing up at 10 a.m. for bird photography is like arriving at 2 p.m. for sunrise landscape photography. You’ve missed the window.
Flight shots are harder than perched shots for one reason: your autofocus needs to lock and stay locked on a small, fast, erratically moving subject against a complex background. This is where camera settings really matter.
Choose your background deliberately. A dark bird against a bright sky is difficult; autofocus hunts for contrast and may lock on the background instead. A bird over open water or a field of grass, where the background is uniform and distant, gives your AF a cleaner job. This is a compositional decision, not a luck decision, position yourself so the bird will cross a simpler background.
Let the camera track while you pan. With subject detection enabled and continuous AF active, your job is to keep the bird roughly centered in the frame while panning to follow it. The camera handles the focus. Your job is just to keep it in the viewfinder. Most beginners stop panning the moment they press the shutter, keep moving with the bird through the whole sequence.
Expect a low keeper rate. Professional bird photographers keep 5-10% of their flight shots. Beginners keep 1-2%. This is normal. A session that yields 1,000 frames and 15 keepers is a good session.
A great starting target for your first flight shots: mallard ducks taking off from a pond. They’re large, fly predictably (straight up and away), and move at a manageable speed. Geese are even bigger and slower. These are training birds, learn the motion on them before you chase anything smaller.
Week 4: Field craft and going further
By week four, you have the camera settings dialed in and you’ve gotten good at approaching birds. The next level is about field craft, knowing where to be and when.
eBird is the most powerful tool in your bag. It’s a citizen science database where birders report what they’re seeing and where. Search for “hotspots” within 30 miles and sort by high species count. The spots that consistently produce long lists are where experienced birders go, and you can show up at those same locations. Filter by “Recent visits” to see what’s been reported in the last week.
Learn to identify what you’re shooting. The Merlin Bird ID app (free, from Cornell Lab) can identify birds from a photo or even from a recording of their call. Use it every time you see something unfamiliar. The faster you build species recognition, the faster you can predict bird behavior and anticipate shots.
Lighting direction matters more than time of day after the first hour. The best bird photography light is when the sun is behind you or at a 45-degree angle to you, lighting the bird’s face. If you’re facing the sun and the bird is backlit, you’re fighting the light. Position yourself so the most interesting birds will cross a lit zone in front of you, not behind.
Most beginner bird photographers plateau around month two from the same handful of issues:
AF mode not set to continuous. If your camera is in single-point AF (S mode or One-Shot), it locks focus once and doesn’t track. Birds move. Set to continuous AF and subject detection and leave it there.
Shutter speed too slow. Anything under 1/800s on a moving bird will show motion blur in the wings, even if the body is sharp. Fight the instinct to keep ISO down at the expense of shutter speed.
Getting frustrated by miss rate. Bird photography has a higher miss rate than any other genre. The pros miss most shots too. The answer is volume, take more photos, delete ruthlessly, and your keepers-per-session count rises over time.
Ignoring the light. Harsh overhead midday light is the enemy of feather detail and color. Schedule your sessions around golden hour and you’ll notice an immediate improvement in the photos that come back.
Save your money
What you don't need yet
Beginners get pressured to buy a lot of stuff that doesn't help them play
better. Here's what we'd skip on day one.
A 600mm prime lens — The 500-600mm zoom gets you 95% of the way there for a fraction of the cost. Primes run $10,000–15,000 and require vehicle support. Not for your first two years.
A 1.4x or 2x teleconverter — These multiply focal length at the cost of autofocus speed and image quality. Learn to fill the frame by getting closer before adding optical compromises.
A dedicated hide or camouflage blind — Birds in parks, refuges, and feeders are habituated to humans and cars. You don't need camo to get close to 95% of the birds you'll start with.
A weather-sealed pro body — The R50 and A6700 handle light rain fine. A $3,000+ weather-sealed full-frame body doesn't improve your images, it just costs more to drop.
A remote shutter / camera trap setup — Fantastic for nesting birds and shy subjects, but a month-three tool, not month one. Learn to get close first.
First week
Your first seven days
A short, real plan to get from gear-on-doorstep to actually playing.
Download Merlin Bird ID (free, by Cornell Lab) and walk your neighborhood, you'll be surprised what lives nearby. · Action
Merlin Bird ID · Cornell Lab's free bird identification app, also identifies by sound
Find your nearest birding hotspot on eBird, refuges, parks, and wetlands within 30 minutes are where your first good shots will come from. · Action
eBird Explore · Cornell's citizen science database, hotspot finder and species lists by location
Go out in the first hour after sunrise, golden hour is when birds are most active, light is warmest, and backgrounds go soft. · Action
Start with accessible, unbothered birds, ducks, geese, herons, and backyard feeders, to practice autofocus tracking before chasing warblers in the brush. · Action
Order a fast memory card before your first outing. · Buy
Do I need a full-frame camera for bird photography?
No, crop-sensor (APS-C) cameras are actually better for bird photography in most cases. The 1.5–1.6x crop multiplier gives you extra effective reach on any telephoto lens: a 400mm lens becomes 640mm equivalent on a Canon R50. Full-frame only makes sense if you also shoot low-light portraits or print very large.
What focal length do I actually need?
400mm effective focal length is the minimum for bird photography, most birds will still be small in the frame at 300mm. On a crop-sensor camera, a 100-400mm zoom gives you 160–640mm equivalent, which covers most situations. You'll want 600mm eventually; start at 400mm and learn first.
Why are my bird photos blurry?
Three main culprits: shutter speed too slow (use at least 1/1000s for perched birds, 1/2000s for birds in flight), autofocus set to single-point instead of tracking mode, or too much camera shake at long focal lengths. Set your camera to Bird Eye tracking AF, use shutter priority at 1/1600s, and let ISO go where it needs to.
Can I use my kit lens (18-55mm or 24-105mm) for bird photography?
Not meaningfully. Even at 105mm on a full-frame camera, songbirds will be tiny specks. The kit lens works for large birds at close range (ducks, geese, herons in a park) but not for any real bird photography. 400mm effective focal length is the practical minimum.
What's the difference between a gimbal head and a ballhead?
A ballhead locks in any position, useful for landscape photography. A gimbal head counterbalances your telephoto lens so it floats in neutral equilibrium, letting you pan and tilt with zero effort using just a fingertip. For telephoto lenses over 300mm, tracking birds with a ballhead is nearly impossible. The gimbal head solves this completely.
What time of day is best for bird photography?
The golden hour after sunrise is far and away the best: birds are most active, light is warm and directional, and backgrounds tend to go soft and golden. The hour before sunset is second best. Midday is the hardest, harsh overhead light, birds resting, and flat backgrounds.
How do I find birds worth photographing?
eBird.org is the most powerful tool, it shows you exactly which species have been reported at specific hotspots near you, with dates and frequency. Filter for 'High Species Count' hotspots within 30 miles and start there. Wildlife refuges, sewage treatment ponds (seriously, amazing birds), and known migration stopover sites consistently produce good subjects.
All About Birds (Cornell Lab) — Cornell's authoritative species guide, range maps, songs, identification photos. The first place to look when you see something new.
eBird — Citizen science database and hotspot finder. Shows you exactly which species are at which locations, updated by thousands of birders daily.
Merlin Bird ID — Cornell's free identification app, photos, description, and Sound ID that identifies birds by recording their song. Essential field tool.
Audubon Society — Conservation, field guides, and local chapter events. Local Audubon chapters often run free field trips, a great way to learn from experienced birders.
Steve Perry / Backcountry Gallery (YouTube) — The best wildlife photography technique channel on YouTube. Camera settings, autofocus systems, and field workflow, start with his bird AF videos.
Arthur Morris / BIRDS AS ART — Legendary bird photographer's blog and workshops. Dense with technique, field positions, light angles, exposure decisions. Better after month three.
r/wildlifephotography — Active community with gear discussions and field reports. Better critique culture than r/birding for photography-specific questions.
As an Amazon Associate, JustBeginning earns from qualifying purchases.
We may also earn commission from other affiliate programs linked on this
page. Editorial recommendations are independent; we don't choose
products based on commission rates.
Product prices and availability are accurate as of the date and time
indicated and are subject to change. Any price and availability
information shown on Amazon at the time of purchase will apply.


 Best starter