3D printing has never been easier to start — but the first-printer choice is a genuine minefield. FDM or resin? Bambu or Creality? Here's what actually matters on day one, and what you can safely ignore until you've made a few things.
By Colin B. · Published May 22, 2026 · Last reviewed June 2, 2026
A solid beginner FDM setup runs $220–380: printer, two spools of filament, and basic tools. Resin is similar upfront but adds ongoing consumable and safety costs.
We earn commission on qualifying Amazon purchases — see our
affiliate disclosure.
Price tiers and budget totals shown above are editorial estimates;
actual Amazon prices vary.
At a glance
Our top pick in each category
The fastest path through this guide — each best-starter pick by category.
Scroll for the budget and upgrade alternatives.
FDM vs. resin is the first real decision. FDM (filament) printers are forgiving, produce larger objects, and use cheap materials. Resin printers produce stunning detail — the kind you need for 28mm miniatures — but require serious ventilation, nitrile gloves, and a separate UV curing station. Start with FDM unless you specifically need miniature-level detail.
Don't buy the cheapest Creality you can find. Sub-$150 FDM printers require constant manual tuning: leveling the bed, adjusting Z offset, troubleshooting layer adhesion. In 2026, Bambu Lab has disrupted this tier — their A1 Mini costs around $300 and just works. The time you'd spend tinkering with a cheap printer is easily worth the extra $100.
You don't need to design your own files to get started. Printables.com and Thingiverse have millions of free, print-tested designs. Your first ten prints will all be other people's files — and that's exactly right.
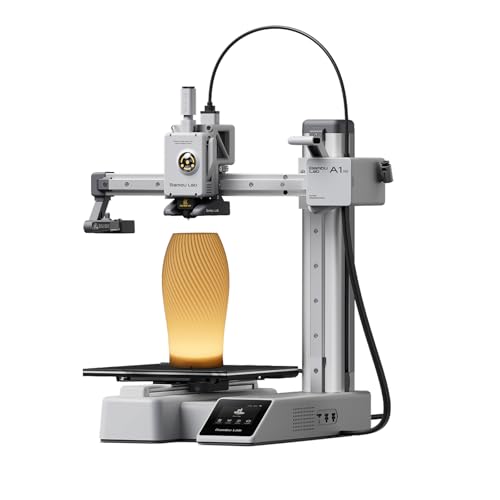
The printer is the central purchase — and the most confusing one. Short version: for your first FDM printer, buy a Bambu A1 Mini. It auto-calibrates, uses excellent slicing software, and doesn't require any tinkering to get good prints on day one. The Creality Ender 3 series is cheaper and has a massive community, but you'll spend your first weeks debugging instead of printing. For resin, Elegoo's Mars series is the clear beginner pick — small build plate, well-documented, and great community support.
3D Printers — what's the difference?
A few common shapes, each making a different trade.
A1 mini 3D Printer + LED Lamp Kit, Set Up in 20 Mins, High Speed & Precision, Full-Auto Calibration & Active Flow Rate Compensation
$234.00 as of Jun 22, 2026
★★★★★Our rating· In Stock
The best beginner FDM printer on the market. Auto-calibration means you never level the bed manually. The Bambu slicer is polished and beginner-friendly. Prints reliably on day one without any tweaking — which is rare in this hobby and exactly what a beginner needs. Multi-color printing is possible with the AMS upgrade later.
What we like
Auto-calibrates on every print — no manual bed leveling ever
Bambu Studio is the most beginner-friendly slicer available
Ships nearly ready to print straight out of the box
What to know
Costs $100+ more than Creality entry options
Semi-closed ecosystem limits third-party slicer support
Ender 3 V3 SE 3D Printer, 250mm/s High-Speed Desktop Printer, CR Touch Auto-Leveling, Sprite Direct Extruder, Dual Z-Axis, Auto-Load Filament, 8.66x8.66x9.84 Print Volume, Easy Assembly
$219.00 as of Jun 22, 2026
★★★★☆Our rating· In Stock
The sub-$200 entry point when budget is the hard constraint. Auto-bed leveling is included, which fixes the biggest pain point of older Ender 3 versions. The community is enormous — any problem you run into has been documented. Just accept that you'll be tweaking settings before your first great print.
What we like
Sub-$200 entry point for a capable FDM printer
Massive community — every problem is already documented online
What to know
More manual setup and calibration required than Bambu
Expect 1–2 hours of tinkering before your first great print
★★★★☆Our rating· Only 14 left in stock - order soon.
If you're here for miniatures — D&D figures, Warhammer models, jewelry — resin printing is the right choice and Elegoo is the right brand. The Mars 4 Ultra has a 9K monochrome screen that produces jaw-dropping detail. Read the safety section before you order: resin requires gloves, ventilation, and a wash-and-cure station adding ~$60 to your setup.
What we like
9K monochrome screen produces miniature-level detail FDM can't match
Clear beginner pick in resin with strong community documentation
What to know
Requires nitrile gloves and ventilation — non-negotiable safety setup
Needs a $60 wash-and-cure station before your first print
PLA is the filament you'll start with. Easy to print (low temp, no enclosure needed), biodegradable, and available in every color. A 1kg spool prints quite a lot — dozens of medium-sized objects. PETG is the next step up: more heat-resistant, slightly tougher, no enclosure required. Avoid ABS as a beginner — it warps without an enclosure and releases fumes. If you're on a resin printer, skip straight to the Safety section.
Best starter
Bambu Lab
PLA Basic 1kg
$$
★★★★★Our rating
If you have a Bambu printer, start with Bambu filament. It's pre-loaded in the slicer with dialed-in temperature and retraction profiles — no guessing, no tuning required. Prints reliably without babysitting. Other brands work, but this is the path of least resistance on day one.
What we like
Pre-dialed temperature profiles in Bambu Studio — zero guessing
Consistent quality with no setup for Bambu printer owners
What to know
More expensive per kilogram than third-party PLA alternatives
Matte PLA 3D Printer Filament, Dimensional Accuracy +/- 0.03 mm, 1 kg Spool, 1.75 mm, White
$
★★★★☆Our rating
The most reliable third-party PLA for non-Bambu printers. Consistent filament diameter (critical for even extrusion), good color selection, and widely available. Hatchbox has been the community-recommended entry filament for years, and the reputation is earned.
What we like
Consistent filament diameter ensures even extrusion on every print
Community-proven reliability on non-Bambu printers for years
PETG Filament 1.75mm 1kg Black 3D Printer Filament, PolyLite PETG 3D Printing Filament 1.75mm, Dimensional Accuracy +/- 0.03mm, Print with Most 3D Printers
$$
★★★★☆Our rating
When you need parts that handle heat — a car vent phone mount, an outdoor bracket, anything that'll sit in the sun — PETG is the material. Tougher and more heat-resistant than PLA without requiring an enclosure. Polymaker's prints cleanly at 230°C and is forgiving enough to be a natural second material for FDM beginners.
What we like
Significantly more heat-resistant than PLA for outdoor or car use
Prints at 230°C without an enclosure — no extra hardware needed
What to know
More prone to stringing than PLA — dial in retraction before a big print
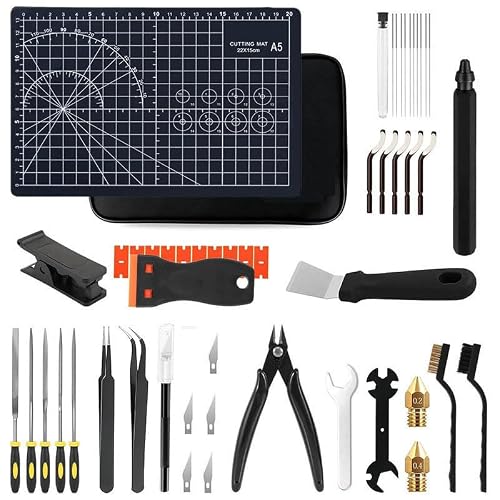
Prints don't come off the plate finished — support material needs removing, rough edges need cleaning, and prints need separating from the build surface. Three tools cover 95% of beginner needs: flush cutters for snipping supports, a spatula for removing prints, and needle-nose pliers for tricky spots. Add sandpaper (220 then 400 grit) for smooth surfaces on display pieces. That's the whole toolkit for most projects.
Best starter
YUYUEMI
52pcs 3D Printer Tool Kit
$46.27 as of Jun 22, 2026
★★★★★Our rating
A comprehensive post-processing kit in one box: flush cutters, metal scraper, needle-nose pliers, deburring tool, tweezers, and a storage bag. Everything a beginner needs to clean up prints, remove supports, and maintain the nozzle. Ships fast and covers all the bases without requiring separate research.
What we like
Complete post-processing kit in one box — no separate research needed
Includes flush cutters, scraper, pliers, tweezers, and storage bag
What to know
Tools are functional-grade, not professional quality
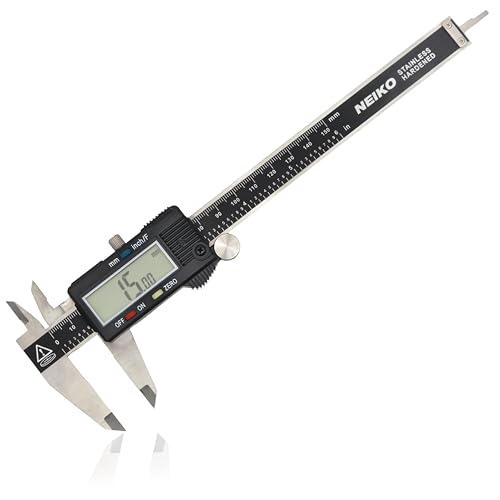
Once you're designing or customizing parts — making things fit together, checking tolerances — calipers become essential. The Neiko reads to 0.01mm and has a simple zero button. Every maker owns a pair eventually. Buy these around your third project; you'll immediately understand why.
What we like
Reads to 0.01mm — accurate enough for any hobbyist tolerance work
Zero button makes back-to-back measurements fast and simple
What to know
Overkill until you're designing your own parts to fit together
For prints that need a smooth finish before painting — display pieces, cosplay props, game terrain — superfine sanding removes the last visible layer lines and leaves a surface you can prime cleanly. The softback sponge conforms to curves better than flat paper, and a 20-pack lasts through many projects.
What we like
Flexible backing conforms to curves better than flat sandpaper
20-pack lasts through many finishing projects at low per-unit cost
What to know
Only useful for display pieces or paint prep — skip for functional prints
FDM printing with PLA has minimal safety concerns — open a window and you're fine. Resin is a different story. Uncured liquid resin is a skin sensitizer and respiratory irritant; some people develop lasting allergies without protection. Nitrile gloves are non-negotiable. A wash-and-cure station handles post-processing cleanly. An air purifier with activated carbon keeps your workspace breathable. None of this is scary with the right setup — it's just chemistry.
Best starter
Elegoo
Mercury Plus 2.0 Wash and Cure Station
$89.99 as of Jun 22, 2026
★★★★★Our rating· In Stock
Washing and curing resin prints requires two UV steps, and doing them by hand in a jar of IPA is messy and inconsistent. The Mercury Plus handles both in one unit — wash cycle with a spinning basket, then UV cure on a rotating turntable. An essential pairing with any Elegoo resin printer; designed to fit their own build plates.
What we like
Handles wash and UV cure in one unit — no separate station needed
Designed to fit Elegoo build plates with no compatibility guesswork
What to know
Required add-on to any resin printer — budget it from day one
Safe-Touch Black Nitrile Exam Gloves (Medium, 100-count)
$14.59 as of Jun 22, 2026
★★★★☆Our rating· Only 4 left in stock - order soon.
Order these before your resin printer arrives. Nitrile only — latex does not protect against liquid resin adequately. Black color makes resin contamination visible at a glance. A 100-count box lasts months at normal printing volume. This is the single most important consumable purchase for any resin setup.
What we like
Black color makes resin contamination immediately visible
100-count box lasts months at normal resin printing volume
What to know
Order before your printer arrives — this is not optional PPE
The first print is the hardest. Not because the machine is complicated — because you don't know what normal looks like yet. Here's what actually happens in your first thirty days, and how to get through the rough parts fast.
3D printing has a reputation for being finicky. That reputation is half-earned and half-outdated. A modern beginner printer like the Bambu A1 Mini prints reliably on day one. A budget Creality requires tuning. Neither is magic, and neither should take you more than a week to get working.
What actually separates the people who stick with 3D printing from the people who sell their printer after two months is expectation management. Failed prints happen — even to experienced makers. The question is whether you can diagnose them and move on, or whether you treat each one as evidence you bought the wrong thing.
Here’s what your first thirty days actually look like.
Week 1: Setup and the first successful print
Your printer arrives in a flat-pack box. Assembly ranges from fifteen minutes (Bambu) to two hours (most Creality models) to considerably longer if something is misaligned. Follow the manufacturer’s guide exactly on first setup — resist the impulse to skip ahead.
The first thing you print should be the Benchy. Search for it on Printables.com; it’s free. The Benchy is a small tugboat designed specifically as a printer calibration test: it has overhangs, bridges, a curved hull, and a tiny chimney with a hole in it. Your first Benchy will probably have issues — stringing, layer separation, a slightly saggy overhang. That’s useful information, not failure.
Slice your file in the slicer software before printing. If you have a Bambu, use Bambu Studio — it’s pre-configured for your printer and produces reliable default settings. If you have a Creality or another open-platform printer, Orca Slicer is the community choice. Don’t change the default settings on your first prints. The defaults are conservative for a reason.
Common first-week failures and what they mean:
Print not sticking to the bed — Your first layer isn’t adhering. Clean the print surface with IPA, re-run the auto-leveling routine, and try again. If it’s still not sticking, your Z offset (nozzle height) is probably too high.
Spaghetti on the plate — The print detached and the printer kept going. Stop it, clean the plate, check that auto-leveling ran correctly.
Stringing between parts — Fine wispy threads between towers or features. Increase retraction distance slightly in the slicer, or reduce printing temperature by 5°C.
Layers separating — The opposite problem: temperature is probably too low, or print speed too high for this filament.
The Bambu A1 Mini will have fewer of these on day one. The Creality will require more iteration. Both are normal.
Once you’ve printed the Benchy and one or two other test pieces, the hobby becomes a different question: what do I actually want to make?
This is where most beginners stall. The answer is always specific to your life — a cable organizer for your desk, a replacement part for a broken household item, a phone stand, a gaming piece, a custom hook for the wall. Browse Printables.com with a search term from your life rather than a generic one. “Ender 3 knob replacement” is more useful than “cool 3D prints.”
Your first real project should be something you’ll actually use. Functional objects — cable clips, organizers, mounts, brackets — are the best teachers because you immediately know if they worked. Decorative objects are fine too, but a wobbly vase is forgiven; a cable clip that snaps under load tells you something specific.
A few things you’ll learn from your first real projects:
Tolerances are tighter than you expect. If you’re designing a part that has to fit inside another part, leave 0.2–0.3mm of clearance. Printed parts are slightly oversized due to plastic expansion; two parts designed to be exactly the same size will not fit together. Add clearance in your design, or design expecting to lightly sand the mating surfaces.
Print orientation matters more than any other setting. A print is weakest along the layer lines — a part designed to snap in a direction perpendicular to the print bed will snap along those layers under load. Orient your parts so stress runs along the layers, not across them.
Infill percentage is not “quality.” Most decorative prints look identical at 15% and 40% infill. Use 15–20% for most things, 30–40% for load-bearing parts, and 100% almost never (it wastes time and material for minimal structural gain).
Week 3–4: Customizing and designing
By week three, you’ll have an opinion on what the defaults aren’t giving you. Maybe you want a part in a color Printables doesn’t have. Maybe you need something that’s almost right but not quite. This is when the design tools become worth learning.
Tinkercad is the fastest entry point. Browser-based, free, no installation required, and you can build a functional part in thirty minutes. The constraint is that everything is built from primitive shapes (boxes, cylinders, spheres) subtracted from or added to each other. That’s enough for most beginner functional parts.
Fusion 360 is the professional choice — parametric modeling, industry-standard workflow, free for personal use. Steeper learning curve but far more powerful. If you find yourself wanting to model organic shapes, complex curves, or anything with real engineering tolerances, Fusion is where you end up eventually.
Don’t try to learn CAD in week one. Your slicing settings are the first thing to master. CAD comes after you understand why a part fails — because until you’ve seen print failures, you won’t understand why certain design choices matter.
Multi-color printing is an addictive rabbit hole. If you have a Bambu printer, adding the AMS (automatic material system) attachment lets you print in up to four colors in one job. The setup is more complex (you calibrate color changes, manage filament runouts) but the results are genuinely impressive. Wait until you’ve printed at least 20 reliable single-color objects before adding this variable.
The failures that actually teach you
Every 3D printer owner has a collection of failed prints. Most of them teach you something specific:
The first time your print detaches mid-job and you come back to find a plate full of spaghetti, you learn why first-layer adhesion is so critical.
The first time a load-bearing part snaps in the direction you didn’t expect, you learn about layer orientation.
The first time a print that looked perfect on screen comes out wrong, you learn that slicers have settings that matter and that defaults aren’t always right for your filament.
The useful response to a failed print is to diagnose it, not to change five settings at once. Change one variable, print a small test, observe. The 3D printing subreddit has a remarkably good troubleshooting wiki — most failure modes have a name, a cause, and a fix.
Benchy (calibration test — the standard first print)
A simple cable organizer for your desk (functional, immediately useful)
A phone stand or wall mount (teaches orientation and tolerances)
Something for someone else — a gift, a replacement part, a personalized item (this is when the hobby becomes rewarding rather than technical)
One design you made yourself in Tinkercad or Fusion 360 (even if it’s just a box with your name on it — you’ll learn more from designing one print than downloading twenty)
By the end of month one, you’ll have a working printer, a growing pile of printed objects, a spool of filament that’s mostly gone, and an opinion on what you want to print next. That’s the hobby.
Save your money
What you don't need yet
Beginners get pressured to buy a lot of stuff that doesn't help them play
better. Here's what we'd skip on day one.
An enclosure — FDM enclosures help with ABS and high-temp materials but PLA doesn't need one. Don't add complexity until you have a specific reason — and you won't for your first twenty prints.
A multi-color AMS system — Multi-material printing is genuinely impressive, but it adds significant complexity. Learn to print reliably in single colors first. Add the AMS after your first month.
CAD software — Printables.com and Thingiverse have millions of free, tested designs. You don't need to design anything for your first ten prints, and learning CAD while also learning to print is two learning curves at once.
A second printer — Gear acquisition syndrome is real in this hobby. Master one machine first. Two printers sitting in parallel double your maintenance without doubling your output.
Specialty filaments (carbon fiber, nylon, ASA) — Standard PLA handles 90% of beginner projects. Exotic filaments require higher temps, sometimes an enclosure, and dialed-in settings. Wait until you've hit the limits of PLA on a real project.
First week
Your first seven days
A short, real plan to get from gear-on-doorstep to actually playing.
Download Bambu Studio or Orca Slicer before your printer arrives — you can import and slice files before printing anything. · Action
Bambu Studio · Official Bambu slicer — best choice for Bambu printers
Orca Slicer · Open-source slicer compatible with most printers including Bambu
Browse Printables.com and pick 3–5 objects you actually want to print in your first week. · Action
r/3Dprinting · General community — great wiki and troubleshooting
FAQ
Common questions
FDM or resin — which should I start with?
Start with FDM unless you specifically need miniature-level detail. FDM is more forgiving, cheaper to run, and doesn't require PPE. If you're planning to print D&D minis or jewelry at 28mm scale, resin is worth the safety overhead — just set up your workspace before the printer arrives.
How much does it cost to get started?
A Bambu A1 Mini plus two spools of filament and a basic tool kit runs about $350–380. If budget is tight, a Creality Ender 3 V3 SE with a spool of Hatchbox PLA gets you in for around $220 — just budget extra time for setup and calibration.
Do I need to learn CAD to 3D print?
No. Printables.com and Thingiverse have millions of free, tested designs you can download and print immediately. Most beginners print other people's files for months before designing their own. When you're ready, Fusion 360 (free for personal use) and Tinkercad (browser-based, no learning curve) are the right starting tools.
What's the Benchy and why does everyone print it?
The Benchy is a tiny boat designed as a stress test — it has overhangs, bridges, curves, and small holes all in one object. Printing it is the standard way to assess a new printer's calibration. Takes about 30 minutes and tells you everything about your machine.
How safe is resin printing?
Safe with the right setup — genuinely unsafe without it. Uncured resin is a skin sensitizer; some people develop permanent allergies from unprotected exposure. Nitrile gloves and ventilation are mandatory. Once you have those plus a wash-and-cure station, the process is straightforward. FDM printing with PLA has no significant health concerns.
Is 3D printing hard to learn?
The first two prints will be frustrating. The next twenty will feel satisfying. The learning curve is steep for week one — printer setup and slicing software — then flattens dramatically. By end of week two, most beginners are printing reliably and starting to customize designs.
r/3Dprinting — The most active general 3D printing community. The wiki and troubleshooting threads answer most beginner questions. Start here before posting your own.
Printables.com — Prusa's model-sharing hub. Better curation than Thingiverse, active remix ecosystem, and the best place to find print-tested designs.
Thingiverse — Makerbot's legacy model hub. Older interface but still the largest catalog. Good for niche objects that haven't made it to Printables yet.
Bambu Lab Wiki — Official Bambu documentation. Essential if you own a Bambu printer — covers setup, calibration, filament profiles, and troubleshooting guides.
Teaching Tech (YouTube) — The best technical YouTube channel for FDM printing. Calibration guides, material tutorials, and printer reviews that go deep without being condescending.
Maker's Muse (YouTube) — Design thinking, material science, and creative projects. Excellent once you're past setup and want to use 3D printing for real-world projects.
r/resinprinting — Resin-specific community. Excellent for exposure settings, resin comparisons, and the safety questions you should answer before your printer arrives.
Elegoo Support — Official firmware, exposure settings, and troubleshooting guides for the Mars and Saturn resin series.
As an Amazon Associate, JustBeginning earns from qualifying purchases.
We may also earn commission from other affiliate programs linked on this
page. Editorial recommendations are independent; we don't choose
products based on commission rates.
Product prices and availability are accurate as of the date and time
indicated and are subject to change. Any price and availability
information shown on Amazon at the time of purchase will apply.
Our top pickBambu Lab A1 mini 3D Printer + LED Lamp Kit, Set Up in 20 Mins, High Speed & Precision, Full-Auto Calibration & Active Flow Rate Compensation


 Best starter