Archery is more approachable than it looks, a basic recurve bow, a backyard target, and an hour of form work will have you grouping arrows in your first session. The gear decisions are real but not complicated. Here's what you actually need, and what you should skip until you know more.
By Colin B. · Published May 15, 2026 · Last reviewed August 7, 2026
A basic recurve setup (bow, arrows, arm guard, and a backyard foam target) runs $150-180. The typical beginner kit with better arrows, a quality target, and accessories lands around $280.
We earn commission on qualifying Amazon purchases — see our
affiliate disclosure.
Price tiers and budget totals shown above are editorial estimates;
actual Amazon prices vary.
At a glance
Our top pick in each category
The fastest path through this guide — each best-starter pick by category.
Scroll for the budget and upgrade alternatives.
Draw weight is the single most consequential decision, and most beginners get it wrong. Start at 25-30 lbs for adults, not the heaviest bow you can pull. Heavy draw weight teaches bad form, causes overuse injury, and won't make you more accurate. You can always move to a heavier bow in six months when your back muscles have built up.
Your arrows must match your bow. Arrow spine (stiffness) has to be matched to your specific draw length and draw weight. Mismatched arrows don't just fly inconsistently, they can be unsafe. When buying arrows, use the manufacturer's arrow selection chart with your actual draw length. If in doubt, go slightly stiffer.
Consider a beginner lesson before buying anything. Most indoor archery ranges offer 1-2 hour beginner sessions for $30-50, equipment included. Thirty minutes of supervised form instruction is worth more than a week of YouTube, and a coach can measure your draw length precisely, which determines both bow size and arrow length.
For most beginners, the choice is between a recurve takedown and a compound bow. A recurve teaches proper form from the start, the technique you build on a recurve transfers everywhere in archery. A compound bow has mechanical advantages (a let-off wheel that holds part of the weight at full draw) that make it easier to hold aim, but the setup is more complex and the gear is more expensive. Most archery programs, ranges, and coaches recommend starting on a recurve. Whatever you choose, buy from a real archery brand and choose a draw weight you can comfortably pull for 50 arrows in a row, your form breaks down when you're straining.
Bow — what's the difference?
A few common shapes, each making a different trade.
Recurve Takedown
The standard beginner recommendation. Teaches proper form, takes upgrades, preferred by most programs.
Draw weight
20-70 lbs (choose 25-30 lbs to start)
Setup
String, rest, maybe a basic sight
Upgrades
New limbs, clicker, stabilizer, competition sight
Best for Beginners, anyone interested in Olympic-style or traditional archery
Tradeoff Harder to hold at full draw than compound, no mechanical let-off
The Sage is the bow most archery instructors recommend. It's a proper takedown recurve, the limbs unscrew and can be upgraded independently when you're ready for a heavier draw weight. Right-hand and left-hand versions available, in draw weights from 25 to 60 lbs. Buy the 25 or 30 lb version to start and you'll be shooting correctly within a few sessions, not fighting your equipment.
What we like
Limbs unscrew and upgrade independently as you progress
Available in left or right hand, 25-60 lb draw weights
Trusted by archery instructors and range programs worldwide
What to know
No let-off, requires full draw weight held until release
Needs a bow stringer and basic setup before first use
A step below the Sage in finish and brand heritage, but a real recurve at a lower entry price. The Spyder XL has the longer riser that most adult beginners need (68" bow, better for draw lengths over 28"), and it takes standard ILF limbs so you can upgrade. A legitimate starter option if budget is the constraint.
What we like
68" riser suits adult draw lengths over 28" well
Takes standard ILF limb upgrades like pricier risers
What to know
More variable QC than Samick, inspect limbs carefully on arrival
Less established brand reputation in the archery community
When you're ready for compound, or if you know from the start that compound is your path, the Cruzer G3 is the most recommended beginner compound. Adjustable draw weight (5-70 lbs) and draw length (12-30") mean it grows with you instead of getting outgrown in a year. Bear is a legitimate archery brand, and the Cruzer ships ready to shoot with a sight, arrow rest, and wrist sling included.
What we like
Adjustable 5-70 lb draw weight grows with your strength
Ships ready to shoot with sight, rest, and wrist sling included
What to know
Needs pro shop setup for accurate draw length adjustment
Compound technique doesn't transfer back to recurve archery
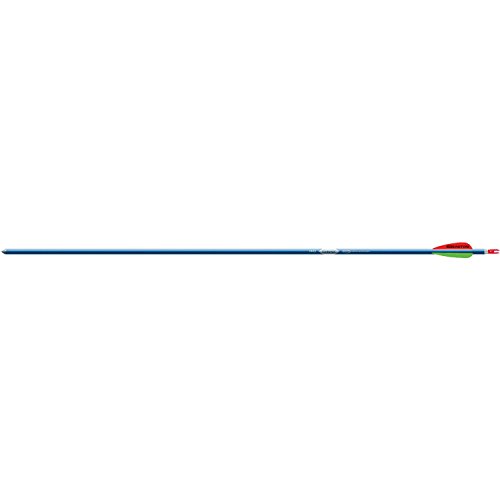
Arrows are more consequential than most beginners realize. Every arrow has a 'spine' rating, a stiffness number that must match your bow's draw weight and your draw length. Mismatched arrows wobble in flight and group poorly no matter how good your form is. Buy arrows specifically selected for your setup, not whatever looks like a deal. For most recurve beginners (25-35 lb draw), a spine around 500-600 is right. Carbon arrows are the modern standard: lighter, faster, and more forgiving than aluminum for most practice use.
Best starter
Gold Tip
Traditional XT Shafts (12-pack)
$$
★★★★★Our rating
Gold Tip makes the standard arrows for recreational recurve archers. The Traditional XT has a wood-grain finish that looks right on a recurve, all-carbon construction for durability, and shafts come in multiple spine sizes to match your draw weight and draw length. Buy the 500 spine for most beginner recurve setups (25-40 lb draw).
What we like
All-carbon construction more durable than aluminum shafts
Multiple spine sizes match your exact draw weight and length
What to know
Sold as bare shafts, nocks, inserts, and points sold separately
Must use spine chart to order correct stiffness for your setup
The Genesis is the official arrow of the National Archery in the Schools Program, it's literally what millions of beginners use to learn archery under coached conditions. One-size-fits-all spine works across a wide range of draw weights, which makes them forgiving of the arrow-selection math. Great arrows if you're not sure of your exact draw length yet. Six-pack is plenty to start.
What we like
Official arrow of the National Archery in the Schools Program
One-size-fits-all spine works across a wide draw weight range
What to know
Limited ceiling, you'll outgrow them once form becomes consistent
Once your form is consistent, properly-spined arrows make a visible difference in grouping. The Maxima Pro Recurve has tighter spine tolerancing than beginner options, designed specifically for recurve target archers. You'll feel the improvement once your form is solid enough to reveal it. Not worth the upgrade until you've been shooting for 2-3 months.
Two pieces of safety gear are non-negotiable for recurve archers: an arm guard and finger protection. The arm guard protects your bow arm from string slap, which will absolutely happen without it, especially early on. Finger protection (a tab or glove) keeps the string from cutting into your fingers and, more importantly, lets you release cleanly. A rough release from bare fingers drags the string and throws your shot.
Best starter
Neet
T-AGL-6 Armguard (Lace-On Suede)
$23.99 as of Jun 22, 2026
★★★★★Our rating· Only 1 left in stock - order soon.
Neet has made archery arm guards for decades and the T-AGL-6 is the standard recommendation for beginners. Traditional lace-on suede leather, six-inch coverage, snug and adjustable fit. String slap without an arm guard hurts enough to make you flinch, which ruins form. Buy this before your first arrow.
What we like
Six-inch lace-on coverage protects the full bow arm
Traditional suede leather construction that lasts for years
What to know
Lace-on takes slightly longer to put on than Velcro designs
A leather finger tab protects all three drawing fingers and releases faster and more consistently than a glove. The Pak-Tab is reversible for right or left hand, grip-tite cushion won't absorb moisture, and can be used with or without a finger spacer. Takes about two sessions to adapt to, then you won't shoot without it.
What we like
Reversible design works for both right and left hand archers
Grip-tite cushion releases the string cleanly without drag
What to know
Sized, must measure your fingers before ordering
Takes 1-2 sessions to adapt after shooting with bare fingers
A shorter, more minimal arm guard option from Neet. The N3V has three nylon reinforcement staves, elastic Velcro straps, and ventilation for hot-weather sessions. Slightly less coverage than the T-AGL-6 but lighter and less bulky, the right pick if a full lace-on guard feels like too much.
What we like
Elastic Velcro straps attach and adjust in seconds
Ventilated design stays comfortable in warm-weather sessions
A self-healing foam target is the standard for backyard and indoor practice. The foam compresses around the arrow tip and expands back when you pull it out, so each shot doesn't permanently damage the target. You want something thick enough to stop arrows at your expected distance (10-20 yards for most beginners), and rated for the bow type. Paper targets work only behind a proper backstop (a bale of straw works, a fence doesn't). Budget at least $50 for a target that lasts a season.
Best starter
Morrell
Yellow Jacket YJ-425 Archery Target
$65.52 as of Jun 22, 2026
★★★★★Our rating· In Stock
The Yellow Jacket is the go-to beginner archery target. Dense self-healing foam, rated for both recurve and compound, and sized appropriately for practice at 10-25 yards. Arrows pull out cleanly without tearing the foam. It'll last at least a full season of regular practice, and Morrell backs it with a warranty.
What we like
Self-healing foam stops arrows cleanly and pulls out easily
Rated for both recurve and compound, lasts a full season
What to know
Field points only, hunting broadheads will damage the foam
Four shootable sides, self-healing foam, and an easy arrow-pull design. The Black Hole is great for beginners who want to practice from multiple angles or rotate sides as they wear. Slightly smaller face than the Yellow Jacket, better if you're shooting in a tighter space.
What we like
Four shootable sides significantly extend the target's lifespan
Easy arrow-pull design won't fatigue your hands between sets
What to know
Smaller face than the Yellow Jacket, tighter practice area
★★★★☆Our rating· Only 8 left in stock - order soon.
Eighteen different target faces across four sides, great for beginners who get bored with a static bullseye and want to mix up practice. Self-healing foam, lightweight enough to move around. Excellent once you're grouping arrows consistently and want more variety in your practice sessions.
What we like
18 target faces across 4 sides keeps practice sessions fresh
Self-healing foam and lightweight enough to reposition easily
What to know
Costs more than the Yellow Jacket for similar foam performance
Best value only once you've established consistent grouping
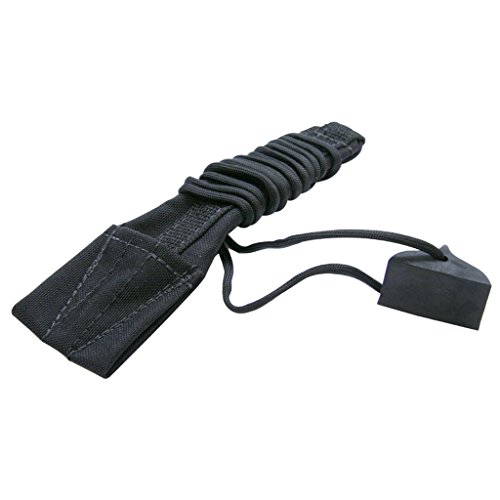
Three items round out a complete beginner recurve setup: a bow stringer, a quiver, and eventually a basic sight. The bow stringer is the most urgent, it's the tool that lets you string and unstring your recurve safely. Stringing a recurve by hand (the step-through method) can torque and damage the limbs; a stringer costs $10 and takes 30 seconds. A hip quiver keeps arrows within reach and off the ground during practice. A simple pin sight can come after your first few sessions once you're confident in your form.
Best starter
Selway
Limbsaver Bow Stringer
$18.69 as of Jun 22, 2026
★★★★★Our rating· Only 3 left in stock - order soon.
Every recurve archer needs a bow stringer, it's the safest way to string and unstring your bow, and it prevents limb twist that ruins accuracy. The Selway design works with almost all recurve bows and lasts essentially forever. Buy this before you try to string your bow any other way.
What we like
Prevents limb twist that silently ruins bow accuracy over time
Works with virtually every recurve bow on the market
What to know
Requires learning correct technique, takes a few tries to master
★★★★☆Our rating· Only 12 left in stock (more on the way).
A side quiver keeps your practice arrows accessible and protects the fletching between shots. The Allen Sidekick attaches to a belt, holds arrows securely without scuffing vanes, and has a small accessory pocket for a tab or a small tool. Nothing fancy, but it does the job and will outlast several seasons of regular practice.
What we like
Belt-clip keeps arrows within reach at the shooting line
Small accessory pocket holds a finger tab or scoring pencil
What to know
Budget construction, not as durable as leather hip quivers
A 3-pin sight makes a visible difference once your form is consistent, repeatable aiming reference means tighter groups at longer distances. The Apex Tundra is lightweight and compact with a protected fiber-optic pin and tool-free windage and elevation adjustment. Wait until you've had 5-10 sessions before adding a sight, it masks form errors when added too early.
What we like
Tool-free windage and elevation adjustment for quick zeroing
Fiber-optic pins stay visible in low-light shooting conditions
What to know
Masks form errors if added before consistent anchor is built
Pin gap requires distance estimation, no magnified scope
Archery has a counterintuitive learning curve: you hit the target your first day, then spend two weeks confused why you can't repeat it. By week four, something locks in (the anchor, the back tension, the release) and consistency follows almost automatically.
Archery sits at an unusual intersection of patience and precision. The physics are simple: you pull a string, you release, an arrow flies toward a target. The hard part is that every inconsistency in your body (a slightly different anchor, a tense shoulder, a finger that drags on the string) shows up in the arrow. The target doesn’t lie, and it’s unforgiving in a way that’s actually motivating once you understand what it’s telling you.
This is what your first month looks like, and what to focus on to make the improvement curve as steep as possible.
Before your first shot: get measured
The single most useful thing you can do before buying a bow is measure your draw length: the distance from the bow grip to where your draw hand anchors at full draw. This number determines your bow size and, critically, your arrow length.
The rough formula: wingspan in inches ÷ 2.5 = draw length in inches. Measure your wingspan fingertip to fingertip, standing naturally against a wall. A 70-inch wingspan gives a 28-inch draw length. This is approximate (a range visit or a coach’s measurement is more precise), but it’s close enough to order from.
Why does this matter? An arrow cut for a 28-inch draw length shot from a bow set for a 26-inch draw length won’t fly right no matter what you do. Arrow spine (stiffness) is also selected by draw length. Skipping this step and buying “standard” arrows first is the most common expensive mistake beginners make.
Week one: learn the form before the accuracy
Most beginners show up, pull a bow, and aim at the target. That’s understandable, but it’s the wrong sequence. Accuracy is the output of correct form, not something you aim your way into.
The core form sequence has ten steps: stance, grip, hook, set, pre-draw, draw, anchor, aim, release, follow-through. You don’t need to memorize all ten by name, but you do need to understand each one before you start burning in bad habits. Watching NUSensei’s beginner series on YouTube (about 45 minutes total) before your first session changes the entire arc of your first month.
A few things that matter most early:
The grip. Hold the bow with a relaxed, open hand, the bow should rest against the meaty pad of your thumb, not be gripped. A tight grip torques the bow on release and scatters arrows. Counterintuitive, but you’re holding a bow that wants to fall, and your instinct is to grip it harder. Resist that. Fingers slightly curled, relaxed.
The anchor. Every recurve archer anchors their draw hand in the same spot on their face, every single time, typically the index finger touching the corner of the mouth, or the thumb under the jaw. Find one anchor point and use it identically on every shot. Inconsistent anchor = inconsistent results, regardless of everything else.
Back tension. The release should come from squeezing your shoulder blades toward each other (back muscles pulling the draw arm back), not from opening your fingers. When you “let go” with your fingers rather than drawing through with your back, the string travels with your hand and kicks the arrow sideways. This is the hardest beginner habit to build because fingers-open feels natural and back-tension feels weird until it doesn’t.
Your first week goal is not accuracy. It’s building these three mechanics until they feel normal.
Week two: distance and repetition
By the end of week one, you should be grouping, meaning your arrows are landing in roughly the same part of the target, even if that part isn’t the bullseye. Grouping means your form is becoming consistent. Once you’re grouping, you can aim, because now you have a repeatable action to aim with.
Start at 10 yards and stay there until you’re regularly getting 6 of 6 arrows in a 12-inch circle. This sounds very close and easy. It isn’t, yet. Once you can do that consistently, move to 15 yards. Then 20.
The urge to shoot at 20-30 yards in week two is strong. Resist it. Every yard of distance magnifies form errors by an equal factor. What’s a 2-inch error at 10 yards becomes a 6-inch error at 30. More distance before consistent form produces nothing but frustration and reinforced bad habits.
One tool that accelerates week two improvement: video yourself from behind and from the side. You cannot see your own anchor or your own release, and a 10-second video clip catches things you’ll never notice in the moment. The r/Archery subreddit has a regular form critique thread where experienced archers give specific, useful feedback.
Week three and four: when it starts clicking
Somewhere in weeks three or four, you’ll have a session where everything feels different. The draw feels smooth, the anchor is automatic, and the arrows land where you were looking. Not every shot, but enough of them that you know the feeling now.
This is when the sport becomes genuinely addictive. The gap between your best shots and your worst shots narrows. You start understanding what a bad shot felt like before it landed. You start diagnosing your own errors: too low means high anchor or early release, right-side groups means plucking the string, high and right (for right-handed archers) usually means anticipating the release and dipping the bow arm.
The archery feedback loop (release, watch, retrieve, understand) runs faster than almost any other precision sport. You get 50 reps in an hour. Each arrow tells you something.
A few things to add in weeks three and four:
An arm guard if you haven’t already. String slap without an arm guard hurts enough to make you flinch at the moment of release, which destroys consistency. If you’ve been shooting without one, this explains groups that should be tighter.
Keep a shot journal. Not long, just a note after each session of what worked and what didn’t. “High anchoring: raised two inches, shot dropped.” “Best session: back tension was clicking, 8/10 in the ring at 15 yards.” Two months of this and you have a map of your own form.
The most common beginner mistake after the first few weeks is jumping draw weight too fast. You’re grouping at 20 yards, and 25 lbs feels easy, so you jump to 35. Then 45.
Here’s what actually happens: your form was built at 25 lbs. At 45 lbs, you can’t hold the draw as long, your back muscles fatigue faster, and your anchor shifts under the strain. Groups get worse, not better. Many beginners misattribute this to needing more practice, practice more, and cement in form errors that take months to undo.
The right progression: add 5 lbs when you can shoot 100 arrows in a session at current draw weight without your form degrading in the last 30. That’s the signal your back and shoulder muscles have caught up. Most adults go from 25 to 35 lbs over three to six months. Faster isn’t better.
What to focus on at month two
By the end of month one, you have the basics: consistent form, repeatable anchor, and a feel for what a good shot is versus a bad one. Month two is about making the good shots the default.
A few things that accelerate the slope here:
Take one lesson. A single hour with a qualified archery coach around week 4-6 is more valuable than it was at week zero, now you have enough context to understand what they’re telling you and enough form developed for them to work with. They’ll identify the one or two things actively limiting your grouping.
Shoot more arrows per session, not more sessions. Volume is what builds consistency. 100 arrows in one session beats 30 arrows in three sessions.
Try an indoor range. Controlled conditions, marked distances, standardized target faces. Indoor leagues and open practice sessions are where most serious recreational archers spend their time. They’re also a fast track to meeting archers at your level and better.
Archery is a genuine lifetime sport. The gap between beginner and intermediate is about six months of regular practice. From there, the ceiling is wherever you want to put it.
Save your money
What you don't need yet
Beginners get pressured to buy a lot of stuff that doesn't help them play
better. Here's what we'd skip on day one.
A stabilizer — The long rod that sticks out from competition recurves reduces wobble and adds vibration dampening. Useful at intermediate level. Day one, it's just extra weight and an extra thing to adjust.
A clicker — Olympic recurve archers use a clicker to confirm consistent draw length on every shot. You need months of consistent form before a clicker helps rather than confuses you.
A release aid for compound — Mechanical releases (wrist strap or index-finger trigger) improve compound accuracy significantly, once you have the form to benefit. Most coaches recommend bare fingers or a basic glove for the first few sessions even on compound.
Broadhead arrows — Hunting-tip arrows require their own tuning and different spine selection. They'll also destroy your practice target. Field points only until you're actively hunting.
A carbon-fiber riser upgrade — The riser (the handle section of a takedown recurve) is legitimately upgradeable. Wait until you know you're committed and have a coach recommend the next step, this is a $300-800 purchase that only matters at an intermediate level.
First week
Your first seven days
A short, real plan to get from gear-on-doorstep to actually playing.
Find a local archery range and book a beginner session. Most ranges offer 1-2 hour intro lessons for $30-50 including equipment, this gets you measured for draw length before you buy anything. · Action
Learn the 10-step form before you pull the bow. Stance, grip, hook, set, pre-draw, draw, anchor, aim, release, follow-through. NUSensei's beginner playlist covers all ten in under an hour. · Learn
Set up your target at 10 yards and shoot 50-100 arrows your first session focusing entirely on form, not where they land. · Action
FAQ
Common questions
Recurve or compound for a beginner?
Recurve for most people. It teaches proper form, back tension, clean release, consistent anchor, that transfers to every archery discipline. Compound has mechanical advantages (let-off makes it easier to hold at full draw) but the setup is more complex and the technique is less transferable. If you know you want to hunt or compete in 3D archery, start compound. Everyone else: start recurve.
What draw weight should I start with?
25-30 lbs for most adults. That's much lighter than you think you need, and that's fine. Form breaks down when you're straining. With 25-30 lbs you can shoot 100 arrows in a session with clean form and actually improve. Most beginners try to skip to 40-50 lbs and spend their first months fighting their equipment. Start light, build up over 6-12 months.
How do I know what arrows to buy?
Use the arrow manufacturer's spine selection chart with your draw weight and draw length. Arrow spine (stiffness) must match your setup, a mismatch causes inconsistent flight no matter how good your form is. For most adult beginners on a 25-35 lb recurve, a 500-spine carbon arrow in the right cut length is the starting point. When in doubt, go slightly stiffer (lower spine number = stiffer = more forgiving of user error).
Can I practice archery in my backyard?
In most areas yes, with two conditions: a safe backstop behind the target (not a fence, straw bales, thick foam panels, or a purpose-built range net) and a clear lane with no people or property beyond the backstop. Check local ordinances; many municipalities allow backyard archery with a proper setup. The safest practice distance for beginners is 10-15 yards.
How long until I can shoot accurately?
You'll hit the target your first session. Consistent grouping, where most arrows land in a predictable cluster, usually arrives around weeks 3-6, once the form steps become automatic. The accuracy improvement from week one to week eight is dramatic. The improvement from week eight to week twenty is real but slower.
Do I need to join a club to learn archery?
No, but a range visit or two is strongly recommended at the start. A single supervised session gets your draw length measured, your stance corrected, and catches bad habits before they're ingrained. After that, solo backyard practice is completely viable. Joining a club accelerates improvement through coaching and access to longer distances, but it's optional once you have the fundamentals.
USA Archery — The national governing body. Find clubs, coaches, and beginner programs. Their 'Learn to Shoot' resources are free and well-structured.
World Archery — International federation. Good for following competition and understanding the Olympic disciplines.
NUSensei (YouTube) — The most thorough beginner archery channel online. Patient, well-organized, covers the 10-step form, equipment selection, and common mistakes. Start here.
World Archery TV (YouTube) — Free international competition footage. Watching Olympic recurve finals teaches you what clean form looks like at the elite level.
Archery Talk — Largest archery forum online. Skip the brand debates; search for form critique posts and equipment selection threads.
National Archery in the Schools Program — The NASP runs youth archery programs in thousands of schools. Their equipment standards (Genesis compound, Easton arrows) are a useful baseline for beginners of any age.
r/Archery — Active community with a detailed wiki. Post your form on video and the regulars will critique it, genuinely useful feedback for self-taught beginners.
As an Amazon Associate, JustBeginning earns from qualifying purchases.
We may also earn commission from other affiliate programs linked on this
page. Editorial recommendations are independent; we don't choose
products based on commission rates.
Product prices and availability are accurate as of the date and time
indicated and are subject to change. Any price and availability
information shown on Amazon at the time of purchase will apply.


 Best starter