Astrophotography is photography at its most extreme: camera pointed at the sky, sensor collecting light for minutes at a time. The reward is your own images of the Milky Way, nebulae, and star clusters invisible to the naked eye. The bad news: the learning curve is real and the gear matters. Here's exactly what you need for your first night out, and what you don't.
By Colin B. · Published May 24, 2026 · Last reviewed June 9, 2026
Canon EOS Rebel SL3
— The lightest DSLR Canon makes, with live-view that makes manual star focus actually doable.
Budget total
$400
Typical total
$900
Your first setup (tracker, camera body, and widefield lens) runs $850-950 from scratch. If you already own a camera, the tracker and lens alone cost $550-600. Costs drop significantly with a used DSLR body.
We earn commission on qualifying Amazon purchases — see our
affiliate disclosure.
Price tiers and budget totals shown above are editorial estimates;
actual Amazon prices vary.
At a glance
Our top pick in each category
The fastest path through this guide — each best-starter pick by category.
Scroll for the budget and upgrade alternatives.
The single biggest mistake beginners make is spending on a telescope or a fancy camera when the mount is what actually limits their results. If your tracker is too cheap or too shaky, a $3,000 lens won't save the shot. Start with a solid tracker, a capable DSLR, and a fast widefield lens. In that order. The note is especially true here: beginners wildly overspend on aperture and underspend on mounts.
Your first target is the Milky Way, not nebulae or galaxies. Widefield Milky Way photography (a DSLR on a star tracker with a 14mm f/2.8 lens) is both the entry point and the most forgiving introduction to long-exposure work. Deep-sky objects (nebulae, galaxies, clusters) require more gear, more patience, and a steeper processing curve. Learn widefield first.
Dark sky access matters as much as any gear purchase. A modest setup at a genuinely dark site (Bortle 4 or lower) beats an excellent setup in a suburban backyard. Plan on driving 60-90 minutes from a major metro for your first shoots. Apps like Light Pollution Map and Clear Dark Sky will tell you exactly how dark any location is before you make the trip.
The mount is the single most important piece of gear in astrophotography, and the one beginners most often underbuy. The Earth's rotation smears stars into trails after about 25 seconds without compensation. A tracker counteracts that rotation, letting your sensor soak up light for two, three, or five minutes instead. The result is dramatically more detail and less noise. Don't scrimp here to buy a fancier lens or scope. A solid tracker with a modest lens beats a beautiful lens on a shaky mount every single time.
Star Tracker Mounts — what's the difference?
A few common shapes, each making a different trade.
Compact Single-Axis Tracker
Widefield and Milky Way. Portable enough for carry-on travel.
Payload
2–5 lbs
Best for
14–85mm lenses
Setup time
10–20 min
Best for Beginners, widefield Milky Way, travel astrophotography
Tradeoff Not enough payload for small telescopes or heavy telephotos
Automated pointing and tracking. The mount finds targets for you.
Payload
20–40 lbs
Best for
Telescopes
Setup time
30–60 min
Best for Dedicated deep-sky imaging with a full telescope rig
Tradeoff Expensive; requires a semi-permanent setup to justify the complexity
Budget pick
Sky-Watcher
Star Adventurer Mini
$$
★★★★☆Our rating
The Mini is the lightest capable tracker made: 2.2 lbs and fits in any camera bag. It handles a DSLR plus a lens up to 200mm and will keep the Milky Way sharp for 3-4 minute exposures at 14mm. If you're not sure astrophotography will stick, this is the low-commitment way in before spending more on the full 2i.
What we like
Lightest capable tracker made: 2.2 lbs fits in any camera bag
5-hour battery life on 4 AA batteries
Accurate enough for widefield Milky Way at 14mm focal length
What to know
3.3 lb payload limit: no small telescopes, only camera + lens
No WiFi or app control: all settings are physical dials
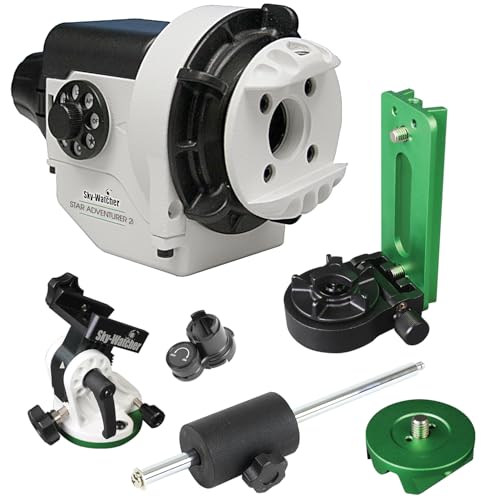
The 2i is the tracker most astrophotographers recommend for beginners. A 5 lb payload handles any DSLR with a widefield lens, the built-in polar scope makes alignment learnable rather than mysterious, and WiFi control from your phone means fewer frozen-finger moments during polar alignment setup. The community is massive, with tutorials for every problem you'll run into.
What we like
5 lb payload handles any DSLR + widefield lens with room to spare
Built-in polar scope makes polar alignment learnable, not guesswork
WiFi app control: adjust settings from inside a warm car
What to know
Polar alignment still takes 20 minutes to master the first few times
When you're ready to shoot deeper-sky objects at 300-600mm, the SkyGuider Pro's 11 lb payload and built-in counterweight shaft keep heavy setups properly balanced. It's the entry point for serious telephoto deep-sky work, where galaxies and nebulae start replacing Milky Way wide-fields in your portfolio.
What we like
11 lb payload fits a small telescope or heavy telephoto lens
Built-in counterweight shaft stabilizes heavy loads properly
Dual-axis tracking improves accuracy at longer focal lengths
What to know
More complex setup than compact trackers
Significant price jump over the Star Adventurer 2i
Almost any modern DSLR or mirrorless camera can do astrophotography. The key spec is high-ISO noise performance: how much detail your sensor extracts at ISO 1600–6400. Full-frame sensors have larger pixels that collect more light; APS-C sensors are smaller and cheaper but very capable for widefield work. Start with whatever you already own. If buying new, the camera body matters less than the tracker and lens combination.
Budget pick
Canon
EOS Rebel T7
$$
★★★★☆Our rating
The cheapest new DSLR worth buying for astrophotography. The APS-C sensor handles ISO 1600-3200 with acceptable noise, the Canon EF lens ecosystem means cheap fast primes are abundant, and the beginner community is enormous. It's not the best high-ISO performer, but it's honest: a capable entry point that won't hold you back in year one.
What we like
Cheapest new Canon DSLR, with a huge YouTube tutorial community
Kit lens included for general daytime photography
Works with Rokinon/Samyang astro lenses via Canon EF mount
What to know
Higher noise at ISO 6400+ than newer APS-C sensors
Older processing engine that shows its age in very long exposures
The lightest DSLR Canon makes at 14 oz, with a touchscreen live-view that makes manual focus on faint stars genuinely workable. The improved sensor shows real differences at ISO 3200-6400, and the weight savings matters when you're on a cold hillside at 2am waiting for your tracker to reach equilibrium.
What we like
Lightest DSLR Canon makes at 14 oz, welcome on cold late-night hikes
Touchscreen live-view makes manual star focus much easier
Lower noise than the T7 at ISO 3200-6400, giving cleaner sky backgrounds
What to know
Kit 18-55mm lens is too slow (f/3.5-5.6) for astrophotography
APS-C sensor; 1.6x crop factor applies to all focal lengths
The ZWO ASI533MC is where dedicated astrophotographers land for deep-sky work. A cooled CMOS sensor suppresses thermal noise by 30-40°C below ambient, and the square 9MP chip eliminates corner vignetting. It requires a laptop and capture software (not a first camera), but the results justify it for serious deep-sky imaging.
What we like
Active cooling suppresses thermal noise by 30-40°C below ambient
Square sensor eliminates corner vignetting from telescope light cones
USB 3.0 + 256MB onboard buffer for long uninterrupted sessions
What to know
Requires laptop + capture software: no standalone use at all
Much more expensive than a DSLR for entry-level deep-sky work
For your first Milky Way shot, you want a fast lens (f/2.8 or faster) at a wide focal length (14–24mm on full-frame, or 10–16mm on APS-C). Wide angle captures more sky per frame; fast aperture collects more light per second. You're going to focus manually on stars at infinity anyway, so autofocus performance is irrelevant. Rokinon and Samyang make excellent manual-focus astro lenses for a fraction of what Canon or Nikon charge, and most astrophotographers buy them over name-brand glass.
Best starter
Rokinon
FE14M-C 14mm f/2.8 IF ED Lens for Canon EF
$$$
★★★★★Our rating
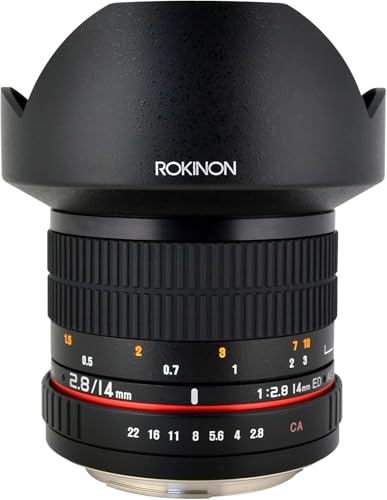
The Rokinon 14mm f/2.8 is the entry-level standard for Milky Way photography. Manual focus only, some corner star distortion wide open, but it delivers real astrophotography results for around $300. Available in Canon EF, Nikon F, Sony E, and most major mounts. More astrophotographers start here than on any other lens.
What we like
Available for Canon, Nikon, Sony, and Fuji (all major mounts)
f/2.8 gathers enough light to show the Milky Way clearly
Massive astrophotography community with tutorials and settings everywhere
What to know
Corner coma visible at f/2.8: stars bloom slightly at the edges
★★★★☆Our rating· Only 4 left in stock - order soon.
The Sigma 14mm f/1.8 Art is the best widefield astro lens for most photographers: a full stop faster than the Rokinon, with corner-to-corner sharpness and minimal coma even wide open. At f/1.8 you're collecting twice as much light per second as f/2.8, which translates directly to sharper stars and cleaner sky backgrounds. Expensive, but worth it once astrophotography becomes a real habit.
What we like
A full stop faster than f/2.8: collects twice the light per second
Corner-to-corner sharpness even wide open at f/1.8
Minimal coma and chromatic aberration by any standard
What to know
Expensive: hard to justify until astrophotography is a real habit
Heavy at 1.2 lbs, eating into your tracker's payload budget
Your tripod needs to hold your camera and tracker rigid through a 5-minute exposure: any flex in the legs or ball head introduces blur. Heavy and solid beats light and wobbly for night sky work. If you're hiking to dark sites, a travel-sized tripod that locks firm is the better trade. Skip anything under $50; the legs flex in a breeze and your long exposures blur.
Budget pick
AmazonBasics
Amazon Basics 60-Inch Lightweight Tripod with Bag
$25.99 as of Jun 22, 2026
★★★★☆Our rating· In Stock
The AmazonBasics 60-inch handles a DSLR and compact tracker adequately on calm nights for under $40. It's not our first choice (the ball head is stiff and the legs flex slightly in wind), but it works, and starting cheap before you know if you'll keep shooting is reasonable.
What we like
Under $40: low-stakes way to start before upgrading
Handles up to 6.6 lbs, adequate for a DSLR + compact tracker
What to know
Legs flex in wind; breezy nights will blur long exposures
Ball head lacks the damped movement of proper photo tripods
Solid aluminum legs, a smooth ball head, and a 67-inch working height that's comfortable with a star tracker mounted on top. The locking mechanism holds firm through 2-minute exposures on calm nights. Under $80, with no meaningful compromise for night sky use.
What we like
Ball head locks firm through 2-minute tracked exposures
67-inch height comfortable with a star tracker mounted on top
Under $80 with no meaningful compromise for night sky use
What to know
Ball head stiffer than mid-range tripods during initial positioning
All-aluminum adds weight vs. carbon fiber: heavier to haul
Three small purchases that pay off immediately: a remote shutter release prevents camera shake during long exposures, a red-light headlamp preserves your night vision while you work (white light destroys dark adaptation in seconds), and a light pollution filter gives you a fighting chance when you can't reach truly dark skies. All three together cost under $120.
Best starter
Pixel
TW-283 E3 Wireless Remote Shutter Release
$39.99 as of Jun 22, 2026
★★★★★Our rating· In Stock
A remote shutter release is the most impactful $20 accessory in astrophotography. Pressing the shutter physically vibrates the camera for a full second, enough to blur a 2-minute exposure. A wired or wireless remote triggers the shutter without contact and lets you program automatic exposure sequences to run unattended.
What we like
Prevents camera shake from physically pressing the shutter button
Programs automatic exposure sequences to run unattended
What to know
Check compatibility: Canon, Nikon, and Sony need different connectors
The Black Diamond Spot has a true red LED mode that preserves your night vision while you set up gear, check polar alignment, or consult a star chart. It's the headlamp most night-sky photographers own because it's waterproof, genuinely bright, and the red mode is actually red, not pink.
What we like
True red LED preserves night vision while you adjust gear
Waterproof, reliable when dew is in the air at 2am
What to know
Even dim red light resets night vision if too bright: use lowest setting
★★★★☆Our rating· Only 16 left in stock - order soon.
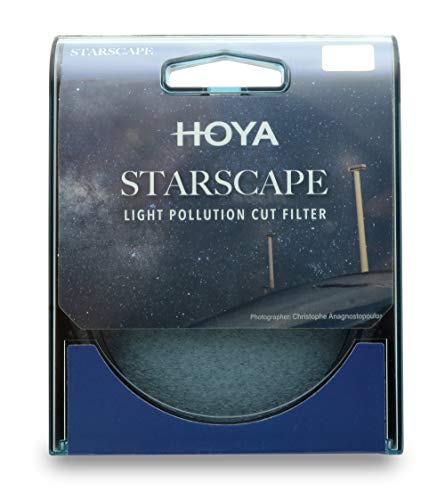
The Hoya Starscape cuts wavelengths from mercury-vapor and sodium streetlights while passing hydrogen-alpha emissions from nebulae. In Bortle 5-7 skies, the difference in contrast is visible. Not a substitute for a dark site, but a meaningful upgrade when you can't drive 90 minutes away from city glow.
What we like
Cuts sodium and mercury streetlight wavelengths, recovers contrast
Visible improvement in Bortle 5-7 suburban skies
What to know
No substitute for dark skies: won't work in heavy light pollution
Must match your lens's filter thread diameter exactly
Every astrophotographer has the same first-night story: they drove somewhere dark, set up their gear, stared at the screen, and came home with a folder full of blurry stars and orange sky glow. This is normal. It’s not a sign that you’re doing it wrong: it’s a sign that you’re learning a hobby with a real technical floor, and you’re not at it yet.
Here’s what those first three nights actually look like, and what to do differently on each one.
Night one: everything takes longer than you think
You will spend the first night mostly on setup. This is not wasted time. This is the first night.
Polar alignment is the thing nobody warned you about. To track the stars accurately, your mount’s rotation axis has to point at Polaris (the North Star). This sounds easy. It takes 20-30 minutes the first time, involves a small polar scope inside the mount, and requires adjusting three different axes while looking through a tiny eyepiece. You will do it wrong twice before you get it right. This is fine.
The payoff: once you’re polar aligned, the tracker can follow a star for minutes without it drifting off-frame. Without alignment, even a $600 tracker produces blurry stars after 20 seconds.
Focusing on stars is the second surprise. Your lens’s infinity mark is not actually infinity: autofocus can’t find stars in the dark, so you focus manually by zooming to 10x live view, pointing at a bright star, and turning the focus ring until the star is the smallest point possible. The star will bloom into a large circle when the lens is out of focus. When it collapses to a sharp point, you’re there.
Set your camera to: ISO 1600, aperture wide open (f/2.8), shutter at 25 seconds. Take a test shot. Look at what you got. The Milky Way probably looks faint and orange at the edges. This is normal.
Night two: you understand what you’re trying to do
Come back with two improvements: a better polar alignment routine, and a plan for what you’re actually shooting.
The 500-rule and why you’re ignoring it. Divide 500 by your focal length and that’s your maximum exposure time without star trails. At 14mm, that’s about 35 seconds. But if your tracker is working, you’re ignoring this rule: the tracker is compensating for Earth’s rotation, so you can shoot 3-5 minute exposures and get dramatically more light. The difference between a 30-second untracked shot and a 3-minute tracked shot is enormous.
Stacking is where the magic happens. You’re going to take 15-20 exposures of the same patch of sky and combine them in software (DeepSkyStacker, free). Each individual frame has a lot of noise. When you stack them, the noise averages out and the real signal (the stars, the nebulosity, the dust lanes) gets stronger. One image looks like a noisy mess. Twenty stacked images look like astrophotography.
Also take dark frames: 10-15 exposures at the same ISO and shutter speed with the lens cap on. Dark frames capture the sensor’s thermal noise pattern and subtract it from your light frames during stacking. Takes five minutes and improves your results visibly.
On night two, you probably don’t get the shot you imagined. You get something interesting, and you start to understand the process well enough to know exactly what went wrong and how to fix it.
By night three, polar alignment takes 10 minutes instead of 30. Focusing takes 3 minutes. You know what ISO and shutter speed you want, and you spend the night actually shooting instead of troubleshooting.
This is when astrophotography becomes rewarding. You come home with 30 tracked exposures of the same patch of sky, stack them, and pull detail out of an image that looks nothing like the individual frames. The Milky Way has structure. The core has color. The noise is gone.
Processing is half the work. DeepSkyStacker handles the stacking. After that, you bring the stacked image into Lightroom: pull the highlights down, boost the shadows, adjust white balance toward cool (around 3800K), and then stretch the histogram by pulling the whites right and the blacks left. Astrophotography images look flat out of the stacker: the stretch is where all the nebulosity and color emerge.
A few things will still be wrong. Maybe your stars are slightly elongated (imperfect polar alignment). Maybe there’s a gradient across the sky from light pollution. Maybe you want more total exposure time. All of these are solvable. The point is that you can see the path forward, and that the image on your screen is something you made.
Shooting near a full moon. The moon is the enemy. It illuminates the sky the same way light pollution does, washing out faint objects. Plan your shoots around the new moon, when the sky is darkest. The window is roughly 5-6 days on each side of new moon.
Chasing targets you can’t resolve yet. The Andromeda Galaxy looks like a smudge in a beginner’s widefield image. The Orion Nebula looks slightly fuzzy. That’s fine: you can see them, and learning to capture any object builds the skills for harder targets. Don’t decide your equipment is inadequate because your Andromeda shot doesn’t look like a Hubble image.
Neglecting dark frames and flat frames. Dark frames reduce sensor noise. Flat frames (exposures of an evenly-lit surface at the same camera settings) correct vignetting and dust spots. Skipping them is fine for your first few nights; by night five, you’ll want them.
Under-dressing. Astrophotography means standing outside at 2am doing nothing while your camera runs. It’s 15 degrees colder than you think it’s going to be. Bring a layer you definitely won’t need, and then bring another one.
What happens after night three
At this point you have a workflow, a handful of images, and a sense of what you actually want to shoot more of. A few things will change your results meaningfully from here:
More exposure time. The single biggest improvement is shooting the same target over multiple nights. 30 minutes of total exposure vs. 3 hours is a visible quality difference.
Darker skies. Even a modest setup at Bortle 4 beats an excellent setup at Bortle 7. The drive is worth it.
Learning PixInsight eventually. It’s a steep curve and an expensive license, but serious astrophotographers use it because it produces better results. Not a year-one priority.
Cross-hobby connection: If you’re already into stargazing, you know your constellations and can navigate the sky. That knowledge translates directly: you’ll find your targets faster and spend less time staring at Stellarium trying to figure out which smudge is which.
Save your money
What you don't need yet
Beginners get pressured to buy a lot of stuff that doesn't help them play
better. Here's what we'd skip on day one.
A telescope — For your first year, a widefield lens and tracker beats a scope for both results and simplicity. Scopes are harder to polar align precisely, require longer exposures, and narrow your field of view when you want the whole Milky Way arch.
An autoguider (guide scope + PHD2) — Auto-guiding corrects tracking errors in real time and is necessary at focal lengths above 200mm. For widefield Milky Way work with a 14mm lens, a good compact tracker is all you need.
Narrowband filters (Ha/OIII/SII) — Narrowband imaging of emission nebulae is stunning, and requires a cooled mono camera, a very dark site, or both. Come back to this after a year of broadband imaging.
PixInsight — The processing software serious astrophotographers use ($450). DeepSkyStacker (free) and Lightroom handle beginner results well. PixInsight's learning curve is steep enough that it's a distraction in year one.
A dew heater controller — In humid climates, dew will fog your lens mid-session. Useful after you've confirmed you're shooting regularly. On your first few outings, just pick drier nights.
First week
Your first seven days
A short, real plan to get from gear-on-doorstep to actually playing.
Check your local light pollution level before planning your first shoot. · Action
Light Pollution Map · Interactive Bortle scale map: find the nearest dark sky to you
Dark Site Finder · Alternate source with land-use overlay for public access sites
Order the Sky-Watcher Star Adventurer 2i Pro Pack. · Buy
Download Stellarium (free) and find the Milky Way core's rise time for your location and the next new moon window. · Action
Stellarium Web · Free browser-based planetarium: no install needed
Practice polar alignment in daylight using a distant landmark instead of Polaris. You want this process to feel routine before you're in the dark. · Action
Plan your first shoot around a new moon weekend. Check the astronomical forecast. · Action
Clear Dark Sky · Best astronomical weather forecast for North America
Download DeepSkyStacker (free) so you're ready to stack your first night's frames. · Action
DeepSkyStacker · Free image stacking software: the standard beginner processing tool
FAQ
Common questions
Do I need a telescope to start astrophotography?
No, and a telescope is the wrong starting point for most beginners. Widefield Milky Way photography with a DSLR and fast wide-angle lens is more beginner-friendly, produces dramatic results faster, and teaches the fundamentals (polar alignment, exposure settings, dark sky planning) without telescope collimation, focus, and field rotation added on top.
What's the 500-rule for exposure time?
Divide 500 by your focal length to get the maximum exposure in seconds before star trails appear: 14mm gives you about 35 seconds, and 50mm gives about 10. On APS-C cameras, divide by focal length × 1.6. A star tracker bypasses this entirely, letting you shoot 2-5 minute exposures without any trails.
Can I shoot the Milky Way without a tracker?
Yes, with limitations. At 14mm you get about 20-30 seconds before star trails appear. That's enough for a single dramatic shot, but the noise is significant. Stacking 10-20 of those short frames in DeepSkyStacker reduces noise meaningfully. A tracker eliminates the trade-off entirely.
How dark does it need to be?
Bortle 4 or lower gives the best results: a sky where the Milky Way is clearly visible to the naked eye and you can see dust lanes. Bortle 5-6 (suburban skies about an hour from a major city) is workable with a light pollution filter. Bortle 7-9 (urban) produces disappointing results regardless of gear.
What time of year is best for Milky Way photography in the US?
The galactic core is visible from roughly March through October, peaking late April through August. The core rises earlier and stays up longer as summer approaches. Winter skies have different targets (Orion Nebula, Pleiades, Andromeda), but not the classic core arch shot.
What software do I need to process astrophotos?
Start with DeepSkyStacker (free, Windows) to stack multiple exposures and reduce noise, then Lightroom or Darktable (free) for final color and contrast. PixInsight ($450) is where serious astrophotographers land eventually, but it's a steep learning curve that's a distraction until you've mastered basic workflow.
AstroBackyard (YouTube) — Trevor Jones's channel is the best beginner resource in astrophotography: clear tutorials, real mistakes, and step-by-step walkthroughs from a DSLR shooter who started exactly where you are.
Cloudy Nights Forum — The largest astrophotography forum. Leans expert, but the Beginner's Forum subforum is genuinely helpful. Search before posting: most beginner questions have detailed answers already.
Light Pollution Map — Find your Bortle class and plan routes to dark sky sites. Essential for every shoot.
Clear Dark Sky — Astronomical weather forecast for North America. Predicts transparency, seeing, and cloud cover specifically for astrophotography. Far more useful than a regular weather forecast.
DeepSkyStacker — Free stacking software (Windows). The standard beginner processing tool: stacks multiple exposures to reduce noise and recover detail you can't see in a single frame.
r/astrophotography — Active community with weekly image showcases and gear threads. Search the wiki before asking equipment questions: the beginner FAQ is thorough.
As an Amazon Associate, JustBeginning earns from qualifying purchases.
We may also earn commission from other affiliate programs linked on this
page. Editorial recommendations are independent; we don't choose
products based on commission rates.
Product prices and availability are accurate as of the date and time
indicated and are subject to change. Any price and availability
information shown on Amazon at the time of purchase will apply.
Our top pickSky-Watcher Star Adventurer 2i Pro Pack


 Budget pick