Cricut machines look intimidating — subscriptions, mystery blade types, seven kinds of vinyl. Most beginners overcomplicate their entry. Start with one machine, one green mat, and a roll of permanent vinyl. Make a few decals. Then expand. The machine does the hard part; you just design and peel.
By Colin B. · Published May 24, 2026 · Last reviewed June 10, 2026
The machine is the big spend ($150–400 depending on model). Starter materials and tools add another $50–100. Vinyl and supplies are ongoing — roughly $20–30 a month for active crafting.
We earn commission on qualifying Amazon purchases — see our
affiliate disclosure.
Price tiers and budget totals shown above are editorial estimates;
actual Amazon prices vary.
At a glance
Our top pick in each category
The fastest path through this guide — each best-starter pick by category.
Scroll for the budget and upgrade alternatives.
Don't start with the Maker 3. The Explore 3 handles vinyl, iron-on, and cardstock — everything in beginner tutorials — at a lower price. Buy the Maker 3 only if fabric cutting is your stated goal from day one.
Cricut Access isn't required. The subscription ($10/month) unlocks Cricut's image library. You can buy individual designs à la carte or import free SVGs from the web. Many dedicated crafters never pay for Access.
Third-party vinyl is often better than Cricut brand. Oracal 651 (adhesive vinyl) and Siser EasyWeed (iron-on) are what professional shops use. They cost less and perform as well or better on standard projects.
The gear
What you actually need
Cutting Machine
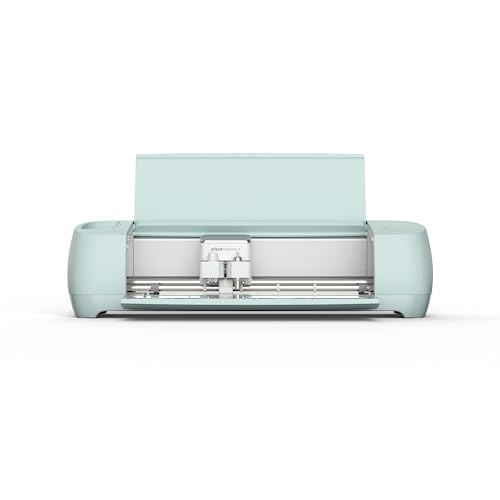
Three machines, one real question: what will you actually make? The Explore 3 cuts vinyl, iron-on, and cardstock — everything you see on Pinterest — wirelessly and without a subscription. The Maker 3 adds fabric and thick materials but costs more. The Joy Xtra is compact and affordable but limited to 8.5-inch cuts. For most beginners, the Explore 3 is the answer. Buy the Maker 3 only if quilting or soft goods are your stated goal from day one.
Cutting Machine — what's the difference?
A few common shapes, each making a different trade.
Cricut Explore 3
Cuts vinyl, iron-on, and cardstock at 2x speed. Best first Cricut machine.
Cut width
12"
Wireless
Yes
Fabric cutting
Light only
Best for Most beginners — vinyl, iron-on, paper, and everyday crafts
Tradeoff Can't cut thick materials without the Maker's knife blade
Compact 8.5-inch cutter. Best for smaller projects and tighter budgets.
Cut width
8.5"
Wireless
Yes
Fabric cutting
No
Best for Small projects, limited counter space, first machine on a tight budget
Tradeoff 8.5-inch width limit and shorter compatible-materials list than full-size machines
Best starter
Cricut
Explore 3
$$$
★★★★★Our rating
The Explore 3 is the sweet spot for beginners: cuts vinyl, iron-on, cardstock, and light fabric at twice the speed of older models — wirelessly. No subscription required for basic Design Space features. Handles 95% of the projects you'll see on Pinterest and TikTok. The machine to recommend to someone who wants to start without overthinking the purchase.
What we like
Cuts vinyl, iron-on, and cardstock at 2x speed wirelessly
No subscription needed for basic Design Space features
Compatible with the full Cricut accessory and mat ecosystem
What to know
Can't cut thick materials without the Maker's knife blade
Design Space requires internet — no offline mode available
The Joy Xtra cuts up to 8.5 inches wide — enough for shirts, small decals, and greeting cards — at roughly half the price of the Explore 3. Smart entry if you're genuinely unsure whether Cricut will stick, or if counter space is limited. The accessory ecosystem is smaller but covers most beginner projects.
What we like
Compact footprint — stores in a drawer between uses
Cuts vinyl and iron-on at roughly half the price of the Explore 3
Wireless and quick to set up for occasional small projects
What to know
8.5-inch width limit rules out full 12-inch vinyl sheets
Joy-specific mats don't swap with Explore or Maker accessories
The Maker 3's adaptive tool system — rotating blade and optional knife blade — cuts genuine leather, balsa wood, denim, and felt without pre-scoring. If your goals include quilts, stuffed animals, leather accessories, or custom apparel, this is the machine to start on. Spending more now beats buying the Explore 3 and upgrading six months later once you hit its limits.
What we like
Cuts 300+ materials including fabric, leather, and balsa wood
Adaptive tool system supports rotary, knife, and scoring blades
The ceiling machine — no need to upgrade further once you own it
What to know
Costs $100+ more than the Explore 3 — premium for vinyl-only crafters
Specialty blades (knife, rotary) sold separately and add to total cost
The mat grips your material during cutting — wrong mat means skipped cuts or torn material. The green Standard Grip mat is your everyday workhorse for vinyl and cardstock; it ships with most machines. The purple Strong Grip holds thick chipboard, magnet sheets, and heavy materials. Third-party mats cost about half as much and perform nearly the same after a brief break-in. Start with an official Standard Grip, then switch to third-party for replacements.
Best starter
Cricut
Standard Grip Mat 12x12 (2-pack)
$
★★★★★Our rating
The green Standard Grip mat ships with most machines for a reason: holds vinyl, iron-on, and light cardstock reliably without gripping so hard that material tears on removal. A 2-pack is the right quantity — mats lose tack over 20-40 uses and need replacing. Your first replacement is not the time to experiment with third-party alternatives.
What we like
Holds vinyl and cardstock flat for clean, skip-free cuts
2-pack gives you a spare when the first wears out mid-project
The default mat for 80% of Cricut projects — always useful
What to know
Loses grip after 20-40 uses — a real ongoing supply cost
Brand-new mats can be too sticky for delicate paper or vellum
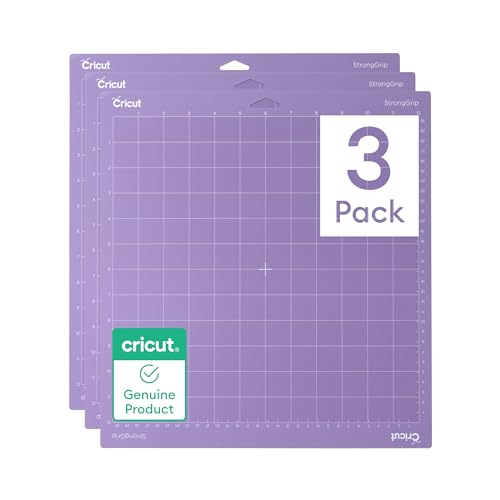
StrongGrip Cricut Cutting Mat 12in x 12in, Craft Mat for Cricut Maker & Explore, Use with Heavyweight Materials - Specialty Cardstock, Matboard & More, Reusable, Clear Protective Film (3 Count)
$16.49 as of Jun 22, 2026
★★★★☆Our rating· Only 19 left in stock - order soon.
For chipboard, thick leather, magnet sheets, and anything that would slide off the Standard Grip mid-cut. If you're using the Maker 3 on heavy-stock materials, keep one Strong Grip mat designated for that work. Don't use it for everyday vinyl cuts — the aggressive tack tears thin material on removal.
What we like
Holds chipboard and leather flat that Standard Grip can't manage
Purple color-coding makes grabbing the right mat fast and easy
What to know
Too aggressive for vinyl or iron-on — tears thin material on removal
Not needed unless you're deliberately cutting thick materials
Third-party mats cost about half as much as Cricut's and perform nearly identically after the break-in period (first one or two uses are stickier than ideal). A 3-pack keeps you cutting for months without running out mid-project. This is where experienced crafters save money on ongoing supplies without sacrificing cut quality.
What we like
About half the per-mat cost of official Cricut mats
3-pack means months of regular crafting without running out
What to know
First use is often too sticky — lint-roll before the first cut
Inconsistent on delicate paper and fabric; use official mats there
Two material categories cover 80% of Cricut projects. Permanent adhesive vinyl cuts into shapes or text and transfers to mugs, tumblers, walls, and signs using transfer tape. Iron-on HTV (heat transfer vinyl) bonds to fabric with heat — for shirts, tote bags, and hats. Third-party vinyl is cheaper than Cricut brand with no real quality difference for standard projects. Buy Cricut-branded materials only for specialty finishes like glitter or holographic vinyl.
Best starter
Oracal
651 Permanent Vinyl Sampler (63 Colors)
$64.99 as of Jun 22, 2026
★★★★★Our rating· In Stock
Oracal 651 is the pro-grade standard for outdoor-rated adhesive vinyl — what sign shops use. Cleaner cuts, better color saturation, and dramatically cheaper per roll than Cricut-branded. Sticks to mugs, tumblers, and smooth surfaces for years. An 63-color sampler pack gets you experimenting across colors before committing to bulk rolls.
What we like
Pro-grade outdoor-rated vinyl — same as professional sign shops use
Cleaner cuts and better color saturation than Cricut-branded
Dramatically cheaper per roll than Cricut Permanent Vinyl
What to know
Permanent once cured — not right for temporary or rental-friendly decals
Ships without transfer tape; budget for that as a separate purchase
Siser EasyWeed is what professional heat-transfer shops use for iron-on work. Weeds cleanly even on small text, applies at lower temperatures than Cricut brand, and bonds durably through hundreds of washes. Better results on shirts and fabric than any Cricut iron-on sampler once you're comfortable with the heat application process.
What we like
Professional heat-transfer standard — what shirt shops use daily
Weeds cleanly on small text that Cricut iron-on tends to tear
Bonds durably through hundreds of washes at lower temperatures
What to know
Must mirror design in Design Space before cutting — easy to forget
Requires even heat and pressure for a clean, lasting bond
® Value Iron-On, Rainbow Sampler - 12 in x 12 in (20 ct)- HTV Heat Transfer Vinyl
$16.09 as of Jun 22, 2026
★★★★☆Our rating· In Stock
The easiest way to start with iron-on before committing to a specific brand. Cricut's sampler gives you a range of colors pre-calibrated for Design Space's time-and-temperature chart — no guesswork on heat settings. Solid for your first 10-15 projects before you develop opinions strong enough to evaluate alternatives like Siser.
What we like
Pre-calibrated for Design Space's time-and-temperature chart
Sampler format lets you try multiple colors before buying bulk
What to know
More expensive per sheet than Siser or other third-party iron-on
Narrower color selection than what Siser offers in their full range
Weeding is removing the vinyl you don't want — the negative space around letters and shapes. Get this wrong and designs tear or lift at the edges. A weeding hook and brayer are the two must-haves. Transfer tape moves adhesive vinyl from its backing to your target surface without stretching the design. Cricut's basic tool set covers the full finishing workflow; transfer tape is the essential add-on that doesn't come with it.
Best starter
Cricut
Basic Tool Set
$10.49 as of Jun 22, 2026
★★★★★Our rating· In Stock
Covers the full finishing workflow: a weeder for removing vinyl negative space, a scraper for smoothing air bubbles, a spatula for lifting cuts without tearing, a brayer for pressing material flat on the mat, and scissors. These five tools address every frustration beginners hit in their first ten projects — in a single box.
What we like
All five finishing tools in one box — no piecemeal purchasing
The brayer prevents skipped cuts from loose material on the mat
Cricut-sized to fit accessory slots on compatible machines
What to know
Scissors are small; keep a regular pair nearby for larger trimming
Weeder tip dulls over heavy use — replacement tips sold separately
Transfer tape is the step most beginners skip and then regret. It lifts a weeded adhesive vinyl design off its backing in one piece and places it precisely on the target surface — no smearing, no misalignment. This medium-tack tape releases cleanly from vinyl after pressing, which cheap transfer tapes often don't.
What we like
Releases cleanly after pressing — cheap tapes often stay fused to vinyl
50-foot roll lasts months of regular adhesive vinyl work
Grid lines make straight placement and alignment much easier
What to know
Medium tack too aggressive for glitter or specialty finishes
Grid lines not perfectly scaled — measure before relying on them
Iron-on vinyl needs consistent heat to bond to fabric — inconsistency causes peeling after the first wash. A regular clothes iron works but creates cold spots from steam holes and an uneven sole plate. Cricut's EasyPress delivers precise, flat heat across the entire plate in a defined temperature window. The 9x9-inch size handles standard shirt chest designs; the Mini (3x5 inches) reaches hat brims, sleeves, and small patches the larger plate can't.
Best starter
Cricut
EasyPress 2 (9 x 9 in)
$130.37 as of Jun 22, 2026
★★★★★Our rating
The EasyPress 2 separates consistent iron-on from amateur results. It delivers even heat across the entire plate in a defined temperature window — no cold spots, no burned patches. The 9x9 plate covers a standard shirt chest design in one press. Use Cricut's time-and-temperature chart for exact settings per material; it removes the guesswork entirely.
What we like
Flat sole plate delivers even heat with no steam-hole cold spots
Digital temperature control eliminates guesswork from manual irons
9x9 covers a full shirt chest design in a single press
What to know
Won't reach shoulder seams, hat brims, or tight sleeve patches
Priced at $100+ — a regular iron works for occasional projects
Three by five inches — built for places the 9x9 can't reach: hat brims, sleeve patches, small tote bags, and pocket detail on denim. Also the right EasyPress for beginners unsure whether iron-on will become a regular part of their crafting. Costs about half what the full-size EasyPress 2 runs.
What we like
Reaches hat brims and sleeve patches the 9x9 can't access
About half the price of the EasyPress 2 — lower-risk entry point
Compact enough to store in a drawer between crafting sessions
What to know
3x5 inches requires multiple overlapping presses for large designs
Upgrade to the 9x9 once shirts become your primary iron-on use case
Most people unbox a Cricut and immediately make it harder than it needs to be. Here's the actual sequence — from machine setup to your first finished project — without the rabbit holes.
Cricut has a reputation for being complicated. It’s a little earned — there are three machines, four mat types, five blade options, a software subscription decision, and at least a dozen vinyl categories before you’ve even plugged anything in. Most beginner guides don’t help because they cover everything at once.
This isn’t that guide. This is your first week: one machine, one mat, one roll of vinyl, and your first finished project. Everything else can wait.
Day 1: Get the machine talking to your computer
The first thing you do is not cut anything. It’s getting Design Space installed and your machine linked to your account.
Design Space is Cricut’s software — it’s where you create or import designs and send cut instructions to the machine. It runs in a browser (Chrome works best) or as a desktop app. There’s no meaningful difference between the two for beginners; use whatever’s easier.
Create a free Cricut account, open Design Space, and connect your machine via Bluetooth or USB. The software walks you through it. When it asks you to run the test cut, do it — it’s not optional busywork. The test cut confirms your blade depth and pressure are calibrated correctly. Skip it and you’ll spend your first real project wondering why your cuts are incomplete.
A few things to know about Design Space before you get frustrated at it:
It requires internet. Every session. There’s no offline mode and this isn’t changing.
The free tier is fine to start. Cricut Access ($10/month) unlocks the image library. You don’t need it yet. Import free SVG files from the web or use the basic free designs available in the app.
“Ready to cut” is a button you’ll click a lot. Design Space keeps you on your toes; every session requires confirming your machine, material, and blade. This is annoying in year two. In week one, it’s a useful checklist.
Day 2–3: Your first vinyl cut
Adhesive vinyl (permanent, glossy) is where almost every beginner starts. It’s the most forgiving material, the most common use case — decals on tumblers, water bottles, car windows — and the one that will teach you the most about how the machine works.
Here’s the process, step by step:
1. Load your material on the mat. Peel off the mat’s protective backing. Place your vinyl (liner side down) on the mat, pressing firmly along the edges. Don’t stretch it or leave bubbles. Run the brayer over it to smooth it flat against the mat surface.
2. Choose your material in Design Space. Select “Vinyl” from the material list. Don’t choose “Smart Vinyl” unless you have a Maker 3 or Explore 3 with Smart materials loaded without a mat. Regular vinyl needs the mat. Cricut’s material settings are calibrated well; trust them for your first few cuts.
3. Load the mat and cut. Feed the mat into the machine gripper by pressing the arrows button, then press the flashing Cricut logo to start the cut. You’ll hear a faint whirring. The machine will cut your design and the surrounding negative space. When it finishes, use the unload arrows to eject the mat.
4. Weed. This is the step beginners rush and regret. Weeding is removing the vinyl you don’t want — the space between letters, the space around shapes, the bits of background that don’t belong on your project. Use the weeding hook. Work slowly, starting from a corner of the outer border, then peel around the design. Go slow. If something starts to lift that shouldn’t, stop and reverse. Small letters and complex shapes tear at this stage; patience is the skill.
5. Apply with transfer tape. Cut a piece of transfer tape slightly larger than your design. Peel the backing and lay it over your weeded vinyl. Burnish it down firmly with the scraper so the tape grips the vinyl. Then peel the vinyl off its liner — the design transfers to the tape. Position it on your final surface, press firmly, and then peel the transfer tape back slowly at a low angle. If vinyl lifts with the tape, press it back down and try again slower.
Your first result won’t be perfect. It might have a small bubble. A letter might have torn. The transfer might have shifted slightly. This is all normal and this is all fixable with repetition — most people have a consistently good process by cut five or six.
Day 4–5: Your first iron-on project (optional but worth trying)
If you have a heat source — the Cricut EasyPress, the Mini, or even a regular household iron — try a simple iron-on (HTV) design this week. The process is similar to vinyl with one critical difference: you mirror the design before cutting.
Iron-on vinyl is applied adhesive-side-down to fabric. That means anything with text, or anything directional, needs to be flipped before the machine cuts it. In Design Space, look for the “Mirror” toggle before you hit “Make It.” Missing this step is the single most common beginner mistake, and it ruins the material.
The heat settings for iron-on depend on your material and heat source. Cricut publishes a time-and-temperature chart — bookmark it. If you’re using Siser EasyWeed (highly recommended), apply at 305°F for 10-15 seconds with firm, even pressure. Let it cool before peeling the carrier sheet.
The carrier sheet on iron-on is the clear or matte backing that comes with the vinyl and stays attached after cutting. You weed with it still attached, then press it against the fabric, and peel it off after pressing and cooling. Peeling while it’s still hot is another classic beginner mistake that pulls up the vinyl.
Day 6–7: Make something you’ll actually keep
The best thing you can make in your first week is something you’ll actually use. A water bottle decal with your name. A custom shirt. A tote bag. Something that goes into your life, not a practice scrap.
Pick a project that matches your skill level from days 2-5. Single color, simple shape or text, minimal small details to weed. Design Space has free designs in this category if you don’t have something in mind — search “beginner” or “simple” in the design library.
When it’s done, share it. Cricut’s community is enormous and uniformly enthusiastic about seeing new crafters’ first projects. r/cricut is a welcoming place to post a photo and ask questions.
After a week of cutting, the difference between people who stick with Cricut and people who put the machine in a closet comes down to a few things:
Cut quality beats cut quantity. One clean project teaches you more than five rushed ones. If a cut goes wrong, stop and figure out why before the next one — usually it’s blade depth, pressure setting, or a mat that’s lost its tack.
Your mat is a consumable. When material starts sliding during cutting, or when your cuts don’t go all the way through, the problem is almost always a worn-out mat, not the machine. Mats last 20-40 uses in normal conditions.
The Design Space learning curve is real, but short. Most people feel comfortable navigating the software after 3-4 projects. It’s not intuitive at first; it becomes intuitive fast. Give it a week before forming a strong opinion.
Save your money
What you don't need yet
Beginners get pressured to buy a lot of stuff that doesn't help them play
better. Here's what we'd skip on day one.
Cricut Access subscription — The free tier in Design Space is adequate for most beginners. Wait until you know you want Cricut's image library before committing $10/month.
A full-size heat press — The EasyPress 2 handles 99% of beginner iron-on work. A 15x15 heat press is for people pressing dozens of shirts a week as a business.
Extra Cricut blades — The included blade cuts cleanly for months of normal use. Wait until you notice degraded cut quality — you'll feel it — before replacing.
Cricut pen adapter and pens — Draw-and-cut is a fun workflow but adds complexity. Get comfortable with standard vinyl cuts before adding the pen tool to the mix.
Cricut-branded vinyl for standard projects — Oracal 651 and Siser EasyWeed are cheaper and preferred by experienced crafters. Don't pay the brand premium when third-party materials genuinely perform better.
First week
Your first seven days
A short, real plan to get from gear-on-doorstep to actually playing.
Download Design Space and create your free account — link your machine when prompted. · Action
Run the test cut your machine walks you through on setup. Don't skip it — it confirms your blade depth and pressure are correct before you waste real material. · Action
Order your vinyl starter pack — assorted colors so you can experiment before committing to specific shades. · Buy
Make your first project: a single word or simple shape in one vinyl color. Keep it small — weeding is manageable and the stakes are low. · Action
Practice weeding on a scrap before touching your real project. Start at a corner and pull slowly — you'll feel the difference between a clean cut and one about to tear. · Action
FAQ
Common questions
Do I need Cricut Access to use my machine?
No. Cricut Access ($10/month) unlocks Cricut's image library for unlimited free downloads. You can upload your own SVGs, purchase individual images à la carte, or use the free designs in Design Space without any subscription. Many active crafters never pay for Access.
What's the difference between the Cricut Maker 3 and Explore 3?
The Explore 3 cuts vinyl, iron-on, and cardstock at twice the speed of older models and handles 95% of beginner projects. The Maker 3 adds an adaptive tool system that cuts fabric, leather, and thick materials the Explore can't. Both are wireless and use the same mats. Buy the Explore 3 first unless fabric or leather is your specific goal.
Can I use Design Space offline?
No — Design Space requires an internet connection to open and operate. You can't save projects for offline access. This is one of the most common complaints from Cricut users and hasn't changed. Plan your crafting sessions around a reliable connection.
Can I use third-party vinyl and materials?
Yes, and most experienced crafters do. Oracal 651 (adhesive vinyl) and Siser EasyWeed (iron-on) are the professional standards and cost significantly less than Cricut brand. Third-party mats also work well after a brief break-in period. Buy Cricut-branded materials only for specialty finishes like holographic or glitter vinyl that third parties don't reliably replicate.
What does 'weeding' mean in Cricut crafting?
Weeding is removing the excess vinyl after cutting — the negative space around your letters and shapes. You use a weeding hook to lift and pull away the parts you don't want to keep. It's the most time-consuming step for intricate designs, and where most beginners make their first mistakes. Go slowly, work from the outside in, and use good lighting.
What's the best first project for a Cricut beginner?
A simple adhesive vinyl decal — a word, short phrase, or basic shape in a single color. This teaches mat loading, Design Space basics, cutting, weeding, and transfer tape all in one low-stakes project. Avoid multi-layer designs or iron-on for your first two or three projects; introduce one complexity at a time.
Cricut YouTube Channel — Official tutorials for machine setup, Design Space, and project walkthroughs. Start here for machine-specific how-tos.
Jennifer Maker (YouTube) — The most comprehensive free beginner resource. Detailed tutorials, free SVG downloads, and machine comparison videos. Subscribe on day one.
Makers Gonna Learn (YouTube) — Practical project walkthroughs and Design Space deep dives. Good complement to Jennifer Maker once you have the basics.
r/cricut — Active community for troubleshooting, project inspiration, and machine questions. Search before posting — most beginner questions have detailed answers already.
Cricut Community Forum — Official Cricut support community. Best for machine-specific bugs and Design Space issues. Slower pace but moderated by Cricut staff.
As an Amazon Associate, JustBeginning earns from qualifying purchases.
We may also earn commission from other affiliate programs linked on this
page. Editorial recommendations are independent; we don't choose
products based on commission rates.
Product prices and availability are accurate as of the date and time
indicated and are subject to change. Any price and availability
information shown on Amazon at the time of purchase will apply.

 Best starter