Resin 3D printing delivers detail that filament printing simply can't: miniatures with individual scales, functional hinges, jewelry. The catch: it's a chemical process requiring ventilation, gloves, and post-processing gear. Here's how to set up a safe, complete beginner kit for $400–600.
By Colin B. · Published May 30, 2026 · Last reviewed August 7, 2026
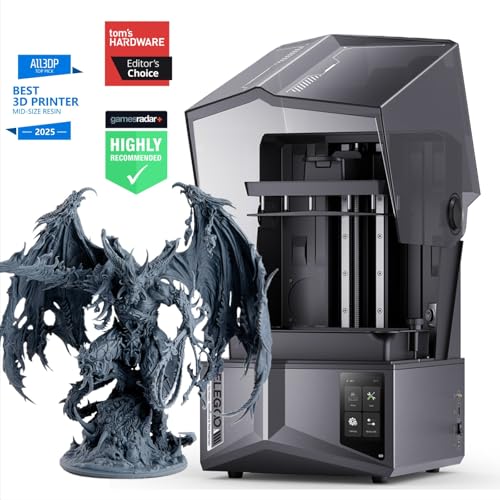
Elegoo Mars 4 Ultra
— Elegoo Mars 4 Ultra, the community-vetted MSLA starter with proven hardware and free slicer support.
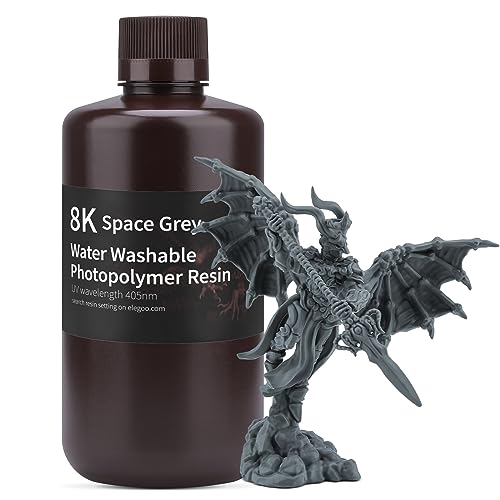
Elegoo ABS-Like Resin 2.0
— Elegoo ABS-Like Resin 2.0, the forgiving low-odor resin most MSLA beginners run first.
Elegoo Mercury Plus 2.0
— Elegoo Mercury Plus: washes and cures in one machine, the step beginners most often skip.
Budget total
$400
Typical total
$600
Printer ($150–300) + resin ($30) + wash-and-cure station ($80–120) + PPE ($30–60). A printer alone is half a setup, budget for the full kit.
We earn commission on qualifying Amazon purchases — see our
affiliate disclosure.
Price tiers and budget totals shown above are editorial estimates;
actual Amazon prices vary.
At a glance
Our top pick in each category
The fastest path through this guide — each best-starter pick by category.
Scroll for the budget and upgrade alternatives.
Resin printing is NOT the same as FDM (filament) printing. Output is far more detailed, but the workflow involves UV-reactive chemicals that require ventilation, nitrile gloves, and careful post-processing. Know this before you order.
Budget for the full kit upfront, not just the printer. A wash-and-cure station and PPE are not optional extras, they're part of the process. Skipping them means ruined prints or a health risk.
Start with Elegoo or Anycubic hardware. Both dominate the hobbyist MSLA market, have massive communities, and work with the best free slicers. With any other brand, you're on your own when something goes wrong.
The gear
What you actually need
Resin Printers
MSLA printers (the consumer resin standard) use an LCD screen and UV array to cure an entire layer at once: fast, precise, affordable. Build volume determines what you can print: compact printers (~153×77mm) handle miniatures and small parts; large-format printers (~218×123mm) tackle terrain, busts, and props. Start compact: cheaper per failed print, and forces you to master supports and exposure settings at lower stakes. Every major brand shares the same workflow; the differences are community size and slicer integration.
Resin Printers — what's the difference?
A few common shapes, each making a different trade.
Compact MSLA (Mars-class)
Compact build plate, ideal for miniatures and small parts.
Build volume
~153×77mm
Resolution
9K–12K
Best for
Miniatures, jewelry
Best for Miniatures, jewelry, small props, beginners learning the workflow
Tradeoff Can't print large objects in one piece, terrain requires splitting files
★★★★★Our rating· Only 14 left in stock - order soon.
The Elegoo Mars series is the most-used MSLA platform in the hobbyist community, and the Mars 4 Ultra earns that position. 9K mono LCD, reliable FEP film, tilting release mechanism for better print adhesion, and compatibility with every major slicer: Chitubox, Lychee, UVtools. If something goes wrong, there's a forum thread for it.
What we like
9K mono LCD produces crisp detail at standard miniature scales
Massive community, troubleshooting is a Reddit or forum search away
Works with Chitubox, Lychee, and UVtools, all free
What to know
Compact build volume, can't print large objects in one pass
FEP film wears out and needs periodic replacement ($5–10)
Anycubic's entry MSLA, slightly smaller build volume than the Mars 4 Ultra but nearly identical resolution and print quality. Good if the Elegoo is out of stock or you prefer Anycubic's ecosystem.
What we like
Near-identical print quality to the Mars 4 Ultra at a lower price
Photon Workshop slicer gets you printing without extra installs
What to know
Smaller community than Elegoo, fewer forum threads when troubleshooting
Photon Workshop lags behind Lychee for advanced support settings
★★★★☆Our rating· Only 19 left in stock - order soon.
When you outgrow the Mars's 153mm plate, the Saturn 4 Ultra is the obvious step up. 218×123mm build volume, 12K resolution, same proven Elegoo ecosystem. Print terrain tiles, full busts, and multi-figure scenes without splitting files. Worth it after six months once you know the projects you actually want to make.
What we like
218×123mm build volume, terrain and busts in one piece, no splitting
12K resolution matches or beats compact-class detail
What to know
Failed prints waste far more resin at this scale
Needs the larger Mercury X station, Mercury Plus is too small
Not all resins are equal. Standard ABS-like resins are the beginner default: reliable exposure, good detail, $25–40 per liter. Water-washable resins trade slightly weaker layer adhesion for IPA-free cleanup: wash with water instead of isopropyl alcohol. Engineering resins (tough, flexible, castable) are specialty picks once you know what mechanical properties you actually need. Start with ABS-like. You'll know when you need something else.
Best starter
Elegoo
ABS-Like Resin 2.0
$
★★★★★Our rating
The community default for first bottles of resin, and for good reason: lower odor than most standard resins, consistent layer adhesion, and community-published exposure settings for nearly every MSLA printer. A reliable, forgiving starting point at $30–35 per liter.
What we like
Community exposure settings published for nearly every MSLA printer
Lower odor than most ABS-like resins, manageable in ventilated workspace
Consistent adhesion, forgiving of minor exposure variation
What to know
Still requires IPA wash, not water-washable
More brittle than engineering resins, don't print snap-fit clips
A dollar or two cheaper per liter and nearly as consistent as the Elegoo Pro 2. Works well if you're running Anycubic hardware and want manufacturer-matched exposure profiles already loaded in Photon Workshop.
What we like
Often 10–15% cheaper per liter than Elegoo ABS-Like Pro 2
Pre-tuned profiles in Photon Workshop for Anycubic printers
What to know
Fewer community exposure references than Elegoo equivalents
If IPA washing (cost, fumes, disposal) is your biggest friction point, water-washable resin removes it. Wash prints in warm water instead. The tradeoff: slightly more brittle prints and a disposal step: resin-contaminated wash water must be UV-cured before going down the drain.
What we like
No IPA needed, wash in warm water with lower fume exposure
Lower running cost, water is free, IPA is not
What to know
Slightly more brittle than standard ABS-like resins
Wash water needs UV curing before drain disposal, not zero-effort
Every resin print needs two post-processing steps: washing (removing uncured resin with IPA or water) and curing (UV light to fully harden the print). DIY options exist (a mason jar of IPA and a UV nail lamp) but they're inconsistent and messy. A dedicated combo station handles both reliably in 5–10 minutes. Budget $70–120 for a unit matched to your build plate size.
Best starter
Elegoo
Mercury Plus 2.0
$$
★★★★★Our rating
The Mercury Plus is what most Mars owners end up buying. The wash bucket fits the Mars build plate, the cure turntable handles small-to-mid prints, and it runs $70–90. Two steps in one machine, no extra bins, no jury-rigged UV lamp. Buy it with your printer and have a complete workflow on day one.
What we like
Sized for Mars-class printers, the natural pairing for most beginners
Wash and cure in one machine, no separate bins or UV lamps needed
Covered wash bucket reduces IPA evaporation between sessions
What to know
800ml wash capacity, needs fresh IPA more often than larger units
Too small for Saturn-class build plates, upgrade to Mercury X if needed
Anycubic's combo unit at the same price point as the Mercury Plus. If you're already on Anycubic hardware, this is the natural pairing, matched sizing, same workflow, one brand for support.
What we like
Natural pairing with Anycubic printers, matched sizing and brand support
Same price point as Mercury Plus, no premium for the brand match
What to know
Less community documentation than Elegoo's Mercury Plus
Cure turntable arm less robust in long-term heavy use
Resin is a skin and respiratory sensitizer. Repeated exposure without protection causes allergic reactions that get worse over time and can eventually prevent you from working with resin at all. A proper respirator, nitrile gloves, and UV-blocking glasses are not optional. Buy all three before you open your first bottle of resin. Total cost is under $70.
Best starter
3M
6502QL Half Facepiece Respirator
$$
★★★★★Our rating
Resin vapor is an organic compound; a dust mask will not filter it. The 3M 6502 half-facepiece with 60926 OV/P100 cartridges handles both resin fumes and sanding particulate. This is the standard setup hobbyists actually use. Cartridges last 6–12 months of regular hobby use.
What we like
OV/P100 cartridges filter both resin fumes and sanding particulate
Half-facepiece seals better than cup masks, no leakage at the edges
Replaceable cartridges, long-term cost is low
What to know
Cartridges expire even if unused, replace annually regardless of use
Requires a proper facial seal, test fit before your first session
Resin is a sensitizer: skin exposure without gloves can trigger an allergy that grows worse with each session. Nitrile (not latex) is resin-resistant, latex degrades and lets resin through. A 100-count box costs around $15 and lasts months of regular printing sessions.
What we like
Nitrile is resin-resistant, latex is NOT safe for resin handling
100-count lasts months of regular sessions at roughly $0.15/pair
What to know
4-mil gloves tear easily, replace immediately if torn mid-session
Doesn't protect against vapor, wear your respirator too
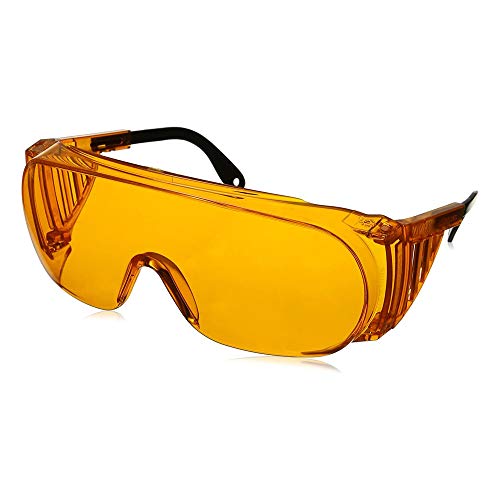
UV cure lamps emit 405nm light, the same wavelength that cures resin and damages retinas with repeated exposure. These glasses (rated 200–400nm) are the $12 insurance policy against cumulative eye damage during curing. Regular sunglasses don't cover the right spectrum.
What we like
Rated 200–400nm, covers the 405nm wavelength that cure lamps emit
Wraparound design blocks scatter from indirect UV exposure
What to know
You only wear them for 30 seconds at a time, but do wear them
Some tints affect color accuracy when painting immediately after curing
After washing and curing, your print needs cleanup: removing supports, smoothing attachment points, and optional surface finishing. Flush cutters are the everyday workhorse; you'll use them on every single print. Wet-dry sandpaper handles surface prep. A UV repair pen lets you spot-fix cracks or fill gaps without reprinting the whole model. Total cost under $30.
Best starter
Hakko
CHP-170 Flush Cutters
$
★★★★★Our rating
Support removal is the most satisfying step in resin printing with the right tool, and the most frustrating without one. Hakko CHP-170s are the hobbyist standard: sharp enough to clip support nubs flush without tearing the surface. Don't buy the $3 knockoff. Dull cutters leave divots that require sanding every time.
What we like
Sharp enough to clip support nubs without tearing the print surface
The community-standard tool, every tutorial assumes you have these
What to know
Spring softens slightly after heavy use, still functional but less crisp
Wet-dry sandpaper in 400–3000 grit covers the full finishing progression: rough cleanup at 400, smoothing at 800–1500, polish at 2000–3000. Used wet, it lasts longer and produces less airborne particulate. A multi-grit pack costs a few dollars and covers months of prints.
What we like
400–3000 grit range covers rough cleanup through polish in one pack
Wet use reduces airborne particulate and extends paper life
What to know
Fine grits wear out fast on large flat surfaces, stock extra 2000
Manual process, slow on large prints compared to rotary tools
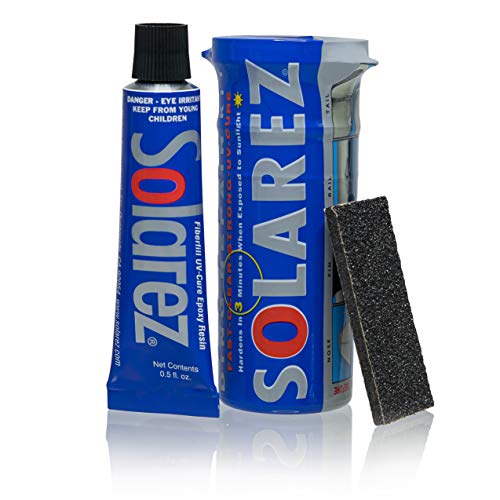
A UV cure pen lets you spot-repair a cracked support nub, fill a layer gap, or reinforce a thin section without reprinting the whole model. Cure it under your UV lamp in 10 seconds. Saves prints that would otherwise go straight in the trash.
What we like
Spot-repair cracks and gaps without reprinting the full model
Cures in under 10 seconds under a UV lamp, instant fix
What to know
Repair texture may differ slightly from the parent print surface
Tip dries out if left uncapped, store horizontally with cap on
Resin printing has a real learning curve, but it's a short one. Here's what actually happens between unboxing your printer and pulling your first clean print.
Resin 3D printing has a reputation for being finicky, and that reputation is partly earned. Your first few prints may fail. Your exposure settings will probably need adjusting. You might have a print stick to the FEP film instead of the build plate and wonder what you did wrong.
But the learning curve is short and predictable. Most people figure out their printer within a week. After that, it becomes one of the most satisfying making hobbies you can do at home — the detail is genuinely astonishing, and the workflow becomes automatic.
Here’s what your first month actually looks like.
Week 1: Setup and your first prints
Before you open any resin, get your workspace sorted. You need:
Ventilation. A window you can crack open, or an exhaust fan. Resin fumes are irritating even in small amounts and potentially harmful with prolonged exposure. This isn’t optional.
Gloves on. Put on your nitrile gloves before you touch the resin bottle. Make this a reflex before you’ve had a single bad experience — it’s easier to build the habit now than after you’ve sensitized yourself.
Workspace mat. Silicone mats or butcher paper catches drips. Cured resin on a countertop is harmless; uncured resin on a countertop is a permanent stain and a sensitization risk.
With the printer assembled and leveled (follow the printed manual — it usually takes 10 minutes), pour in your resin and run the test print on the USB stick. Don’t skip this. The test print was designed to succeed easily, and running it tells you immediately if your printer hardware and factory exposure settings are working. If the test fails, you have a hardware problem. If it succeeds, you have a baseline.
Your first real print will probably use the factory exposure settings, which are a reasonable starting point for common resins. Check the r/resinprinting wiki for your specific printer and resin combination — community members have published calibrated settings for almost every major pairing, and using them instead of factory defaults gives you a real head start.
Why prints fail in week one:
The most common beginner failure is a print that detaches from the build plate mid-print and fuses to the FEP film instead. This is almost always caused by one of three things:
Build plate not level. If the plate isn’t uniformly close to the FEP, some areas won’t adhere. Relevel and try again.
Exposure too low. Bottom layers didn’t cure hard enough to stick. Increase your bottom exposure time (not normal exposure — the bottom layers specifically).
Supports not touching. If you’re printing an object with overhangs and didn’t add supports, the overhangs cure in mid-air and collapse.
When a print fails, note what happened and adjust one variable at a time. Resin printing rewards systematic troubleshooting.
Week 2: Learning supports
Supports are the part of resin printing that takes the most practice and judgment. Unlike FDM printing where gravity mostly works in your favor, resin prints are built upside-down — which means every unsupported overhang beyond about 45 degrees will droop or detach.
Lychee Slicer’s auto-support function is good enough for most models, but you’ll quickly learn its limits. Auto-supports tend to over-support flat surfaces (leaving more nubs to clean up) and under-support thin, pointed features (which snap off mid-print). Within a week or two, you’ll find yourself adding and removing individual supports manually, and this skill is what separates clean prints from messy ones.
A few rules that hold almost universally:
Orient the model to minimize supports on visible surfaces. Every support leaves a nub. Put the nubs where you’ll either sand them or never see them.
Hollow large models and add drain holes. Solid prints use more resin, take longer, and are more prone to warping. Lychee’s hollow tool makes this one click. Add two drain holes at the lowest point so uncured resin can escape after printing.
Print at a slight angle (15–30°). Models printed perfectly flat often have suction cup problems — the flat surface creates a vacuum against the FEP that rips the print off the build plate. Tilt it.
Week 3: Dialing in your exposure
Even with community settings as a starting point, you’ll eventually want to calibrate exposure specifically for your printer and resin combination. Printers vary — even two identical units can need slightly different exposure times due to LCD variance.
The standard calibration tool is the Resin Exposure Calibration Matrix (RERF) or the AmeraLabs Town test model. Print it, measure the results, and use them to refine your settings. It takes one print and half an hour — and after you’ve done it once for a resin, you don’t have to do it again until you switch resins.
What you’re tuning:
Layer exposure time. Too low = weak layers, print detaches or deforms. Too high = “elephant foot” (first layers flare out), loss of fine detail.
Bottom exposure time. Longer than normal layers, helps the print bond to the build plate. Typically 30–60 seconds for most setups.
Lift speed. How fast the build plate pulls away from the FEP between layers. Faster = shorter print time but more peel force, which can detach fragile prints. Slower = gentler but longer prints.
The r/resinprinting wiki has a calibration guide that walks through this in 10 minutes.
Week 4: Post-processing and finishing
Wash and cure are the last steps, but finishing is where the hobby gets fun. Once you have clean prints coming off the plate consistently, you can start paying attention to surface quality.
The finishing progression:
Support removal. Use your flush cutters. Clip as close to the surface as possible without nicking the model. There will be small nubs — that’s normal.
Wet sanding. Start at 400 grit for prominent nubs, work up to 800–1500 for general smoothing. Use water, not dry. Takes minutes per print.
Primer. A thin rattle-can coat of gray or white primer reveals surface defects you couldn’t see on bare resin — layer lines, nubs you missed, thin spots. Sand those, reprime.
Paint. Miniature painters use citadel or Army Painter acrylics; prop makers often use brush-on lacquers. The primer layer is what makes paint adhere cleanly.
Every resin printer owner goes through the same failures. Knowing they’re coming makes them less demoralizing:
FEP film damage. The FEP film at the bottom of your resin vat is consumable. When it gets cloudy or scratched (usually after 1–3 liters of resin), prints start coming out cloudy or failing. Replace it — it’s $5–10 and takes 15 minutes.
Resin settling. If your resin bottle has been sitting, gently stir or shake it before pouring. Pigments settle, and out-of-suspension resin prints with inconsistent color and layer adhesion.
Leaving resin in the vat. If you’re not printing for more than a few days, pour unused resin back in the bottle through a paint strainer. Resin left in the vat can cure from ambient UV, gum up the FEP, and ruin both.
Storing resin in sunlight. Clear or semi-transparent bottles + a sunny shelf = partially cured resin. Store in a dark cabinet.
What’s next after month one
By the end of the first month, you’ll have printed enough to know what you actually want to make. That’s when the deeper rabbit holes open up:
STL marketplaces. Designers like Loot Studios, Titan Craft, and Ill Gotten Games release monthly STL packs aimed specifically at MSLA printers. The quality is consistently higher than free libraries.
Miniature painting. The resin printing community and the miniature painting community overlap heavily. If your prints are ending up as unpainted gray resin, the miniature painting guide is the next stop.
Large-format printing. If your projects keep getting limited by build volume, the Elegoo Saturn is the natural upgrade — same workflow, 4× the plate.
The detail that resin printing produces never gets old. Your tenth successful print is just as satisfying as your first — and cleaner.
Save your money
What you don't need yet
Beginners get pressured to buy a lot of stuff that doesn't help them play
better. Here's what we'd skip on day one.
Engineering or castable resins — ABS-like is the right first material. Engineering variants have tighter calibration windows and punish beginners with high failure rates.
A large-format printer (Saturn-class) — A compact Mars-class covers 90% of beginner projects. Print 20+ successful models first, then decide if build volume is actually your limitation.
An airbrush setup — Miniature painters start with hand-brushing and primer rattle cans. Airbrush layers on top of painting skill, not under it.
A second resin vat — Multi-vat workflows make sense once you're printing daily in multiple colors. That's a month-six problem, not month-one.
An ultrasonic cleaner — Your Mercury Plus wash step is sufficient. Ultrasonic cleaners offer marginally better cavity cleaning at $100+ more, a refinement, not a necessity.
First week
Your first seven days
A short, real plan to get from gear-on-doorstep to actually playing.
Order the complete kit together: printer, resin, wash-and-cure station, and PPE. Don't start without the wash station and safety gear in hand. · Buy
Set up in a ventilated space before unboxing resin. A garage with a window cracked open is ideal. A bathroom exhaust fan works in a pinch. · Action
Run the test print on the USB stick that came with the printer, before loading your own STL. It tells you immediately if your printer and resin are calibrated correctly. · Action
Learn supports in Lychee Slicer or Chitubox before attempting your own model. Watch one beginner tutorial specifically on support placement, this is the #1 reason first prints fail. · Learn
Yes, with the right setup. You need ventilation (open window or exhaust fan), nitrile gloves every time you handle uncured resin, and an organic vapor respirator when printing and washing prints. The chemicals are manageable with proper PPE, they're hazardous when treated carelessly.
How is resin printing different from FDM (filament) printing?
FDM printers melt plastic filament layer by layer, easy workflow, great for functional parts, less detailed. Resin printers cure liquid resin with UV light, dramatically higher detail, better for miniatures and jewelry, but requires chemical handling and post-processing. Different tools for different goals.
What's the difference between MSLA and SLA?
SLA printers use a laser to trace each layer, slower but extremely precise. MSLA printers use an LCD screen to expose the entire layer at once, faster and affordable. MSLA (like the Elegoo Mars) is what 95% of hobbyists use. SLA is for professional and industrial applications.
Why did my first print fail and stick to the FEP film?
Usually overexposure (layers cure too hard to release cleanly) or inadequate supports. Check your exposure settings against the community-published values for your specific resin and printer, r/resinprinting's wiki has a searchable database. Start by reducing bottom exposure layers.
Do I need to pay for STL files, or can I find free ones?
Thousands of free models exist on Printables.com (best-curated), Thingiverse (largest), and MyMiniFactory. Paid STL sets from miniature designers like Loot Studios or Titan Craft are worth buying once you're consistently getting clean prints and want original content.
How much does resin printing cost to run monthly?
A liter of ABS-like resin (~$30–40) covers 15–30 average miniatures. IPA for washing runs $5–10/month. FEP film replacement is $5–10 every 2–4 months. Total running cost is $40–80/month for an active hobbyist, cheaper than buying equivalent pre-painted miniatures.
r/resinprinting — The largest hobbyist resin community. The wiki has exposure-settings databases for common printer/resin combinations, check it before your first print.
Printables.com — Prusa's free STL repository. Best-curated library for hobby models, filter by license type if you plan to sell prints.
Lychee Slicer — The most beginner-friendly MSLA slicer. Free tier is fully functional. In-app tutorials cover supports, hollowing, and drain holes better than most YouTube series.
UVtools — Free open-source utility for analyzing, repairing, and calibrating resin print files. Used to diagnose failed prints and fine-tune exposure settings.
Elegoo Community — Active Mars-series community on Reddit. Exposure profiles for popular resins, hardware tips, and firmware discussion. Search before posting, most beginner questions are already answered.
As an Amazon Associate, JustBeginning earns from qualifying purchases.
We may also earn commission from other affiliate programs linked on this
page. Editorial recommendations are independent; we don't choose
products based on commission rates.
Product prices and availability are accurate as of the date and time
indicated and are subject to change. Any price and availability
information shown on Amazon at the time of purchase will apply.

 Best starter