Cold brew is the most forgiving coffee you can make at home. Steep coarse grounds in cold water for 12–24 hours, strain, and you have a smooth, low-acid concentrate that keeps for two weeks in your fridge. The gear list is short, the process is hard to mess up, and the result beats any bottle from the grocery store.
By Colin B. · Published May 22, 2026 · Last reviewed June 3, 2026
The cold brew maker is ~$25–30. Add a hand grinder and fresh beans and you're under $90 — a complete setup that makes two weeks of cold brew from one batch.
We earn commission on qualifying Amazon purchases — see our
affiliate disclosure.
Price tiers and budget totals shown above are editorial estimates;
actual Amazon prices vary.
At a glance
Our top pick in each category
The fastest path through this guide — each best-starter pick by category.
Scroll for the budget and upgrade alternatives.
Cold brew and iced coffee are not the same thing. Iced coffee is hot-brewed coffee poured over ice — it's thinner, brighter, and more acidic. Cold brew is steeped cold the entire time, which produces a smoother, sweeter concentrate with about 70% less acid. If you've had bitter or harsh cold coffee in the past, this is the method that changes your mind.
You're probably making concentrate, not ready-to-drink coffee. Most cold brew recipes produce a 4:1 concentrate — one part cold brew to one part water or milk to serve. If you drink it straight and it tastes intense and overpowering, that's correct. Dilute to taste. This also means one batch goes a long way.
Grind size is the only real technical variable. Too fine and you'll get bitter, silty concentrate. Too coarse and it'll taste thin and weak. You want coarser than anything else you'd brew — think sea salt, not table salt. This is the single adjustment most beginners need to make after their first batch.
The cold brew maker is your brewing vessel and filter system combined. Pitcher-style makers with a mesh filter basket are the most common and easiest — fill the basket with grounds, submerge in water, steep, and pull the basket when done. The Toddy system uses a wide vessel and a felt filter, which makes a richer, more textured concentrate. For most people starting out, a pitcher-style maker in the $25–35 range is the right call.
Cold Brew Maker — what's the difference?
A few common shapes, each making a different trade.
Pitcher + Mesh Basket
The standard. Easiest cleanup, compact, goes straight to the fridge.
Process
Steep basket in pitcher, remove
Filter
Reusable stainless mesh
Cleanup
Dishwasher-safe (most models)
Best for Most beginners, everyday home use
Tradeoff Slightly more sediment than felt-filtered systems
Cheapest path — steep in a wide-mouth jar, strain through a nut milk bag.
Process
Steep loose grounds, strain through bag
Filter
Nut milk bag or cheesecloth (sold separately)
Cleanup
Requires separate straining step
Best for Trying cold brew before buying dedicated equipment
Tradeoff More mess; sediment control is harder without a real filter
Best starter
Takeya
Cold Brew Coffee Maker 64oz
$34.99 as of Jun 22, 2026
★★★★★Our rating· In Stock
The most sensible first cold brew maker: a 64oz pitcher with an airtight lid and a fine mesh filter basket. Steep, pull the basket, and the pitcher goes straight to the fridge door. Dishwasher-safe, compact enough for any shelf, and priced under $30. No separate straining step, no cheesecloth — cleanup is genuinely fast.
What we like
Airtight lid keeps concentrate fresh for two weeks in the fridge
Fine mesh basket pulls cleanly — no separate straining step needed
Dishwasher-safe and priced under $30
What to know
64oz batch is large for one person — the 32oz version may suit better
Under $15 and does the job. Same pitcher-with-basket approach as the Takeya — a mesh filter and a glass carafe with a silicone lid. Build quality isn't as refined (lid seal is looser, mesh slightly coarser), but the cold brew comes out the same. The honest budget pick if you want to try cold brew before committing to nicer equipment.
What we like
Under $15 — the honest answer if you're not sure you'll stick with cold brew
Glass carafe shows concentrate level at a glance
What to know
Looser lid seal risks spills in a packed fridge
Filter assembly requires hand-washing, not dishwasher-safe
The original cold brew maker, invented in the 1960s. Steep grounds in a wide vessel with a felt filter at the bottom, then drain through a rubber stopper into a glass carafe. The felt filter produces a cleaner, smoother concentrate than mesh — very low sediment, silkier mouthfeel. If pitcher-style cold brew feels thin to you, the Toddy is the step up.
What we like
Felt filter removes more sediment than mesh — silkier, cleaner concentrate
The original cold brew system, refined over decades
What to know
Felt filters are consumable — expect to replace every 8–10 uses
Two-vessel setup takes more counter space than a simple pitcher
Grind size matters more in cold brew than most people expect. You want a coarser grind than you'd use for anything else — roughly the texture of raw sugar or coarse sea salt. Too fine and the cold water over-extracts bitter compounds during the long steep; too coarse and the flavor is thin and watery. A burr grinder produces consistent particle sizes that extract evenly. For cold brew you're grinding 60–80g per batch, so an electric grinder starts earning its keep faster than with other methods.
Best starter
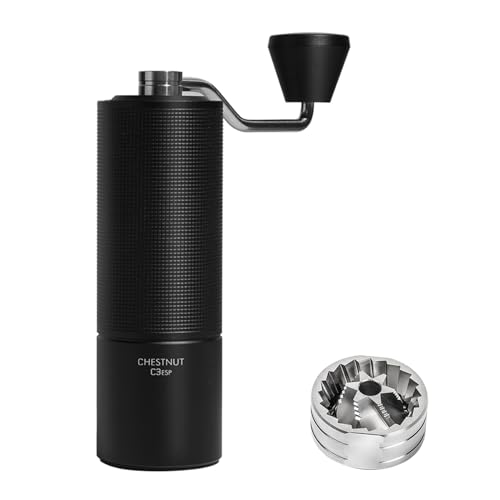
TIMEMORE
Chestnut C3 ESP Manual Coffee Grinder, Stainless Steel S2C Portable Conical Burr Hand Coffee Grinder, Adjustable Grind Setting for Espresso to French Press - Black
$99.00 as of Jun 22, 2026
★★★★★Our rating· In Stock
The best hand grinder under $70 by a significant margin. Dual stainless burrs produce consistent grinds from fine (espresso) to very coarse (cold brew). The click-stop dial makes it easy to return to your cold brew setting. For a single person making one batch at a time, the ~90-second grind for 60g is manageable, and the same grinder works across every coffee method you might add later.
What we like
Click-stop dial makes it easy to return to your exact cold brew setting
Dual stainless burrs outperform most budget electric grinders
Doubles for pour-over and French press — not a single-use tool
What to know
Grinding 80g for a large batch takes 2–3 minutes by hand
The classic entry grinder at under $30. Ceramic burrs, drawer-compact, and perfectly acceptable for cold brew. Consistency isn't as tight as the Timemore, but cold brew's long extraction is forgiving of minor inconsistency. The right pick to start grinding before committing to the C3.
What we like
Under $30 and perfectly acceptable for cold brew's forgiving extraction
Compact enough to keep in a drawer
What to know
Ceramic burrs are less consistent than the Timemore's steel burrs
No click-stop dial — harder to return to the same grind setting
The entry electric grinder most coffee people eventually land on. Grinds 60g in about 20 seconds, consistent across every setting, and repairable (Baratza stocks parts for years). For households making 64oz+ cold brew batches, the time savings over hand-grinding justify the price. Buy it when hand-grinding has become the bottleneck.
What we like
Grinds 60g in about 20 seconds — eliminates the hand-grinding bottleneck
Baratza stocks replacement parts for years; fully repairable
What to know
Moderately loud and takes real counter space — not a compact grinder
Cold water extracts gently, pulling out sweetness and body while muting the sharpest acids and bitter compounds. This means medium-dark and dark roasts tend to shine in cold brew — the chocolatey, caramel, and nutty notes that hot coffee can obscure become the main event. Very bright light-roast single-origins are harder to pull well cold; save those for AeroPress or pour-over. You also go through beans faster than other methods (60–80g per 32oz batch), so don't start with the expensive stuff.
Best starter
Stone Street Coffee
Stone Street Cold Brew Reserve Colombian Dark Roast 1LB
$22.49 as of Jun 22, 2026
★★★★★Our rating
The most popular cold-brew-specific coffee on Amazon. A single-origin Colombian dark roast, available coarse pre-ground (ready to use without a grinder) or whole bean. Rich chocolate and caramel notes, low bitterness, no harsh finish. Roasted fresh to order. Consistent batch after batch — exactly what you want while dialing in your technique.
What we like
Available pre-coarsened for cold brew — ready to use without a grinder
Consistent chocolatey flavor dials in easily across batches
Roasted fresh to order for every bag
What to know
Pre-ground version can't be adjusted once you dial in a preferred grind
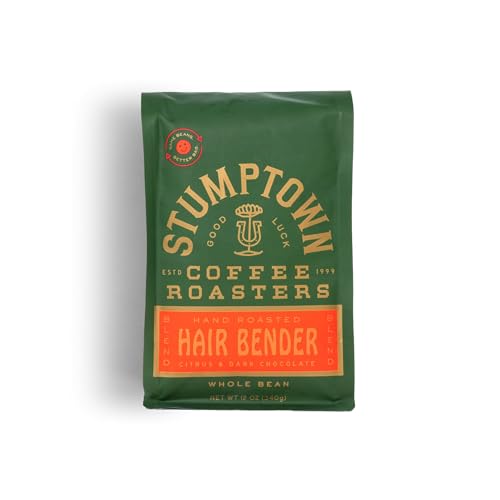
Once you've dialed in your technique, Hair Bender is the go-to step up. A blend of Latin American and Indonesian beans — caramel, cherry, citrus — that works unusually well cold. Ships fresh nationwide. Medium-light roast means steeping toward the 16-hour end of the range, but the result is more complex and interesting than a standard dark roast.
A scale is optional for cold brew — more so than for any other coffee method. The ratios are forgiving enough that 'one cup of grounds per four cups of water' works without weighing anything. But once you've had a few good batches and want to reproduce them exactly, weight-based brewing (typically 75g coffee per 500ml water for concentrate) removes the last variable. Any kitchen scale accurate to 1g is enough — cold brew doesn't need the 0.1g precision of espresso.
Best starter
Hario
V60 Drip Scale
$$
★★★★★Our rating
Compact, 0.1g accurate, with a built-in timer. The same scale that works for AeroPress and pour-over — for cold brew the timer is irrelevant, but the compact footprint and coffee-optimized design make it the natural first scale for anyone building a coffee setup. 2kg max capacity handles any cold brew batch size comfortably.
What we like
0.1g accuracy — overkill for cold brew, perfect if you add pour-over later
Compact footprint fits under a pitcher without interfering
What to know
Built-in timer is irrelevant for cold brew — you're paying for unused features
Limited water resistance — don't leave it under a dripping spout
Under $50, accurate to 1g, and the pull-out display is readable under a large pitcher. 11lb (5kg) capacity handles any cold brew batch. If you're already using a kitchen scale for cooking, this doubles as your coffee scale. The OXO is more robust than a dedicated coffee scale for people who want one device that does everything.
What we like
Pull-out display stays readable under a full-sized pitcher
11lb capacity and 1g accuracy handle any cold brew batch size
What to know
Larger footprint than a dedicated coffee scale — less streamlined on a small counter
Cold brew is the most forgiving coffee you can make at home — coarse grounds, cold water, and time. One batch yields two weeks of smooth, low-acid concentrate.
Cold brew is unusual in the home coffee world: there’s almost nothing to master in the traditional sense. No temperature to control, no bloom timing, no technique to calibrate in real time. You grind coarsely, combine with cold water, wait most of a day, and strain. That’s the whole thing.
But there’s a reason first batches often disappoint — usually bitter, occasionally too weak, sometimes both. A handful of variables are doing real work here, and they’re easy to get wrong before you understand what they’re doing. After a week and two or three batches, you’ll have your recipe dialed in and wonder why you ever bought bottled cold brew.
The two variables that actually matter
Every cold brew recipe comes down to two settings: ratio and grind size.
Ratio is how much coffee to how much water. Most guides use 1:4 (one part coffee to four parts water) to make concentrate. Start here: 60g of coffee to 240ml of water, or one cup of grounds to four cups of water. The result is strong concentrate you dilute 1:1 before drinking. If you want ready-to-drink cold brew with no dilution step, use 1:8 — lighter flavor, shorter shelf life.
Grind size is the variable most beginners get wrong. Cold brew needs a very coarse grind — coarser than French press, much coarser than drip. Think raw sugar or coarse sea salt. Fine grounds over-extract during the long steep and produce a bitter, harsh result. If your first batch was bitter, grind coarser before changing anything else.
Everything else — water temperature, steep duration, bean type — makes a real but secondary difference once these two are right.
Assuming a 64oz pitcher maker (like the Takeya) and aiming for a full pitcher of concentrate:
Grind: 120g of coffee at your coarsest burr setting.
Fill: Add grounds to the filter basket. Pour 32oz (about 900ml) of cold tap water into the pitcher. Submerge the basket.
Seal and refrigerate: 18–20 hours. Set a phone reminder.
Pull the basket: Remove and discard or compost the grounds. You now have about 28oz of concentrate — some absorbs into the grounds, which is expected.
Taste it straight: Should be intense — sweet, chocolatey, noticeably strong. If it doesn’t taste like concentrated coffee, see troubleshooting below.
Serve: Dilute 1:1 with cold water or milk. Pour over ice. Add simple syrup if you want sweetness.
The first batch takes 20–25 minutes of active time: grinding, assembling, and cleanup. After that, you do nothing for 18–20 hours.
Troubleshooting the first batch
Too bitter or harsh: The most common outcome. Could be grind too fine (most likely), steep time too long, or a very dark roast that’s particularly sensitive to over-extraction. Grind coarser first. If still bitter after adjusting, try 14–16 hours instead of 18–20.
Too weak or watery: Steep longer, up to 24 hours. Or increase the ratio — use 75g per 240ml instead of 60g. Or both.
Gritty or silty: The mesh filter let through very fine particles. This usually means your grind had too many fines — blade grinder, or burr grinder on too fine a setting. Grind coarser. If using a mason jar and cheesecloth rather than a pitcher, double-layer the cheesecloth.
Flat or boring: You used old or stale pre-ground coffee. Cold brew highlights good beans and hides nothing. Fresh beans from a local roaster or a cold-brew-specific blend will change the result dramatically.
Room-temperature steep. Same ratio, same grind, same beans — but leave it on the counter instead of in the fridge. Steep 8–12 hours. The result is typically a bit more bitter and less smooth, but the faster turnaround is useful to know about.
The coffee tonic. Equal parts cold brew concentrate and tonic water, over ice. No milk, no sweetener. Sounds wrong, tastes surprisingly good — the bitterness of the tonic plays off the sweetness of the cold brew. Popular enough at coffee shops that it’s worth making at home.
A looser recipe. If your first batch came out strong and almost syrupy, try 1:5 or 1:6 for the next one. Some people prefer a lighter, more drinkable concentrate. The range between “this seems right” and “this is definitely too weak” is wide — find yours.
If you’ve made two or three batches and have a ratio and steep time you like, you’re done — cold brew is one of those hobbies that delivers quickly. A few things worth knowing for the long run:
Keep a batch log. Write down: beans, ratio, grind setting, steep time, result (too bitter / right / too weak). Cold brew is made in 24-hour cycles, so without notes you’ll repeat mistakes.
Always have a batch going. Most cold brew drinkers keep a rotating pitcher — start a new batch as soon as the old one is half-finished.
Upgrade the beans before the gear. The equipment ceiling for cold brew is genuinely low. Better beans will improve your cup more than any equipment upgrade at this stage.
Save your money
What you don't need yet
Beginners get pressured to buy a lot of stuff that doesn't help them play
better. Here's what we'd skip on day one.
A gooseneck kettle — You're brewing cold — no hot water involved. This is essential for pour-over, completely irrelevant for cold brew.
A nitro cold brew setup — Nitrogen-infused cold brew is delicious. It's also a $150+ setup that makes sense after you've been making cold brew for months. Start first.
A cold drip tower — Cold drip produces a more refined cup than immersion cold brew — it's also expensive, slow, and finicky. Save it for after you're bored with immersion.
Multiple filter options — Your cold brew maker already comes with a filter. Paper, metal, and felt all produce slightly different results — interesting to experiment with eventually, not a day-one concern.
A cold brew coffee subscription — Once you're making your own, subscriptions don't make economic sense. A bag of beans costs $15–20 and makes 6–8 batches. Specialty subscriptions charge $20–30 per shipment for the same volume.
First week
Your first seven days
A short, real plan to get from gear-on-doorstep to actually playing.
Order the Takeya cold brew maker and a bag of Stone Street beans so both arrive before the weekend. · Buy
First batch: use 1 cup coarsely ground coffee per 4 cups cold water. Stir briefly, seal, and refrigerate 18–20 hours. · Action
Taste the concentrate straight from the fridge. Should be strong and smooth — almost sweet. Dilute 1:1 with cold water or milk to serve. · Action
Assess: too bitter = grind coarser or steep 14–16 hours next time. Too weak = steep longer, or increase the coffee ratio slightly. · Action
Make a second batch with your adjustments. Write down the ratio and steep time — cold brew is made in 24-hour cycles and you'll repeat mistakes without notes. · Action
Try it three ways: straight over ice, 1:1 with oat milk, and as a coffee tonic (equal parts cold brew + tonic water over ice — surprisingly good). · Action
FAQ
Common questions
What ratio of coffee to water should I use?
For concentrate: 1 part coffee to 4 parts water by volume, or about 75g per 500ml. Steep 18–20 hours, dilute 1:1 to serve. For ready-to-drink cold brew: use 1:8 and drink straight — lighter flavor, shorter shelf life.
How long should I steep cold brew?
18–20 hours in the fridge is the sweet spot for most dark-roast recipes. You can go as short as 12 hours (lighter body) or up to 24 hours. Past 24, dark roasts can become harsh. Room-temperature steeping is faster — 8–12 hours — but slightly more bitter.
Can I steep at room temperature instead of in the fridge?
Yes. Room-temperature steeping is faster (8–12 hours) because warmer conditions accelerate extraction. The result is typically a bit more bitter and less smooth than fridge-steeped cold brew. Fridge steeping is our recommendation for beginners — slower extraction is more forgiving and there's no food safety concern.
How long does cold brew last?
Sealed in the fridge, concentrate keeps for two weeks without significant flavor loss. Ready-to-drink cold brew (diluted before storage) tastes best within a week. An airtight lid is key — cold brew picks up fridge odors readily.
Does cold brew have more caffeine than regular coffee?
Cold brew concentrate drunk straight has more caffeine per ounce than hot-brewed coffee. But cold brew is almost always diluted 1:1 before serving, which brings caffeine content roughly in line with hot coffee. If you're drinking it undiluted, yes — you're getting significantly more caffeine per cup.
Can I use any coffee beans for cold brew?
You can, but medium-dark and dark roasts work best. Cold extraction is gentle — it highlights sweetness, chocolate, and caramel notes while muting sharp acids. Very bright light-roast single-origins can taste flat or sour when brewed cold. Once you have the basics down, experimenting with lighter beans is interesting — but start with a medium-dark.
r/Coffee — The main coffee subreddit. Search the wiki before posting — cold brew ratios, grind settings, and bean recommendations have been discussed thousands of times. The recommended coffees thread is a solid starting point for beans.
James Hoffmann (YouTube) — The most credible coffee educator online. His cold brew and immersion brewing videos are worth watching once you've made a few batches and want to understand why the variables work the way they do.
Serious Eats — Cold Brew Guide — Methodical, testing-based guide that explains the science behind ratios and steep times. The best 'why' resource for cold brew — written by someone who actually tested the variables.
Specialty Coffee Association — The industry body that defines brewing standards. Their extraction guidelines apply primarily to hot methods, but understanding them explains why cold brew extracts differently and why the long steep compensates for temperature.
Counter Culture Coffee — Education — One of the best specialty roasters in the country. Their education blog covers cold brew technique, bean selection, and extraction in plain language. Genuinely educational despite being on a roaster's site.
As an Amazon Associate, JustBeginning earns from qualifying purchases.
We may also earn commission from other affiliate programs linked on this
page. Editorial recommendations are independent; we don't choose
products based on commission rates.
Product prices and availability are accurate as of the date and time
indicated and are subject to change. Any price and availability
information shown on Amazon at the time of purchase will apply.


 Best starter