Hard cider is one of the most approachable fermentation projects you can start — cheaper to set up than home brewing, more forgiving than wine, and your first drinkable batch arrives in about four weeks. The core process is simple: juice, yeast, time, and a sealed vessel. Here's the gear that makes it work and the expensive stuff you can skip.
By Colin B. · Published June 3, 2026 · Last reviewed June 3, 2026
A 1-gallon starter kit runs $15–30; add yeast, campden tabs, and swing-top bottles and you're under $60. Scaling to 5 gallons with a glass carboy, auto-siphon, and capper lands around $100–150.
We earn commission on qualifying Amazon purchases — see our
affiliate disclosure.
Price tiers and budget totals shown above are editorial estimates;
actual Amazon prices vary.
At a glance
Our top pick in each category
The fastest path through this guide — each best-starter pick by category.
Scroll for the budget and upgrade alternatives.
Start with store-bought apple juice, not fresh apples. Pasteurized juice is consistent, wild-yeast free, and lets you focus on process without fighting unpredictable variables. Fresh pressing is a fun project for batch five, not batch one.
One gallon is the perfect first batch. You get 4–5 bottles of finished cider — enough to know if you like the process without committing to 24+ bottles of something you might need to tweak. Buy a 1-gallon kit, learn on it, then decide if you want to scale.
Sanitation isn't optional. The number-one way beginners ruin their first batch is poor sanitation — wild yeast and bacteria can outcompete your cider yeast and turn the whole gallon undrinkable. No-rinse sanitizer plus a clean workspace makes this a non-issue.
The gear
What you actually need
Fermentation Vessels
Your vessel is where the cider lives for 2–6 weeks. Glass carboys are the standard — they don't scratch, don't absorb odors, and let you see exactly what's happening inside. A 1-gallon glass jug with an airlock is the ideal starter: low commitment, easy to work with, and available everywhere. When you're ready to make real quantities (24 bottles per batch), step up to a 5-gallon carboy.
Fermentation Vessels — what's the difference?
A few common shapes, each making a different trade.
1-Gallon Starter
4–5 bottles per batch. Low commitment, perfect for learning.
Batch size
~1 gal
Yield
4–5 bottles
Weight full
~9 lbs
Best for First-time fermenters, small kitchens, experimenting with flavors
Tradeoff Frequent batching needed to maintain a drinking supply
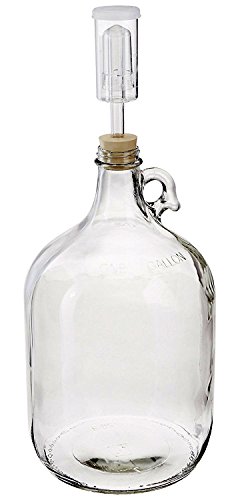
1-Gallon Glass Carboy Starter Kit with Airlock and Stopper
$23.58 as of Jun 22, 2026
★★★★★Our rating· In Stock
A complete 1-gallon setup in one box — glass jug, two-piece airlock, drilled stopper, and bung. This is exactly what you need for batch one: no scavenging for parts, no guessing about airlock fit. Buy this, buy a gallon of juice and some yeast, and you're making cider.
What we like
Complete kit — jug, airlock, and stopper arrive together
1-gallon size is low-stakes for experimenting with recipes
Glass is food-safe, odor-neutral, and easy to see through
What to know
Thinner glass than a proper carboy — handle carefully
4–5 bottles per batch; you'll want to scale up quickly
The 5-gallon glass carboy is the standard vessel for serious home cider-making — thick walls, narrow neck that minimizes oxidation, and a smooth interior that cleans completely. This size produces about 24 bottles per batch. Buy this after two or three 1-gallon batches once you know the hobby is sticking.
What we like
Narrow neck limits oxygen contact during aging — cleaner cider
Thick glass lasts decades with normal handling
24 bottles per batch — your cost per bottle drops dramatically
What to know
Over 40 lbs when full — plan your fermentation spot before filling
Narrow neck makes fruit additions messy without a wide funnel
6.5-Gallon Fermentation Bucket with Lid and Airlock
$35.59 as of Jun 22, 2026
★★★★☆Our rating· In Stock
The wide-mouth bucket is the easiest vessel to clean and the most forgiving for adding crushed fruit or spices. If you're planning to make country wines or meads alongside cider, a bucket handles them all. Less elegant than glass but genuinely practical for high-fruit batches where you need full access to the interior.
What we like
Wide mouth accepts fruit additions without a funnel
Lightweight even full — easy to move around the house
What to know
Scratches harbor bacteria — budget for replacement every few years
Opaque — you can't see fermentation activity through the sides
Yeast is the thing that turns juice into cider — different strains produce dramatically different results. For beginners, champagne yeast (like Lalvin EC-1118) is the safest pick: it ferments reliably, tolerates a wide temperature range, and produces clean dry cider every time. As you get comfortable, drift toward strains that leave more fruit character and residual sweetness — more expressive but more finicky.
Best starter
Lalvin
EC-1118 Champagne Yeast (5-Pack)
$7.99 as of Jun 22, 2026
★★★★★Our rating· In Stock
EC-1118 is the most widely used cider and wine yeast in the world. It ferments reliably even at cooler temperatures, handles high-sugar musts without stalling, and produces clean dry cider with minimal off-flavors. A 5-pack gives you five batches for a few dollars — the cheapest per-batch cost in all of home fermentation.
What we like
Most reliable fermentation yeast you can buy — rarely stalls
Works at 50–86°F — no temperature control needed in most homes
5-pack covers 5 batches for under $5 total
What to know
Ferments very dry — needs backsweetening for sweeter cider styles
Neutral flavor profile — won't add complexity on its own
Designed specifically for cider, M02 preserves more apple aroma and leaves a touch of residual sweetness naturally — you don't have to backsweeten as aggressively. The result is a more fruit-forward cider that drinks closer to fresh-pressed. Worth trying on your second or third batch.
What we like
Designed for cider — preserves apple aroma other yeasts blow off
Naturally retains some sweetness — less backsweetening needed
What to know
Narrower temperature range — needs a stable 64–72°F to perform
★★★★☆Our rating· Only 6 left in stock - order soon.
Premier Blanc (also sold as Champagne yeast) is EC-1118's direct competitor and performs almost identically in cider — reliable fermentation, clean dry finish, very forgiving. The 10-pack is a great bulk buy once you know you'll be making cider regularly.
What we like
10 packets for under $10 — great value for regular batch makers
Ferments as reliably as EC-1118 with a comparable dry profile
What to know
Ferments fully dry just like EC-1118 — same backsweetening needed
Neutral profile — experienced makers will notice little difference
A hydrometer tells you two things: how much sugar is in your juice before fermentation (which predicts final ABV) and whether fermentation has actually finished. Without one, you're guessing on both counts. Bottling too early — before fermentation is fully done — creates bottle bombs. A $10 hydrometer prevents that. A thermometer matters for pitching yeast at the right temperature; too hot kills it.
Best starter
Brewer's Elite
Triple Scale Hydrometer with Test Jar
$21.99 as of Jun 22, 2026
★★★★★Our rating· In Stock
Triple-scale means one instrument reads specific gravity, potential alcohol, and Brix — the three measurements you'll actually use. The included plastic test jar means you don't need a separate container for readings. Inexpensive and essential.
What we like
Three scales in one — SG, potential ABV, and Brix covered
Includes plastic test jar — no separate container needed
Under $15 for a tool you'll use on every single batch
What to know
Glass — it will break eventually. Keep a spare on hand
Requires ~100ml of cider to test — minor waste per reading
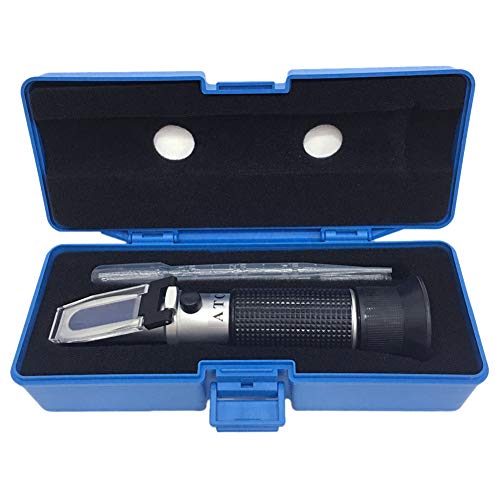
A refractometer only needs 2–3 drops of liquid for a Brix reading — far faster than floating a hydrometer in a test jar. Great for checking juice sugar before pitching. Note: refractometers aren't accurate for finished cider (alcohol distorts readings), so you still need a hydrometer for final gravity checks.
What we like
2–3 drops gets a reading in seconds — no test jar or cleanup
Handy for evaluating fresh juice sugar at a pick-your-own orchard
What to know
Alcohol distorts readings — useless for measuring finished cider ABV
Requires calibration with distilled water before first use
Pitching yeast into juice that's too hot kills it; too cold and it stalls. An instant-read probe thermometer takes the guesswork out — dip it in, get the reading, pitch your yeast at the right 65–75°F sweet spot. You probably already have one in your kitchen; if not, this is the one to own.
What we like
2-second reading — dip and pitch with confidence
Folds flat and waterproof — lives in your brewing kit permanently
What to know
Overkill if you already own a probe thermometer
Needs battery replacement eventually — stock CR2032
Two additives do most of the work in beginner cider: campden tablets knock out wild yeast and bacteria in fresh-pressed juice before pitching, and pectic enzyme breaks down apple pectin for a cleaner result. Neither is required for store-bought pasteurized juice — but both matter a lot once you work with fresh-pressed cider. Star San no-rinse sanitizer is non-negotiable for every batch regardless of juice source.
Best starter
Five Star
Star San No-Rinse Sanitizer (8 oz)
$
★★★★★Our rating
Star San is the standard no-rinse sanitizer across all home fermentation. Mix 1 oz per 5 gallons of water, coat everything that touches your cider, and let it drain — no rinsing needed. The foam is harmless. This single product prevents more contamination failures than anything else in your toolkit.
What we like
No-rinse formula — wet equipment goes straight into use
8 oz makes ~40 gallons of sanitizer solution
The fermentation standard across brewing and cider making worldwide
What to know
Foam looks alarming to beginners — it's harmless, but plan for it
Diluted solution weakens over a few weeks — mix fresh as needed
Campden (potassium metabisulfite) knocks out wild yeast and bacteria in fresh-pressed juice before you pitch your chosen yeast strain — essential when working with apples from an orchard or pick-your-own farm. Add 1/4 tsp per gallon, wait 24 hours, then pitch yeast. Also protects finished cider from oxidation when racking.
What we like
Kills wild yeast and bacteria in fresh-pressed juice before pitching
Also prevents oxidation when racking and bottling
Small quantity lasts through many batches
What to know
Sulfite allergen — problematic for sensitive individuals
Requires 24-hour wait after addition before pitching yeast
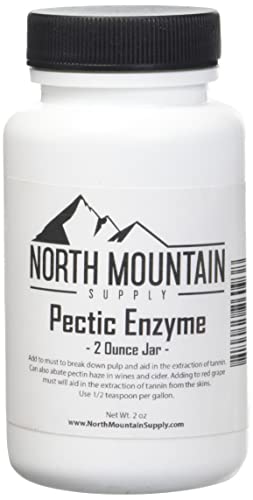
Apple pectin turns fresh-pressed cider milky and hazy. Pectic enzyme breaks that pectin down and lets the cider clear naturally without filtering. Add it 12 hours before pitching yeast. The difference between treated and untreated fresh-press cider is dramatic — one looks like orange juice, one looks like rosé.
What we like
Clears pectin haze from fresh-pressed juice dramatically
2 oz treats many batches at standard usage rates
What to know
Heat-sensitive — must add to cool juice only
No effect on pasteurized store-bought juice (already pectin-free)
When fermentation finishes, you need to move cider from the vessel into bottles without oxidizing it. An auto-siphon starts the transfer with one pump stroke — no mouth contact, no disturbing the sediment layer. Swing-top bottles are the easiest entry: the lid is built in, no capper needed, and they handle light carbonation safely. Once you're making 5-gallon batches, a proper bottle capper and crown caps are worth the investment.
Best starter
Encheng
16 oz Swing Top Glass Bottles (8-Pack)
$$
★★★★★Our rating
Swing-top bottles eliminate the capper — the lid is built in and reusable indefinitely. They handle moderate carbonation without issue and are dishwasher-safe. An 8-pack covers a full 1-gallon batch. The easiest possible entry into cider bottling.
What we like
No capper needed — the swing-top seal is built in and reusable
Dishwasher-safe and reusable indefinitely
8-pack covers a 1-gallon batch with bottles to spare
What to know
Rubber gaskets degrade over 2–3 years — replacements eventually required
Not ideal for very high carbonation — use crown caps for sparkling styles
★★★★☆Our rating· Only 19 left in stock - order soon.
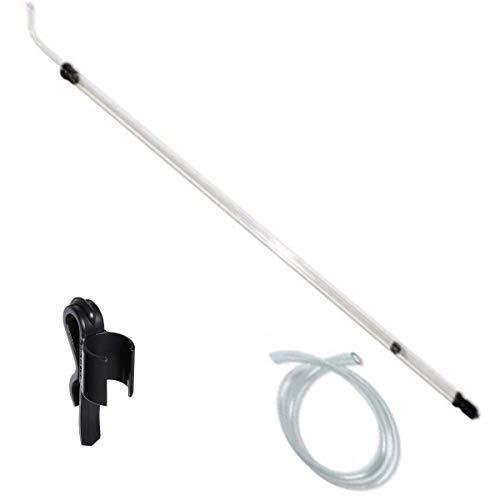
The auto-siphon is the single tool that makes racking clean and easy. Push the piston once and the siphon starts — no mouth contact, no disturbing the sediment. The ½-inch model is right for cider and beer. This one piece of equipment protects every batch from oxidation and contamination during the transfer from carboy to bottles.
What we like
Single pump stroke starts the siphon — no mouth contact
Includes 6-ft tubing — enough to reach carboy to bucket
Leaves sediment behind cleanly when positioned correctly
What to know
Plastic body cracks eventually — not a lifetime tool
½-inch size is correct for cider; verify before ordering
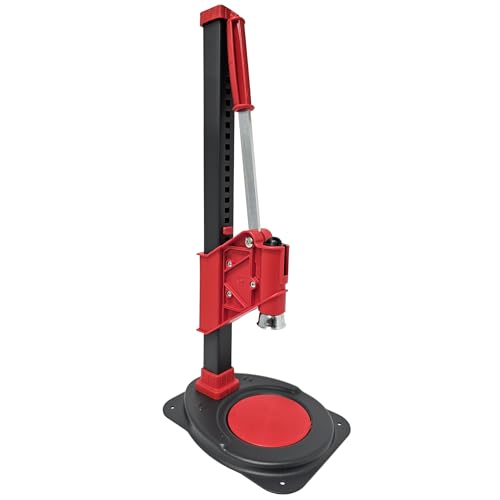
If you want properly carbonated sparkling cider, crown caps hold much higher pressure than swing-tops. A bench capper is faster and more consistent than a handheld model for batches over a dozen bottles. Buy a separate bag of crown caps (standard 26mm) to go with it.
What we like
Crown caps handle high carbonation better than swing-tops
Bench-style capper is faster than handheld for 5-gallon batches
What to know
Requires 26mm bottle compatibility — check your bottles first
Most people expect their first batch to be complicated. It isn't — but the waiting is hard. Here's what actually happens, week by week, from pitching yeast to pouring your first glass.
Hard cider has a reputation for being a hobby that requires apple orchards, special equipment, and inherited knowledge. None of that is true. Your first batch requires a glass jug, a packet of yeast, a gallon of juice from the grocery store, and about four weeks of patience.
The process is genuinely simple. The challenge is understanding why each step matters — and resisting the urge to rush.
Week One: Pitch Day
Cider making starts with one decision that beginners consistently get wrong: the juice. You need 100% apple juice with no preservatives. Sorbate and benzoate — common preservatives in cheap juice — are specifically designed to inhibit yeast. They will prevent fermentation from starting or cause it to stall halfway through. Read the label. If it says “pasteurized” and nothing else, you’re good. If it lists preservatives, find different juice.
On pitch day, you do four things:
Sanitize everything that will touch the cider — the jug, the airlock, the stopper, your funnel, your spoon. Use no-rinse sanitizer (Star San is the standard). Wet the equipment, let it drain, use it immediately. The foam is harmless. Don’t rinse it off.
Take a gravity reading with your hydrometer before adding the yeast. This is your “original gravity” — it predicts the final ABV. Standard apple juice at 1.050 specific gravity will ferment to roughly 6–6.5% ABV with EC-1118. Write this number down.
Pitch the yeast. Empty the packet into the juice, seal the jug with the drilled stopper and airlock, and add a small amount of sanitized water to the airlock to create a seal.
Move the jug somewhere dark and 60–72°F. A kitchen cabinet, a closet shelf, or a corner of a room away from sunlight. Temperature consistency matters more than hitting a specific number.
Within 12–24 hours, you’ll see bubbling in the airlock — CO2 pushing through the water seal as fermentation ramps up. This is the sign that everything is working. If you see nothing by 48 hours, check the juice label for preservatives, or check that the stopper is sealing the jug completely. A leaking seal means CO2 escapes around the stopper instead of through the airlock.
Weeks Two and Three: The Waiting Game
Fermentation peaks in days 2–5 and then slows. By the end of week one, the airlock is bubbling occasionally instead of constantly. By week two, you might see one bubble per minute or less. This is not a problem — this is fermentation finishing.
The most common beginner mistake is opening the jug to check, taste, or smell during this phase. Every time you remove the airlock you introduce oxygen and potential contamination. Leave it alone. The cider is fine. It doesn’t need attention.
What you will notice as the weeks pass:
Cloudiness decreasing. Fresh cider is murky from yeast in suspension. As fermentation slows, yeast drops to the bottom and the cider begins to clear from the top down.
Sediment accumulating. A layer of tan or light brown sediment builds on the jug bottom. This is yeast lees — entirely normal and not a sign of contamination.
Color deepening slightly. Very light golden when fresh; it may darken to a pale amber as it clears.
Resist the temptation to taste until at least week two. Early-fermentation cider tastes harsh and yeasty — not representative of what you’ll have at the end.
Fermentation is finished when the specific gravity stops changing — not when the airlock stops bubbling. Airlock activity is an unreliable indicator of completion. A seal that’s slightly loose can stop bubbling while fermentation is still active. A completely finished cider in a sealed jug can release occasional CO2 for days after.
The correct way to confirm fermentation is done:
Take a gravity reading with your hydrometer. EC-1118 fermenting standard apple juice will finish near 0.998–1.002 specific gravity.
Take another reading 48 hours later. If it hasn’t moved, fermentation is done. If it dropped even slightly, wait another few days and check again.
When two readings 48 hours apart are identical, you’re done. Your final gravity minus your original gravity tells you approximate ABV (a simple calculator: search “ABV calculator hydrometer” for a free tool).
At this point you have still dry cider. It’s drinkable, but most beginners find it sharper than they expected — EC-1118 leaves essentially no residual sugar. You have two options:
Option A: Bottle it still. Transfer to swing-top bottles and refrigerate. Serve cold. This cider will taste clean, dry, and apple-forward with a slight tartness. If it’s too dry for your taste, add a small amount of apple juice concentrate to each bottle before sealing to sweeten it.
Option B: Carbonate it. Add 3/4 teaspoon of white sugar per 16 oz bottle before sealing, then leave at room temperature for 7–10 days. The residual yeast will consume the priming sugar and produce CO2 inside the sealed bottle, carbonating the cider. Refrigerate before drinking to stop further fermentation.
What Comes Next
Your first batch will teach you things no guide can: what active fermentation looks like in your specific space, how temperature variations affect timing, what your tap water’s character does to the final flavor. That knowledge compounds fast.
Batch two is where you start experimenting. Try a different yeast strain — Mangrove Jack’s M02 is designed for cider and produces noticeably more apple character than EC-1118. Try adding a small amount of spice (a cinnamon stick, a few cloves, a vanilla bean) to the secondary. Try fermenting fresh-pressed juice from a local orchard when fall arrives.
The equipment path scales naturally. A 1-gallon batch teaches you the process; a 5-gallon carboy lets you make enough to share. Most cider makers who stick with it make the jump around batch four or five, once they’ve dialed in a recipe they want to make in quantity.
Save your money
What you don't need yet
Beginners get pressured to buy a lot of stuff that doesn't help them play
better. Here's what we'd skip on day one.
A fruit press — Store-bought pasteurized juice makes excellent cider. Press your own apples after 5–6 batches when you understand the process end to end.
A pH meter — pH strips are accurate enough for cider. Digital meters cost $30–80 and need calibration — overkill until you're intentionally adjusting acid levels.
An oak barrel — Oak aging is an advanced technique that rewards batches you've already dialed in. Not batch one — not batch five.
A conical fermenter — Expensive ($150–400) and designed for professional breweries. A glass carboy does the same job for cider at a fraction of the price.
A kegging system — CO2 tanks, regulators, and kegs run $200+ to set up. Learn to bottle first — most home cider makers bottle forever and enjoy it.
Tannin powder — Apple juice already contains tannins. Tannin additions are a fine-tuning move for experienced makers chasing a specific mouthfeel.
First week
Your first seven days
A short, real plan to get from gear-on-doorstep to actually playing.
Buy a gallon of apple juice — check that the label says no preservatives (sorbate or benzoate will kill your yeast). · Action
Order a 1-gallon fermentation kit, a packet of Lalvin EC-1118 yeast, and a hydrometer. · Buy
Sanitize everything that will touch the cider. Fill your vessel with juice, take a gravity reading, pitch the yeast, seal with the airlock, and move it somewhere 60–72°F. · Action
Check for airlock activity at 24 hours. Active fermentation produces steady bubbling. Nothing by 48 hours? The juice may have preservatives or the yeast packet was bad. · Action
Wait 2–4 weeks. Resist opening it. Take a final gravity reading and confirm it's stable over 48 hours before bottling. · Action
FAQ
Common questions
Can I use store-bought apple juice instead of fresh-pressed apples?
Absolutely — it's the recommended way to start. Use 100% juice with no preservatives (sorbate or benzoate kill yeast). Many experienced cider makers use store-bought juice for regular batches and save fresh pressing for special occasions.
How long does it take to make hard cider?
A basic batch takes 2–4 weeks of fermentation plus 1–2 weeks of bottle conditioning if you want carbonation. Still cider can be ready in 3 weeks. Most cider improves with another 2–4 weeks of aging after fermentation, but it's drinkable as soon as fermentation finishes.
How much alcohol will my cider have?
Standard apple juice fermented dry with EC-1118 yeast produces around 5–7% ABV — similar to a strong beer. Adding more sugar before fermentation raises ABV. Backsweetening after fermentation doesn't raise ABV because fermentation is already done.
What does 'backsweetening' mean?
Fermentation turns all natural sugar into alcohol, leaving a dry cider. Backsweetening means adding juice concentrate, non-fermentable sweeteners (like erythritol), or fresh juice after fermentation finishes to restore sweetness before bottling.
Is homemade hard cider safe to drink?
Yes — cider's low pH and alcohol content make it inhospitable to the pathogens that cause food illness. Off-flavors (vinegar, nail polish, sulfur) are quality problems, not safety problems. If it tastes bad, pour it out; it won't hurt you.
What's the difference between still and sparkling cider?
Still cider has no carbonation — bottle it when fermentation is fully done. Sparkling cider adds a small amount of sugar before sealing ('priming') so the yeast produce CO2 inside the bottle. Swing-top bottles work for light carbonation; crown caps handle higher pressure for truly sparkling styles.
American Cider Association — The trade body for cider in North America. Style guidelines, producer directory, and cider education resources.
r/cider — The most active beginner community online. Check the wiki first — most beginner questions are answered there. Active troubleshooting threads if something goes wrong with a batch.
The Cider School (YouTube) — Clear beginner-friendly video tutorials covering basic cider making through more advanced fermentation techniques.
Craft Cider Making by Andrew Lea — The definitive technical reference for serious cider makers. More chemistry and apple science than most beginners need — save it for after batch three.
CiderSage — Recipe database and style guides. Useful for your second batch when you want to try something beyond a basic dry apple cider.
As an Amazon Associate, JustBeginning earns from qualifying purchases.
We may also earn commission from other affiliate programs linked on this
page. Editorial recommendations are independent; we don't choose
products based on commission rates.
Product prices and availability are accurate as of the date and time
indicated and are subject to change. Any price and availability
information shown on Amazon at the time of purchase will apply.
Our top pick1-Gallon Glass Carboy Starter Kit with Airlock and Stopper

 Best starter