French press is the lowest-barrier path to genuinely great coffee at home. No paper filters, no finicky technique, no machine that costs as much as a used car — just coarsely ground beans, hot water, four minutes, and a cup that tastes like it came from a real café.
By Colin B. · Published May 15, 2026 · Last reviewed June 1, 2026
A good french press and a decent burr grinder is all you really need. The upgrade from pre-ground to freshly ground is dramatic — that's where to spend.
We earn commission on qualifying Amazon purchases — see our
affiliate disclosure.
Price tiers and budget totals shown above are editorial estimates;
actual Amazon prices vary.
At a glance
Our top pick in each category
The fastest path through this guide — each best-starter pick by category.
Scroll for the budget and upgrade alternatives.
The grinder matters more than the press. Pre-ground coffee is already stale and cut too fine for french press — it extracts muddy and over-extracted. A $40 hand grinder and a basic press beats a fancy press with bag coffee every time. If you can only upgrade one thing, make it the grinder.
Don't worry about water temperature for your first few brews — 'just off the boil' (30 seconds after the kettle clicks off) is close enough. A variable-temperature kettle is a real improvement once you've dialed in your recipe, but it's not where to start.
French press uses a coarse grind. Coarser than you think. If your first cup is muddy, bitter, or full of sediment, your grind is probably too fine. Dial coarser before changing anything else.
The gear
What you actually need
French Press
Any french press will work — technique matters more than the vessel. That said, some presses are noticeably better designed. The things worth caring about: a plunger that fits snugly (fewer grounds in your cup), a mesh filter that doesn't flex or gap at the edges, and a handle that won't burn you. For size: a standard 8-cup (34 oz) is right for most people even if you're making just one or two cups — the extra headspace makes pressing easier and the bloom more effective.
French Press — what's the difference?
A few common shapes, each making a different trade.
Standard Glass (8-cup / 34 oz)
The most common size. Enough headroom to bloom and press comfortably, works for 1–3 cups.
Volume
34 oz (1 L)
Serves
2–3 cups
Material
Borosilicate glass
Best for Most beginners, households with 1–3 coffee drinkers
Tradeoff Glass breaks; coffee cools quickly if left in the press
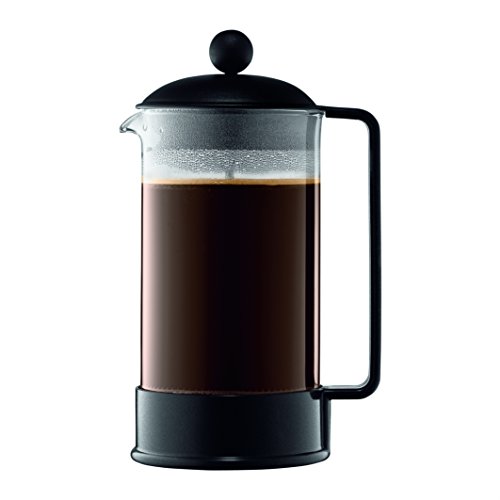
The Chambord has been the benchmark french press since the 1950s for good reason. Chrome frame, borosilicate glass, a plunger that fits correctly, and a mesh filter that doesn't sag. It's affordable, replacement parts are everywhere, and it makes genuinely excellent coffee. If you only read one line: buy this.
What we like
Plunger fits snugly — minimal grounds in your cup
Borosilicate glass handles daily heat without cracking
Replacement parts available everywhere online and in stores
Same plunger and filter mechanism as the Chambord, plastic frame instead of chrome. Makes identical coffee. If budget is tight, start here — you can always upgrade later, and the press itself does the same job.
What we like
Same filter mechanism as the Chambord for significantly less money
Plastic frame makes it lighter and harder to shatter
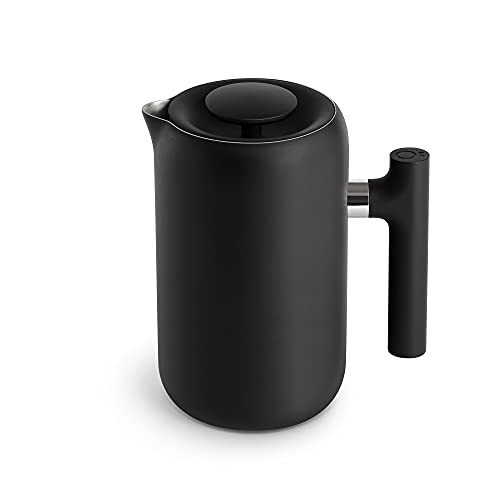
Fellow's take solves the two most annoying things about standard glass presses: it keeps coffee hot for an hour (double-wall stainless) and the fine mesh filter cuts sediment noticeably. More design object than kitchen tool, but the quality is real. Worth it once you're pressing daily and want the full experience.
What we like
Double-wall stainless keeps coffee hot for a full 60 minutes
Fine mesh filter cuts sediment more than standard presses
What to know
Can't see the brew — no visual cue when it's ready
Premium price for incremental improvement over the Chambord
This is the most important piece of gear you'll buy, and it's not the press. A burr grinder crushes coffee between two abrasive surfaces, producing uniform particles. A blade grinder chops randomly, producing a mix of fine dust and chunks that extract at wildly different rates — the dust goes bitter while the chunks are still watery. Muddy, harsh french press coffee is almost always a blade grinder problem. Get a burr grinder. It doesn't have to be expensive.
Best starter
Timemore
Chestnut C2 Hand Grinder
$$
★★★★★Our rating
Hand grinders get you to burr-grinder quality at a fraction of the cost of an entry-level electric. The C2 has conical steel burrs, a click-wheel that stays put between uses, and build quality of something twice the price. Takes about 90 seconds of grinding per cup — some people find it meditative, others want to throw it out the window. But the coffee it makes is excellent.
What we like
Conical steel burrs produce uniform grounds at a fraction of electric prices
Click-wheel grind setting stays put between brews without drift
What to know
90 seconds of hand-cranking is rough before your first cup
The entry point to burr grinding. Ceramic burrs instead of steel — grind consistency isn't as tight, but it's still a genuine improvement over any blade grinder. Under $30 and a solid 'I'm not sure about this hobby yet' purchase.
What we like
Ceramic burrs are a genuine step up from any blade grinder
Under $30 — easy to justify before you're fully committed
What to know
Ceramic burrs aren't as consistent as steel at coarse settings
★★★★☆Our rating· Only 12 left in stock - order soon.
When you want push-button convenience and a proper burr grinder, the Encore ESP is where most coffee people start. Forty grind settings, a conical burr, and a company famous for customer service and replacement parts. The ESP version adds espresso-range fine settings — handy if you ever branch into espresso.
What we like
40 grind settings span french press through espresso-fine
Baratza's customer service and parts availability are industry-best
What to know
At this price you're close to buying a full espresso setup instead
The best single upgrade you can make costs the least: buy fresher beans. Specialty roasters print a roast date on the bag — you want beans roasted within the last 2–4 weeks. Grocery store beans typically have no roast date and are 6–12 months old. The difference is immediate and dramatic. For french press specifically, medium to medium-dark roasts work better than light roasts — the coarse grind and short contact time don't fully develop the delicate acidity of lighter roasts.
Best starter
Counter Culture
Big Trouble Blend
$$
★★★★★Our rating
Counter Culture is a North Carolina roaster that ships fresh nationwide. Big Trouble is their most approachable blend — chocolate, caramel, toasted nut, consistently medium. Available at Whole Foods in many cities and ships online. Roast date printed on every bag. This is the coffee to learn on before chasing single origins.
What we like
Roast date on every bag — freshness you can verify before buying
Available at Whole Foods in many cities, no wait for shipping
What to know
Blend profile won't vary — branch out once you know your preferences
Once you want to start exploring, Onyx is one of the best small roasters in the country. Southern Weather is their beginner-friendly blend — fruit-forward but not aggressive, excellent in french press. Ships fast from Arkansas with clear roast dates.
What we like
One of the best small roasters in the US — consistently excellent
Fruit-forward but not aggressive — easy entry point to single origins
What to know
Ships from Arkansas — plan ahead to stay within the 2-4 week window
Any kettle gets you started. A gooseneck isn't strictly necessary for french press — you're not trying to hit a precise spot on a pour-over bed — but water temperature matters. Boiling water (212°F) can scorch the grounds and add bitterness. Target 200°F, which is about 30 seconds off the boil. A variable-temperature kettle handles this automatically and doubles as a precise pour-over tool if you ever go down that path.
Best starter
Bonavita
1.0L Electric Gooseneck Kettle
$$
★★★★★Our rating
The most recommended entry-level gooseneck in coffee circles, and the price reflects it. Fixed temperature at 100°C, quick to boil, holds heat well enough for a morning routine. The gooseneck gives you pour control you'll actually use once your technique develops. Does exactly what it needs to.
What we like
Most recommended entry-level gooseneck in specialty coffee circles
Gooseneck spout gives pour control for future pour-over experiments
What to know
Fixed 100°C — no temperature control for delicate lighter roasts
If you already own a kettle, use it first. Let it boil, wait 30 seconds, pour. The coffee will be fine. This is the right choice only if you need a new kettle anyway and want a starting option without committing to a gooseneck.
What we like
1.7L capacity makes enough for multiple cups without refilling
Good value if you just need a replacement kettle
What to know
Standard wide spout makes precise, slow pouring difficult
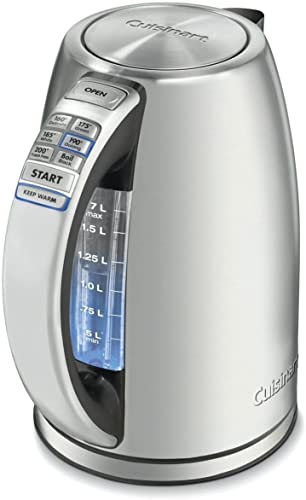
Sets temperature to the degree, holds it there while you prep, and looks great on a counter. If you're brewing pour-over, aeropress, and french press from the same kitchen, this handles all three perfectly. Overkill for french press alone — but if coffee is becoming a real hobby, not a gear impulse purchase.
What we like
Temperature holds to the exact degree while you set up your brew
Covers french press, pour-over, and aeropress from one kettle
What to know
Overkill if french press is your only brew method
Premium price driven partly by looks, not just function
Brewing by weight instead of scoops is the easiest route to consistency. The standard ratio is 1:15 — 1 gram of coffee to 15 grams of water. A typical 34-oz press uses about 60g coffee and 900g water. You don't need to weigh every time once you've calibrated your scoop, but weighing for the first few brews teaches you what correct looks like. Any kitchen scale works; a dedicated coffee scale adds a timer, which matters more for pour-over than french press (though tracking a 4-minute steep is genuinely useful early on).
Best starter
Hario
V60 Drip Scale
$41.99 as of Jun 22, 2026
★★★★★Our rating
Flat, light, accurate to 0.1g, with a built-in timer that starts on button press. Overkill for french press on its own, but legitimately useful if you ever graduate to pour-over or aeropress — which you probably will. Earns its counter space.
What we like
Built-in timer means you're not reaching for your phone mid-brew
Accurate to 0.1g — enough precision for coffee and baking alike
What to know
More scale than you need for french press alone — value depends on future plans
Under $15 and accurate enough for coffee ratios. No built-in timer, but your phone has one. Gets you to weight-based brewing without a dedicated purchase.
What we like
Under $15 and accurate enough for 1:15 coffee ratios
Works immediately alongside your existing phone timer
What to know
No built-in timer — you'll be reaching for your phone mid-brew
French press has a reputation for being simple. It is — eventually. But most first brews are muddy, bitter, or thin, and beginners assume they're doing something wrong. Usually they're not. They're just using stale supermarket coffee and the wrong grind.
French press has a reputation for being simple. It is — eventually. But most first brews are muddy, harsh, or thin, and beginners assume they’re doing something fundamentally wrong. Usually they’re not. They’re doing what everyone does: using stale beans from a grocery bag, grinding them too fine, and either under-steeping or leaving coffee sitting on the grounds for too long.
The learning curve from “frustrating” to “I want to make this every morning” is about one month of regular brewing. Here’s what that month actually looks like.
Week 1: The baseline brew
Start with this recipe and don’t change anything until you’ve made it at least twice:
Ratio: 1:15 — 60 grams of coffee to 900 grams of water (for a standard 34-oz press)
Grind: Coarse — chunky like rough sea salt, not fine like table salt
Water temperature: 200°F — 30 seconds after your kettle clicks off
Steep time: 4 minutes exactly
Pour about 100g of water first and let the grounds bloom for 30 seconds. They’ll puff up and release CO₂ — this matters less for french press than pour-over, but it’s a good habit to start with. Add the rest of the water, stir gently once, set the lid on with the plunger up, and set a timer.
When the timer goes off, press slowly. If there’s real resistance, your grind is too fine. Pour immediately into your cup — coffee left sitting on grounds after pressing keeps extracting and turns bitter within ten minutes.
Your first cup will probably be imperfect. That’s expected and informative.
Week 1 troubleshooting
Three problems cause 90% of bad french press coffee:
Muddy and gritty. Your grind is too fine. The metal mesh filter can’t catch particles ground as fine as drip coffee. Go coarser. If you’re using pre-ground supermarket coffee, you will always have this problem — it’s cut for drip machines.
Bitter and harsh. Usually over-extraction: grind too fine, water too hot, or you left coffee in the press too long. Try coarser grind first. If it persists, let the kettle sit 45 seconds instead of 30 before pouring.
Thin, weak, sour. Under-extraction: grind too coarse, ratio off (not enough coffee), or under-steeped. Check your ratio first — 60g to 900g is the baseline — then verify your grind is coarse sea salt, not cracked pepper.
Adjust one variable at a time. Starting with grind is almost always right.
Week 2: The dial-in
By week two, your baseline cup should be drinkable. Now you can start actually tasting it instead of just consuming it.
The most useful experiment: brew the same beans twice, with your grind one notch coarser and one notch finer than your current setting. Taste both side by side. The coarser brew will be lighter and slightly less bitter. The finer brew will be fuller-bodied with more intensity. Most people settle on the coarser side for daily drinking.
This is also the week to try the James Hoffmann method — search YouTube for “Ultimate French Press Technique.” Instead of pressing the plunger down all the way, you skim the foam off the top after steeping, then press very slowly just until the plunger reaches the liquid surface (not to the bottom). The result is noticeably less sediment in your cup. Some people swear by it; others find it fussy. Worth doing once to see which camp you’re in.
By week three, your technique is stable enough that beans become the main variable. Here’s what to pay attention to:
Roast date matters more than roast level. Fresh beans (roasted within 2–3 weeks) are brighter, more aromatic, and more forgiving than stale beans at any roast level. If your coffee smells like almost nothing when you grind it, the beans are old. Specialty roasters print roast dates; most grocery store bags don’t have one.
Medium to medium-dark roasts work better in french press. Light roasts tend to go sour with the coarser grind and shorter contact time french press demands — the bright acidity that makes them shine in pour-over doesn’t fully develop. Save the light roasts for after you’ve branched into pour-over.
Buy from a local roaster first. Find the closest specialty coffee shop that roasts their own beans, buy a quarter pound, and use those. The freshness advantage over shipping is real, and you’ll know exactly when they were roasted. Once you know what style you like, online roasters ship fast and fresh.
Month 1: The ritual
Around week three or four, the process stops feeling like an experiment and starts feeling like a ritual. You stop consulting the timer. You know what your grind sounds like. You pour on instinct.
This is when the “low-maintenance” reputation of french press becomes real. No paper filters to buy or run out of. Cleanup is rinsing the filter and carafe with warm water — no soap needed (it leaves a residue that shows up in the next brew). The whole process from boiling water to first sip takes under eight minutes.
What to try next
If you’ve got french press dialed in and want to explore:
Pour-over (V60 or Chemex) — cleaner, brighter cup from the same beans. The paper filter removes the oils that french press keeps in. A completely different drink from identical ingredients.
AeroPress — faster, more pressure, endlessly adjustable. Beloved by travelers and experimenters. The coffee community has entire championships dedicated to AeroPress recipes.
Single-origin beans — instead of blends, beans from a specific farm or region. A Kenya AA brewed in french press will taste nothing like a Guatemala blend. This is where the rabbit hole starts.
French press doesn’t ask much of you. If you’ve worked through week one’s troubleshooting and found a grind and ratio that works, you’ve done the hard part. Everything from here is exploration.
Save your money
What you don't need yet
Beginners get pressured to buy a lot of stuff that doesn't help them play
better. Here's what we'd skip on day one.
A blade grinder — It's not a shortcut — it actively makes your coffee worse. If you own one, skip it entirely and order a hand burr grinder instead.
Flavored coffee beans — The oils and coatings used to add flavor gunk up grinder burrs. Real flavor comes from the bean itself, not from vanilla extract sprayed on top.
A coffee subscription — Fine once you know what you like, but subscribing too early locks you into a style before you've figured out your preferences.
A water filtration system — Your tap water is probably fine. If your coffee tastes bad, it's your grind, ratio, or temperature — rule out everything else before blaming the water.
A milk frother for lattes — French press is its own thing. If you want milk drinks, an AeroPress or espresso machine is the better starting point for that path.
First week
Your first seven days
A short, real plan to get from gear-on-doorstep to actually playing.
Order your press and grinder so they arrive together — you need both before you start. · Buy
If the first cup is muddy or bitter, dial your grind coarser by one or two clicks and brew again. One variable at a time. · Action
Pour immediately after pressing — coffee left sitting on grounds keeps extracting and turns bitter within 10 minutes. · Action
FAQ
Common questions
How much does it cost to get started with french press?
Around $60 with a Bodum Brazil press and a Hario hand grinder, plus a bag of beans. That setup makes genuinely good coffee. Spending $160 gets you the Chambord plus a Timemore C2 — the setup most serious french press drinkers settle on.
Why is my french press coffee muddy or gritty?
Almost always the grind. French press needs a coarse grind — chunky like rough sea salt, not fine like table salt or powder. Pre-ground supermarket coffee is cut for drip machines and is too fine. A burr grinder set to coarse fixes this immediately.
Do I really need a burr grinder?
Yes. A blade grinder chops beans randomly, producing a mix of fine dust and chunks that extract at different rates. The dust turns bitter while the coarse chunks are still under-extracted. A $35 hand burr grinder is a real and immediate improvement — the single most impactful gear upgrade in home coffee.
How long should I steep french press coffee?
Four minutes at a coarse grind is the standard. Too short and it's thin and sour; too long and it goes bitter. Use a timer for your first few brews until it becomes automatic.
Can I leave french press coffee in the carafe after brewing?
Don't. Once you plunge, the grounds continue extracting in the remaining water. Coffee left sitting on grounds for 10+ minutes will taste harsh and over-extracted. Pour immediately into your cup or a separate thermal carafe.
What's the difference between french press and pour-over?
French press is immersion brewing — grounds steep in the water, and the metal filter lets oils and fine particles through. Pour-over drips water through grounds via paper, which catches almost all oils and fines. French press is fuller-bodied and earthier. Pour-over is cleaner and brighter. Neither is better; they make different drinks from the same beans.
James Hoffmann (YouTube) — World Barista Champion turned coffee science communicator. His 'Ultimate French Press Technique' video is the definitive beginner guide. Start here.
Counter Culture Coffee — Brew Guide — Clean, practical brewing guide from one of the best specialty roasters. Good first reference for ratios and technique.
Specialty Coffee Association — Industry body for coffee standards. Useful for understanding brewing ratios and water chemistry once you want to go deeper.
r/Coffee — Active community. The wiki and sidebar are genuinely helpful for beginners. Skip gear threads until you know what questions to ask — they're opinion-heavy.
Home Grounds — Independent coffee site with solid, practical guides. Good for troubleshooting specific problems — grind, ratio, steep time.
As an Amazon Associate, JustBeginning earns from qualifying purchases.
We may also earn commission from other affiliate programs linked on this
page. Editorial recommendations are independent; we don't choose
products based on commission rates.
Product prices and availability are accurate as of the date and time
indicated and are subject to change. Any price and availability
information shown on Amazon at the time of purchase will apply.

 Best starter