Most people's first cheese is a 30-minute mozzarella, and most people are genuinely surprised by how easy it is. A gallon of whole milk, a simple kit, half an hour. This guide covers what to buy to make that happen, what to skip, and where the hobby goes once you're hooked on pulling your own curds.
By Colin B. · Published May 23, 2026 · Last reviewed June 3, 2026
The kit alone gets you started for $35. Add a thermometer and butter muslin and you're fully equipped for about $110.
We earn commission on qualifying Amazon purchases — see our
affiliate disclosure.
Price tiers and budget totals shown above are editorial estimates;
actual Amazon prices vary.
At a glance
Our top pick in each category
The fastest path through this guide — each best-starter pick by category.
Scroll for the budget and upgrade alternatives.
Check your milk first. The single biggest beginner mistake is using ultra-pasteurized milk: the proteins are too damaged to form a curd and you end up with warm milk soup. Look for 'pasteurized' on the carton, not 'ultra-pasteurized.' Regular whole milk from most grocery stores works fine; organic whole milk is often ultra-pasteurized, so check that label especially carefully.
Temperature is everything. Off by five degrees at the wrong moment and you get whey soup instead of curds. A good digital thermometer isn't optional. It's the first purchase that actually affects your results. The included thermometer in most starter kits is serviceable but imprecise; if you're serious, get a ThermoWorks ThermoPop or equivalent before your first batch.
Your first cheese should be mozzarella. The 30-minute citric acid recipe is faster and more forgiving than any culture-based recipe, and it teaches you what milk looks like when it's behaving correctly. Build intuition here before you attempt anything with a 24-hour ferment.
The gear
What you actually need
Starter Kits
A cheese kit is the right way to start. You get rennet, cultures, and instructions in one box, and Ricki Carroll's New England Cheesemaking Supply Company has been the industry standard for home cheesemakers for 40 years. The 30-minute mozzarella kit is the gateway everyone means when they say 'cheesemaking is easier than you think.'
Starter Kits — what's the difference?
A few common shapes, each making a different trade.
Fresh & Fast
Mozzarella and ricotta. Results in 30-60 minutes.
Timeline
30–60 min
Skill level
Complete beginner
Aging
None; eat same day
Best for First-time cheesemakers; kitchen projects with immediate payoff
Tradeoff Citric acid shortcut is faster but less complex than traditional cultures
Best for Committed cheesemakers building a dedicated aging space
Tradeoff Months of patience before you know if it worked
Best starter
New England Cheesemaking Supply
New England Cheesemaking Mozzarella & Ricotta Kit
$29.99 as of Jun 22, 2026
★★★★★Our rating· In Stock
The industry-standard beginner kit. Citric acid, vegetable rennet, a thermometer, and Ricki Carroll's step-by-step instructions: everything except the milk. You'll make your first batch in about 45 minutes and it will actually be good. The kit supplies last for roughly 20 one-pound batches.
What we like
Ricki Carroll's company, the most trusted name in home cheesemaking
Supplies last ~20 one-pound batches before you need to restock
Citric acid method is faster and more forgiving than culture-based
What to know
Ultra-pasteurized milk won't work. Label reading is step zero
Included thermometer is basic; upgrade it for serious cheesemaking
Once mozzarella stops feeling like a challenge, this is the natural next step. Includes actual freeze-dried Chevre DS culture, four goat cheese molds, butter muslin, and a thermometer, everything to make authentic chèvre and fresh French-style goat cheese. A completely different technique from mozzarella, and the flavor difference is dramatic.
What we like
Includes actual freeze-dried cultures, not just citric acid shortcuts
Four goat cheese molds + butter muslin make it truly all-in-one
Chèvre is one of the most satisfying fresh cheeses to make at home
What to know
Recipes take 12-18 hours, a bigger commitment than 30-minute mozzarella
Best with goat milk; cow's milk works but produces a milder result
Once you've graduated from kits, buy rennet separately. Liquid rennet doses more precisely than tablets, stores 6+ months refrigerated, and covers 80+ batches, far better value than the dropper vials in starter kits. The bottle you buy in month three will last you through year one.
What we like
Covers 80+ batches at a fraction of kit-rennet cost
Liquid form doses precisely in quarter-teaspoon increments
What to know
Requires refrigeration; lasts 6 months once opened
Buy this only after you understand what rennet does. Not for batch one
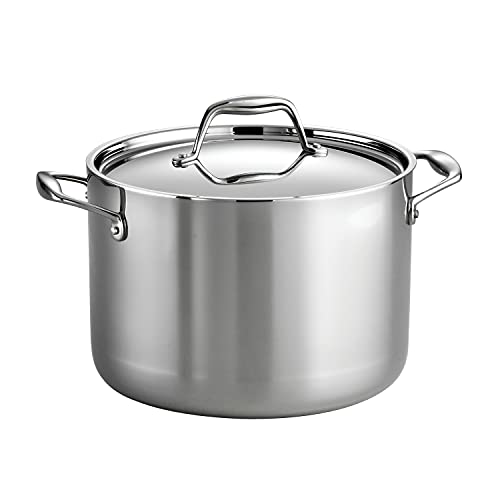
Stainless steel only (aluminum reacts with acidic milk and whey and can ruin the curd). An 8-quart pot handles up to 2 gallons of milk, which is the standard batch size for most beginner recipes. Check your existing cookware before buying; many people already own a suitable pot.
Best starter
Tramontina
Signature 8-Qt Tri-Ply Stock Pot
$74.69 as of Jun 22, 2026
★★★★★Our rating· In Stock
Tri-ply construction with an aluminum core between stainless steel layers. It heats more evenly than impact-bonded base-only pots, which matters when you're holding milk at 86°F for 45 minutes. A pot you'll still be using in five years, and reasonably priced for what it is.
What we like
Tri-ply construction heats more evenly than base-only bonded pots
8 qt handles up to 2 gallons, the standard beginner batch size
Lid retains heat during curd-setting stage without babysitting
What to know
Not a double boiler. Stir frequently to prevent hot spots
More pot than you need for small ricotta batches; still works fine
Half the price of premium stock pots and still proper stainless steel. Full cap aluminum-core base heats reasonably evenly. Will get you through your first year of fresh cheese making without any problems.
What we like
Full aluminum-core base for even heating at half the price
Widely available; easy to replace if needed
What to know
Thinner walls than tri-ply pots. Watch temperature more carefully
Consider upgrading when moving to culture-based temperature-critical recipes
Temperature is the most critical variable in cheesemaking. Miss 86°F during culture addition and the bacteria won't activate. Hit 105°F instead of 98°F during mozzarella stretching and you get rubber. A fast, accurate digital thermometer is the single most consequential equipment decision you'll make.
Best starter
ThermoWorks
ThermoPop 2 Instant-Read Thermometer
$47.00 as of Jun 22, 2026
★★★★★Our rating
Two-second reads and ±0.5°F accuracy across the full cheesemaking range. ThermoWorks is the brand that professional kitchens use, and the ThermoPop 2 is their everyday workhorse at a fraction of the Thermapen's cost. If your thermometer is slow or imprecise, your cheese will be inconsistent. There's no way around it.
What we like
2-second reads; ±0.5°F accuracy across cheesemaking temps
ThermoWorks quality, used by food professionals, not gadget brands
Folds flat and stores cleanly in a kitchen drawer
What to know
No clip mount. You'll hold it or prop it on the pot edge
More precise than needed for ricotta; exactly right for everything else
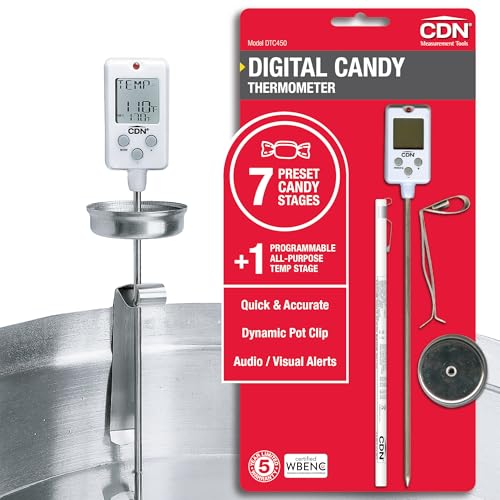
During the milk-heating stage, a clip-on probe lets you monitor temperature hands-free without interrupting your stir. The DTC450 clips to the pot rim and reads from 14°F to 450°F, covering the full milk-heating range from cold start to stretch temperature. Pair it with the ThermoPop for final precision checks.
What we like
Clips to pot rim, both hands free during the heating stage
Reads 14–450°F; covers the full cheese-making temperature range
What to know
Slower response than instant-read; don't use it for final curd checks
Not as accurate as ThermoWorks. Monitoring only, not precision reads
Fresh cheese needs to drain, and the difference between proper butter muslin and grocery store cheesecloth is enormous. Real butter muslin has a tight weave that holds curds while letting whey through. The gauze stuff at the grocery store lets your curds slip right through it. Beyond cheesecloth, perforated molds shape your cheese and let it release whey from all sides simultaneously.
Best starter
Regency Wraps
Chef-Grade Cheesecloth, 2 Yards
$5.19 as of Jun 22, 2026
★★★★★Our rating· In Stock
Real chef-grade cotton muslin, tight enough to hold the finest curds while still draining whey efficiently. Washable and reusable for 20+ batches. This is the piece of equipment every single cheesemaking recipe assumes you have, and the grocery store version will actively ruin your results with mozzarella.
What we like
Chef-grade cotton holds curds that grocery cheesecloth lets through
Washable and reusable for 20+ batches. Pays for itself immediately
Works for mozzarella, ricotta, chèvre, and drained yogurt
What to know
Must be rinsed soap-free. Residue interferes with cultures
Keep it dedicated to cheese; don't mix with general dish linens
Molds do two things: shape the cheese and create drainage from all sides at once. These perforated basket molds cover fresh chèvre, ricotta, feta, and soft-ripened wheels. The basket imprint isn't just decorative. It helps soft cheeses hold their shape for days longer than cheesecloth draining alone.
What we like
Perforations drain whey from all sides simultaneously
Works for ricotta, feta, camembert, and fresh soft cheese
Food-grade plastic; dishwasher-safe
What to know
Not needed for mozzarella (it forms by hand stretching)
If you already own a large fine-mesh strainer, use it for your first batch of ricotta before buying anything else. Suspend it over a deep bowl and let gravity drain the curds. A perfectly valid first experiment. Then buy real cheesecloth for mozzarella.
What we like
Zero additional cost if you already own one. Test ricotta for free
Double-rod handle stays stable balanced over a bowl
What to know
Too coarse for mozzarella curds. You need real cheesecloth for those
Can't walk away. Mesh fills and stops draining if you leave it
Fresh cheeses (mozzarella, ricotta, chèvre) need no aging equipment. Once you move to semi-firm and hard cheeses, you need two things: a way to seal and protect the rind, and a controlled environment to age in. The home cheesemaker's classic setup is wax for the exterior and a temperature-controlled mini fridge. Skip this category entirely for your first month.
Best starter
New England Cheesemaking Supply
Cheese Wax, Red, 1 lb
$14.99 as of Jun 22, 2026
★★★★★Our rating· In Stock
Wax sealing is how most home cheesemakers protect their first pressed and aged wheels. Melt it in a small pot, dip the wheel twice, let it set. Keeps mold out and slows moisture loss during aging. One pound makes 10-15 small wheels. Simple and reliable. The method has worked for centuries.
What we like
Seals the wheel completely, keeping mold out during aging
1 lb covers 10-15 small wheels; melts and reapplies cleanly
Traditional method that works without any special equipment
What to know
Ruins cookware permanently. Dedicate a thrift-store pot to wax only
Doesn't breathe like natural rinds; inhibits some culture development
Aged cheese needs 50-55°F and 80%+ humidity, conditions no regular fridge or pantry naturally provides. An Inkbird controller + a used mini fridge + a small bowl of water is the home cheese cave setup. Skip this until you've made five or six batches and are genuinely committed to aged cheese.
What we like
Converts any mini fridge into a precision aging environment
Dual-stage control: cools when warm, heats when cold (add a warming pad)
Works for fermentation and wine too, useful across multiple hobbies
What to know
Needs a separate mini fridge. Controller only, no fridge included
Humidity still requires manual management alongside temperature
The first batch of mozzarella takes 45 minutes and it will actually be good. Here's what that first month looks like: what you'll learn, what will go wrong, and when you'll realize this hobby has its hooks in you.
Cheesemaking has a reputation for being complicated. It isn’t, at least not at first. The 30-minute mozzarella you’re about to make is closer to a science experiment than a professional skill, and the experiment almost always works. The complexity comes later, when you want it to.
This is what your first month actually looks like: what to make, what will surprise you, what will go wrong, and when the hobby stops feeling like a project and starts feeling like a practice.
Week one: Make mozzarella. Then make it again.
Your first batch should be mozzarella. Not because it’s the most impressive cheese (it isn’t), but because the 30-minute citric acid recipe is the fastest path from “gallon of whole milk” to “I just made cheese” and that experience is the whole foundation of what comes next.
The kit recipe is straightforward: heat the milk to 90°F, add citric acid dissolved in water, watch the milk separate into curds and whey, heat the curds to 105°F, and stretch them like taffy. The stretching is the satisfying part. When it works, you can pull the curd into long elastic ropes and fold it back on itself until it’s smooth and glossy.
Before you start, read your milk label. Ultra-pasteurized milk will not curd. The proteins are too damaged. You need regular pasteurized whole milk. Most grocery store brands work. Organic milk is often ultra-pasteurized; check the carton every time.
The first batch is mostly observation. What does milk look like when the curd starts forming? What’s the texture of the curd when you pick it up? Is the whey cloudy or clear? You’re building sensory vocabulary more than you’re building skill.
Make the second batch within the week. It doesn’t need to be immediately. Wait a day, let it process. But the second batch is where the patterns start to emerge. You’ll recognize the moment the curds begin to set. You’ll be more confident about the stretch temperature. You’ll taste the difference if you got it right versus close-but-rubbery.
Week two: What went wrong, and why it matters
Something will go wrong. Almost certainly. Here’s the short list:
The curd didn’t set / milk stayed liquid. Ninety percent of the time: ultra-pasteurized milk. Check the carton. If the label is definitely pasteurized, suspect your thermometer. The milk may not have reached 90°F. Rennet is temperature-sensitive; too cold and it won’t activate.
The mozzarella is rubbery. The curd got too hot during the stretch phase. 105°F is the sweet spot; 112°F and you’re making rubber bands. Use your thermometer obsessively until you’ve done this enough times to feel it by touch.
The curd shattered instead of stretching. Usually means the milk’s acidity was off, or the curd cooled too much before stretching. Keep the curd in the hot whey (or a bowl of hot water) right up until you stretch it. Cold curd won’t pull.
The finished cheese is grainy. Often overworked: too many stretch-and-fold cycles. Mozzarella needs enough manipulation to align the proteins, then it needs to be left alone. Four or five pulls is usually enough.
None of these failures mean you did something catastrophically wrong. They’re the same mistakes everyone makes in batch two or three, and they’re teaching you something that recipes can’t fully explain: the physical feel of milk-in-process and what it’s telling you.
Week two is also when you might try ricotta. Traditional ricotta is the simplest cheese you can make. Heat whole milk nearly to boiling, add acid (lemon juice or white vinegar), watch the curds form, strain through cheesecloth. Fifteen minutes, start to finish. The technique is totally different from mozzarella (much higher heat, immediate curd formation, no stretching), and making both gives you a feel for how many different paths milk can take.
The mozzarella kit uses citric acid as a shortcut. It acidifies the milk instantly, bypassing the bacterial fermentation that traditional cheesemaking depends on. The flavor is clean and mild, which is why it works for pizza but not for complex aged cheese.
By week three, you’re ready to try something with actual cultures. Fresh chèvre (goat cheese) is the natural next step. You add a mesophilic starter culture to the milk, let it ferment at room temperature for 12-18 hours, add a small amount of rennet, and drain the resulting curd through cheesecloth overnight. The next morning you have soft, tangy, spreadable goat cheese.
The experience is completely different from mozzarella. No precision heating, no dramatic stretching. Just time. You set it up in the evening and check it in the morning, and if the temperature in your kitchen stayed in a reasonable range (60-75°F), you have chèvre.
What this teaches you: patience, and the fact that bacteria are doing most of the work. You’re not making cheese. You’re creating conditions where cheese makes itself. That shift in perspective changes how you think about every recipe after it.
A few things to know before the chèvre attempt:
Use goat milk from the grocery store if you can find it. Cow’s milk makes something delicious, but it won’t have the characteristic tang. Chèvre made with cow’s milk is more accurately called fresh farmer’s cheese.
The kitchen temperature matters. If your kitchen is below 65°F overnight, the culture will work slowly and the cheese may take 24 hours instead of 12.
The cheesecloth is critical. The grocery store stuff is too coarse. The curds fall through. You need real butter muslin. If you’re not sure what you have, hold it up to a window: if you can see clearly through it, it’s too coarse.
Week four: You have opinions now
By the end of the month, something changes. You’re not following a recipe mechanically anymore. You’re watching milk and making small decisions. You taste the curd as it forms. You feel the stretch and know when it’s ready. You start wondering what a slightly longer ferment would do to the flavor.
This is when people split into two groups. Some are perfectly happy making mozzarella every two weeks and maybe ricotta on the weekends. It’s a satisfying kitchen project that produces something genuinely good, and that’s enough. Others start looking at aged cheese. They buy Ricki Carroll’s book. They research mini fridge cheese cave setups. They order cultures by name.
Both are right. The hobby scales exactly as far as you want to take it.
If you’re in the second group, the next moves are: make a simple fromage blanc or queso fresco (both one-day fresh cheeses), then attempt a simple pressed cheese like a small cheddar or a caerphilly. Pressed cheeses require a mold and some weight, but not a full cheese press. A cleaned-out can with holes punched in it and a book on top will work for your first attempt.
Not the technique. That’s learnable in a month. What’s hard is consistency. The same recipe, the same milk brand, the same process, and the cheese is subtly different every time. Sometimes it’s the milk (it varies batch to batch from the dairy). Sometimes it’s ambient temperature. Sometimes it’s humidity.
Advanced cheesemakers track these variables obsessively. Beginners just make another batch.
The other genuinely hard thing is aged cheese: the months of waiting, the uncertainty, the possibility that the wheel you’ve been tending for eight weeks has a problem you won’t discover until you cut it open. But that particular suspense is also why people get obsessed with it.
For now: make the mozzarella. Make it again. Taste the difference.
Save your money
What you don't need yet
Beginners get pressured to buy a lot of stuff that doesn't help them play
better. Here's what we'd skip on day one.
A cheese press — Fresh cheeses drain perfectly under gravity. You don't need mechanical pressing until you're making cheddar or gouda. Month three at the earliest.
Raw milk — Excellent for flavor but harder to source and work with safely. Master pasteurized milk first; the technique difference is invisible to beginners.
A pH meter — Useful for precision work but unnecessary for your first six months. Home cheesemakers learn by taste, texture, and timing long before needing a pH meter.
Specialty cultures — Species-level culture selection is a year-two rabbit hole. The mesophilic and thermophilic cultures in starter kits cover everything a beginner needs.
A dedicated cheese cave — Skip until you're making aged cheeses. Your first 6-10 batches are all fresh cheeses that need zero aging infrastructure.
First week
Your first seven days
A short, real plan to get from gear-on-doorstep to actually playing.
Order the mozzarella kit. It ships in 2-3 days from most suppliers. · Buy
Find whole milk. Read the carton: 'pasteurized' is what you need. 'Ultra-pasteurized' won't curd. Buy two gallons so you can make two batches back-to-back. · Action
Make your first batch of mozzarella. Follow the kit recipe exactly. No improvising yet. · Action
Take notes: which milk brand, your temperature readings, what the curd looked and felt like when you stretched it. · Action
Make batch number two within the week. The second batch teaches you more than the first. · Action
FAQ
Common questions
Can I use ultra-pasteurized milk for cheese?
No, and this is the #1 beginner mistake. Ultra-pasteurized milk has proteins denatured by high heat that won't form a curd. Check the carton: you want 'pasteurized,' not 'ultra-pasteurized.' Regular whole milk from most grocery stores works fine. Organic milk is often ultra-pasteurized, so check that label especially carefully.
How much does it cost to make cheese at home?
The starter kit runs about $35. Add a good thermometer ($35) and butter muslin ($12) and you're at roughly $80 total. Ongoing costs are cheap: a gallon of whole milk ($4-6) makes about a pound of fresh mozzarella. The milk is the main ongoing cost.
Do I need a special pot?
Stainless steel only (aluminum reacts with acidic milk and can ruin the curd). Cast iron imparts metallic flavor. You may already own a suitable stainless pot; an 8-quart size is ideal for a 1-2 gallon batch. Check before buying.
How long does homemade mozzarella last?
Fresh mozzarella at its best is same-day. Store in salted water (about 1 teaspoon salt per cup of water) in the fridge and it keeps 3-5 days, but the texture softens. Freeze it if you won't use it within a few days. It loses some stretch but still melts beautifully on pizza.
What's the difference between animal rennet and vegetable rennet?
Animal rennet (from calf stomachs) is traditional and works reliably across all cheese types. Vegetable rennet is suitable for vegetarians and fine for fresh cheeses, though some aged cheeses develop off-flavors over long aging. For beginner mozzarella, the difference is invisible. Starter kits use whichever they stock.
Is cheesemaking complicated?
Fresh cheese like mozzarella is genuinely easy. If you can follow a recipe and read a thermometer, you'll succeed on your first batch. Aged hard cheeses are a different story: they take months and require controlled environments. Start fresh, build intuition, and complexity becomes interesting rather than intimidating.
New England Cheesemaking Supply — Ricki Carroll's company, the one-stop shop for equipment, cultures, rennet, and recipes. Their free recipe database covers 100+ cheese varieties. Start here before buying anything.
Gavin Webber (YouTube) — The most thorough English-language cheesemaking channel on YouTube. Clear technique videos for everything from mozzarella to parmesan. Watch his 30-minute mozzarella video before your first batch.
r/cheesemaking — Active community of home cheesemakers. Post a photo of your curd problem and get answers in hours. Also a great place to discover what to make next.
Home Cheesemaking by Ricki Carroll — The definitive beginner textbook. Covers 75+ cheeses with more depth than any kit sheet. Buy it once you're confident in mozzarella and want to expand.
The Art of Natural Cheesemaking by David Asher — For the cheesemaker ready to move beyond commercial cultures into raw milk and wild fermentation. Not a beginner book. It's a compelling next chapter for anyone 6+ months in.
As an Amazon Associate, JustBeginning earns from qualifying purchases.
We may also earn commission from other affiliate programs linked on this
page. Editorial recommendations are independent; we don't choose
products based on commission rates.
Product prices and availability are accurate as of the date and time
indicated and are subject to change. Any price and availability
information shown on Amazon at the time of purchase will apply.
Our top pickNew England Cheesemaking Mozzarella & Ricotta Kit

 Best starter