Fermentation has a reputation for being fussy, but kombucha is the most beginner-friendly ferment you can make. You need a jar, a SCOBY, sweet tea, and nine days of patience. Here's what to buy, what to skip, and the two places where shortcuts actually matter.
By Colin B. · Published May 23, 2026 · Last reviewed June 4, 2026
Joshua Tree Kombucha Heat Wrap
— A heating mat keeps your brew at the ideal 74-78°F, the single biggest variable most beginners miss.
Budget total
$65
Typical total
$120
A complete starter kit plus swing-top bottles and a heat mat lands around $120. After that, tea and sugar are the only recurring cost.
We earn commission on qualifying Amazon purchases — see our
affiliate disclosure.
Price tiers and budget totals shown above are editorial estimates;
actual Amazon prices vary.
At a glance
Our top pick in each category
The fastest path through this guide — each best-starter pick by category.
Scroll for the budget and upgrade alternatives.
You need SCOBY plus starter liquid, not just the SCOBY. The starter liquid (already-fermented kombucha, strongly acidic) is what prevents mold in the first 48 hours. Most kits include it. If you're sourcing a SCOBY from a friend, ask for at least 1-2 cups of liquid from their last batch. A dehydrated SCOBY without starter liquid has a much higher failure rate.
Temperature makes or breaks your timeline. Below 65°F, fermentation slows to a crawl or stalls. Above 85°F, it runs too fast and comes out vinegary. If your kitchen runs under 68°F in winter, a heating mat wraps around the vessel and fixes the problem for about $15. This is the most common reason beginners quit after one batch: they didn't have it warm enough.
Second fermentation isn't optional if you want fizz. First fermentation makes kombucha. Second fermentation (bottling with a spoonful of juice or fruit and sealing tight for 2-4 days) is what creates carbonation. You need proper swing-top or pressure-rated bottles for this step; standard mason jar lids don't seal tightly enough to carbonate and can crack under pressure.
The gear
What you actually need
Starter Kits & Vessels
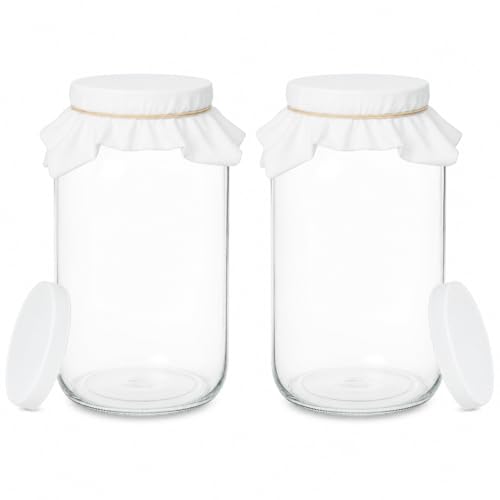
The vessel is the one purchase you'll use for years. It just needs to be glass, wide-mouthed, and at least a gallon. A complete kit gets you the jar plus cloth cover, thermometer strip, and pH strips in one box. The real decision is whether to buy a complete kit or source the jar and a SCOBY from a friend separately.
Starter Kits & Vessels — what's the difference?
A few common shapes, each making a different trade.
Complete Kit
Everything in one box. Jar, cloth cover, pH strips, thermometer strip, instructions included.
Batch size
1 gallon (~12 bottles)
Setup time
30 minutes
SCOBY source
Add-on at checkout
Best for Total beginners who want a guided, no-guesswork start
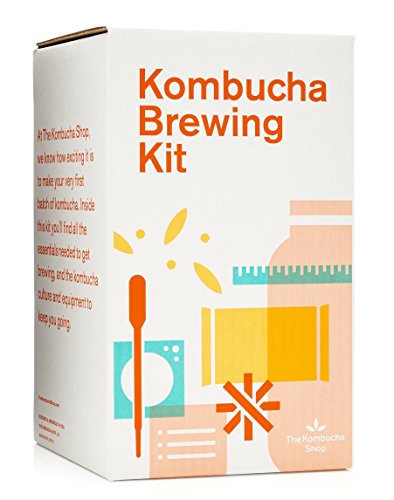
The most coherent beginner kit on the market. You get a 1-gallon glass jar, cloth cover, rubber band, temperature strip, pH strips, and detailed instructions, plus the option to add a live SCOBY with starter liquid at checkout. The Kombucha Shop is a dedicated fermentation supplier, not a random Amazon brand, and their instructions are accurate. This is what we'd hand a friend on day one.
What we like
Complete kit: jar, cloth cover, pH strips, and instructions in one box
Dedicated fermentation supplier with genuine kombucha expertise
Add a live SCOBY with starter liquid at checkout
What to know
1-gallon size disappears fast if you drink kombucha daily
Costs $20-30 more than sourcing a jar and SCOBY separately
★★★★☆Our rating· Only 5 left in stock - order soon.
Specifically designed for kombucha: comes with the jar, cotton cloth filter, and rubber band (the three things you need beyond a SCOBY and starter liquid). kitchentoolz makes fermentation-focused gear, not just generic mason jars, so the proportions and mouth width are right. Under $15 and everything is included.
What we like
Under $15 for the three essentials: jar, cloth cover, and rubber band
Designed for kombucha with the right mouth width and proportions
What to know
No pH strips or thermometer strip; source them separately
Once you're brewing regularly, a continuous brew setup is a genuine upgrade: you draw off finished kombucha through the spigot and top up with fresh sweet tea. No full restart cycle, more consistent results, and a larger SCOBY that keeps everything healthy. Overkill for batch one. The right step for batch five or six.
What we like
Continuous brew setup: draw off finished kombucha and top up without restarting
Larger SCOBY in a bigger vessel produces more consistent results
What to know
Overkill until you know your fermentation rhythm; start with batch brewing first
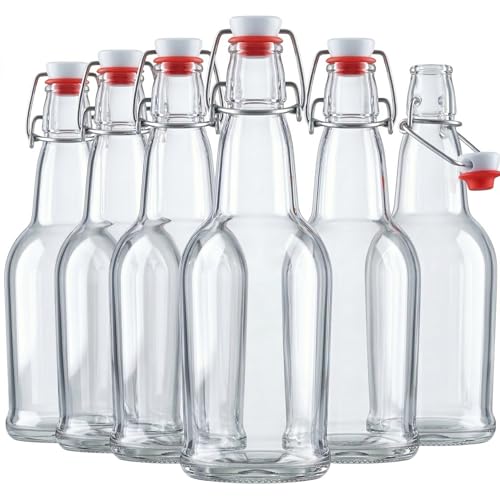
Second fermentation (bottling your kombucha with a little fruit juice and sealing it for 2-4 days) is what creates carbonation. You need bottles rated for pressure: glass swing-top (bail-top) bottles. Standard mason jar lids don't create a reliable seal for carbonation and can crack under pressure. Plan for at least six 16-oz bottles per gallon batch.
Best starter
Paksh Novelty
16-oz Glass Bottles with Swing-Top Lids (6-pack)
$$
★★★★★Our rating
Thick glass, tight bail-top seals, and the right size for a 1-gallon kombucha batch. These exact bottles are what most home brewers use: rated for carbonation, easy to fill and clean, and built to last for years. Six bottles covers a full gallon batch with room to spare.
What we like
Thick glass rated for carbonation pressure
Bail-top seals tight; the right size for a gallon batch
Six bottles covers a full gallon with room to spare
What to know
Pricier per bottle than a 12-pack; fine if you're starting with one gallon
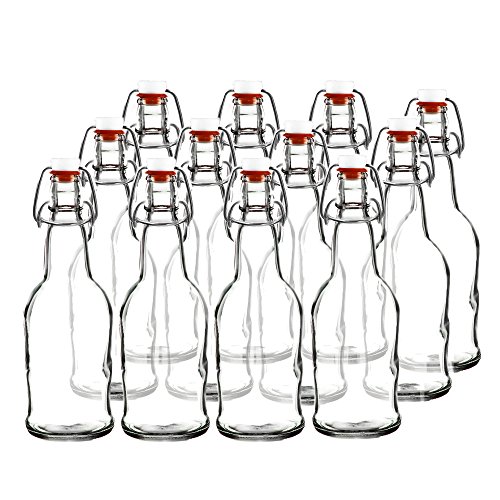
Easy Cap Beer Bottles for Kombucha 16 oz Clear (12-pack)
$59.89 as of Jun 22, 2026
★★★★☆Our rating· Only 13 left in stock - order soon.
More economical per bottle, and a 12-pack gives you room to experiment with different flavors in the same batch. The rubber gaskets hold up well over time. Replace them annually if you see any cracking.
What we like
12-pack lets you run multiple flavor experiments in the same batch
More economical per bottle than a 6-pack
What to know
Rubber gaskets need periodic replacement if they show cracking
Kombucha's sweet spot is 74-78°F. Below 65°F it stalls; above 85°F it runs too fast and comes out vinegary. If your house is consistently warm, you don't need anything extra. If you're brewing in a cool kitchen or during winter, a heating mat is the single best investment after the vessel itself. pH strips let you track fermentation progress without guessing.
Best starter
Joshua Tree
Kombucha Heat Wrap
$$
★★★★★Our rating
A thermostat-controlled heating belt with three adjustable temperature settings, sized to fit a 1-gallon glass brewing jar. Waterproof, designed to stay plugged in continuously, and includes a temperature strip so you can verify your fermentation temp at a glance. This is the gear that saves the most first batches.
What we like
Thermostat-controlled wrap with three adjustable temperature settings
Designed specifically for gallon brewing jars; fits snugly
Includes a temperature strip to verify your ferment temp
What to know
Costs $25-30; a flat seedling mat works if you're on a tighter budget
Waterproof Heat Mat for Kombucha and Fermentation (3" x 20")
$11.99 as of Jun 22, 2026
★★★★☆Our rating· In Stock
A standard seedling mat placed under the brewing jar works well in most kitchens. Not as targeted as a wrap, but a perfectly functional option if the heating belt feels like overkill for your first batch.
What we like
About $10-15 and widely available; a functional starter option
Waterproof, so spills around the brewing jar aren't a concern
What to know
No temperature control; heats from below only, less targeted than a wrap
Finished kombucha should sit between 2.5 and 3.5 pH. These food-grade strips are accurate enough for home brewing. At $8 for 100 strips you have plenty to test every batch. A digital pH meter at $50+ is overkill for home brewing.
What we like
100 strips for about $8; enough to test every batch for a year
Food-grade and accurate to 0.5 pH, plenty for home kombucha
What to know
Less precise than a digital meter if you want to fine-tune pH closely
Kombucha needs caffeinated tea (black, green, or oolong). Herbal, decaf, and flavored teas are out: the SCOBY bacteria need caffeine and tannins from real tea to stay healthy. For sugar, plain white cane sugar is the standard; the SCOBY eats most of it during fermentation. Don't use honey (antimicrobial properties compete with the culture) or alternative sweeteners.
Best starter
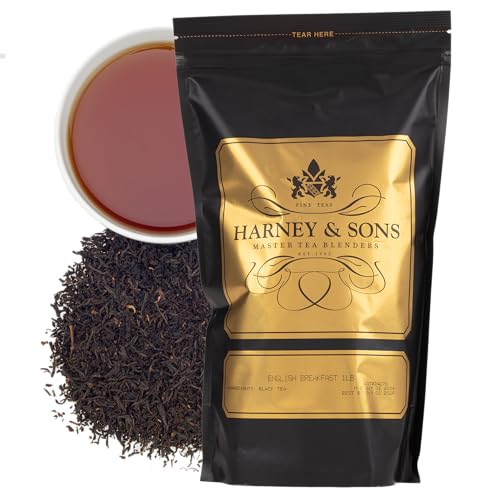
Harney & Sons
English Breakfast Loose Leaf Black Tea (16 oz)
$21.27 as of Jun 22, 2026
★★★★★Our rating· In Stock
English Breakfast is the gold-standard black tea for kombucha: strong tannins, clean flavor, and Harney & Sons is a well-established tea company with consistent quality batch to batch. At 16 oz, you'll get 20+ gallon batches before running out. Use 1 oz (about 8 tsp) per gallon.
What we like
Strong tannins and clean flavor; the most reliable kombucha base tea
16 oz yields 20+ gallon batches before running out
Consistent quality from a 40-year-old specialty tea company
What to know
Pricier than supermarket tea bags; the quality difference is real
Gunpowder green makes a distinctly different kombucha than black tea: lighter, slightly earthy, more nuanced. Many home brewers blend 50/50 black and green for complexity. Try it after your first successful black tea batch. Davidson's Organics is certified organic and their Gunpowder Green is consistent quality.
What we like
Makes a lighter, earthier kombucha; great for blending 50/50 with black tea
Certified organic with consistent quality batch to batch
What to know
SCOBY turns white with green tea, which looks alarming but is completely normal
Kombucha gives you a clear result every nine days: a jar of tangy, alive liquid you made yourself for about a dime a bottle. The process is mostly patience. You spend maybe twenty minutes of active work per batch, then wait. By batch three, your setup runs on autopilot and you'll wonder why you ever paid $5 for a store bottle.
Brewing kombucha for the first time feels like there should be a catch. You combine tea, sugar, a rubbery disc of bacteria and yeast, and some liquid from someone else’s jar. Nine days later you have a fizzy, tangy, genuinely good drink. No complicated equipment, no precise chemistry, no special skills. The catch, if there is one, is that most beginners either overthink the process and paralyze themselves with questions, or underthink the temperature and kill their ferment by putting it somewhere too cold.
This guide covers exactly what happens in your first batch, from setup day through your first bottle.
Before you start: the one thing that determines everything
Temperature. Kombucha ferments well between 74-78°F. Below 65°F, the culture slows to almost nothing. Below 60°F, it stops entirely. Above 85°F, fermentation runs too fast and produces a harsh, vinegary result.
Most people discover the temperature problem after their first batch fails. They set the jar on a kitchen counter that’s 64°F in winter and wonder why nothing is happening after two weeks. The fix is easy: a heating mat under or wrapped around the vessel costs about $15 and solves the problem permanently. But you have to buy it before you start.
The other variable (sanitation) matters less for kombucha than for beer or wine. The starter liquid (already-fermented kombucha) acidifies your new batch quickly, creating an environment that’s hostile to contamination. The starter liquid is doing the work. This is why you absolutely must use enough of it: at least 1-2 cups per gallon.
Brew the sweet tea. Bring a gallon of water to a boil, steep 8 black tea bags (or 1 oz loose leaf) for 10 minutes, then dissolve 1 cup of plain white sugar into the hot liquid. Cool to room temperature completely before adding anything else. Adding the SCOBY to hot liquid will damage it.
Combine in your vessel. Pour the cooled sweet tea into your gallon jar. Add the SCOBY and all the starter liquid. Don’t leave any behind, and don’t dilute it.
Cover and place. Cover the jar with a cloth secured with a rubber band. The cover keeps fruit flies and airborne contaminants out while letting the ferment breathe. Do not use a lid that seals. Find a warm spot (74-78°F) away from direct sunlight, then leave it alone.
That’s it. Setup takes less than thirty minutes, not counting cooling time for the tea.
Days 1-9: first fermentation
You will be tempted to check on it constantly. Resist. Leave the jar completely undisturbed. Don’t stir it. Don’t move it. Don’t refrigerate it. The only reason to open it is to taste-test starting on day 7.
In the first 24-48 hours, you might see bubbles on the surface or rising from the SCOBY. The culture is active.
Between day 2 and day 5, a new SCOBY layer (called a “baby”) will start forming on the surface of the liquid. This is a smooth, white, rubbery disc that looks slightly different from your original SCOBY. It’s a sign of a healthy ferment.
On day 7, do your first taste test using a clean straw inserted gently alongside (not through) the SCOBY:
Still mostly sweet with no acidity: leave it 2-3 more days.
Pleasantly tart with a slight vinegar edge: ready to bottle.
Strongly acidic, sharp, like vinegar: it went a bit long. Still safe, but blend it with sweet tea or use it as starter liquid. Next batch, taste-test on day 6.
Temperature matters here: a jar at 76°F is often ready on day 9. A jar at 70°F might need 12-13 days.
First fermentation is done. Now the batch sits in your jar, still unflavored and mostly still (not yet carbonated). Second fermentation fixes both things.
How it works: You transfer the kombucha into sealed bottles with a small amount of sugar, usually fruit juice. The culture consumes the new sugar, producing CO₂ that can’t escape the sealed bottle, which builds carbonation.
For each 16-oz bottle:
Leave 1-2 inches of headspace at the top
Add 1 teaspoon of 100% fruit juice (ginger, mango, pomegranate, raspberry, or grape juice all work well)
Seal the bottle tight with the bail-top closure
Leave sealed bottles at room temperature (not cold) for 2-4 days. During this time, check the pressure once daily: carefully open one bottle just a crack to see how much carbonation has built. When it’s noticeably fizzy on the release, move all bottles to the refrigerator immediately. Cold stops the fermentation and locks in the carbonation.
The pressure check matters. Over-carbonated bottles can become dangerously pressurized. If you forget to check and leave them out more than 4-5 days in a warm kitchen, you’ll find out the hard way. Refrigerate when fizzy, not when you get around to it.
Nothing is happening after 5 days. Almost always a temperature issue. Verify your fermentation spot is actually 70°F+. Move it somewhere warmer, or add a heating mat.
It smells like vinegar. It went long, or was too warm. A mild vinegar smell is normal; a sharp, strong vinegar smell means fermentation ran too fast or too long. The kombucha is technically fine. Use it as extra-strong starter liquid for your next batch, which you can then combine with a fresh, milder batch at bottling.
There’s fuzzy stuff on the SCOBY. Distinct fuzzy patches (not just cloudy white film) are mold. Discard everything and start over with a fresh SCOBY and starter liquid. This is rare when you use enough starter liquid; mold happens mostly when the batch doesn’t acidify fast enough in the first 48 hours.
The bottles are flat after second fermentation. Either the bottles weren’t sealed properly, or the culture was slowed by cold temperatures during F2. Keep bottles at room temperature (65°F+) during second fermentation; cold refrigerator temps stall carbonation.
There are brown strings in the liquid. Normal: this is yeast. The brown stringy particles that collect at the bottom or float through the liquid are live yeast strands. Harmless and a sign of an active culture.
What changes in batch two
Your original SCOBY has grown. You now have two layers: the original and the baby that formed during batch one. Either layer works for the next batch; most brewers keep both in what’s called a SCOBY hotel (a jar with extra starter liquid, kept covered in the fridge) and brew with one at a time.
By batch two, you’ll have found your fermentation timing. You’ll know whether your kitchen spot runs warm or cold, and whether day 9 or day 12 is your sweet spot. You’ll have tried at least one flavor combination and know which fruit juice you prefer for F2.
By batch three, the whole process takes less than thirty minutes of hands-on time across the full two weeks. You’ll be making something significantly better than most store-bought kombucha, for about $0.12 per 12-oz serving.
Save your money
What you don't need yet
Beginners get pressured to buy a lot of stuff that doesn't help them play
better. Here's what we'd skip on day one.
A digital pH meter — Paper pH strips do the job for $8. A $50 digital meter is a satisfying gadget, not a meaningfully better brew.
A continuous brew system — Great once you understand your fermentation rhythm, but premature when you're still learning to read the process. Master batch brewing first.
Multiple SCOBY strains — One healthy SCOBY reproduces on its own and lasts for years. You don't need a collection until you have multiple vessels.
Kombucha flavoring kits — A spoonful of ginger juice, mango puree, or frozen raspberries produces better second-ferment flavor than anything sold as a 'kombucha flavoring kit.'
A dedicated brewing cabinet — A $15 heating mat handles temperature control for 95% of home setups. A cabinet is a solution looking for a problem.
First week
Your first seven days
A short, real plan to get from gear-on-doorstep to actually playing.
Order your starter kit (or gather a wide-mouth gallon jar, cloth cover, and rubber band). · Buy
Source a SCOBY with starter liquid from a friend, a local fermentation shop, or Cultures for Health online. The starter liquid is not optional. · Action
Cultures for Health · Reliable mail-order SCOBY; includes enough starter liquid to protect your first batch
Brew 1 gallon of sweet black tea: 8 tea bags (or 1 oz loose leaf), 1 cup white sugar, steeped 10 minutes. Cool completely to room temperature before adding anything. · Action
Add the SCOBY and all the starter liquid to the jar. Cover with cloth, secure with a rubber band. · Action
Find the warmest consistent spot in your house: top of the refrigerator, near a water heater, or on a heating mat. Ideal is 74-78°F. · Action
Leave it alone for 7-10 days. On day 7, do a taste test with a clean straw. If pleasantly tart with a slight fizz, bottle it. If still mostly sweet, leave it 2-3 more days. · Action
Bottle your finished kombucha with 1 tsp of fruit juice per bottle, seal tight, and leave at room temperature for 2-3 days to carbonate. Refrigerate after that. · Buy
The best source is a friend who brews (they'll have extra SCOBYs and can give you a cup of starter liquid at the same time). Second best is Cultures for Health (mail-order, reliable). You can also grow one from a bottle of plain GT's Synergy kombucha over 2-3 weeks, though it takes longer. Never use a dehydrated SCOBY without also getting starter liquid. It's what actually protects the batch from mold.
How long does first fermentation take?
Usually 7-14 days depending on temperature. At 76°F, most batches are ready around day 9. At 68°F, plan for 12-14 days. Below 65°F, fermentation stalls. Taste it on day 7 with a clean straw: if still mostly sweet, give it more time; if pleasantly tart with a slight vinegar note, it's ready to bottle.
Can I use tea bags instead of loose leaf?
Yes, 8 standard black tea bags per gallon works fine. Just avoid flavored teas (Earl Grey, chai, fruit teas) and herbal teas: the SCOBY bacteria need caffeine and tannins from real tea. Decaf doesn't work well. Plain black, green, or oolong are the safe choices.
What does mold look like, and is it serious?
Mold looks like dry, fuzzy spots (usually white, blue, or black) on the surface of the SCOBY. It's uncommon if you used enough starter liquid and kept the vessel covered. If you see mold, discard the entire batch including the SCOBY. It can't be saved. Brown strings floating in the liquid, a tan or brown SCOBY, and a vinegary smell are all normal and not mold.
What is second fermentation and is it required?
Second fermentation (F2) is when you bottle the finished kombucha with a small amount of fruit juice, seal it tight, and leave it at room temperature for 2-4 days. This builds carbonation. It's not required. Still kombucha is perfectly good. But F2 is what creates the fizzy, flavored bottles you're used to paying $5 for.
How much does home-brewed kombucha cost versus store-bought?
After the upfront gear investment, a gallon batch (about 12 bottles) costs roughly $1-2 in tea and sugar, about $0.10-0.15 per 12-oz serving versus $4-5 for a store bottle. The gear pays for itself within 3-4 batches.
Cultures for Health — The best all-around resource for home fermentation beginners. Detailed troubleshooting guides, starter culture sourcing, and step-by-step instructions for every ferment. Bookmark the kombucha troubleshooting page.
Kombucha Kamp — Hannah Crum's site. She's the leading kombucha educator in the U.S. and co-author of The Big Book of Kombucha. Best-in-class troubleshooting content and technique deep dives.
The Big Book of Kombucha (Hannah Crum & Alex LaGory) — The definitive reference on kombucha, covering everything from first batch to advanced fermentation styles, flavor combinations, and culture care. Worth buying once you're 2-3 batches in.
r/Kombucha — Active community for troubleshooting and sharing SCOBY photos. The wiki handles 90% of beginner questions; use it before posting.
As an Amazon Associate, JustBeginning earns from qualifying purchases.
We may also earn commission from other affiliate programs linked on this
page. Editorial recommendations are independent; we don't choose
products based on commission rates.
Product prices and availability are accurate as of the date and time
indicated and are subject to change. Any price and availability
information shown on Amazon at the time of purchase will apply.
Our top pickThe Kombucha Shop Kombucha Brewing Kit

 Best starter