Hot sauce making sits at the intersection of cooking and fermentation — you can start with nothing but peppers, salt, and a jar. The rabbit hole goes as deep as you want: wild-fermented sauces with pH meters and custom bottles, or simple blended fresh sauces you're tasting within an hour. Either way, the first batch is the best part.
By Colin B. · Published May 24, 2026 · Last reviewed June 18, 2026
A basic blended hot sauce setup costs under $60. Add a real pH meter and proper fermentation gear and you're at $120-140. The crocks and meter last forever.
We earn commission on qualifying Amazon purchases — see our
affiliate disclosure.
Price tiers and budget totals shown above are editorial estimates;
actual Amazon prices vary.
At a glance
Our top pick in each category
The fastest path through this guide — each best-starter pick by category.
Scroll for the budget and upgrade alternatives.
Start with a simple blended sauce before committing to fermentation. Blending roasted peppers with vinegar and salt takes 20 minutes and teaches you more about flavor balance than any recipe. Then decide if you want to go the fermented route.
The pH meter isn't optional for fermented sauces — it's safety equipment. A finished fermented hot sauce should read below pH 4.6. That's the threshold below which foodborne pathogens can't survive. Get a real meter, not strips.
Woozy bottles (the classic long-necked hot sauce bottles with the plastic orifice reducer) are what you want for gift bottles. They look professional, they're cheap, and they solve the problem of making a pourable-not-drippy sauce.
Most hot sauce fermentation happens in one of two places: a wide-mouth Mason jar with a loose lid or airlock system, or a ceramic crock. Both work. The jar method is cheaper, takes up less space, and is easier to monitor. The crock is traditional, keeps light out, and scales up more naturally for bigger batches. Either gets you to the same place — a funky, complex fermented mash that tastes nothing like the bottled stuff.
Fermentation Vessels — what's the difference?
A few common shapes, each making a different trade.
Mason Jar Method
Accessible, cheap, and easy to monitor. The right way to start.
Cost
$10-15 for a 4-pack
Batch size
1-2 bottles per jar
Visibility
Full glass — easy to monitor
Best for Beginners, small batches, anyone who wants to see the ferment
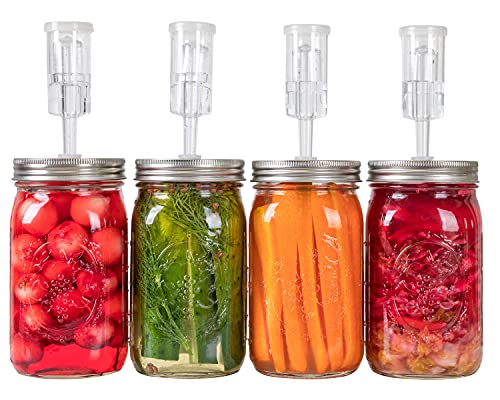
The default fermentation vessel for a reason: cheap, ubiquitous, easy to monitor, and available at every grocery store. A loose lid or dedicated airlock lid turns a quart jar into a capable fermenter. Four jars means two batches running simultaneously — the right amount for figuring out what you actually like.
What we like
Cheap, ubiquitous, and stocked at most grocery and hardware stores
Wide mouth handles whole and chopped peppers without fuss
Amber glass filters light — some ferments stay more stable
What to know
Glass exposed to light — wrap in a towel or keep in a dark spot
Quart size limits single-batch yield to about two sauce bottles
A proper ceramic fermentation crock with a water-seal lid and two stone weights — the old-world setup that's been fermenting things for centuries. Keeps light out completely, maintains even temperature, and scales to a full gallon batch. Buy one of these once you're hooked on fermented sauces and want to do it seriously.
What we like
Water-seal lid naturally vents CO2 without letting oxygen in
Stone weights hold peppers below brine — no floating problems
Ceramic blocks all light, keeping the ferment stable
What to know
Heavy — not ideal for apartments without dedicated storage space
1-gallon minimum is overkill until you're making sauce regularly
Fermentation Lids for Wide Mouth Mason Jars, Stainless Steel Auto Venting Fermenting Lid Kit with Airlocks & Silicone Grommets for Pickles, Kimchi & Sauerkraut, 4 Pack, No Jars Included
$16.99 as of Jun 22, 2026
★★★★☆Our rating· In Stock
A 4-pack of airlock-style lids that turn any wide-mouth Mason jar into a proper fermenter. The silicone grommet seals airtight and the one-way airlock vents CO2 without letting oxygen in. Stainless steel means no plastic contacting your brine. If you already own Mason jars, this is the cheapest path to a real airlock setup.
What we like
Converts any wide-mouth Mason jar into an airlock fermenter for under $15
Stainless steel — no plastic contacting your acidic brine
What to know
No submersion weight included — buy coil weights separately
Silicone grommet can degrade after many cycles in the dishwasher
A pH meter isn't optional if you're making fermented sauces — it's the only reliable way to confirm your sauce is safe to bottle at room temperature. The target is pH 4.6 or below (the threshold for pathogen safety). Test strips give you a ballpark but not the precision you need. A decent digital meter runs $25-40 and lasts for years with proper storage.
The meter that fermentation hobbyists and food scientists both reach for at this price. Replaceable probe means you swap the electrode instead of buying a new meter, automatic temperature compensation keeps readings accurate in cold brine, and ±0.01 pH accuracy is genuine precision. Apera makes meters for commercial food labs — this is their consumer pocket version.
What we like
Replaceable probe extends meter life indefinitely
Automatic temperature compensation — accurate in cold brine
Accurate enough for home fermentation, costs under $15, and gets the job done for beginners who aren't sure hot sauce fermentation will stick. Calibration drifts faster than the Apera, so recalibrate every 3-4 uses. A reasonable way in before you've committed to the hobby.
What we like
Under $15 — right for beginners unsure if fermentation will stick
Simple two-button operation with fast readout
What to know
Drifts faster — recalibrate every 3-4 uses or readings go off
No temperature compensation; cold brine readings may vary
Every hot sauce gets blended at some point — a raw fresh sauce, a cooked vinegar sauce, or a post-ferment pepper mash. The question is how smooth you want it. An immersion blender handles small batches well and cleans up fast. A high-speed countertop blender produces genuinely silky smooth sauce that strains cleanly. Neither requires more than what you might already own.
Best starter
Mueller
Ultra-Stick Immersion Blender
$39.99 as of Jun 22, 2026
★★★★★Our rating· In Stock
For blending directly in your fermentation jar, stockpot, or quart container, an immersion blender is the right tool — no transfer, no mess, fast cleanup. Mueller's is reliable, powerful enough for pepper mashes, and costs under $30. The detachable shaft goes in the dishwasher. For small-to-medium batches, this is all you need.
What we like
Blend directly in the pot or jar — no transfer, no mess
Detachable shaft is dishwasher safe — cleanup in two minutes
Under $30 and handles pepper mashes without complaint
What to know
Leaves slightly more texture than a countertop blender
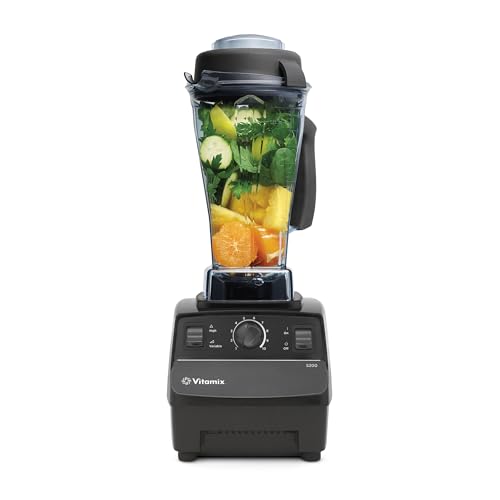
If silky-smooth sauce is the goal — the kind that strains clean and has zero texture — a Vitamix is what serious hot sauce makers run. The blade speed fully homogenizes seeds, skins, and pulp into a uniform liquid. Overkill for beginners, but if you're already into cooking and want one appliance that does everything, this is it.
What we like
Blade speed fully homogenizes seeds and skins into silky liquid
Doubles as a full kitchen workhorse well beyond hot sauce
What to know
At $400+, hard to justify for hot sauce alone
Large footprint — counter space is a real consideration
The bottle you put your sauce in changes the whole experience. Woozy bottles — the classic narrow-necked shape with a plastic orifice reducer insert — control the pour and look exactly like what people expect a hot sauce to look like. Swing-top bottles are easier to fill and refill. If you ever want to share or gift sauce, a 24-pack of woozies and some caps is the right call.
Best starter
Encheng
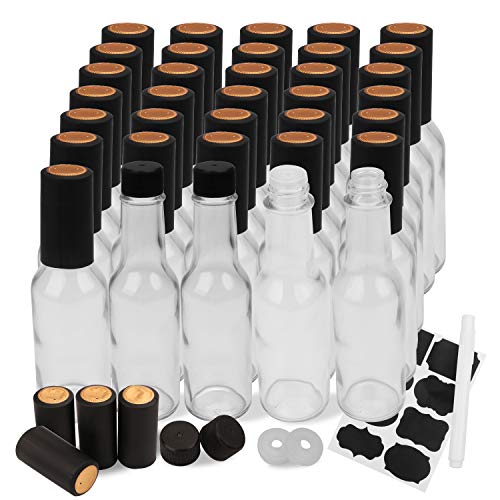
5 oz Woozy Hot Sauce Bottles with Dripper Inserts 35-Pack
$29.99 as of Jun 22, 2026
★★★★★Our rating· In Stock
Thirty-five 5 oz woozy bottles with orifice dripper inserts and shrink capsules — the full package for your first bottling day. The classic woozy shape signals this is a real product, not a mystery jar. At under $25 for 35, you'll give away more bottles than you keep, which is the point.
What we like
Classic woozy shape with orifice reducer — looks like a real hot sauce
24-pack under $20 — enough for a whole season of gifting
Caps included; no separate capper equipment needed
What to know
Plastic orifice insert warps with sauce above 140°F
Caps are single-use — reopened bottles won't reseal cleanly
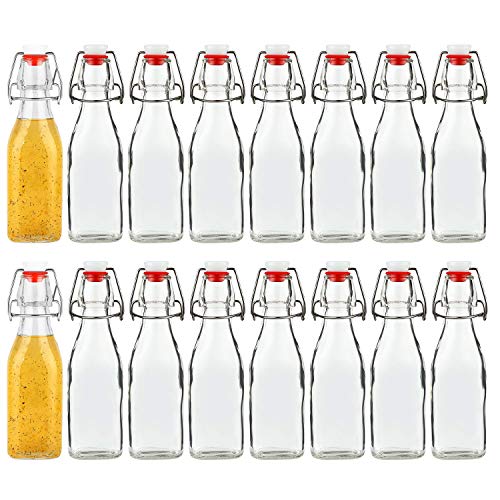
Swing-top bottles seal completely, reseal easily, and look great on a shelf. The 8 oz size is practical if you're making sauce for yourself rather than gifting. No caps to buy, no capper needed. The wider mouth is also easier to fill with thicker, chunkier sauces.
What we like
Swing top reseals cleanly — no separate caps or capper needed
Wider mouth makes filling thick chunky sauces easier
What to know
Rubber gasket needs replacing after 20-30 washes
Less giftable — woozy shape reads as 'hot sauce' more clearly
A handful of inexpensive tools make the whole workflow dramatically cleaner: a wide-mouth funnel for filling bottles without catastrophe, glass fermentation weights to keep peppers submerged in brine, and a fine-mesh strainer for pulling seeds and skins from finished sauce. Total spend under $30 and every piece gets used every batch.
Best starter
Norpro
Canning Funnel with Strainer
$15.35 as of Jun 22, 2026
★★★★★Our rating· In Stock
A stainless canning funnel with a removable strainer insert — the one tool that stops hot sauce from covering your counter. The wide mouth fits quart jars and woozy bottle necks. The strainer catches seeds and skins inline during filling, which saves a whole separate straining step.
What we like
Stainless funnel + strainer insert catches seeds while filling
Fits quart jars and standard woozy bottle necks
Dishwasher safe — cleanup in under a minute
What to know
Strainer clogs with very thick mash — press through with a spoon
Single size — won't fit narrower 2 oz bottle necks
Stainless steel coil weights that screw into any wide-mouth Mason jar and hold your pepper mash submerged below the brine. Floating peppers exposed to air develop surface mold that can ruin the batch. These coils solve the problem cleanly — no glass to break, dishwasher safe, and they fit every wide-mouth jar you own.
What we like
Stainless steel keeps peppers submerged — no surface mold risk
Dishwasher safe and won't break like glass weights can
What to know
Wide-mouth only — incompatible with regular-mouth Mason jars
Stainless can have mild metallic taste in very long high-acid ferments
Most people start with a recipe and miss the whole point. Here's what actually happens — batch by batch — between your first blended sauce and the moment fermentation clicks.
Hot sauce making has a reputation for being complicated — pH meters, airlock lids, brine percentages. That reputation is earned, but it front-loads all the wrong things. The first batch you should make takes 30 minutes, requires nothing but peppers and vinegar, and will teach you more about flavor than a week of reading.
Here’s what your first month actually looks like, batch by batch, with the things that matter and the things that will trip you up.
Week 1: The blended sauce
Before fermentation exists in your life, there’s the blended sauce. It’s the foundation everything else is built on, and it’s the fastest way to understand what you’re actually trying to build.
Roast a pound of jalapeños or Fresno chiles under the broiler until they’re blackened and soft. Toss them in a blender with three cloves of garlic, a quarter cup of apple cider vinegar, a teaspoon of salt, and a splash of water. Blend until smooth. Taste.
What you’re tasting is the base flavor profile of a fresh hot sauce. Now push it in a direction: more acid (more vinegar), more heat (add a habanero to the roast), more sweetness (a roasted carrot or a teaspoon of honey), more depth (roasted garlic instead of raw).
This is the whole skill of hot sauce making — not technique, but flavor literacy. You’re building a vocabulary of what each ingredient does. The fermentation and the bottling are just systems for preserving decisions you’ve already made.
The one thing to get right on your first batch: don’t cook the vinegar. Add it after roasting. Cooking vinegar drives off the acetic acid that preserves the sauce and gives it brightness. Add it raw, blend, and taste.
Your first batch won’t be perfect. It might be too thin, or too salty, or hotter than you expected. That’s useful information — write it down. The batch after this one will be better, and the one after that better still.
Week 2: Starting your first ferment
If the blended sauce is about flavor, fermented sauce is about patience and a little bit of chemistry. The process is simple: pack chopped peppers in a jar with a 2-3% salt brine, weigh them down below the surface, cover, and wait.
What happens next is wild fermentation — lactic acid bacteria (the same ones in sauerkraut and kimchi) colonize the peppers and start producing acid. The pH drops. The peppers soften. The flavor transforms into something complex and funky that no amount of vinegar can replicate.
The math: 2% salt brine means 20 grams of salt per liter of water (or 2 teaspoons per cup, roughly). Pack your jars tightly. Weigh the peppers below the brine with a glass weight or a small zip-lock bag of brine. The peppers must stay submerged — anything above the brine line can develop surface mold.
Cover the jar loosely (a lid set on top without tightening, or a proper airlock lid) and leave it at room temperature — 65-75°F is ideal. Check it every day. You should see bubbling within 24-48 hours. That’s CO2 from the bacteria, and it means your ferment is active.
The hard part of week two isn’t the technique — it’s the waiting. Five to seven days is the minimum for jalapeños. Some makers go two weeks, or even a month. The longer the ferment, the more complex the flavor. Start at five days and taste from there.
Week 3: Blending the ferment
After five to seven days, your peppers should be soft, sour-smelling (funky-sour, not rotten), and the brine should be cloudy. This is what success looks like.
Drain the brine into a separate container — you’ll want it. Blend the peppers until smooth. Taste. Then add brine back in, a little at a time, until you hit the consistency and saltiness you want.
This is where your pH meter earns its spot. Before you bottle anything meant to be stored at room temperature, you need a pH reading below 4.6. That’s the threshold below which foodborne pathogens cannot survive. A properly fermented batch should come in around pH 3.5-4.0. If it reads above 4.6, add apple cider vinegar until it drops below.
What to do with texture: Fermented pepper mash is thicker and more complex than a blended fresh sauce. If you want a pourable hot sauce, strain it through a fine-mesh strainer and press the solids through. If you want a chunky situation — salsa-level thick — leave it. Both are right.
Week 4: Bottling and what you’ve learned
Bottling day is the satisfying part. Warm the sauce gently (below 140°F — don’t boil it), funnel it into your woozy bottles, cap, and label.
The label matters more than you think. Write at minimum: pepper type, date, and batch number. Your memory of what you did differently will be gone by the next batch.
By the end of week four, here’s what you’ve actually learned:
Flavor is about decisions, not recipes. Every choice — pepper variety, roasted vs. raw, fermentation time, acid level — changes the outcome. Start keeping notes.
Fermentation is reliable but not passive. You check it every day. You make sure peppers stay submerged. You taste at the five-day mark and decide whether to go longer. It’s an active process dressed up as waiting.
Yields are small. One quart jar of peppers produces about two woozy bottles of sauce. You need more jars than you think.
The mistakes everyone makes
Every new hot sauce maker runs into the same handful of problems:
Floating peppers. The #1 cause of surface mold. Weigh everything down below the brine with glass weights or a small zip-lock bag of brine.
Too much salt. A common overcorrection from fear of spoilage. Stick to 2-3% brine by weight. More salt doesn’t make it safer — pH does.
Forgetting to label. You will have four unmarked bottles in your fridge within a month. Label everything at bottling.
Bottling too soon. Tasting at day three and deciding the ferment is done because it seems sour. Let it go to day five minimum. Complexity develops over time.
Nobody’s first batch is perfect. That’s the whole point — each batch teaches you something the previous one couldn’t.
What to do in month two
Try a different pepper. Fresnos make a beautiful red sauce; smoked chipotles produce something closer to a mole than a hot sauce.
Experiment with aromatics in the ferment — a crushed garlic clove, a slice of ginger, a piece of dried mushroom.
Make a cooked sauce once — garlic, onion, peppers sautéed and blended — and compare it to your fermented version. The flavor difference is instructive.
You’re not a beginner anymore after one month. You know what fermentation looks and smells like when it’s working. That’s the hardest thing to learn, and you learned it.
Save your money
What you don't need yet
Beginners get pressured to buy a lot of stuff that doesn't help them play
better. Here's what we'd skip on day one.
A commercial-grade food mill — An immersion blender and a fine-mesh strainer achieve the same result for home batches.
A bottle capper and crown caps — Woozy bottles with included caps are simpler, cheaper, and perfectly shelf-stable without a capper.
A dehydrator for pepper flakes — Separate hobby entirely. Start with fresh or store-bought dried peppers — dehydrating is its own rabbit hole.
Specialty pepper seeds — Dried peppers from a grocery store or spice shop work perfectly for your first dozen batches. Seeds are for later.
A pH logging system or bluetooth meter — You don't need real-time monitoring. A pocket meter you dip once a day tells you everything you need.
First week
Your first seven days
A short, real plan to get from gear-on-doorstep to actually playing.
Make a simple blended fresh sauce before touching fermentation — roasted peppers, apple cider vinegar, garlic, salt. Twenty minutes, delicious. · Action
Order your quart Mason jars so they're on hand when you're ready to ferment. · Buy
Pick a pepper: jalapeños and serranos are forgiving, available year-round, and a good first ferment. · Action
Start a fermented brine batch: 2-3% salt by weight, pack jar with chopped peppers, weigh down, wait 5-7 days at room temperature. · Learn
Check your fermenting jars daily. Bubbling is good. A white film on top (kahm yeast) is annoying but harmless — skim it off. · Action
After 5-7 days, blend, taste, and adjust. Check pH before bottling — target below 4.6. · Action
FAQ
Common questions
Do I need a pH meter to make hot sauce?
For fresh sauces stored in the fridge and used within a few weeks, no. For fermented or vinegar-based sauces you plan to store at room temperature, yes — pH 4.6 or below is the food safety threshold. A $15-40 meter is the right tool; strips aren't precise enough.
What's the difference between fermented and fresh hot sauce?
Fresh sauce is blended raw or cooked peppers with vinegar, salt, and seasonings — simple, fast, and tangy from the vinegar. Fermented sauce uses lactic acid bacteria (the same organisms in sauerkraut) to acidify peppers naturally over days or weeks, producing complex, funky flavor that vinegar can't replicate. Most classic hot sauces — including Tabasco — are fermented.
What peppers should I start with?
Jalapeños and serranos are forgiving, available year-round, and relatively mild — perfect for learning the process. Fresno chiles make excellent fermented red sauce. Habaneros taste incredible but punish small mistakes with intense heat — save those for after you've nailed the technique with milder peppers.
How long does homemade hot sauce last?
Properly acidified fermented sauce (pH ≤ 4.6) in woozy bottles is shelf-stable at room temperature for 6-12 months. Once opened, refrigerate and use within a month or two. Fresh blended sauces without fermentation need refrigeration and last 2-4 weeks.
Why does my ferment smell weird?
Funky, yeasty, and slightly sulfurous is normal and often great — that's active fermentation. Strong mold smell, pink or black fuzz on the surface, or slimy texture means something went wrong. The usual culprit is peppers floating above the brine and oxidizing. Keep them submerged and most problems don't start.
Can I make hot sauce without fermenting?
Absolutely — a roasted pepper sauce blended with apple cider vinegar, garlic, and salt takes 30 minutes and is legitimately delicious. Frank's RedHot and Crystal are vinegar-forward sauces made without wild fermentation. Start there if fermentation feels like too much to tackle first.
Serious Eats — Fermentation — Science-backed fermented hot sauce recipe with thorough headnotes. Read this before your first fermented batch.
r/hotsauce — Active community of makers and buyers. The wiki has solid beginner fermentation links and troubleshooting threads.
r/fermentation — Broader fermentation community but hot peppers are a major topic. Troubleshooting posts with photos get real answers fast.
The Chile Pepper Institute — NMSU's pepper research program. Not beginner-facing, but authoritative on pepper heat levels, Scoville science, and variety data.
As an Amazon Associate, JustBeginning earns from qualifying purchases.
We may also earn commission from other affiliate programs linked on this
page. Editorial recommendations are independent; we don't choose
products based on commission rates.
Product prices and availability are accurate as of the date and time
indicated and are subject to change. Any price and availability
information shown on Amazon at the time of purchase will apply.
Our top pickApera Instruments AI311 Premium Series PH60 Waterproof pH Pocket Tester Kit, Replaceable Probe, ±0.01 pH Accuracy, Lcd display


 Best starter