Inline skating is one of those sports that feels impossible for thirty minutes and then clicks all at once. The gear is where beginners go wrong first — especially skates, wheel hardness, and stopping. Here's exactly what you need, and exactly what to skip.
By Colin B. · Published May 23, 2026 · Last reviewed June 8, 2026
Skates are the big-ticket item ($80–180 for a solid beginner pair). Pads are non-negotiable — budget another $40–60. Everything else is optional or replaceable.
We earn commission on qualifying Amazon purchases — see our
affiliate disclosure.
Price tiers and budget totals shown above are editorial estimates;
actual Amazon prices vary.
At a glance
Our top pick in each category
The fastest path through this guide — each best-starter pick by category.
Scroll for the budget and upgrade alternatives.
The biggest mistake beginners make is buying aggressive or speed skates when they mean to buy fitness skates. The frame styles look similar in photos but skate completely differently. Fitness skates (tall boot, large wheels, straight frame) are what you want to start. Aggressive skates (short boot, small wheels, soul plate) are for tricks. Speed skates (low boot, huge wheels) are for racing. If you don't know which you want, you want fitness.
Wheel hardness (durometer) trips up every first buyer. The number (like 80A) measures hardness — lower is softer and grippier, higher is harder and faster. Softer wheels (76A–80A) are better for outdoor pavement with cracks and grit. Harder wheels (84A–90A) are for smooth indoor surfaces or serious speed. Most beginners should start with 80A–82A outdoor wheels and never think about it again.
Don't skip the pads. Inline skating on pavement has exactly one predictable failure mode: you fall. Wrist guards prevent the most common injury (reflex to catch yourself on outstretched hands). Knee pads are next. A helmet matters most if you're going fast. Buy the pads before you buy upgraded skates.
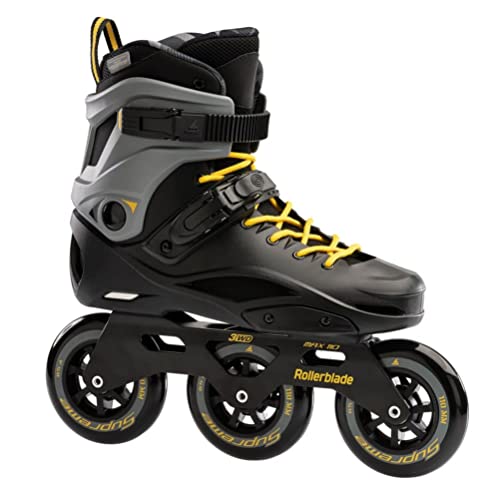
Fitness/recreational skates are what 90% of beginners want — taller boot for ankle support, 80mm wheels, and a brake on the right skate. The boot height matters: a taller cuff keeps your ankle from rolling while you're still learning. Size as you would a running shoe (not street shoe). Skates that are too big are actually dangerous — they won't transfer power and your heel will lift on every push.
Skates — what's the difference?
A few common shapes, each making a different trade.
Fitness / Recreational
Tall boot, 80mm wheels, heel brake. The right frame for 90% of beginners.
Wheel size
76–84mm
Cuff height
Tall
Brake
Heel brake included
Best for Park paths, neighborhood skating, fitness, beginners
Medium cuff, 80–90mm wheels, no brake (learn the T-stop first).
Wheel size
80–90mm
Cuff height
Medium
Brake
Usually none
Best for City skating, commuting, mixed terrain, second skates
Tradeoff No brake — requires T-stop mastery before you skate traffic
Aggressive / Trick
Short boot, small wheels (56–60mm), soul plate for grinds.
Wheel size
56–60mm
Cuff height
Short
Brake
None
Best for Skate parks, grinds, jumps, and rail skating
Tradeoff Uncomfortable and slow for any distance skating
Speed / Marathon
Very low boot, 100–110mm+ wheels, no brake. Pure distance and pace.
Wheel size
100–125mm
Cuff height
Very low / race
Brake
None
Best for Road racing, marathons, long-distance fitness
Tradeoff Demands strong technique — not for beginners
Best starter
Rollerblade
Zetrablade Adult Inline Skates
$$
★★★★★Our rating
Rollerblade invented the modern inline skate and the Zetrablade is their entry-level workhorse. High cuff for ankle support, 80mm wheels at 80A (exactly right for outdoor pavement), a heel brake, and a price that won't sting if you decide the sport isn't for you. Comfortable out of the box, which matters on day one.
What we like
High cuff keeps ankles stable while you're still learning balance
80mm / 80A wheels are the correct all-around outdoor setup
Heel brake included — you need this before you learn the T-stop
What to know
Runs slightly narrow — half-size up if you're between sizes
Liner softens over 20-30 hours and feels less supportive
K2's BOA closure system is a genuine advantage at this price point — a dial tightens the fit evenly instead of hunting for the right lace tension. Supportive cuff, 80mm wheels, and a fit that locks your heel down better than most entry-level lace-up skates. Men's equivalent is the K2 F.I.T. 80 Boa.
What we like
BOA dial closure creates even, consistent fit in seconds
Heel hold is noticeably better than lace-up skates at the same price
Available in men's version (K2 F.I.T. 80 Boa) same price
Once you're skating regularly and want more speed, the RB 110 is the next step up. Larger 110mm wheels (more roll, more speed) with an 85A durometer for mixed surfaces, a stiffer frame, and a lower-profile cuff. You'll feel the difference after 20+ hours — not before. This is a six-month upgrade, not a day-one purchase.
What we like
110mm wheels roll faster with dramatically less effort per push
Stiffer frame transfers power more efficiently on long distances
Covers ground 20–30% faster than 80mm beginner skates
What to know
Lower cuff offers less ankle support — requires established technique
Harder to brake and maneuver at low speeds with larger wheels
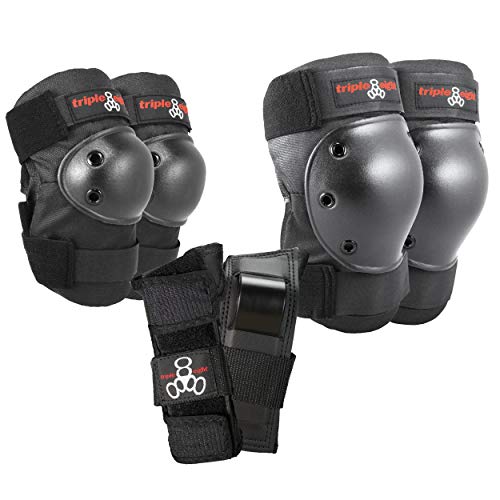
Falling is part of learning inline skating, especially on the first day. The question is what you land on. Wrist guards are the single most important piece — the reflex to catch yourself causes the most common beginner injury (wrist fractures). Knee pads protect the second most common impact point. A helmet matters most once you're moving at speed. A complete set from one brand ensures the fit works together.
Best starter
Triple Eight
Saver Series Pad Set
$$
★★★★★Our rating
Triple Eight makes the most trusted skate protection in the business, and this set covers wrists, knees, and elbows in one box. All three pads have the same quality hardshell caps and foam lining you'd get buying them individually — at a meaningful bundle discount. Wear it every session for the first month and you will not regret it.
What we like
Wrist, knee, and elbow in one box — no compatibility hunting
Dual-certified for both skateboarding (CPSC) and cycling (ASTM), which matters if you ever skate near road traffic. Sweatsaver liner is genuinely comfortable for sweaty sessions. A dedicated skate helmet fits and vents better than a bike helmet and stays on better in a fall — worth it once you're moving fast.
What we like
Dual CPSC + ASTM certified — covers skating and cycling use
Sweatsaver liner stays comfortable through 90-minute sessions
Better impact geometry for falls than a road bike helmet
What to know
Measure your head — sizes vary significantly between models
Not rated for high-speed road falls; consider full-face for speed skating
If you already have wrist guards and just need knee protection, 187 is the brand every skateboarder and skater trusts. Plastic cap, foam liner, and wide straps that actually stay put. Better knee protection per dollar than bundled sets, and they last for years.
What we like
Trusted by park skaters for decades — proven cap design
Wide velcro straps hold position through hard skating sessions
Durable enough to outlast multiple pairs of skates
What to know
Knee pads only — wrist guards sold separately
Plastic cap scuffs floors in rinks — check rink rules first
Wheels wear down and eventually need replacing — plan on it. The two specs that matter: size (measured in mm) and hardness (durometer, the 'A' number). Bigger wheels (80mm+) roll faster; smaller wheels (72–76mm) turn faster. Softer wheels (76A–80A) grip rough outdoor pavement; harder wheels (84A–90A) are for smooth indoor surfaces. Most beginners should replace worn wheels with 80mm / 80A all-rounders and call it done.
Best starter
Rollerblade
Supreme Urban 80mm Wheels (8-pack)
$$
★★★★★Our rating
An 80mm / 80A wheel is the correct all-rounder for outdoor fitness skating — fast enough to feel good, soft enough to absorb cracked sidewalks. This 8-pack replaces a full set of skates at once, which you should always do (mixing old and new wheels creates uneven wear and a wobbly ride).
What we like
80A durometer is the right hardness for cracked outdoor pavement
8-pack replaces all wheels at once for even, consistent roll
Rollerblade hub fits most fitness skate frames without adapters
What to know
Softer compound wears faster on rough concrete than 84A+ wheels
Not suitable for racing or indoor rinks — get harder wheels for those
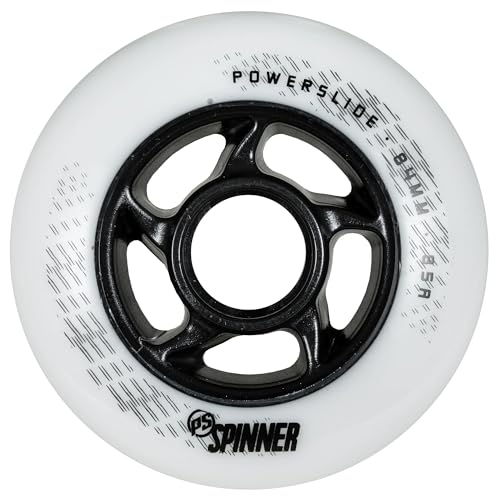
If you skate at an indoor rink or on gym-quality smooth concrete, harder wheels roll faster and last longer. The Powerslide Spinner at 84A is the sensible step up — still grippy enough for most surfaces but noticeably faster on smooth floors. Buy a separate set and swap depending on where you're skating.
What we like
84A rolls noticeably faster on smooth indoor rink surfaces
Lasts longer than softer wheels when skating indoors regularly
Powerslide hub fits most standard frames without modification
What to know
Will skid on wet pavement or rough outdoor concrete
Only a 4-pack — buy two for a full replacement set
Bearings are the small rings inside each wheel that let it spin. Every skate comes with bearings; most starter skate bearings are mediocre. The ABEC rating is a precision standard — higher means more precisely manufactured, which means less friction and more roll. ABEC-5 is typical in beginner skates. ABEC-7 is the sweet spot. ABEC-9 exists but the real-world difference over ABEC-7 is tiny. Bones Reds are the skate-world standard — $17 to $25 and they genuinely transform how a skate rolls.
Best starter
Bones
Reds Precision Skate Bearings (16-pack)
$49.90 as of Jun 22, 2026
★★★★★Our rating· Only 14 left in stock - order soon.
Bones Reds are the single most recommended bearing upgrade in skating. They've been the value-for-money standard for decades — smoother, faster, and longer-lasting than any bearing that ships on a $100 entry-level skate. A 16-pack covers all 8 wheels (2 bearings per wheel). Install them yourself with a bearing press or a skate tool and your skates will feel like a different machine.
What we like
The gold-standard skate bearing for 20+ years — proven at every level
Rolls faster and smoother than any stock bearing in a beginner skate
16-pack covers all 8 wheels with 2 bearings each
What to know
Requires a bearing press or skate tool to install cleanly
Not rated for water — rinse and dry immediately if caught in rain
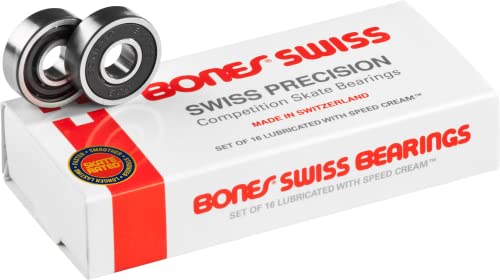
If Bones Reds are the everyman standard, Swiss are the obsessive choice. Swiss-made steel races with tighter tolerances, longer service life, and a noticeably smoother spin. The upgrade over Reds is real but small — most skaters feel it at speed, not at slow recreational pace. Worth the jump if you skate several times a week and maintain your bearings regularly.
What we like
Swiss-made steel races — measurably tighter tolerances than Reds
Longer service life when properly cleaned and lubricated
Noticeable spin improvement at speed for performance skaters
What to know
3x the cost of Reds — diminishing returns for recreational skating
Same maintenance requirements — won't last longer if neglected
Three things every inline skater eventually needs: a skate tool (for rotating wheels and swapping bearings), brake pads (the rubber heel stop wears down and needs replacing every few months of regular skating), and bearing lubricant (cleans and re-oils bearings when they start to sound rough). The whole toolkit runs under $30 and extends the life of your skates significantly.
Best starter
Rollerblade
Bladetool for Inline Skates
$17.95 as of Jun 22, 2026
★★★★★Our rating· In Stock
A T-shaped hex tool that handles every common skate adjustment — rotating wheels (do this every 10–15 hours to even out wear), swapping brake pads, and pressing bearings. Compact enough to carry in a bag. Having one means you can make adjustments at the skate path instead of driving home with a loose wheel.
What we like
Handles wheel rotation, brake replacement, and bearing swaps
Small enough to carry in a backpack or skate bag
Compatible with most Rollerblade and standard fitness skate hardware
What to know
Verify hex key size fits your specific skate axle before ordering
No torque feedback — easy to over-tighten and strip axle bolts
The rubber heel stop on your right skate is a consumable — expect to replace it every 3–6 months of regular skating. When it's worn to the plastic holder, your stopping distance doubles and the holder scratches pavement. Replacing it takes two minutes and costs under $10. Keep a spare.
What we like
Replacing worn brakes is the most important skate maintenance task
Under $10 — cheap insurance against poor stopping on worn rubber
Two-minute swap with the included skate tool bolt
What to know
Must match your specific skate model — check Rollerblade's brake chart
Third-party brake pads often don't snap in properly — stick to OEM
★★★★☆Our rating· Only 2 left in stock - order soon.
When your bearings start sounding rough or scratchy, they need cleaning and re-lube, not replacement. Bones Speed Cream is thin (low-viscosity) oil formulated for skate bearings — it flows into the races and maintains the spin without the drag of thick general-purpose lubricants. One bottle lasts years. Clean bearings with isopropyl alcohol, let dry, then add two drops per bearing.
What we like
Low-viscosity formula flows into bearing races without drag
Two drops per bearing — one bottle lasts for years
Extends bearing life significantly compared to no-lube degradation
What to know
Thinner than multi-purpose oil — bearings need re-lube more often
Won't save bearings that have been contaminated with water or grit
Balance comes faster than you think. Stopping is harder than it looks. Here's what actually happens in your first few hours on wheels — and how to skip the painful learning tax.
Five hours is about right for inline skating. In two hours you’ll be gliding. In five you’ll feel like a skater. In ten you’ll wonder why you didn’t start years ago.
The problem with most beginner advice is that it skips the awkward part — the first twenty minutes where you genuinely cannot figure out why your legs keep sliding apart. This guide doesn’t skip it. It explains what’s happening, what to do about it, and what to learn in what order so you don’t waste sessions on the wrong things.
Hour 1: Getting comfortable not moving
Before you try to skate, you need to be comfortable not falling while wearing skates. This sounds obvious; almost no one does it.
Put your skates on inside or on carpet. Walk around. Get used to the weight and how your ankle feels inside the boot. The moment you step onto pavement your brain panics — the wheels want to roll and your body doesn’t know how to fight it yet. Spend five minutes inside first.
When you step outside, start on a patch of slightly rough pavement or grass where the wheels won’t roll freely. Stand in a V-shape (heels together, toes out about 30 degrees). This is your “ready position” and it’s the first thing inline skating teaches: your feet parallel will slide away from you; V-position gives you control.
The first thing to learn is not a stop. It’s a stance. Knees bent. Weight forward over your toes, not back over your heels. Arms slightly out to the sides for balance. If you’re leaning back, you’re about to fall back — lean forward until it feels wrong, then come back 10%.
Try tiny glides. Push with one foot, let the other roll. Don’t try to stride — try to hold a one-foot glide for one or two seconds. When that feels okay, switch sides. You’re learning that the skate will roll in a straight line if you let it. Most beginners fight the roll; the skill is trusting it.
Hour 2: The heel brake, specifically
The heel brake — the rubber stop on the back of your right skate — is the only stopping mechanism you have right now, and it’s more involved than it looks.
This is the correct sequence:
Glide with feet parallel.
Extend your right foot forward, slightly ahead of your left.
Lift the toe of your right skate, dropping the heel to engage the brake.
Apply pressure. The skate will slow. Let it.
The mistake 90% of beginners make: they lift the toe of the wrong foot, or they keep both feet parallel and lean back. The leaning-back instinct is exactly wrong — it reduces the brake pressure and sends your weight over your heels, which is where falls happen.
Practice it at slow speed on flat pavement, over and over, until the sequence is automatic. You are not ready to skate anywhere interesting until stopping is boring.
The T-stop exists, and you should know about it, but don’t drill it yet. The T-stop (dragging your back skate perpendicular to your direction of travel) is what you’ll use once you upgrade to skates without a heel brake. It requires more balance and more practice. Learn the heel brake first. The T-stop will take 3–4 sessions of dedicated practice on its own; you don’t need it in your first week.
Hours 3–5: Actual skating
Once you can glide and brake, you start skating. These are the things that separate a recreational skater from someone who just had their skates on:
The stride. Push sideways, not backward. The inline skating push goes out at about 45 degrees from your center line — not straight behind you like running. Each push drives you forward. The recovery brings the foot back under your body in a wide arc. This is what the long, sweeping stride looks like: push out at 45°, glide, recover, push the other side.
Turning. At low speed, lean the way you want to go. Your body weight steers the skates. At medium speed, crossover turns are what you need: step your outside foot across and in front of your inside foot as you arc. It’s a skill with a learning curve, but the short version is: lean into the turn and let your feet follow.
Hills. Avoid significant downhill until you can stop reliably in three attempts out of three. A hill that looks gentle can get fast quickly. Snowplow (V-stop) technique — toes inward, heels out, both skates acting as a wedge — works for mild hills before you master the T-stop. Practice it.
By hour four, you’ll start to feel the rhythm — the alternating push and glide, the smooth roll on a good surface, the small adjustments your ankles make automatically. This is when it stops feeling like surviving and starts feeling like skating.
What will go wrong (and what to do)
You’ll fall backward. It means your weight is over your heels. Fall forward instead: knee pads on the ground, wrists catching through the guards, chin tucked. Backward falls hit the tailbone and the head. Forward falls are survivable.
You’ll swing your arms too much. Flailing arms are a balance reflex. Once you relax your arms to a natural position (slightly out, not windmilling), your balance improves immediately.
Uphills feel harder than they should. Because you’re not pushing sideways enough. The sideways push is what makes inline skating efficient — more angle, more distance per push.
Your ankles will hurt after 30–60 minutes. Normal for new boots. Take them off, rest, continue. The liner compresses and breaks in over 5–10 sessions. If you have genuine sharp pain, check that you’re buckling the cuff correctly (not cutting off circulation).
After hour five
At five hours you have the fundamentals. At this point the things worth your practice time are:
T-stop — the technique you’ll need for skates without a brake
Crossover turns — the tool that makes corners feel fluid
Backward skating — genuinely fun once you can go forward confidently, and easier than it sounds
Find a smooth bike path or park with moderate traffic. Other skaters are almost always willing to share technique; the inline community tends to be friendly and un-intimidating.
Save your money
What you don't need yet
Beginners get pressured to buy a lot of stuff that doesn't help them play
better. Here's what we'd skip on day one.
Aggressive skates — Unless you specifically want to grind rails and do tricks, these are uncomfortable to skate any distance and completely wrong for fitness or recreational use.
Speed skates with 110mm+ wheels — Bigger wheels require more technique to control at slow speeds. Learn balance and stopping on 80mm skates first — you'll know when you're ready for bigger.
A bearing press — A skate tool handles bearing swaps for most fitness skate frames. A dedicated press is only worth it if you're doing frequent bearing swaps on multiple pairs.
Inline hockey skates — Completely different boot geometry and frame — great for hockey, wrong for fitness skating. Don't mix up the sport.
Rocker or anti-rocker frame configurations — Adjusting your frame's wheel height pattern is an intermediate technique adjustment. Leave your frame flat (all wheels same height) until you've built solid fundamentals.
First week
Your first seven days
A short, real plan to get from gear-on-doorstep to actually playing.
Find a smooth, low-traffic surface for your first session — an empty parking lot, a smooth bike path, or an indoor rink. · Action
Order your skates and pads before the weekend — don't step on pavement without wrist guards. · Buy
Once the heel stop feels natural, start working on the T-stop — the technique you'll use when you upgrade to brakeless skates. · Learn
T-stop tutorial · YouTube · the next stopping skill after the heel brake
FAQ
Common questions
How much should I expect to spend to start inline skating?
Budget $120–230 total. Decent beginner skates run $80–150, pads (wrist, knee, elbow) are another $30–50, and a helmet is $30–50 more. Everything else — bearings, tools, spare wheels — can wait until you know you're sticking with it.
Is inline skating hard to learn?
The first 30 minutes are humbling and the next hour is a breakthrough. Most people can glide and do basic stops in one session. The heel brake is easy; the T-stop takes a few sessions. Real speed and agility take months — but recreational fitness skating is achievable in a single afternoon.
What's the difference between fitness skates and aggressive skates?
Fitness skates have tall boots, large wheels (80mm+), and a heel brake — they're designed for rolling distance and stability. Aggressive skates have short boots, tiny wheels (56–60mm), and a soul plate for grinding rails. They look similar in photos; they skate completely differently. Most beginners want fitness skates.
What does wheel hardness (durometer) mean, and which should I get?
Durometer measures how hard the wheel is — the 'A' number, like 80A or 84A. Softer wheels (76A–80A) grip rough outdoor pavement better. Harder wheels (84A–90A) roll faster on smooth indoor surfaces. Most outdoor recreational skating: start with 80A and don't overthink it.
Do I really need pads, or can I just be careful?
Yes, you need pads — especially wrist guards. The most common inline skating injury is a wrist fracture from reflexively catching yourself on outstretched hands. Knee pads are next. A helmet matters once you're moving at speed. Wear them until stopping and balance feel second nature.
Can I skate on regular sidewalks and paths?
Yes. Fitness skating on smooth bike paths and sidewalks is the whole point. Avoid wet pavement (your wheels will hydroplane), loose gravel (will eat your wheels), and steep hills until you've mastered braking. A smooth, flat, low-traffic surface is the ideal first session location.
Inline Planet — Long-running community site with news, tutorials, and gear reviews. The beginner section covers technique in practical, non-intimidating detail.
Adam Bazydlo (YouTube) — One of the clearest beginner coaching channels on YouTube. Patient explanations, practical drills, and good coverage of urban skating technique.
Fr David (YouTube) — Deep dives into skate setup, wheel science, and frame options. Essential viewing once you want to understand the gear beyond the surface level.
r/rollerblading — Active community. The wiki has excellent beginner recommendations for skates by budget. Skip the tribal debates about brands.
As an Amazon Associate, JustBeginning earns from qualifying purchases.
We may also earn commission from other affiliate programs linked on this
page. Editorial recommendations are independent; we don't choose
products based on commission rates.
Product prices and availability are accurate as of the date and time
indicated and are subject to change. Any price and availability
information shown on Amazon at the time of purchase will apply.
Our top pickRollerblade Zetrablade Adult Inline Skates


 Best starter