Kayaking rewards you immediately — your first hour on calm water feels like real skill, not a fumbling introduction. The biggest mistake beginners make is buying the wrong type of kayak for their actual situation. Here's exactly what to get first and what to rent, borrow, or skip entirely.
By Colin B. · Published May 15, 2026 · Last reviewed June 1, 2026
An inflatable kayak plus paddle and PFD runs $200-250. A decent hardshell recreational kayak with proper paddle and life jacket lands at $550-700. The boat is the variable — everything else is under $150 combined.
We earn commission on qualifying Amazon purchases — see our
affiliate disclosure.
Price tiers and budget totals shown above are editorial estimates;
actual Amazon prices vary.
At a glance
Our top pick in each category
The fastest path through this guide — each best-starter pick by category.
Scroll for the budget and upgrade alternatives.
Rent before you buy, especially your first two or three times on the water. A local outfitter charges $30-50 for an afternoon and teaches you more than any review will — you'll discover whether you prefer sitting up high (sit-on-top) or enclosed (sit-inside), how different widths feel, and whether kayaking is a habit you actually want to build. Most people who rent once and immediately buy end up with a boat that doesn't match how they actually paddle.
Your life jacket is non-negotiable — wear it, don't just bring it. Most kayaking drowning deaths involve paddlers who had a PFD but weren't wearing it. Buy a kayak-specific PFD cut for paddling range of motion; standard bulky lifejackets restrict your arms badly after ten minutes. A comfortable PFD is the one you'll keep on all day.
Don't buy a kayak before you know where you'll store it and how you'll transport it. A 10-foot hardshell weighs 45-55 lbs and needs either a roof rack or a truck to move. If you live in an apartment or can't manage a car roof load, an inflatable is the right first answer — it packs into a bag and stores in a closet.
The kayak is your biggest decision and the one most beginners get wrong. Three main types — sit-on-top, sit-inside, and inflatable — suit different conditions and lifestyles, and the wrong one for your situation is expensive to fix. Sit-on-top kayaks are the easiest starting point: very stable, naturally self-draining, and simple to remount if you tip. Sit-inside kayaks are more efficient and keep you drier in cooler weather, but require practicing a wet exit before you go anywhere remote. Inflatables pack into a bag and fit in any car trunk — right for anyone without storage space or a roof rack. Read the kayak-type guide below before you buy.
Kayaks — what's the difference?
A few common shapes, each making a different trade.
Sit-on-Top
Open deck, self-bailing, easiest self-rescue. The default beginner kayak.
Stability
Very high
Self-rescue
Easy — just climb back on
Best water
Lakes, bays, calm ocean shores
Best for Beginners, warm-weather paddling, fishing, beach launches
Tradeoff You'll get wet; slower in wind; not ideal for cold water or long exposed crossings
Sit-Inside
Drier, warmer, more efficient. The touring standard once you have basics down.
Stability
Moderate — edge-stable
Self-rescue
Harder — requires wet-exit practice first
Best water
Cooler lakes, coastal touring, rivers
Best for Cooler climates, multi-day touring, paddlers focused on improving technique
Tradeoff Re-entry after capsize takes real practice — beginners should learn wet exit before paddling anywhere remote
The Aruba 10 SS is the kayak we'd put a first-timer in without hesitation. Wide (30-inch beam), stable, and forgiving, with a large open cockpit that's easy to get in and out of. Adjustable padded seat with lumbar support, molded-in footrests, and carry handles for portaging. It won't win speed contests, but that's not what you need yet — you need a stable platform to learn on, and this is it.
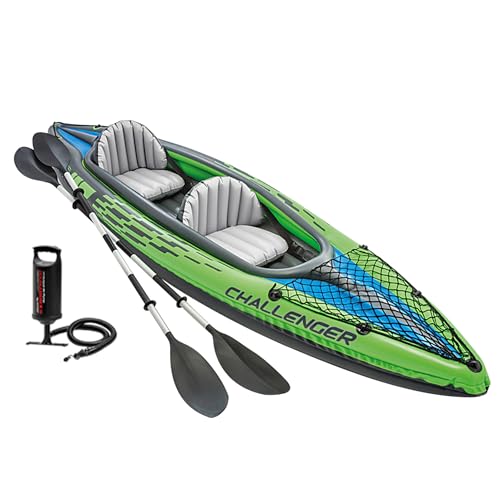
The cheapest functional kayak you can buy, and it actually paddles well on calm flat water. Inflates in under 10 minutes, packs into a carry bag, and fits in any car. The right call if you're not sure kayaking will stick, or if you can't store or transport a hardshell. Don't expect speed — expect a genuinely enjoyable afternoon on a lake.
What we like
Packs into a carry bag — stores in a closet and fits in any car trunk
Inflates in under 10 minutes with no roof rack or storage space needed
What to know
Noticeably slower than hardshell kayaks — the inflatable hull physics are real
Not safe in rough water, strong current, or significant wind
The Pungo 120 is where serious recreational kayakers land and stay. The Phase 3 ACS seat is the most comfortable cockpit on any recreational kayak — five-hour paddles without wincing. The large cockpit makes entry and exit easy for a sit-inside design, and the storage is generous for day trips. When you know you're committed to the sport, this is the kayak that ends the upgrade cycle.
What we like
Phase 3 ACS seat is among the most comfortable cockpits in recreational kayaking
Generous storage hatch and bungees handle everything needed for full-day trips
What to know
At $900+ it's a real commitment — wait until you're certain about sit-inside style
Your paddle is the second most important purchase, and the one beginners consistently undervalue. A heavy aluminum paddle causes real fatigue — every stroke you take comes back as a small vibration through your wrists, and after two hours you feel it. A fiberglass-blend paddle in the $70-100 range is dramatically better: lighter, stiffer, and drier because the blade sheds water cleanly. Length matters too: a taller paddler in a wider boat needs a longer paddle. Most adults in recreational kayaks do well at 220-230cm. When in doubt, measure your boat width and height online.
Best starter
Carlisle
Magic Plus Kayak Paddle
$$
★★★★★Our rating
The paddle the outdoor rental industry trusts for daily abuse, which should tell you something about its build quality. Fiberglass-reinforced polypropylene blades are meaningfully lighter than aluminum, and drip rings keep water off your hands and out of the cockpit on every stroke. Available in 220, 230, and 240cm — size to your height and boat width. Solid, dependable, and priced right.
What we like
Fiberglass-reinforced blades shed water cleanly on every stroke
Rental-grade durability — built to take abuse and last for years
What to know
Heavier than full-carbon alternatives, though the gap only matters at high mileage
If you're buying an inflatable or an entry-level kayak and want to minimize total spend, the Pelican Poseidon is an honest aluminum paddle that does the job without pretending to be more. Heavy relative to better options, but it gets you on the water for under $40. Upgrade to fiberglass once you're paddling regularly and notice the fatigue.
What we like
Gets you on the water for under $40 — the lowest-cost entry that actually works
Pairs honestly with any entry-level or inflatable kayak without overbuilding
What to know
Aluminum shaft conducts cold — your hands will feel it on cool mornings
Heavier than fiberglass with noticeable fatigue building over longer sessions
Once you're paddling more than a few times a month, the weight difference between aluminum and fiberglass becomes impossible to ignore. The Manta Ray is the sweet spot: stiff, efficient, and at ~$200, priced for committed recreational paddlers without requiring a guide's budget. The 2-piece ferrule adjusts for feather angle — a preference you'll develop once you log some miles.
What we like
Stiff, efficient blade with adjustable feather angle as your technique develops
Significant weight reduction over aluminum — fatigue difference is real on long paddles
What to know
Order the correct length carefully — returning an oversized paddle is a genuine hassle
A life jacket is not optional and not negotiable. Most states legally require one on board, and on the water — where cold shock, disorientation, and current can all compound quickly — a PFD you're actually wearing is what lets you make a mistake and recover from it. The wrong PFD is the one you don't wear because it's bulky or restricts your arms. Look for a kayak-specific Type III PFD: shorter torso for seated comfort, open-shoulder cut for full paddling range of motion, and pockets you'll genuinely use for snacks and sunscreen.
Best starter
Onyx
MoveVent Dynamic Paddle Sports Life Vest
$$
★★★★★Our rating
The MoveVent Dynamic is the PFD that disappears when you're wearing it. Open-shoulder design gives full arm range of motion, the mesh back panel doesn't push against a kayak seatback, and the chest buckle opens one-handed. Multiple adjustment points get it snug without fighting it. This is the one we'd actually wear all day — which is the only metric that matters for a life jacket.
What we like
Open-shoulder cut delivers full arm range of motion without restriction
Mesh back panel sits comfortably against a kayak seatback all day
What to know
Fit runs somewhat specific — try one on in a store if possible before buying online
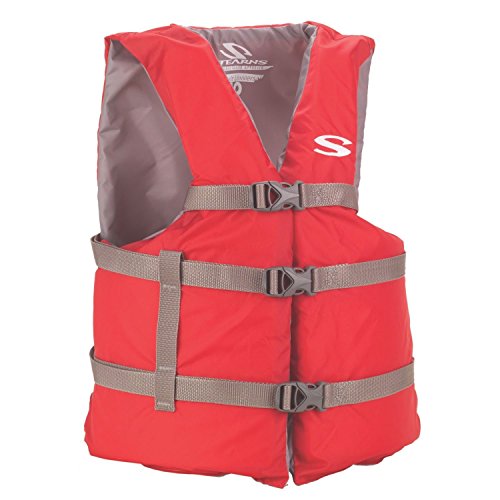
If budget is the primary constraint, the Stearns Classic Series meets the legal and safety bar — Coast Guard Type III certified, it keeps you afloat. It's bulkier than purpose-built paddling PFDs and restricts arm movement more noticeably. Treat this as a starting point you'll want to upgrade once you're paddling regularly and understand what comfort means on the water.
What we like
Coast Guard Type III certified — keeps you legally compliant and genuinely afloat
One of the most affordable PFDs available, and it does the safety job
What to know
Restricts arm movement noticeably during kayak strokes — not cut for paddling
Bulkier construction makes it uncomfortable to wear for a full day on the water
The GreenJacket is what serious kayakers wear. Cut like an athletic jacket rather than a flotation vest, it disappears from your awareness entirely while paddling. Multiple storage pockets, excellent fit across a wide range of builds, and high-visibility colorways mean you're easy to spot. When you want to stop thinking about your PFD, this is what you buy.
What we like
Cut like an athletic jacket — disappears from your awareness on long paddles
Multiple storage pockets plus high-visibility colors make you easy to spot on water
What to know
Sizing runs specific — measure your chest and follow Astral's chart before ordering
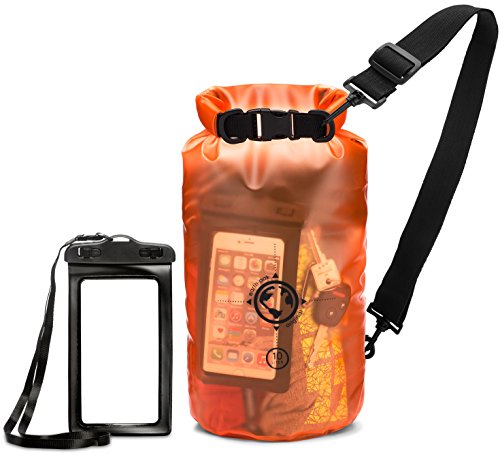
Water and your phone, keys, and wallet have an adversarial relationship — and even if you never tip over, spray and wet hands accumulate fast. A 10-20L roll-top dry bag handles a day trip's worth of essentials: snacks, an extra layer, first aid, and a water bottle. A small waterproof hard case for keys and your phone lives accessible in a cockpit pocket or bungee strap. You don't need expensive gear; you need gear with a proper seal that you'll actually use consistently.
Best starter
Earth Pak
Waterproof Dry Bag (20L)
$
★★★★★Our rating
Earth Pak's roll-top dry bags are properly sealed and durably made for the price. The 20L handles an extra layer, snacks, first aid, and a water bottle — enough for a full day trip. Bright colors help you spot it immediately if it ends up in the water. The welded seam construction keeps contents genuinely dry, not just damp-resistant.
What we like
Welded seam construction keeps contents genuinely dry, not just damp-resistant
Bright colors make it easy to spot immediately if it ends up in the water
What to know
Roll-top closure takes extra seconds to open vs. a zip when you need something fast
Your phone and keys need something smaller and faster-opening than a roll-top bag. The Pelican 1015 snaps open with one finger and keeps both truly waterproof — not splash-resistant, actually waterproof. Clip it to a bungee cord or slip it in a PFD pocket. It's the cheapest item on this page and prevents the most expensive single accident.
What we like
Snaps open with one finger — fast phone access while you're still in the kayak
Actually waterproof to a meter, not just splash-resistant
What to know
Only fits small items — phone and keys; not a substitute for a full dry bag
Three accessories make a real difference and none of them cost more than $25: a bilge pump (the hand-powered tube that clears water from a sit-inside cockpit after a wet exit — much faster than scooping with a water bottle), a paddle leash (keeps your paddle from floating away if you capsize), and a kayak cart for getting the boat from your car to the water without wrecking your back. Buy all three before your first serious paddle. Together they run under $60.
Best starter
Seattle Sports
Tuff Pump Bilge Pump
$
★★★★★Our rating
A bilge pump is the fastest way to clear a flooded cockpit — after a wet exit and re-entry, you could have gallons to bail. The Tuff Pump handles it in a minute; without one, you're scooping with cupped hands. Floats on its own, one-handed operation, stores in cockpit bungees. Every sit-inside kayaker should own one before their first real paddle.
What we like
Floats independently if dropped overboard — won't sink mid-rescue
One-handed operation clears a flooded cockpit in under a minute
What to know
Only necessary for sit-inside kayaks — sit-on-top paddlers can skip this one
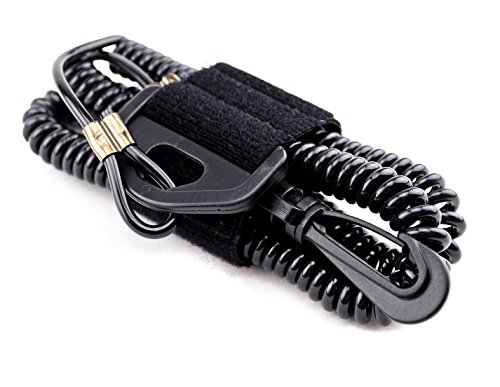
If you capsize and your paddle floats away, you're suddenly in a much worse situation — especially in current or wind. A paddle leash clips your paddle to your wrist or the boat for about $15. The minor annoyance of having it attached is nothing against the insurance value. Especially important if you're paddling anywhere with current, where a loose paddle drifts away faster than you can swim.
What we like
Keeps your paddle tethered if you capsize — prevents it drifting off in current
At ~$15, cheap insurance against a much more dangerous situation
What to know
Coil can occasionally tangle in wind; some paddlers prefer a boat clip over wrist attach
Most people rent a kayak once, have a great afternoon, and spend the next few weeks trying to figure out if they should buy one. Here's what that first-day experience actually teaches you — and what comes next.
Kayaking has an unusually kind learning curve. You don’t need to be fit, technically gifted, or experienced with water sports to have a great first day. Most beginners go from “I’ve never sat in a kayak” to “I want to do this every weekend” within a single three-hour session on calm water.
But there are a handful of things that make the difference between a great first day and a frustrating one — things that won’t show up in the rental brochure. Here’s what your first day actually looks like.
Before you even get in the water
The single biggest mistake beginners make is skipping the land-based setup phase. Spend five minutes on shore getting the boat ready for your body before you launch.
Adjust your footpegs. Most recreational kayaks have sliding footpegs inside the cockpit. Your legs should be slightly bent at the knee when your feet are on the pegs — not straight, not pulled all the way in. Proper leg position means you can brace against the pegs during paddle strokes, which transfers power and keeps you stable. Straight legs = sloppy paddling and early fatigue.
Adjust your seat. If there’s a backrest, position it so it supports your lower back without pushing you too far forward or reclining you backward. You want your torso upright — a slight forward lean is ideal. Slouching into the seat feels comfortable for ten minutes and ruins your posture and stroke efficiency for the whole session.
Put your PFD on before you reach the water. The worst time to struggle with buckles and adjustments is when you’re standing on a slippery dock. Fasten everything, cinch it snug, then go.
Getting into a kayak gracefully is a skill, and most people stumble through it their first time. Here’s the method that works:
For a sit-on-top kayak: Place the kayak parallel to the dock or shore in water shallow enough to stand in. Straddle it with your weight centered, then lower your hips onto the seat. It’s easier than it looks — the wide beam is genuinely stable. Don’t try to step onto the bow and walk toward the seat. That’s how people fall.
For a sit-inside kayak: Position the boat perpendicular to the bank or dock edge. Place your paddle behind the cockpit, perpendicular to the boat, so it bridges the dock/bank. Place one hand on the paddle shaft near the cockpit, one hand on the paddle resting on the bank. Lower yourself into the seat using the paddle as a stabilizing bridge. Pull your legs in last. This sounds complicated; it takes about ten seconds once you’ve seen it done.
Practice getting out the same way before you paddle anywhere. Knowing you can cleanly exit removes 90% of early anxiety.
The forward stroke: the one thing worth learning on day one
Most beginners paddle wrong in a predictable way: they use only their arms, dip the blade too shallow, and swing it behind their hip before pulling it out. The result is a slow, tiring, inefficient stroke that zigzags.
Here’s what actually works:
Wind your torso, not just your arms. The power in a kayak stroke comes from your core rotating, not from your biceps pulling. Reach forward with the paddle blade, bury it completely in the water at your feet, and unwind your torso to drive it back. Your top arm pushes forward, your bottom arm pulls back — think of it as pushing the paddle past the boat, not pulling the boat past the paddle.
Pull the blade out before it passes your hip. Once the blade goes behind your hip, it starts lifting water instead of moving you forward. That exit point is the most common efficiency killer. Slice the blade out cleanly at your hip, swing it forward, and enter on the other side.
Keep your grip loose. A death grip tires your forearms within minutes. Hold the shaft with relaxed fingers; only tighten at the moment of the stroke.
You won’t have perfect technique on day one, and that’s fine. But if you can remember “rotate my torso” and “exit at my hip,” you’ll be paddling twice as efficiently as someone who doesn’t know those two things.
Turning and staying on course
A kayak naturally wants to go where it wants to go, and fighting it with alternating strokes in a panic is exhausting and not very effective. Two moves solve most beginner tracking and turning problems:
Sweep stroke for turning: Plant the blade near the bow, sweep it outward in a wide arc toward the stern while rotating your torso. A sweep on the left turns you right; on the right, left. Use a forward sweep to turn away from the blade, a reverse sweep to turn toward it. This is how you pivot, and it’s useful far more often than beginners expect.
Edge the boat to help it track. Tilting the kayak slightly toward one side (called edging or heeling) helps it naturally curve in that direction. On a sit-on-top, this feels unstable but isn’t — the boats are designed for it. On a sit-inside, pressing one knee against the inside of the hull achieves the same effect. You won’t master edging on day one, but knowing it exists helps you understand why the boat sometimes wants to turn on its own.
Capsizing on your first day is unlikely on flat calm water, but knowing what to do if it happens eliminates the main source of beginner anxiety.
Sit-on-top: The boat self-drains. Flip it back upright by reaching across to the far side and pulling toward you. Remount from the side: kick your legs to get horizontal in the water, swing one leg over the back, and pull yourself on. It’s easier to demonstrate than describe — practice in shallow water before you need it for real.
Sit-inside wet exit: Tuck forward (chin to chest protects you from hitting the cockpit rim). Place both hands on the cockpit rim near your hips. Push your hips up and out while letting the current of the capsize do the work. Most people pop out immediately — the impulse to fight and hold on is the main obstacle. Once out, stay with the boat. Your kayak floats and keeps you afloat; let it.
Practice a deliberate wet exit in knee-deep water before your first real paddle if you’re in a sit-inside. Five minutes of practice removes the panic entirely.
What a good first day feels like
By the end of your first two to three hours, a few things should click:
You’ll stop thinking about every stroke and start looking at where you’re going. The boat will feel stable instead of precarious. You’ll successfully turn when you intend to turn. You’ll probably paddle more than you meant to because you’re enjoying it.
You’ll also notice fatigue in unusual places — the small muscles of your forearms and the muscles around your shoulder blades. These aren’t muscles most people train, and kayaking recruits them constantly. This is normal. Your first week’s soreness fades quickly as your body adapts.
What most beginners don’t expect: how quiet it is. Being at water level, moving under your own power, in no hurry — it turns out this is exactly what a lot of people needed without knowing it.
If you rented, now is the time to decide whether to buy. A few questions worth asking yourself: Do you have somewhere to store a hardshell kayak? Can your vehicle transport one? How often did you think about going while you were out there?
If the answers are yes/yes/constantly, buy. Start with the sit-on-top type that felt most natural, at the price point you’re comfortable with.
If the answers are mixed, rent two or three more times before committing. Try a sit-inside if you only paddled a sit-on-top. Paddle with a fiberglass paddle versus an aluminum one to feel the difference. Make an informed decision rather than an excited one.
Either way, look for a paddling class from an American Canoe Association-certified instructor. A two-hour beginner course will correct the stroke habits you picked up on day one and teach you the wet exit properly. It’s the highest-leverage thing you can do in your first month.
You’re not a beginner after your first day — you’re a paddler with one day in the boat. The next few sessions are where it really starts.
Save your money
What you don't need yet
Beginners get pressured to buy a lot of stuff that doesn't help them play
better. Here's what we'd skip on day one.
A whitewater kayak — Start on flat water. Whitewater is a distinct discipline with its own learning curve, gear, and risk profile. Flat-water competence first.
A spray skirt — Spray skirts (for sit-inside kayaks) keep water out in rough conditions but add a real claustrophobia risk until you've practiced wet exits. Don't buy one until you can reliably exit a capsized sit-inside underwater.
A rudder or skeg system — Rudders help with tracking in wind, but they're an $150-250 add-on that beginners don't need. Proper paddle technique handles the same problem.
A dedicated roof rack system — Foam blocks and ratchet straps ($30 total) transport a kayak safely and legally on most vehicles. A full Thule or Yakima rack system is a nice upgrade once you're paddling every week.
A waterproof action camera — Resist the urge to film until you can paddle without consciously thinking about your hands. A GoPro mount on a wobbly beginner adds one more thing to manage before you're ready.
First week
Your first seven days
A short, real plan to get from gear-on-doorstep to actually playing.
Find local flat water — a calm lake, slow river, or sheltered bay within easy driving distance. · Action
Practice getting in and out of the kayak on land first. Getting into a kayak gracefully takes a specific technique — learn it before you're standing on a dock. · Action
Look for a beginner paddling class or guided tour. A single two-hour class will teach you the forward stroke, sweep turn, and wet exit — skills that take three solo sessions to stumble into on your own. · Learn
An inflatable kayak starts around $80-120. Entry-level hardshell sit-on-tops run $300-500. A quality sit-inside recreational kayak is $500-900. Add $70-100 for a decent paddle and $70-100 for a proper PFD. Budget $200-250 all-in if you go inflatable; $650-700 all-in for a hardshell setup.
Do I need to know how to swim to kayak?
Basic swimming ability is strongly recommended — not because you'll be swimming, but because you should be comfortable in the water if you do capsize. You don't need to be a lap swimmer, but you should be able to stay afloat and get yourself to shore. If you're a non-swimmer, start in very shallow, calm water with an instructor.
Sit-on-top or sit-inside — which should I get?
Sit-on-top if you're a beginner in a warm climate or plan to kayak in summer: easiest self-rescue, most forgiving stability. Sit-inside if you're in a cooler climate, want to go on longer trips, or are committed to improving your technique. If storage or transport is the problem, inflatable first.
Can I transport a kayak without a roof rack?
Yes. Foam kayak blocks and cam-buckle straps let you carry a kayak on any car roof for about $30. It's slower to load and unload than a proper rack, but it works perfectly safely. Once you're paddling weekly, a rack upgrade makes sense.
What do I do if I flip?
On a sit-on-top: flip the kayak back over (it's easy) and climb back on from the side. On a sit-inside: tuck forward, push out, surface alongside your boat, then use a paddle float or assisted rescue to re-enter. Practice a wet exit in shallow water before you paddle anywhere remote — it's simple once you've done it once.
Where can I kayak for free?
Most public lakes, slow rivers with public access points, coastal areas with beach access, and state parks with boat launches allow kayaks at no or minimal cost. A state park day-use pass ($5-10) is the most common fee. Check for permit requirements on any river with whitewater.
American Canoe Association — The national paddlesports organization. Safety standards, certified instruction directory, and club finder. Take an ACA beginner course before paddling anywhere remote.
Paddling.com — Trip finder, gear reviews, and how-to content for all experience levels. Good resource for finding local water and planning first day trips.
National Canoe Safety Patrol — Water safety standards and beginner safety guidelines. Useful reference for understanding rescue techniques and safety requirements by water type.
Brent Reitz — Forward Stroke Clinic (YouTube) — The single most-watched kayak technique series for beginners. Brent Reitz's forward stroke breakdown is the place to start for anyone who wants to paddle efficiently.
Paddle TV (YouTube) — Broad kayaking and canoeing channel with beginner to advanced content. Good beginner skill videos, gear reviews, and destination coverage.
r/kayaking — Active community for questions, trip reports, and gear advice. Search before posting — most beginner questions have thorough existing answers.
Wilderness Medicine (NOLS) — Relevant once you're doing multi-day trips or paddling remote water. NOLS wilderness medicine courses are the standard for backcountry self-rescue preparedness.
As an Amazon Associate, JustBeginning earns from qualifying purchases.
We may also earn commission from other affiliate programs linked on this
page. Editorial recommendations are independent; we don't choose
products based on commission rates.
Product prices and availability are accurate as of the date and time
indicated and are subject to change. Any price and availability
information shown on Amazon at the time of purchase will apply.


 Best starter