SUP is the most accessible way to get on the water — you can learn the basics in under an hour, and a good inflatable board packs into a bag that fits in your trunk. The gear market is full of near-identical-looking boards at wildly different quality levels. Here's what actually matters, and what you can safely skip.
By Colin B. · Published May 15, 2026 · Last reviewed June 2, 2026
NRS Zephyr Inflatable PFD
— A waist-belt PFD you'll actually keep on — doesn't restrict your arms and satisfies the legal PFD requirement.
Budget total
$350
Typical total
$700
A quality inflatable package (board, paddle, pump, leash, bag) runs $350–500. Add a proper PFD for $70–100. Budget sets start around $200, but the board quality difference is real and noticeable on the water.
We earn commission on qualifying Amazon purchases — see our
affiliate disclosure.
Price tiers and budget totals shown above are editorial estimates;
actual Amazon prices vary.
At a glance
Our top pick in each category
The fastest path through this guide — each best-starter pick by category.
Scroll for the budget and upgrade alternatives.
Rent before you buy, at least once. A session at a local outfitter or beach rental costs $25–40 and tells you whether you prefer a wider, shorter board (more stable, slower) or a longer touring shape (faster, more challenging). Knowing this before you spend $400 is worth it.
Inflatable boards are the right default for most beginners. They pack into a duffel bag, fit in any car without a roof rack, and store in a closet. The performance gap between a quality inflatable and a hardboard is real but irrelevant until you're paddling several times a week. Start inflatable.
A leash is not optional — it's safety gear. If you fall off in open water, your board is the biggest floating object near you. A leash keeps it tethered to your ankle so it can't drift 50 feet away in the wind while you're swimming. Every session, every time, no exceptions.
Your board is the most important purchase, and the one with the most confusing options. For beginners, the choice is almost always inflatable: they pack into a bag, don't need a roof rack, and store in an apartment closet. Within inflatables, look for at least 6 inches thick (stiffer, better glide), 30–32 inches wide (more stability), and construction from a brand that tests its drop-stitch core. The three most trustworthy beginner brands are iROCKER, Red Paddle Co, and THURSO SURF. The wide price range in this category is real — cheap boards flex noticeably underfoot and are slower on the water.
Boards — what's the difference?
A few common shapes, each making a different trade.
Inflatable
Packs into a bag, fits in any car. The default choice for beginners and apartment dwellers.
Storage
Rolling backpack — closet-friendly
Transport
Any car trunk — no roof rack needed
Setup
5–10 min to inflate
Best for Beginners, apartment living, anyone without a truck or roof rack
Tradeoff Slightly more flex underfoot than hardboard; inflation/deflation adds setup time
Stiffer, faster, better glide. Needs a roof rack and proper storage space.
Storage
Garage or outdoor board rack required
Transport
Roof rack or truck bed required
Setup
Instant — grab and go
Best for Paddlers with storage and transport solved who want to progress quickly
Tradeoff Harder to repair if damaged; significantly harder to transport without a proper vehicle setup
Soft-Top
Foam deck padding, very forgiving for falls. The type most rental shops use.
Storage
Garage or rack required
Transport
Roof rack or truck bed required
Setup
Instant
Best for Families, kids, anyone who wants a soft landing when they fall
Tradeoff Heavier and slower than epoxy; less efficient for longer distance paddling
Best starter
iROCKER
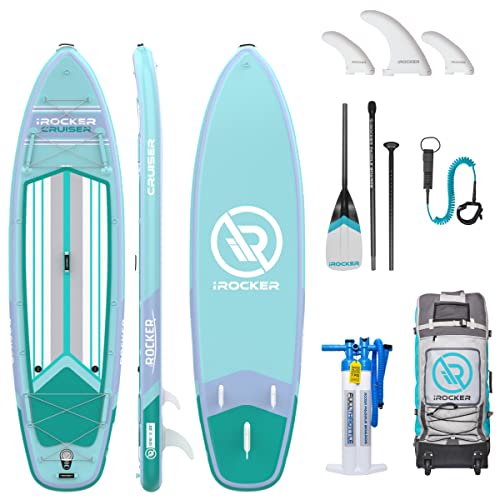
Cruiser Inflatable SUP Package (10'6")
$$$
★★★★★Our rating
The Cruiser is the board we'd hand a first-timer without hesitation. At 33 inches wide and 6 inches thick with military-grade PVC drop-stitch, it's stable and properly made — not a toy. The package includes a carbon/nylon paddle, coiled leash, hand pump, roller bag, fins, and repair kit. iROCKER's customer service is genuinely good, which matters when you're new.
What we like
Stable at 33" wide — most first-timers are standing within the first session
Everything in the package: paddle, pump, leash, bag, fins, repair kit
iROCKER customer service is fast and actually helpful
What to know
Included paddle is heavy; carbon aftermarket upgrade pays off quickly
Manual inflation to 12–15 PSI is a real workout before each session
If you're not sure SUP will stick, SereneLife's entry board is the most honest cheap option. It's genuinely functional — stable enough on flat water, and the package includes everything you need. It's softer and slower than the iROCKER, which you'll feel, but for calm lakes and bay paddling it gets the job done. Treat it as a trial board, not a long-term purchase.
What we like
Gets you on flat water at the lowest honest price for a complete package
Stable enough on calm lakes for a full first season of paddling
What to know
Noticeable flex underfoot compared to mid-tier boards
Thin construction limits use to flat, calm water only
Red Paddle Co makes the most respected inflatables in the world, and the RIDE is their benchmark all-around board. At 34 inches wide and built with their MSL (Multi-Layer System) construction, it's measurably stiffer than standard drop-stitch — it feels closer to a hardboard than any other inflatable we've used. When you're ready to invest in a board you won't outgrow, this is the one.
What we like
MSL construction is measurably stiffer — genuinely closer to a hardboard
All-around shape works equally well for touring, fitness, and casual paddling
What to know
Premium price only pays off if you paddle at least once a week
Heavier to carry at launch than comparable budget inflatables
A paddle that's the wrong length or the wrong weight makes SUP noticeably harder. The rule is simple: your paddle should be 6–10 inches taller than you. Adjustable paddles are the right call for beginners because you can dial this in precisely — a fixed-length paddle at the wrong height is a constant problem. Weight matters more than most beginners expect: an aluminum paddle weighs 1,000–1,200g and causes real fatigue after an hour; a carbon or fiberglass-blend paddle at 600–800g is dramatically more comfortable. This is one category where the mid-tier upgrade is worth making early.
Best starter
THURSO SURF
Full Carbon SUP Paddle (3-Piece Adjustable)
$$
★★★★★Our rating
Full carbon shaft and blade — light enough to paddle for two hours without fatigue, stiff enough to transfer effort to the water. Three-piece breakdown for easy storage, and the adjustment mechanism is secure without being fussy. At around $120, it's the sweet spot between 'toy aluminum' and 'serious race paddle.' Right for recreational paddling.
What we like
Full carbon at $120 — far lighter than paddles bundled with board packages
3-piece breakdown stores neatly in the same bag as your board
What to know
Check the 68–86" adjustment range fits your height before ordering
Fixed blade angle can't be tuned for different paddling styles
The cheapest functional aluminum paddle you can buy with confidence. The blade is decently sized, the adjustment locks are reliable, and it's a step up from the throw-in paddles that come with budget board packages. You'll feel the weight difference vs. carbon after an hour on the water. Gets you paddling affordably — plan to upgrade once you're hooked.
What we like
Gets you paddling with a functional paddle at the lowest possible cost
Adjustment lock is reliable — won't slip mid-stroke
What to know
Noticeably heavier than carbon; arm fatigue sets in after 45–60 minutes
Cold aluminum handle is unpleasant on chilly fall mornings
Werner makes the best paddles in paddlesports — their whitewater and touring paddles are the industry standard. The Trance 85 brings that pedigree to recreational SUP: full carbon layup, 3-piece adjustable, and genuinely lightweight. When you're paddling three or more times a week and want the real experience, this is the paddle that ends the upgrade cycle.
What we like
Werner's carbon layup makes this the lightest paddle at its price point
3-piece adjustable — same portability as cheaper paddles, better feel
What to know
Expensive enough that you'll feel bad if you scratch it on a dock
The US Coast Guard classifies a stand-up paddleboard as a vessel, which means a Coast Guard-approved PFD is legally required on board for anyone over 12. But 'on board' is doing a lot of work — a PFD strapped to your board's bungee isn't helping you when you fall in. The practical question is which PFD you'll actually wear. For SUP, that answer is usually a waist-belt inflatable: it stays completely out of your way while paddling, inflates instantly when you pull the cord, and doesn't interfere with your stroke at all. If you prefer a traditional vest, look for a low-profile paddling cut.
Best starter
NRS
Zephyr Inflatable PFD
$169.95 as of Jun 22, 2026
★★★★★Our rating
The NRS Zephyr is what SUP instructors actually recommend. Worn as a waist belt, it's invisible while you're paddling — no vest, no arm restriction. Pull the cord and it inflates to 26 lbs of buoyancy in under a second. Rearming kits are inexpensive and easy to replace. This is the PFD you'll actually wear every session because you forget it's there.
What we like
Waist-belt design disappears while paddling — you forget it's there
Inflates to 26 lbs buoyancy in under a second when you pull the cord
What to know
Manual inflation only — requires a conscious cord pull in an emergency
Rearming kit needed after every deployment; small recurring cost
If the NRS is out of stock or over budget, the Onyx M-16 is a well-regarded alternative at roughly $30 less. Coast Guard Type V approved, manual inflation (pull the cord), and comfortably worn as a waist belt. Not quite as refined as the NRS in fit and buckle quality, but functionally very similar.
What we like
Belt-pack PFD at roughly $30 less than the NRS Zephyr
Coast Guard Type V approved — meets legal requirements for SUP
What to know
Fit and buckle system slightly less refined than the NRS Zephyr
Same manual-inflation limitation as all belt-pack PFDs
If you prefer a traditional vest-style PFD — or paddle in conditions where automatic inflation makes more sense — the Astral V-Eight is the paddling vest we trust. Cut for range of motion, with real storage pockets, it disappears from your awareness once you've paddled in it for an hour. Worth the price if a waist belt isn't for you.
What we like
Traditional vest cut with full paddling range of motion — not a compromise
Real pockets you can use; stays put even when swimming hard
What to know
Vest bulk is more noticeable than a waist belt on warm days
Sizes run specific — measure Astral's chest chart before ordering
A leash connects your ankle or calf to your board via a coiled cord. If you fall — and you will fall — your board stays within arm's reach instead of drifting 30 feet downwind while you're swimming. On dead-calm flat water, this is a convenience item. On open water, in any current, or in chop, it's life-safety gear. Buy a leash rated for your board length and wear it every single session. Coiled leashes (rather than straight) stay out of the water and don't drag while you're paddling.
Best starter
DAKINE
SUP 10' Coiled Ankle Leash
$
★★★★★Our rating
DAKINE is the leash brand that paddlers and surfers trust — they make leashes for big-wave surfing, so a flatwater SUP leash is easy work. The SUP version uses a thicker 3/16-inch urethane cord, handles the leverage forces from a large board, and attaches at the calf or ankle. Double brass swivels on both ends prevent tangles on long paddles. Straightforward, dependable, and the right tool.
What we like
3/16" urethane cord rated for the leverage forces of a large SUP board
Double brass swivels on both ends prevent tangles on long paddles
What to know
One size only — confirm the leash length matches your board length
Coiled cord can briefly catch a fin if it drags during a fall
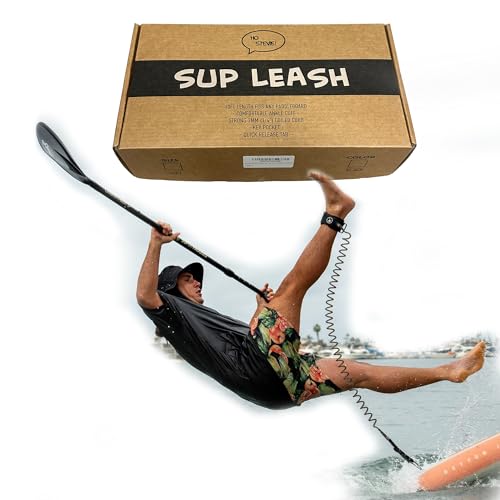
Ho Stevie! makes honest, well-priced surf and SUP accessories, and their coiled SUP leash is a reliable alternative to DAKINE at a slightly lower price point. It stretches to 10 feet if you fall, features a padded ankle cuff with SuperGrip anti-slip silicone, and stays out of the water while you're paddling. A solid backup pick if the DAKINE is unavailable.
What we like
Padded ankle cuff with anti-slip silicone stays comfortable all session
Well-priced relative to DAKINE — good value as a backup or replacement
What to know
Less proven than DAKINE for rough-water conditions beyond calm lakes
Velcro closure can lose grip over time with heavy daily use
Three accessories make a noticeable difference: an electric pump (inflating a SUP board manually takes 10–15 exhausting minutes at 12–15 PSI; an electric pump does it hands-free in five minutes), a waterproof case for your phone and keys (water and spray accumulate every session, even on calm days), and a cart for moving the board from your car to the water if you're paddling somewhere without close parking. Together: under $100.
Best starter
Seamax
SUP Electric Air Pump for Inflatable Boards
$$
★★★★★Our rating
Inflating a SUP board to 12–15 PSI with a hand pump is a genuine workout before you've started paddling. The SEAMAX double-stage electric pump plugs into your car's 12V outlet, auto-stops at your target PSI, and gets a board paddle-ready in five to seven minutes without you lifting a finger. Every serious inflatable paddler eventually buys one — buy it now and skip the hand-pump era entirely.
What we like
Auto-stops at your target PSI — walk away while it inflates your board
Cuts inflation from 15 exhausting minutes of hand-pumping to 5 hands-free
What to know
Requires a 12V car outlet or power bank — can't use at remote launches
Valve adapter must match your board's type; most use Halkey Roberts
Your phone will get wet. Water, spray, and wet hands accumulate every session even on calm water. The Pelican 1015 snaps closed and is genuinely waterproof — not splash-resistant, actually submersible. Clip it to a bungee cord on your board's deck rigging or tuck it in a PFD pocket. It's the cheapest item on this list and prevents the most expensive single accident.
What we like
Actually submersible — not just splash-resistant — and clips to deck rigging
Cheapest item on the list; prevents the most expensive single accident
What to know
Sized for a phone plus keys only — not for bulkier items
Hard case adds more bulk than a simple dry bag sleeve
Most people fall the first time they try to stand on a paddleboard. That's not a technique failure — it's just a balance feedback loop you've never used before. SUP clicks faster than you'd expect: most beginners are paddling confidently on flat water by session three. Here's what the first five sessions actually look like.
Stand-up paddleboarding has a reputation for being easy to pick up, which is mostly true — and slightly misleading. The first five minutes can feel humbling in a way that nothing in the marketing prepared you for. But the window between “I keep falling” and “I can actually do this” is measured in hours, not weeks. Most people get there by their second or third session.
Here’s what those first five sessions actually look like, with the things that click and the things that take longer than you expect.
Session 1: The balance problem (and why it’s not what you think)
The first session is dominated by one sensation: your ankles and feet working overtime to keep you upright. This is unfamiliar — not because you don’t have balance, but because you’ve never before had to produce that kind of subtle, continuous micro-adjustment through your feet while standing on a moving, floating surface.
The instinct is to lock your knees and stiffen your whole body. Do the opposite. Slightly bent knees, relaxed core, eyes on the horizon — not on your feet. The moment you look down at the board, your head tips forward, your center of gravity shifts, and you’re swimming.
The kneeling start is not a beginner crutch — it’s the right technique. Start on your knees in the center of the board (over the carry handle), get the board moving, then rise to standing one foot at a time: plant one foot beside your hand, pause, plant the other, straighten slowly. Rushing this is the most common way to fall in the first five minutes.
A few things that help immediately:
Feet parallel, shoulder-width apart, centered over the board. If your feet are forward or back of center, you’re fighting the board rather than working with it.
Paddle in the water almost always. Using the paddle as a third point of contact dramatically improves stability on a wobbly board. Dip it in on whichever side you’re tipping toward.
Start on the flattest, calmest water possible. A slight ripple is noise you don’t need yet. Wind is much worse than you expect at the beginner stage.
You will fall. Fall to the side — not backward, which risks landing on the fins — and fall away from the board when you can. The board will stay close thanks to your leash.
Sessions 2–3: Paddling technique matters more than balance now
By session two, balance is a background process rather than your entire focus. This is when you start noticing how inefficient your stroke is.
Most beginners paddle wrong in a predictable way: they hold the paddle like a broom, sweep it through the water in a wide arc behind them, and produce a zigzag course that requires constant correction. The correct stroke is almost the opposite.
The forward stroke that actually works:
Plant the blade fully in the water near your feet — not beside you, but out in front. Bury the whole blade, then drive it back by rotating your torso (not just pulling with your arms). Your top hand pushes forward; your bottom hand guides. Pull the blade out cleanly when it reaches your ankle. After that point, you’re lifting water, not moving forward.
The power comes from your core rotation, not your biceps. If your shoulders are burning after ten minutes, you’re using the wrong muscles.
Switching sides: The standard for recreational paddling is to switch sides every three to five strokes. A simple call (“switching!”) with your partner prevents paddle collisions. On your own, a quick J-stroke (hooking the blade outward at the end of the stroke) lets you go more strokes before switching, but it’s a technique detail for later.
Turning: To turn, do a sweep stroke — reach the blade out to one side near the bow, sweep it in a wide arc toward the stern. A sweep on your left turns you right; on your right, left. Much more efficient than crossing up your regular strokes.
By the end of session three, you should be going where you intend to go and staying upright without thinking about it.
Sessions 4–5: Open water, longer distances, variety
Sessions four and five are about expanding your comfort zone: a little more distance, a little more chop, a little more wind, a few paddle partners to navigate around.
Wind is the real teacher. Paddling into a headwind is genuinely hard — the board acts like a sail and wants to blow sideways. When you’re learning, paddle into the wind on the way out so that the easy, downwind paddle brings you home when you’re tired. Crossing any open water with wind, always plan your escape route.
Reading water: Flat water is easy. Water with boat wake or wind chop is different — not dangerous, just more dynamic. Your board will want to yaw (spin sideways) in chop. More aggressive core engagement and quicker paddle corrections handle it. You’ll start to feel the board’s natural rhythm and work with it rather than against it.
Finding your pace: Most beginners start out paddling hard and tire quickly. The sustainable SUP pace feels almost embarrassingly slow — a long, relaxed stroke rate that keeps you moving without burning out. Once you find that pace, the distance you can cover in a session roughly doubles.
By session five, most people have their first “oh, this is the thing” moment — a stretch of paddling where the mechanics disappear and you’re just out on the water, enjoying it.
Every new paddleboarder struggles with the same handful of things. Knowing them in advance takes the sting out:
Wobbling every time you paddle. Your stroke creates a rocking motion until your stabilizers adapt. It fades with reps, not with thinking about it.
Getting pushed sideways by wind. Wind is humbling even for intermediate paddlers. No shame in hugging a sheltered shoreline for your first few sessions.
Wet mounts after a fall. Getting back on a floating board from the water is harder than it looks. Practice the technique: approach from the side, kick your legs horizontal, swing one leg over the back of the board, pull yourself on. It takes a few tries before it’s graceful.
Misjudging chop. What looks like calm water from shore can have enough small wave action to make balance significantly harder. A calm day on a big lake can have genuine chop from boat traffic.
None of these are problems. They’re just the normal arc of learning something physical.
What to do at session six
A few things change the slope of your improvement curve once you have the basics:
Vary your water. After five sessions on a lake, try a slow river, a sheltered bay, or mild ocean conditions. New water teaches you more per session than the same water over and over.
Take a lesson. An ACA-certified SUP instructor in a two-hour session will identify the two or three specific things holding your technique back. Worth doing around session five to eight, when you have enough context to absorb the feedback.
Try a yoga or fitness session on the board. Sounds gimmicky until you realize it’s one of the best unstable-surface balance trainers available. Even just sitting cross-legged on a stationary board is a workout.
Go out at golden hour. Still water at sunrise or sunset, on a SUP, with no one else around, is one of the better experiences outdoor recreation has to offer. Once you can do it safely, do it.
You’re not a complete beginner after five sessions. You’re a paddler who’s learned where the edges of the board are — literally and figuratively. Everything from here is refinement and range.
Save your money
What you don't need yet
Beginners get pressured to buy a lot of stuff that doesn't help them play
better. Here's what we'd skip on day one.
A carbon racing or touring board — Carbon race boards are narrow, tippy, and built for paddlers who've long since solved balance. A beginner on a race board spends the entire session swimming, not paddling.
A roof rack system — If you start with an inflatable, you don't need a roof rack. A $30 foam block set works fine for the occasional hardboard trip once you get there.
A GoPro mount or action camera — Resist filming until you're no longer actively managing balance. One more thing to manage while you're tippy is one too many.
Aftermarket fins — Your board's included center fin is correct for flat water. Aftermarket fin setups make real differences for experienced surf paddlers — irrelevant on a lake.
Neoprene booties or wetsuit — Unless you're paddling in genuinely cold water (under 60°F), quick-dry shorts and a rash guard are all you need. Get a few sessions in before deciding whether conditions warrant neoprene.
First week
Your first seven days
A short, real plan to get from gear-on-doorstep to actually playing.
Find flat, calm water nearby — a lake, slow river, or sheltered bay within easy driving distance. · Action
Paddling.com · Trip finder and local water guide for paddlesports
Rent a board for your first session if possible — one rental confirms whether you prefer a wider/shorter shape or want more length. · Action
Order your board — it takes the longest to arrive, so order it first. · Buy
Practice the kneeling start on land first: start from your knees, get moving, get stable, then stand up. This is how experienced paddlers launch too. · Action
Apply sunscreen before you launch — you're on reflective water for hours, and exposure is twice what you'd expect on land. · Action
FAQ
Common questions
How much does it cost to start stand-up paddleboarding?
A quality inflatable package with paddle, pump, leash, and bag runs $350–500. Add a PFD for $70–100. Budget setups start around $200, but you'll feel the quality difference on the water. Plan for $450–600 all-in for a setup you won't immediately want to replace.
Is SUP hard to learn?
Balance clicks faster than most people expect. Most beginners are standing and paddling on flat water within 30–60 minutes. The tricky part is maintaining balance as conditions change — any wind or chop will challenge you early. Start on the flattest, calmest water you can find for your first few sessions.
Inflatable vs. hardboard — which should I get?
Start with an inflatable. It packs into a bag, fits in any car without a roof rack, and stores in a closet. The performance difference is real but irrelevant at the beginner stage. Move to a hardboard when you're paddling regularly and want to progress — your body will tell you when it's time.
Do I legally need a PFD for SUP?
Yes. The US Coast Guard classifies a SUP as a vessel, making a Type I, II, III, or V PFD legally required on board for anyone 13 and over. Many states have additional requirements. A waist-belt inflatable like the NRS Zephyr satisfies this without restricting your paddling at all.
Can I paddleboard in the ocean?
Yes, but start on flat water first. Ocean paddling introduces surf, current, and wind that require more advanced skills. Once you can paddle straight, turn confidently, and fall and recover cleanly on flat water, introduce mild ocean conditions — small waves, protected coves, offshore-wind-free days.
What size board should I get as a beginner?
At least 10 feet long, 30–32 inches wide, and 5–6 inches thick. Wider is more stable; longer is faster. Most adult beginners do well on a 10'6" board. Go narrower and longer only once you've built enough balance that stability stops being your main challenge.
American Canoe Association (ACA) — The national paddlesports organization. SUP safety courses, certified instructor directory, and club finder. An ACA beginner course is worth taking before paddling anywhere remote.
Paddling.com — Trip finder, gear reviews, and how-to content for all paddlesports. Good starting point for finding local flat water and planning first day trips.
SUP Boarder Magazine — Long-running magazine and website. Gear reviews, technique guides, and race coverage. The editorial is genuinely useful at the beginner and intermediate level.
Naish SUP Tutorials (YouTube) — Clear beginner technique tutorials — stance, paddling form, turns, and falling safely. Start here before your first session on the water.
Red Paddle Co Tutorials (YouTube) — Beginner-to-intermediate instruction from one of the most respected inflatable board brands. Technique and board-care content worth watching early.
r/supboarding — Active community for questions, gear advice, and trip reports. Search before posting — most beginner questions are thoroughly answered already.
US Coast Guard Boating Safety — Official PFD requirements, state-by-state regulations, and safety standards. Look up your state's specific SUP rules before you paddle — they vary more than you'd expect.
As an Amazon Associate, JustBeginning earns from qualifying purchases.
We may also earn commission from other affiliate programs linked on this
page. Editorial recommendations are independent; we don't choose
products based on commission rates.
Product prices and availability are accurate as of the date and time
indicated and are subject to change. Any price and availability
information shown on Amazon at the time of purchase will apply.
Our top pickiROCKER Cruiser Inflatable SUP Package (10'6")


 Best starter