A packraft weighs under two kilograms and stuffs into a corner of your backpack. When you hit a glacial river, a remote lake, or a gorge with no trail around it, you inflate it in five minutes and keep moving. This guide covers exactly what you need to get on the water safely.
By Colin B. · Published June 12, 2026 · Last reviewed June 12, 2026
NRS Vapor PFD
— The PFD packrafters actually choose: slim cut, fits under thigh straps.
Budget total
$950
Typical total
$1600
The packraft itself costs $700-1500. Add a paddle ($150-250), a PFD ($90), and dry bags ($60) and you're in at $1,000-1,900 total. Packrafting is not cheap to start, but the gear lasts a decade with care.
We earn commission on qualifying Amazon purchases — see our
affiliate disclosure.
Price tiers and budget totals shown above are editorial estimates;
actual Amazon prices vary.
At a glance
Our top pick in each category
The fastest path through this guide — each best-starter pick by category.
Scroll for the budget and upgrade alternatives.
Match your packraft to your actual year-one terrain, not your aspirational adventure. An open-boat packraft handles 90% of backpacker use cases (lake crossings, Class I-II river access). Self-bailing packrafts handle Class III whitewater but cost $300 more and weigh more. Buy for where you're going this season.
Take a swift-water self-rescue course before your first solo river trip. It costs $200-400 and teaches you to re-enter a flipped packraft in moving water. The packrafting community considers this non-negotiable for anything beyond flatwater lake crossings.
Your dry bag system is as important as the raft. While paddling, your backpack rides in the cockpit or straps to the bow. Either way it will get wet. Waterproof your sleeping bag, electronics, and food before your first trip.
The gear
What you actually need
Packrafts
The packraft is the whole system. For most backpacking use cases (lake crossings, Class I-II river access, flatwater travel), you want an open-boat design with no spray skirt. Alpacka Raft invented the modern packraft and remains the benchmark; Kokopelli builds competitive boats at a slightly lower price point. Budget at least $700 for a packraft you would trust in a real wilderness situation. Anything cheaper is a recreational float toy, not a tool.
Packrafts — what's the difference?
A few common shapes, each making a different trade.
Open boat
No spray skirt. Flatwater, crossings, Class I-II rivers.
Water class
Class I-II
Weight
1.2-1.8 kg
Price
$700-1,000
Best for Backpackers crossing lakes and mellow rivers
Tradeoff Splashes fill the cockpit in faster water
Closed deck
Spray skirt adds splash protection; handles Class II-III.
Water class
Class II-III
Weight
1.5-2.2 kg
Price
$900-1,300
Best for Whitewater packrafters who want splash protection
Tradeoff Heavier and harder to exit quickly if you flip
Self-bailing
Floor drains automatically; built for Class III+ whitewater.
Water class
Class III+
Weight
1.8-2.8 kg
Price
$1,100-1,500+
Best for Committed whitewater packrafters running technical rivers
Tradeoff Heaviest, most expensive, overkill for crossings
Best starter
Kokopelli
Rogue-Lite Packraft
$$$
★★★★★Our rating
The Rogue-Lite is Kokopelli's entry open-boat packraft: lighter and more packable than the full Rogue, with the same TPU-coated nylon and integrated seat. Stable on Class I-II water, light enough for a 75L backpack, and the most accessible real packraft you can order on Amazon.
What we like
TPU-coated nylon handles rocky riverbank abrasion
Seat and thigh strap system ready to use out of the box
Class II-ready without a spray skirt purchase first
What to know
Paddle sold separately, add $150-250 to the budget
Heavier than Alpacka at a similar price point by ~200g
The Rogue Spraydeck is the Rogue-Lite's bigger sibling: a TiZip-sealed spray deck keeps water out of the cockpit in bigger water, making it a genuine Class II-III boat. Heavier than the Lite, but far more capable in moving water. Where most serious Kokopelli users end up after their first season.
What we like
TiZip spraydeck seals out water in Class II-III whitewater
Same proven Kokopelli TPU construction as the Rogue-Lite
Upgrade path without switching brands; familiar seat and strap system
What to know
Heavier than the open-boat Rogue-Lite, adds up on long portages
Spray deck demands wet-exit practice before moving water
NRS is one of the most trusted names in whitewater gear, and the Riffle is their purpose-built self-bailing packraft. Perforated floor drains automatically in Class III whitewater so you never stop to bail. Comes with a spray deck and thigh straps. The right boat for serious river packrafters.
What we like
Self-bailing floor keeps cockpit clear through Class III+ rapids
Spray deck standard; ready for technical whitewater immediately
The raft serious packrafters end up on after their first season
What to know
Over $1,200 and sold direct; not the right first packraft
Heavier than open-boat designs, which adds up on long portages
Packraft paddles are double-bladed kayak paddles that break down into four pieces, small enough to strap to the outside of your pack or tuck inside it. Four-piece paddles pack tighter than two-piece and fit more packs. You want something lightweight (carbon beats aluminum by 10-15 oz over a full day of paddling) with a blade that moves water efficiently. Most packrafters use 210-220 cm lengths depending on packraft width.
Best starter
Aqua-Bound
Manta Ray Carbon 4-Piece
$209.95 as of Jun 22, 2026
★★★★★Our rating· Only 3 left in stock - order soon.
Carbon shaft and foam-core carbon blades at a price that does not require a second mortgage. Packs to 28 inches, weighs 27 oz, and the snap-button ferrule makes assembly painless even with cold wet hands. Aqua-Bound makes genuinely excellent kayak paddles, and the Manta Ray is their sweet spot.
What we like
Four-piece carbon packs to 28 inches, fits inside most 65L packs
Foam-core carbon blades cut paddle weight dramatically vs. fiberglass
Snap-button assembly works reliably with cold, wet hands
What to know
Blade offset needs checking at first assembly or wrists pay for it
Slightly softer blade flex than Werner at a similar price
★★★★☆Our rating· Only 2 left in stock - order soon.
The Sting Ray is Aqua-Bound's entry-level 4-piece: fiberglass blades on a carbon shaft, one step below the Manta Ray in materials but identical where it counts for backpacking (four pieces, reliable ferrule). A sound choice if you are unsure how much packrafting you will actually do.
What we like
Four-piece breakdown at a significantly lower price than carbon
Same reliable Aqua-Bound ferrule as the Manta Ray
What to know
Fiberglass blades are heavier than carbon; add 4 oz over the day
Less efficient blade shape means more strokes per mile
Werner makes the best production kayak paddles, and the Sherpa is their 4-piece touring blade for packrafters and sea kayakers. The difference in water feel between a Werner and the Aqua-Bound is real and worth it once you are running rivers regularly. Fiberglass blades at a price that does not require the full carbon premium.
What we like
Werner blade geometry is the gold standard in production kayak paddles
Four-piece still packs for backcountry travel
Noticeable efficiency gain on longer paddles vs. mid-range options
What to know
Premium price ($350+); hard to justify before 20 hours of paddling
High-angle blade style; not ideal for touring strokes
A PFD is not optional. In packrafting, wear it always, even on flatwater. The water is cold, the currents can surprise you, and a flip in remote terrain is a completely different situation from a flip at a put-in with help nearby. Packrafters prefer slim-cut Type III PFDs for paddle sports (not bulky fishing vests). The design needs to clear your packraft seat back and not interfere with thigh straps.
Best starter
NRS
Vapor PFD
$109.95 as of Jun 22, 2026
★★★★★Our rating
NRS makes most of the gear that serious river runners actually use, and the Vapor is their minimal-profile kayaking PFD. The short torso cut does not bind against the packraft seat back. Five adjustment points get a true fit across a wide range of body sizes. Front pocket holds a whistle and small items.
What we like
Short torso cut does not bind against packraft seat backs
Five adjustment points dial in fit for any body type
Front pocket handles a whistle, knife, and small items
What to know
Sizing runs large; order down if you are between sizes
Less ventilation than mesh-heavy designs on warm days
Astral builds its life jackets specifically for moving water, and the YTV is their touring PFD: low-profile foam, generous range of motion, and a cut designed to work with a packraft seat without riding up. USCG Type III approved. Once you are paddling regularly, the YTV is the PFD you keep reaching for.
What we like
Low-profile foam cut designed for moving-water paddling positions
Generous range of motion for torso-rotation kayak strokes
Astral is the PFD brand whitewater guides actually buy
What to know
Slimmer foam = slightly less buoyancy than bulkier designs
Higher price than the NRS Vapor for comparable protection
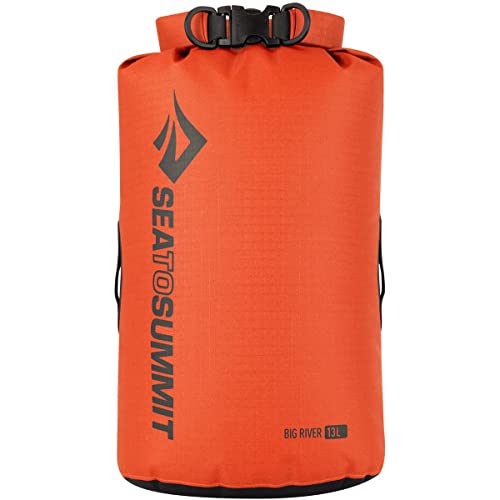
In packrafting, your backpack rides in the raft. When you are on the water, everything inside gets wet through seams, zipper leaks, or splash. The dry bag system is how you protect your sleeping bag, electronics, and food. Most packrafters use a single large main dry bag (55-65L) inside their pack, plus smaller ones for frequently accessed gear. Roll-top closures are more reliable than zip-lock designs for full submersion.
Best starter
Sea to Summit
Big River Dry Bag 65L
$129.97 as of Jun 22, 2026
★★★★★Our rating
Sea to Summit's Big River is their purpose-built paddling dry bag: weld-seam construction (no stitching to leak), a roll-top closure tested for full submersion, and 65L fits inside most 75L backpacking packs. The go-to choice for packrafters who need a main pack liner they can actually trust.
What we like
30D silicone nylon weighs almost nothing, packs to a fist
Roll-top closure waterproof for full submersion, not just splash
65L fits most 75L pack interiors with room for a sleeping pad
What to know
Light fabric is not puncture-resistant near sharp gear edges
No external attachment points for strapping to bow
★★★★☆Our rating· Only 2 left in stock - order soon.
Half the price of the Sea to Summit, still waterproof in a splash or dunking, and available in day-trip sizes. The translucent window helps you find contents without opening it. The right starter if you are not yet sure how seriously you will take packrafting.
What we like
Half the price of ultralight options with reliable waterproofing
Translucent panel lets you find contents without opening the bag
What to know
Heavier and bulkier than silicone-nylon bags when empty
40L size is a tighter fit for a full backpacking kit
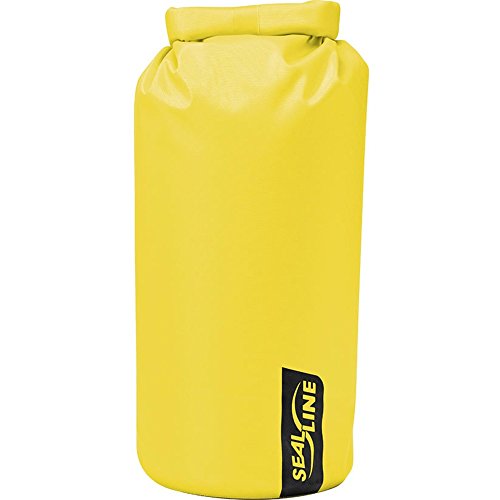
SealLine's Baja is the gear-nerd's pick: weld-seam construction, an articulated shape that sits neatly inside a pack, and a hanging loop for drying contents at camp. Use it for camera gear, first aid, and anything you would genuinely hate to lose if you swam.
What we like
Weld-seam construction (no stitching to leak) for critical gear
Articulated shape sits cleanly inside a backpack frame
What to know
30L is for valuables, not a full pack substitute
Pricier per liter than the Sea to Summit for the same protection
You will flip eventually. On Class II water, a helmet is the difference between a funny story and a bad day. Even Class I rivers have submerged rocks and strainers. Most packrafters add a helmet early; buying one before you need it costs nothing extra. A throw bag is the other essential: it is how you rescue a swimmer who ends up more than a few strokes from shore in current.
Best starter
WRSI
Current Helmet
$149.95 as of Jun 22, 2026
★★★★★Our rating
The Current is the most popular entry helmet in whitewater kayaking and packrafting. ABS shell, foam lining designed for repeat impacts, and a fit system that actually adjusts on the water. Light enough to carry without thinking twice. WRSI makes quality gear at a price that does not punish beginners.
What we like
Most popular entry whitewater helmet for a reason: fits well and lasts
ABS shell designed for repeat impact, not single-use like bike helmets
Adjustable fit system works on the water without removing gloves
What to know
Runs close to ski sizing; measure before ordering
No face cage (buy separately for Class III+ rocky rivers)
★★★★☆Our rating· Only 2 left in stock - order soon.
A throw bag is a 70-foot rope stuffed into a float bag you can throw to a swimmer in current. The NRS version is the standard in whitewater safety kits: floats, uncoils cleanly in the air, and restuffs without tangles. Clip it to the outside of your pack on every river trip.
What we like
70-foot rope floats and uncoils cleanly in the air when thrown
NRS throw bags are the field standard across whitewater safety kits
What to know
Requires practice; a bad throw in current is worse than no throw
70-foot is overkill for mellow rivers; a 50-foot bag is lighter
Packrafting is backcountry travel with a boat. In one day you can hike to a lake with no trail out, paddle to the far shore, and keep moving. Here is how to go from zero to confidently floating solo in your first season.
Most people who buy packrafts are already backpackers. They saw a photo of someone crossing a glacial river in a tiny yellow raft and thought: I want to be able to do that. The good news is that the basic skills are not hard. The bad news is that water is unforgiving in a way that trails are not, and the transition from “beginner” to “competent” requires actual practice, not just gear.
This is what your first season actually looks like.
Before you inflate anything: setup and safety basics
The packraft is simple to set up once you have done it. The first time, it is not. Every brand has a slightly different inflation system: some use a barrel-roll bag (you scoop air by swinging the bag, then roll the end down and attach it to the valve), some use a standard pump, some use a combination. Watch the brand’s setup video before you leave the house.
The same applies to your dry bag system. Your backpack sits in the raft while you paddle, which means it will get wet unless everything important is inside a waterproof dry bag with a rolled-top closure. Test the closure by filling the bag and dunking it in a bathtub. If water gets in, recheck the roll. Do not discover this failure on the water.
Carry a repair kit. Packrafts get small punctures. The repair is simple (clean, dry, glue, patch) but only if you have the materials. Kokopelli and Alpacka both include a patch kit; keep it accessible, not buried in your pack.
Your first float: start on flatwater
Do your first float on the calmest water you can find: a lake, a slow pond, a section of river with zero visible current. The goal is not distance. The goal is learning what the packraft feels like under your body.
A few things will surprise you:
The seat position matters more than you think. Most packrafts have an inflatable seat you adjust before launching. Sit too far back and the bow rises (slow, hard to steer). Sit too far forward and the stern rises (unstable). Center your weight so both ends ride level.
Forward strokes are not like canoe paddling. Kayak technique is a torso-rotation stroke, not an arm pull. Plant the blade fully in the water ahead of you, rotate your torso to pull through, exit cleanly at your hip. It looks subtle, but doing it wrong for a full day of paddling will destroy your shoulders.
The thigh straps connect you to the boat. Most packrafts have thigh straps that run under your thighs and clip at your hips. Properly adjusted, they give you control and stability you do not have without them. Improperly tight, they hold you in during a flip. Find the middle: snug enough to feel connected, loose enough that a deliberate hip-pop releases you instantly.
Before you paddle to the far shore of anything, practice flipping the packraft deliberately and getting back in. Every packrafter flips eventually. Knowing what happens before it happens is the most important skill you can build in calm water.
Moving water: what Class I-II actually means
Class I is water with small waves and a clear channel with no obstacles. Think a wide, smooth-moving river you could wade across in most spots. Class II adds occasional waves and minor obstacles (rocks, small drops), with clear lines visible from the raft. Most backpacker crossings are Class I or lower.
A few things change when you move from flatwater to current:
Rivers have preferred lines. The fastest water is typically in the center; the slower water is near banks. Eddies (calm spots behind rocks or bends) let you stop and read the water ahead. Learning to paddle in and out of eddies is the first whitewater skill worth practicing.
Read the water before you enter it. Standing on the bank for two minutes before launching is not caution, it is standard practice. Look for strainers (logs or brush where the current pushes through but a boat would get trapped), sudden drops you cannot see clearly, and any feature that would be hard to recover from if you flipped.
Swim position matters. If you flip and separate from your packraft on a moving river, float on your back, feet downstream, toes up. You want your feet to hit rocks first, not your head. Keep your arms out to steer toward calm water or the bank.
The single best thing you can do before your first moving-water trip is take a swift-water self-rescue course. The American Packrafting Association lists certified instructors. A half-day course teaches re-entry, swim position, throw-bag use, and how to read basic hazards. It costs $200-400. It is not optional if you plan to do this in serious terrain.
Month one is all flatwater. You are learning setup, breakdown, dry bag packing, and basic paddling mechanics. Do short trips (a few hours) close to the trailhead. Your goal is to be comfortable flipping and re-entering before you take the raft onto moving water.
Months two and three are where you start reading moving water and using eddies deliberately. Class I river crossings feel easy. You start to see Class II as something you could navigate, not something scary. This is when the swift-water course pays off most.
By the end of your first season, you have done several multi-day trips incorporating packraft sections, you can set up and break down in under 10 minutes in the dark, and you have a clear sense of what terrain is within your skill level and what is not. Most packrafters reach this point 6-8 river days into their season.
The thing that most beginners underestimate is how much terrain opens up once you have a packraft and the skills to use it. Lakes that required multi-day detours become afternoon crossings. River corridors with no trail become obvious routes. The packraft does not just add a skill; it changes the way you look at a map.
Beginners get pressured to buy a lot of stuff that doesn't help them play
better. Here's what we'd skip on day one.
A self-bailing floor for your first season — Open-boat packrafts cover 90% of backpacker water crossings. Self-bailing adds $300-500 and weight. Start open, upgrade only if you are actively running Class III.
A drysuit — A wetsuit jacket ($80-100) is enough protection for summer wilderness trips in most regions. A drysuit makes sense for shoulder-season Alaskan expeditions, not for your first year.
Spray deck or cockpit cover — On an open boat, a spray deck is a wet-exit complication you do not need while learning. Master the flip-and-reentry first, then add the deck if you move to bigger water.
Float bags — Float bags fill air space in the bow and stern so the raft floats higher if swamped. Useful for Class III, overkill for lake crossings and mellow river travel.
A satellite communicator — Worth owning eventually for remote expeditions. For your first few packraft trips, stay within a day's hike of a trailhead and borrow a communicator from a friend.
First week
Your first seven days
A short, real plan to get from gear-on-doorstep to actually playing.
Order your packraft early: the best models take 2-4 weeks to arrive, and some are back-ordered. · Buy
Inflate and deflate the packraft in your living room while watching YouTube setup tutorials. Do it three times before your first trip. · Action
Do your first float on a calm lake or pond before any moving water. Practice paddling forward, back, and turning until you feel stable. · Action
Deliberately flip the packraft on flatwater and practice re-entry. Every packrafter flips. Knowing what happens when you do is the most important skill you can build on calm water. · Action
Read Luc Mehl's packrafting resources at lukasmehl.com. His writing is the clearest free introduction to packraft technique and trip planning. · Learn
Find a swift-water self-rescue course in your region and book it before your third trip. The American Packrafting Association lists certified instructors. · Action
Budget $950-1,600 for a complete starter kit: packraft ($700-1,000), paddle ($150-250), PFD ($90), dry bags ($60), and a helmet ($80). There is no budget entry point in packrafts: anything under $600 is a toy, not wilderness gear.
Do I need kayaking experience to packraft?
No, but paddling experience helps. Packrafts are more stable and forgiving than kayaks on flatwater. Most backpackers pick up the basics in a single afternoon on a lake. For anything above Class II, take a swift-water safety course before going solo.
What class of water can a beginner handle?
Class I (flat or very gentle current) and Class II (small waves, clear channels) are appropriate for beginners with a few hours of flatwater practice. Class III involves strong irregular waves and requires swift-water rescue training and a spray deck at minimum.
Can I fly with a packraft?
Yes. A packraft, paddle, and PFD all pack into or onto a standard 50L-75L backpack, well within carry-on dimensions and checked bag limits. The raft itself is fabric and weighs under 2 kg. No special shipping or approvals needed.
How long does a packraft last?
A well-made packraft (Alpacka, Kokopelli) lasts 10-15 years with basic care: rinse with fresh water after salt or silty trips, dry before storage, and patch small punctures promptly with the repair kit. The seams are the weak point; inspect them annually.
Alpacka or Kokopelli for a first packraft?
If you want the best and can wait 4-6 weeks, Alpacka. If you want something excellent on Amazon with faster shipping, Kokopelli Rogue. The gap between them is smaller than the marketing suggests. Both build packrafts serious people trust in serious terrain.
American Packrafting Association — The sport's US governing body. Safety standards, certified instructors, trip-planning resources, and the best community forum for beginners.
Luc Mehl: Packrafting Resources — Luc Mehl wrote the Packrafting Handbook and runs packrafting courses in Alaska. His free online resources are the clearest technical writing on the subject.
Alpacka Raft Blog — Trip reports and technique articles from the brand that invented the modern packraft. The community built around Alpacka's product line is deeply knowledgeable.
r/Packrafting — Active community with gear discussions, trip reports, and honest takes on what to buy. Read the wiki before asking a gear question.
As an Amazon Associate, JustBeginning earns from qualifying purchases.
We may also earn commission from other affiliate programs linked on this
page. Editorial recommendations are independent; we don't choose
products based on commission rates.
Product prices and availability are accurate as of the date and time
indicated and are subject to change. Any price and availability
information shown on Amazon at the time of purchase will apply.

 Best starter