Snorkeling has one of the lowest barriers of any outdoor activity. If you can float, you can do it. The gear list is genuinely short, but a bad mask will ruin an entire vacation. Here's exactly what to buy, what to skip, and why the mask is the decision that actually matters.
By Colin B. · Published May 23, 2026 · Last reviewed June 7, 2026
A solid mask, snorkel, and fins set from a real brand runs $60-80. Add a rash guard and dry bag and you're fully equipped for under $150.
We earn commission on qualifying Amazon purchases — see our
affiliate disclosure.
Price tiers and budget totals shown above are editorial estimates;
actual Amazon prices vary.
At a glance
Our top pick in each category
The fastest path through this guide — each best-starter pick by category.
Scroll for the budget and upgrade alternatives.
The mask is the only piece of gear that has to fit your face specifically. A $15 discount mask that leaks makes snorkeling miserable. A $40 mask from a real brand that seals perfectly makes it magical. Spend the extra $25.
Rent fins first if you're traveling. Rental fins at most dive shops are $10-15, and fins take up half your luggage. If you love snorkeling, buy your own after the trip.
Full-face masks look appealing (one piece, breathe through your nose). The reality: harder to equalize pressure, harder to clear if flooded, can't dive below the surface. Traditional mask plus dry snorkel is better in every practical way.
Your mask is the difference between an unforgettable afternoon and an hour of saltwater in your eyes. Fit is everything. A mask that seals costs $35-60 from a real brand. Avoid the $10-20 range: the silicone is stiffer, seals worse, and you'll feel every small leak. The seal test: press the mask to your face without the strap, inhale lightly through your nose, let go. If it stays, it fits.
Masks — what's the difference?
A few common shapes, each making a different trade.
Traditional (single or twin lens)
Separate snorkel, smaller profile, can dive below the surface.
Seal
Around nose + eyes
Dive depth
Unlimited (equalize by pinching nose)
View
Standard
Best for Any real snorkeling, diving under, most adults
Tradeoff Must breathe through your mouth (takes 5 minutes to adjust)
Covers whole face. Breathe through nose or mouth at the surface.
Seal
Covers entire face
Dive depth
Surface only; cannot equalize
View
Panoramic
Best for Leisurely surface floating, mask-phobic first-timers
Tradeoff Cannot dive under the surface; CO2 risk in low-quality versions
Best starter
Cressi
F1 Snorkeling Mask
$$
★★★★★Our rating
Cressi is the brand Italian divers grew up on, and the F1 is their approachable starter. Single lens, double-feathered silicone skirt that seals well on most adult face shapes, tempered glass. Around $35-40 and consistently outperforms masks twice the price from less serious brands.
What we like
Double-feathered silicone skirt seals better than budget alternatives
Tempered glass lens, scratch-resistant and clear to depth
Cressi builds real dive gear, with decades of underwater credibility
What to know
Single lens gives narrower peripheral view than panoramic styles
Doesn't include a snorkel; buy separately or as the Palau SAF set
US Divers is a real brand (part of Aqua Lung). The Cozumel set gives you a mask, dry snorkel, and fins in one box for around $50. If you're not sure snorkeling will stick, this is the smart way in, not gambling $150 on a hobby you haven't tried yet.
What we like
Mask + snorkel + fins combo for under $50 (complete kit, one order)
US Divers is backed by Aqua Lung, not a novelty import brand
What to know
Mask seal is decent, not great; won't match a dedicated Cressi or Mares
Fins tend to run small; size up if you're between sizes
Once you're hooked, the Mares X-Free is where serious snorkelers land. Frameless design sits closer to your face for better equalization, wide single lens for panoramic views, and Mares' silicone skirt seals faces that mid-tier masks never quite get right.
What we like
Frameless design sits flush, better seal on a wider range of face shapes
Wide panoramic lens, significantly more field of view than twin-lens masks
Mares builds professional dive gear, the quality is real
What to know
Frameless masks fold for storage but need a case; glass is exposed
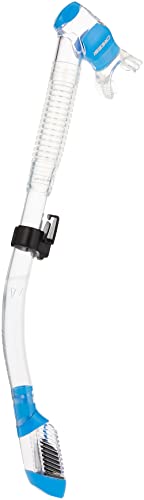
All snorkels let you breathe face-down. The difference is what happens when a wave hits: cheap snorkels flood and you inhale saltwater; dry-top snorkels have a float valve that seals when submerged. In a flat lagoon, either works. In any chop, boat wake, or ocean swell, a dry-top is dramatically better. Always get a dry-top; it's a $5 difference on Amazon.
Best starter
Cressi
Supernova Dry Snorkel
$
★★★★★Our rating
Cressi's dry-top valve is among the most reliable in the category, with minimal water ingress even in decent chop. The purge valve at the bottom clears any residual water with one hard exhale. Fits all standard mask straps. At $25-30, this is the adult option that won't frustrate you.
What we like
Float valve seals against wave splash, far less water ingestion in chop
Purge valve clears residual water with a single sharp exhale
Universal clip attachment fits any standard mask strap
What to know
Float valve adds slight exhalation resistance, gone after 10 minutes
Dry-top adds bulk; free-divers prefer a bare J-tube but you're snorkeling
Kraken Aquatics delivers the full dry-snorkel feature set (floating ball valve, purge valve, swivel mouthpiece, quick-release clip) for under $20. A solid standalone snorkel for anyone assembling their own kit piece by piece rather than buying a combo.
What we like
Full dry-top float valve under $20, not a splash-guard compromise
Swivel mouthpiece reduces jaw fatigue on longer reef sessions
What to know
Less name recognition than Cressi; worth checking reviews by size batch
Clip quality is adequate; inspect before each use and rinse after
Fins let you cover distance with minimal effort and keep your hands free. Full-foot fins (like a slip-on shoe) are lighter, pack smaller, and are ideal for warm tropical water. Open-heel fins (adjustable strap) fit over dive boots for cold or rocky entry points. For a Caribbean or Hawaii vacation: full-foot. For the Pacific Coast or Mediterranean in early season: open-heel. Both work fine for beginners.
Best starter
Cressi
Pluma Full-Foot Snorkeling Fins
$$
★★★★★Our rating
The Pluma is a short, lightweight tropical fin designed specifically for snorkeling, not diving, not spearfishing. Packs into a carry-on bag, fits true to shoe size, and provides enough propulsion to keep up with any reef tour without burning your legs. The right fin for Hawaii, Mexico, or the Caribbean.
What we like
Short blade packs into a carry-on, no checked bag needed for a trip
Full-foot design means no booties required in warm water
Cressi's blade flex is tuned for surface snorkeling, not scuba kick
What to know
Full-foot can't be worn over booties; won't work in cold water
Less thrust than long-blade fins if you're covering serious open water
Under $30 for fins that actually work. Shorter blade, soft foot pocket, available across most adult sizes. If you're unsure whether you'll snorkel more than once or twice, these get you in the water without the real investment.
What we like
Under $30, doesn't sting if this turns out to be a one-trip purchase
Soft foot pocket runs comfortable even without breaking them in first
What to know
Blade is stiffer than it should be at this length; fatigues calves faster
Sizing runs small; most buyers need to go a half to full size up
When you're free-diving or hitting rocky Pacific coastlines, the Avanti Quattro is the open-heel fin serious snorkelers graduate to. Adjustable strap fits over booties, long blade moves real water, and Mares has built professional dive fins since 1949.
What we like
Open-heel fits over booties, works from tropical to cold-water conditions
Long blade generates serious thrust for covering open water efficiently
Mares professional dive quality, built to outlast years of hard use
What to know
Long blades won't fit in carry-on luggage; you're checking a bag
Overkill for casual reef tourists; these are for committed snorkelers
You will get sunburned snorkeling. Your back and legs are perpendicular to the sun for an hour while you're completely absorbed looking at fish. Sunscreen helps but washes off and harms coral reefs. A UPF 50+ rash guard fixes both problems: it blocks 98% of UV, stays on regardless of water, and doubles as physical protection from reef scrapes. This is the piece of gear most first-timers regret skipping.
Best starter
O'Neill
Basic Skins Long Sleeve Rash Guard
$$
★★★★★Our rating
O'Neill has been making surf and water-sports gear since the 1950s. Their basic rash guard is one of the most trusted UPF 50+ options at an honest price. Long sleeve covers arms and most of your back. Quick-dry fabric is comfortable to wear directly from the water to lunch.
What we like
UPF 50+ blocks 98% of UV, more effective than reapplied sunscreen
O'Neill has made water gear for 70+ years, durable and proven in the field
Quick-dry fabric comfortable from water to shore without changing
What to know
Sizing runs large; order a size down if you're between sizes
Long sleeves can feel warm above 90°F when out of the water
If you're snorkeling in water under 75°F (the Pacific Coast, much of the Mediterranean, or early-season Caribbean), a shorty wetsuit adds warmth plus UV coverage. Seavenger's 3mm hits the sweet spot between warmth and mobility. Not for the tropics.
What we like
3mm neoprene adds meaningful warmth for water temps in the 68-78°F range
Covers more skin than a rash guard, better physical protection on rocky reefs
What to know
Too warm for tropical water above 80°F; you'll want it off after 20 minutes
Neoprene feels restrictive for beginners still working out their kick
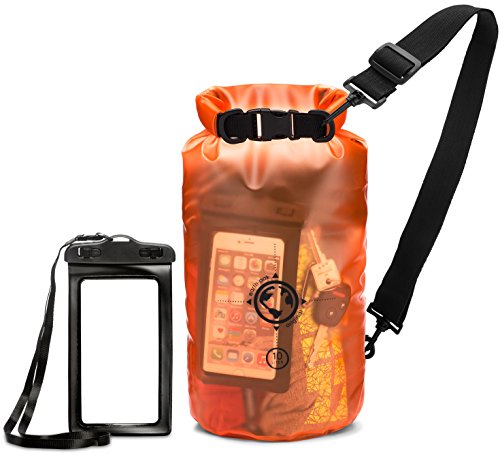
A dry bag is the difference between a working phone and a $1,000 paperweight at the end of your session. Boats get wet. Beaches get waves. Any roll-top dry bag rated IPX6 or better handles the reality. You don't need a $70 expedition bag for casual snorkeling; a reputable 10L roll-top from $20-25 does the job. Roll the top at least three times.
Best starter
Earth Pak
Waterproof Dry Bag 10L
$
★★★★★Our rating
Earth Pak's dry bags have become the default recommendation in water-sports circles for good reason: genuinely waterproof tested to 10 feet, bomber roll-top closure, and a shoulder strap included. The 10L holds a phone, wallet, sunscreen, and a change of shirt. At $20, it's the easiest purchase decision in the whole kit.
What we like
Waterproof tested to 10 feet, genuine submersion protection
Roll-top with clip buckle; three rolls for full water resistance
10L fits phone, wallet, keys, sunscreen, and a spare layer
What to know
Bright colors are visible but not subtle; it stands out on the beach
Clear-window versions fog; opt for a solid color if that bothers you
For kayaking to your snorkel site, multi-day liveaboards, or demanding conditions, the Sea to Summit Hydraulic is the benchmark. TPU-coated fabric, welded seams, and an air-expel valve let you compress the bag before sealing. The 20L fits full camera gear, wetsuit, and clothes.
What we like
Welded seams, no stitching holes for water to enter under pressure
Air valve lets you compress contents before sealing for a slimmer pack
Sea to Summit builds expedition gear; this will outlast the trip
What to know
Premium price ($60-80), far more than casual beach snorkelers need
Snorkeling clicks faster than almost any outdoor activity. Here's what actually happens in the water: the handful of things worth knowing before you go, and what to stop worrying about.
Most people overthink snorkeling before they try it. The list of things you actually need to know before your first session fits in about three paragraphs. The rest is just getting your face wet.
Here’s what actually happens, and what to do when the usual beginner moments arrive.
Before you get in the water
The single most valuable thing you can do before your first open-water snorkel is practice in a pool. Ten minutes in a pool removes 90% of first-timer anxiety.
Put your face in the water and breathe. Just breathe through the snorkel tube. The first few inhales feel wrong (slightly resistant, a little mechanical) and then your brain adjusts and it stops feeling strange. The whole adaptation takes less than two minutes.
Clearing the snorkel: if water gets in (and it will, at least once), you clear it with a single sharp exhale. Hard out, not slow. The purge valve at the bottom of a dry snorkel does most of the work; you just push air through it. Practice this in the pool. It becomes completely automatic by the third time.
Defogging your mask: new masks have a factory coating on the lens that causes fogging. Before your first session, scrub the inside of the glass with a pea-sized amount of toothpaste, scrub with your finger for a minute, rinse thoroughly. Before every subsequent session, spit on the lens, rub it around, and rinse lightly. It sounds primitive. It works.
The mask seal: before you put your mask on properly, do the test. Press it against your face without the strap, inhale lightly through your nose, let go. It should stay. If it falls, the seal isn’t right for your face shape. A leaking mask is the number-one reason people have a bad first time.
Everybody has a brief adjustment period. Here’s what it looks like so you can stop worrying when it happens to you.
The breathing thing: you will briefly feel like you can’t breathe. You can. Your brain is experiencing cognitive dissonance (face underwater, mouth breathing through a tube) and it takes about 60 seconds to convince it this is normal. Float, breathe slowly, don’t fight it. It resolves on its own.
Fin position: your legs should be nearly straight, flutter-kicking from the hip with minimal knee bend. The kick that feels natural (cycling motion, lots of knee) is wrong; you’ll churn water, create drag, and exhaust your calves in 10 minutes. Flutter kick from the hip. Keep your fins underwater; if they’re breaking the surface, your kick is too high.
Where to look: down and slightly ahead. You’re looking at the reef, not at the horizon. Let your body float horizontal; your hips and fins should be near the surface. If your legs are sinking, try taking a slightly deeper breath (more buoyancy) or kicking a tiny bit more.
Breathing rhythm: slow and steady beats fast and anxious every time. Take full breaths. Exhale completely. Some beginners hyperventilate from anxiety and feel dizzy. If that happens, stop, float on your back for 30 seconds, breathe normally, and get back in.
What you’ll see (and what to do about it)
The first time you put your face in clear tropical water and see a reef, most people have a brief moment of “oh, that’s what this is about.” It hits quickly and hard.
Some practical things:
Don’t touch anything. Coral is alive, and your hands will damage it. More importantly, coral can cut you badly enough to need stitches; the edges are razor-sharp and the wound takes forever to heal in saltwater. Keep your hands by your sides. Keep your fins up and away from the reef floor. A single tail swipe with a fin can damage years of coral growth.
Following fish: most reef fish are not scared of snorkelers. You can get surprisingly close by approaching slowly and horizontally; if you’re diving toward them they flee; if you float toward them gently they often hold. The big dramatic-looking fish (parrotfish, pufferfish, moray eels looking out from holes) are usually unconcerned with you.
Going under: if you want to dive below the surface, you need to equalize the pressure in your mask by pinching your nose through the mask skirt and exhaling gently (same technique as flying or going deep in a pool). This is only possible with a traditional mask (not a full-face mask). Dive down, look around, come back up, exhale sharply to clear your snorkel, and you’re back to normal.
Mask floods: a small amount of water in the mask is normal and not a crisis. To clear it, press the top of the mask frame against your forehead with your hand, tilt your face up toward the surface, and exhale sharply through your nose. The air forces the water out the bottom seal. Repeat once if needed. Practice this in the pool beforehand.
Swallowing saltwater: it happens. It tastes terrible. It is not dangerous in a small amount. If you inhale through the snorkel when there’s water in it, you’ll cough; take your head out of the water, cough it out, breathe normally, and go back in. The reflex is unpleasant but over in 30 seconds.
Exhaustion: snorkeling feels effortless until suddenly it doesn’t. If you’re in open water when this happens, roll onto your back. You float easily on your back; rest there for a minute, then either continue or head in.
Feeling the current: a light current is normal and manageable. If you notice you’re drifting, turn and face it and swim at a slight angle across it rather than directly against it. If the current is strong enough that you’re not making progress, don’t fight it; signal for your boat or swim parallel to shore. Strong currents at snorkel sites are unusual; guided tours pick spots with favorable conditions.
Two things happen reliably after a first successful snorkel:
You want to go again immediately.
You can feel exactly the spots you’ll be sunburned tomorrow.
The sunburn is the only real beginner mistake that has lasting consequences. Your back, the backs of your thighs, and the nape of your neck are all angled toward the sun for an hour while you are completely distracted by what’s below you. Wear a rash guard. Bring it next time if you didn’t bring it this time.
If you want to take it further (free-diving, identifying what you saw, finding better spots); the skills build quickly from here. A second session is dramatically more relaxed than the first. A fifth session starts to feel fluent.
Save your money
What you don't need yet
Beginners get pressured to buy a lot of stuff that doesn't help them play
better. Here's what we'd skip on day one.
An underwater camera — Your phone in a $20 waterproof case captures everything in the first year. Buy a real underwater camera once you know you'll use it multiple times a year.
A snorkel vest — Most adults float naturally. Try snorkeling without one first; you almost certainly don't need it. Buy one only if you're genuinely uncomfortable in the water.
Prescription snorkel mask — Worth it eventually if you wear glasses, but most glasses-wearers adapt to a standard mask. Rent or borrow first to confirm you actually need corrective lenses underwater.
A dive flag and float — Useful in areas with serious boat traffic, but overkill for resort reefs and guided tours. Check local regulations; most organized snorkel spots handle this for you.
Reef-safe sunscreen (in addition to a rash guard) — A rash guard covers the exposed-to-sun surfaces. You still want sunscreen on your face, neck, and backs of hands, but the gallon jug is overkill.
First week
Your first seven days
A short, real plan to get from gear-on-doorstep to actually playing.
Do the mask seal test before you commit. Press it to your face without the strap, inhale lightly through your nose, let go. If it stays, it fits. · Action
Order a complete starter kit: mask, snorkel, and fins. · Buy
Practice in a pool first. Put your face in, breathe through the snorkel, exhale hard to clear it. Ten minutes in a pool makes your first open-water session dramatically less stressful. · Action
Defog your mask lens before the first session. Scrub with toothpaste and rinse, or use commercial anti-fog drops. Before each subsequent session, spit on the lens, rub lightly, rinse. · Action
Pack a rash guard. Snorkeling burns are sneaky. You're face-down, your back is perpendicular to the sun, and you're completely absorbed by what's below you. · Buy
A solid mask, snorkel, and fins set from a real brand runs $60-80. Add a rash guard ($30) and a dry bag ($20) and you're fully equipped for under $130. The mask is the most important piece; don't cheap out there specifically.
Should I buy or rent snorkel gear on vacation?
Rent if you've never snorkeled or are only planning to go once. Rental gear at good dive shops is clean and serviceable. Buy your own mask if you'll snorkel more than a couple of times. Fit is personal enough that rental luck is real.
What's the difference between a dry snorkel and a regular snorkel?
A dry snorkel has a float valve at the top that seals when the tip submerges; much less water gets in when a wave hits. In flat, calm water the difference is small. In any chop or swell, a dry-top is noticeably better. Always buy the dry-top.
Are full-face masks safe for snorkeling?
Safe for leisurely surface floating, not recommended for diving below the surface. You can't equalize the pressure inside a full-face mask, and cheaper versions can trap CO2 in the breathing chamber. A traditional mask with a dry snorkel is better in every practical way.
My mask keeps fogging up: what do I do?
New masks have a factory coating on the lens that causes fogging. Scrub the inside with toothpaste or baby shampoo before the first use, then rinse. Before every session, spit on the lens, rub it around, rinse lightly. Anti-fog drops work better if spitting grosses you out.
Can I snorkel if I'm not a strong swimmer?
Yes, with a life jacket or snorkel vest. Snorkeling is fundamentally a floating activity. You're at the surface, breathing through a tube, doing a gentle flutter kick. You don't need to be a strong swimmer, but you do need to be comfortable having your face in the water. A pool practice session before the real thing helps enormously.
PADI: Snorkeling Resources — The world's largest scuba organization has excellent snorkeling resources. Also the natural next step when you're ready to go deeper.
NOAA Coral Reef Conservation Program — Understanding what you're looking at makes every snorkel session richer. NOAA's coral reef resources explain the ecosystem and why not touching it matters.
REEF: Reef Environmental Education Foundation — Citizen-science fish identification project. REEF's field guides and app help you name what you saw. Makes every trip dramatically more memorable.
iNaturalist — Photo-based species ID: snap a photo, the community (and AI) identifies it. Great for logging everything you saw on a snorkel.
r/snorkeling — Active community for gear advice, destination reviews, and fish ID. Search before posting; the common gear questions have thorough existing threads.
As an Amazon Associate, JustBeginning earns from qualifying purchases.
We may also earn commission from other affiliate programs linked on this
page. Editorial recommendations are independent; we don't choose
products based on commission rates.
Product prices and availability are accurate as of the date and time
indicated and are subject to change. Any price and availability
information shown on Amazon at the time of purchase will apply.


 Best starter