Muay Thai is the art of eight limbs: fists, elbows, knees, and kicks. Starting out costs less than you think: most gyms provide bags and pads; you need gloves and wraps for your first class, shin guards before your first sparring session. Here's exactly what to buy, in what order, and what to skip.
By Colin B. · Published May 23, 2026 · Last reviewed June 5, 2026
Gym-only setup (gloves + wraps + shin guards): $80–120. Add Thai shorts and you're at $150. Full home setup with a freestanding heavy bag: $250–350.
We earn commission on qualifying Amazon purchases — see our
affiliate disclosure.
Price tiers and budget totals shown above are editorial estimates;
actual Amazon prices vary.
At a glance
Our top pick in each category
The fastest path through this guide — each best-starter pick by category.
Scroll for the budget and upgrade alternatives.
CenturyCentury Original Wavemaster | Blue Freestanding Punching Bag with Base | Boxing Training Equipment | Punching Bag Stand Adult | Freestanding Kickboxing and MMA Trainer | Adjustable Height 47" to 68"
SISUSISU Aero Medium Mouthguard, Lucky Lavender - 1.6mm Thin - Custom-Molded Fit - Slim Design - Remoldable Up to 20 Times - for Team Sports - Non Toxic
If you're training at a Muay Thai gym, your starter list is three items: gloves, hand wraps, and shin guards. The gym has heavy bags, pads, and everything else. Show up twice before spending beyond those three.
Hand wraps are non-negotiable. Every beginner skips them once and nurses sore knuckles for a week. A $10 set of 180-inch wraps protects the small bones in your hand every single session.
16 oz gloves are right for most adults. The 14 oz vs. 16 oz debate is simpler than forums make it: 16 oz for anyone over 140 lbs doing bag and pad work. Go 14 oz only if you're a lighter person or your coach specifically says so.
The most important, most debated purchase. For beginners, 16 oz is right for most adults (heavy enough to protect your hands on the bag, padded enough for pad work and early sparring). The 14 oz vs. 16 oz debate is simpler than forums make it: go 14 oz if you're under 140 lbs or your coach specifies; otherwise 16 oz. Either way, buy from a recognizable brand: Venum, Fairtex, Twins, Ringside. The gap between a $40 off-brand and a $70 name brand is noticeable after one bag session.
Gloves — what's the difference?
A few common shapes, each making a different trade.
14 oz
Lighter, faster. For smaller practitioners or pad-focused training.
Weight
14 oz
Best for
Adults under 140 lbs
Padding
Moderate
Best for Lighter fighters, pad work focus, faster hand speed
Tradeoff Less padding than 16 oz; you'll feel more impact on the heavy bag
Venum is the brand you'll see most often in Muay Thai gyms at the amateur level, and the Challenger 3.0 is their workhorse entry glove. Triple-density foam, a velcro closure that holds, and a wide wrist strap for real support. It handles bag work, pad work, and early sparring without wearing out quickly. The right first glove for most people.
What we like
Triple-density foam protects hands on hard bag rounds
Wide velcro wrist strap provides real wrist support
One of the most recognizable brands in competitive Muay Thai
What to know
Runs warm inside; ventilation is poor for long rounds
Ringside is a legitimate US brand with a real reputation, and the Apex gets you functional training gloves under $50. Synthetic leather holds up to regular bag and pad use, and the foam density is appropriate for the price. Not as refined as Venum, but the right call if you're not yet sure Muay Thai will stick.
What we like
Ringside is a legitimate brand, not an anonymous import
Synthetic leather holds up to regular bag and pad sessions
Under $50 makes this the clear entry-level choice
What to know
Foam is less dense than mid-range; you'll feel it on the heavy bag
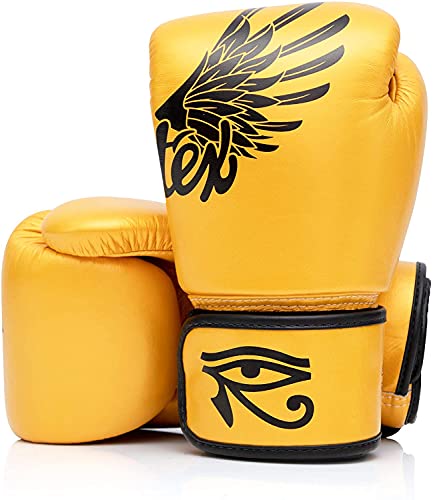
Fairtex makes gloves in Thailand and the BGV1 is the standard that Thai gyms train with. Tighter wrist, longer cuff, designed specifically for Muay Thai's clinch work. Genuine leather lasts years. Buy these when you know Muay Thai is your sport.
What we like
Made in Thailand, the gloves used in Thai gyms worldwide
Longer cuff handles clinch position better than boxing gloves
Genuine leather lasts 5+ years with proper care
What to know
Expensive ($90+), overkill until you've trained 2 months
Non-negotiable. Every beginner skips wraps once and nurses bruised knuckles for a week afterward. Wraps protect the small bones in your hand, compress the wrist during impact, and keep everything aligned during heavy bag rounds. Buy 180-inch elastic wraps: long enough to cover knuckles fully, stretchy enough to form to your hand. Cotton-only wraps without stretch are slower to apply and feel less secure. Get two or three pairs so you always have a dry set ready.
Best starter
Sanabul
Battle Forged Professional 180 Inch Hand Wraps
$
★★★★★Our rating
Sanabul's wraps are the best value in the category. The elastic blend conforms to your hand, the thumb loop holds position during wrapping, and a 3-pack means you're never training with damp wraps. Used by gym regulars who know what they're doing.
What we like
Elastic blend forms to your hand rather than slipping
3-pack means you always have a dry pair ready
Thumb loop holds wrap in place while you finish the wind
What to know
Machine washing occasionally loosens the velcro end; air dry instead
Thinner than competition wraps, less padding for heavy hitters
Fairtex's wraps are the authentic Thai gym standard. Slightly thicker material, tighter weave, and they hold their tension better after dozens of washes than most wraps at this price. The upgrade that doesn't feel like a luxury.
What we like
Thicker weave holds tension through a full training session
Holds up to repeated washing without stretching out
What to know
Sold individually; buy two pairs to start
Slightly stiff until broken in after a few sessions
Muay Thai's kicking game means your shins contact hard surfaces (pads, bags, and training partners' blocks) constantly. Beginners have undertrained shins that feel every impact. Good shin guards cover the instep (the top of your foot) as well as the shin; guards that stop at the ankle leave you vulnerable on teep kicks. You need these before your first sparring session, not after. For bag and pad work you can go a few weeks without them; for partner drilling you cannot.
Best starter
Venum
Challenger Standup Shin Guards
$69.99 as of Jun 22, 2026
★★★★★Our rating· In Stock
Full shin-to-instep coverage, easy hook-and-loop closure, and dense foam that actually absorbs impact rather than just sitting between your shin and the pad. These go on in under 30 seconds and stay put through a full training session. The right first shin guard for most beginners.
What we like
Full shin-to-instep coverage; the foot coverage matters for teep kicks
Dual hook-and-loop closure stays put through a full session
Dense foam absorbs real impact, not just in photos
What to know
Run slightly large; size down if between sizes
Foam compresses over time and needs replacing after a year of heavy use
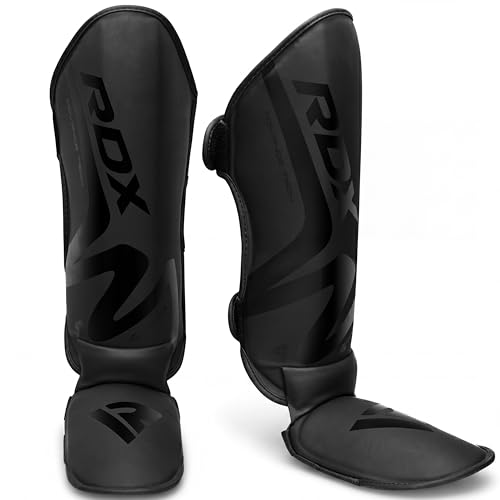
RDX puts out functional gear at accessible prices, and their shin guards are a solid entry point if you're not ready to spend $60 on your first pair. The foam density is adequate for pad work and light bag sessions. Not a lifetime purchase, but a sensible way to start.
What we like
Affordable entry into real shin protection, not costume foam
Available in multiple sizes; size chart is accurate
What to know
Foam thins noticeably after 6 months of regular sparring
Velcro straps lose grip faster than premium guards
The SP5 is competition-grade, used by Thai fighters, contoured to the leg, and built to absorb the kind of hard kicking that would shred a budget guard in a month. When you're sparring regularly, the difference between adequate padding and real padding becomes obvious. Buy these when you're training three times a week.
What we like
Competition-grade padding handles hard sparring rounds without flinching
Genuine leather contours to the leg, more secure than generic guards
Fairtex build quality lasts years with regular training
What to know
Expensive ($90+), hard to justify before you're committed
Contoured fit doesn't suit everyone; wider calves may need a different brand
Thai shorts are more functional than they look. The wide leg opening isn't aesthetic; it's about kicking range. A full Muay Thai roundhouse requires hip rotation and leg clearance that standard athletic shorts restrict. Regular gym shorts work on day one, but they ride up and bunch during kicks within the first session. Authentic Thai shorts run $20–35 and last years. Sizing runs small; most people size up at least one from their usual athletic shorts.
Best starter
Venum
Bangkok Inferno Muay Thai Shorts
$$
★★★★★Our rating
Venum's Bangkok shorts are the accessible entry into real Thai shorts: satin fabric, wide cut, elastic waistband that doesn't dig in during clinch work. Available in multiple colorways, sized for Western bodies (Venum runs slightly larger than Thai brands), and priced at the sweet spot where you're not guessing on quality.
What we like
Wide leg opening doesn't restrict hip rotation during roundhouses
Venum sizing runs larger than Thai brands, easier to fit
Elastic waistband stays comfortable through clinch drilling
What to know
Satin fabric slides during any groundwork component
Fewer colorways than Thai-imported brands like Twins
Hayabusa is a serious martial arts brand, and their shorts hit the right balance of price, quality, and cut. Slightly more matte finish than satin-heavy Thai shorts, looks fine for gym training without the shimmer. Good range of motion and an elastic waistband that holds position.
What we like
Reputable MMA brand, not a generic import
More subdued finish looks good off the mat too
What to know
Less flared than traditional Thai shorts, slightly less hip freedom
Twins Special is one of the oldest and most respected Thai brands, made in Bangkok since 1992, used in Lumpinee Stadium, worn by champions. The fabric is authentic satin, the embroidery is hand-done, and the cut is the real Thai fighter's cut: wider flare, shorter inseam, full hip rotation. Buy these when you want the real thing.
What we like
Made in Bangkok, the authentic Thai fighter's brand since 1992
Widest leg flare of any shorts here, maximum kicking freedom
Hand-embroidered detailing that holds up to repeated washing
What to know
Thai sizing runs very small; size up 2-3 from Western athletic shorts
Authentic satin is slippery if you supplement with grappling
Skip this if you train at a gym; they have bags, and you'll learn faster hitting pads with a coach than slamming a bag alone. If you want a home setup, the first question is ceiling vs. freestanding. Ceiling-mounted bags swing realistically and are the real thing, but need a solid joist or dedicated bracket and a landlord who doesn't mind. Freestanding bags need no installation, can be moved, and are the right call for most beginners. Fill a freestanding base with water or sand; water makes it heavier and more stable.
Best starter
Century
Original Wavemaster | Blue Freestanding Punching Bag with Base | Boxing Training Equipment | Punching Bag Stand Adult | Freestanding Kickboxing and MMA Trainer | Adjustable Height 47" to 68"
$$$
★★★★★Our rating
The Wavemaster is the freestanding bag that actually holds its ground when you throw real kicks. Fill the base with water (about 270 lbs) and it absorbs power without tipping. Adjustable height works for both punches and low kicks, and it doesn't require a single hole in your ceiling.
What we like
Freestanding: no ceiling mount, no installation, no landlord negotiation
Adjustable height accommodates punch combos and low kicks
Water-filled base (~270 lbs) stays stable under hard kicking
What to know
Moves slightly on hard kicks; place against a wall if space allows
Foam cover eventually cracks with daily heavy use over years
The traditional ceiling-hung heavy bag delivers the most authentic training feel: it swings on impact, forcing you to move and re-set just like a real partner would. Everlast's 70 lb canvas bag is the workhorse of boxing gyms for a reason. Requires a solid ceiling joist or heavy-duty wall bracket, but once it's hung, nothing touches it for feel.
What we like
Swings on impact, forces footwork and repositioning like real training
Classic canvas construction holds up to years of hard use
Standard 70 lbs suits Muay Thai kicks without tipping
What to know
Requires a ceiling joist or wall bracket, not an apartment bag
Installation needs proper mounting hardware or a handyman
Two items belong in your bag before your first sparring session: a mouthguard and (for men) a groin cup. For bag and pad work only, neither is urgent; but skip them for sparring even once and you'll understand why they exist. A thin mouthguard (1.6mm) lets you breathe and talk during rounds; thick stock guards muffle everything. The cup matters less for pure technique drilling and becomes essential the moment knees and teep kicks enter the picture.
Best starter
SISU
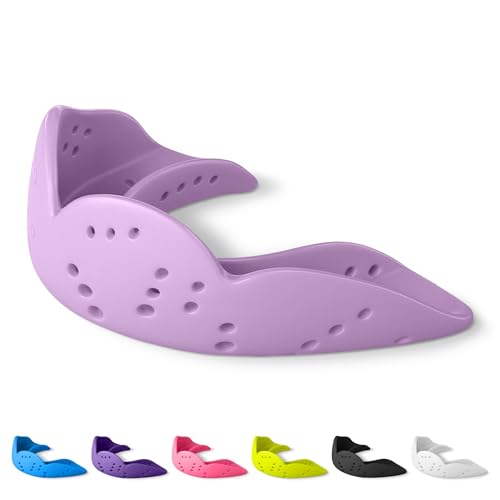
Aero Medium Mouthguard, Lucky Lavender - 1.6mm Thin - Custom-Molded Fit - Slim Design - Remoldable Up to 20 Times - for Team Sports - Non Toxic
$19.99 as of Jun 22, 2026
★★★★★Our rating· In Stock
SISU's Aero guard is 1.6mm thin; you can breathe normally, drink water, and shout instructions to your training partner without taking it out. Molds to your teeth in hot water in 60 seconds. Dentists use thicker guards, but for sports, thin and form-fitted beats thick and generic every time.
What we like
1.6mm thin; you can breathe, drink, and talk through it normally
Custom molds in 60 seconds in hot water at home
Fits under standard mouthguard, no bulge when you bite down
What to know
Thin design offers less shock absorption than thicker guards
Can crack if stored dry and bent; keep in the case
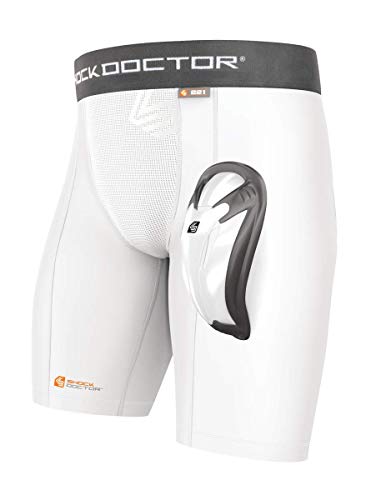
The cleanest solution for male Muay Thai students: the cup is built into compression shorts, so there's nothing to forget in your bag and nothing that shifts during knee work or clinch drilling. BioFlex flex with your body rather than rigidly blocking movement. Non-negotiable for sparring.
What we like
Integrated cup: nothing to forget, nothing to shift during clinch
BioFlex cup moves with your body during knee-heavy training
What to know
Cup compression shorts require a wash after every session
Not needed for women or for bag-only home training
Muay Thai has a clear arc: stance and jab-cross in week one, roundhouses in week two, clinch and knees by week four. Here's what each phase looks like and when things stop feeling awkward.
Muay Thai has a reputation for being brutal. It is. Eventually. In your first month, it’s mostly about learning to stand correctly, hit something without hurting yourself, and survive the conditioning. The brutality is something you earn gradually, and by the time you get there, you’ll be more surprised than scared.
Here’s what the first month actually looks like, week by week, with the things that matter and the things that feel important but aren’t.
Week 1: Stance, jab-cross, and surviving the warmup
Every Muay Thai class starts with a warmup that will humble you. Skipping rope, shadowboxing, burpees, and sometimes a run, all before the actual training begins. Your cardio is not where it needs to be. That’s expected. No one in the gym cares. Do the warmup, go slower if you need to, and don’t stop.
Stance comes first. Your coach will correct it constantly in the first week because it’s the foundation everything else builds on. The orthodox stance (right hand dominant): left foot forward, feet roughly shoulder-width apart, both feet at a slight diagonal, weight slightly on the balls of your feet. Hands at your cheeks, not your chin. Elbows down protecting your ribs.
The instinct is to stand square. Don’t. The angled stance protects your center line and lets you generate rotation for kicks.
The jab-cross is 80% of your early training. Not because it’s flashy (it isn’t), but because your jab sets up everything else. A good jab closes distance, disrupts your opponent’s vision, and creates openings. Your cross generates power from hip rotation, not arm strength. If your shoulder is doing most of the work, you’re doing it wrong.
Spend the first week letting muscle memory build on these two punches. You’ll feel stiff and awkward. That’s correct. You’re rewiring movement patterns you’ve had your whole life.
The Muay Thai roundhouse is not the karate side-chop kick you’ve seen in movies. It’s a shin strike delivered through the target with a full hip pivot; you’re rotating through the kick, not at it.
The setup: step out at a 45-degree angle to generate the pivot, let your hip swing your leg like a baseball bat, and make contact with your shin, not your foot. Keep your hands up during the kick. This feels impossible at first. You will drop your hands constantly. Your coach will remind you constantly.
Why the shin? It’s a denser, harder surface than the top of your foot. Experienced Muay Thai fighters have shins conditioned from years of kicks on bags and pads, hard enough to feel like wood to their training partners. Your shins are not there yet. They will hurt for the first month. This is normal and temporary. It’s called “conditioning” and it actually works.
The teep (push kick) is your other major week-two addition. Less about power, more about distance control: a straight extension of your lead leg into your opponent’s midsection to reset the space between you. Think of it as a jab for your legs.
By the end of week two, you have the basic tools: jab, cross, and roundhouse. These three techniques make up the majority of Muay Thai striking at every level. The rest is combinations, timing, and reading another person.
Week three is where the bag work starts to feel real. Your technique is rough, but you have enough vocabulary to start putting things together: jab-cross-kick is the first combination most coaches teach, and for good reason; it works at every level of competition.
The goal in bag work isn’t power. It’s rhythm and reset. Hit, come back to stance, breathe, hit again. Beginners burn out in thirty seconds by swinging without recovery. Experienced fighters can look effortless through a three-minute round because every combination ends in a reset: hands up, weight balanced, breathing controlled.
Your hands will be fine. If you wrapped them properly and your gloves fit correctly, the bag doesn’t hurt. What hurts is bad technique: punching with your wrist bent, making contact at the wrong angle, or snapping your arm instead of rotating through the punch. When something hurts, it’s usually a form problem, not a conditioning problem.
This is also the week most beginners discover they’re breathing wrong. You should be exhaling sharply on every strike; a tight exhale tightens your core, protects your ribs if you get hit back, and forces you to breathe rhythmically. Holding your breath between combinations is what gasses you out at the two-minute mark.
Week 4: Knees, elbows, and the clinch
Muay Thai adds knees and elbows, the two techniques that separate it from Western boxing and most kickboxing rulesets. In week four, most beginner programs introduce them.
Knees are thrown from the clinch: the close-range grappling position where both fighters grip each other’s necks and battle for control. The knee comes straight up into the midsection or thigh. It requires very little conditioning to generate impact, which is why Thai fighters throw them constantly in close range.
Elbows are the dangerous ones. Short, sharp, and able to cut skin. In training you’ll throw them on pads and bags only; never in light sparring until you have real control. Elbow technique is easier than it looks: most of the power comes from hip rotation, the same source as your punches.
The clinch itself is its own discipline. Grabbing someone’s neck while they grab yours, both of you trying to control the other’s posture; it looks like a wrestling hug but it’s positional combat. At week four, you’re just learning what it feels like. Control comes later.
Every beginner makes the same handful of mistakes in the first month. You’ll make all of them:
Dropping your hands after combinations. Your brain is busy computing the technique; self-protection gets deprioritized. Coaches call this constantly. It improves with reps.
Watching your own technique instead of the target. Looking at your shin while you kick, checking your glove position. Real Muay Thai is eyes on the opponent, always.
Trying to generate power before learning mechanics. Power comes from rotation, not from swinging harder. The harder you try to hit hard, the worse your technique gets. Slow down and rotate correctly.
Skipping the conditioning. The warmup feels like punishment. It’s not; it’s what lets you train hard at the end of the round instead of gassing out at the beginning.
Nobody watching you cares. The experienced fighters in the gym remember being where you are. The other beginners are all making the same mistakes.
What to do at month two
If you’ve shown up consistently (two or three times a week), you have the basics. Here’s what accelerates the curve:
Find your two or three sessions per week and protect them. Muay Thai improves through repetition, not study. Three sessions per week produces noticeably better results than one. The gap between training twice and training three times a week is larger than you’d expect.
Ask your coach for one specific thing to work on. Not “how can I improve” (they’ll give you everything). Ask “what’s the one thing I do most wrong?” A coach who’s been watching you for a month has a very specific answer. Work on that one thing until the next time you ask.
Watch Muay Thai on YouTube. Not to copy technique, but to see the rhythm. ONE Championship posts full bouts. A fifteen-minute fight teaches you more about distance, timing, and combination structure than any technique breakdown.
Don’t spar until your coach says you’re ready. Light technical sparring might start around week four to six in a good beginner program. Hard sparring is months away. There is no hurry. The injuries you avoid by waiting are worth every extra session on the bags.
Save your money
What you don't need yet
Beginners get pressured to buy a lot of stuff that doesn't help them play
better. Here's what we'd skip on day one.
A home heavy bag in month one — If you're training at a gym, they have bags. You'll improve faster hitting pads with a coach than alone on a bag.
Thai pads (kicking pads) — These are for a trainer or training partner to hold. You cannot use them alone, and your gym has them.
Competition headgear — Only needed for sanctioned sparring, which is typically months away. Your gym will tell you when.
Jump rope — A Muay Thai warmup staple, but you'll survive the first month with a standard jog. Buy one after you know the class format.
Ankle supports — Muay Thai develops ankle strength over time. Supports before you need them create dependence, not protection.
First week
Your first seven days
A short, real plan to get from gear-on-doorstep to actually playing.
Find a dedicated Muay Thai or kickboxing gym near you, not a general MMA school unless Muay Thai is its primary offering. · Action
Google Maps search · Search 'Muay Thai gym' in your city; read reviews for 'beginner friendly'
Order gloves and hand wraps before your first class; you can borrow them once but showing up ready is better. · Buy
Watch a hand-wrapping tutorial before your first session. Wrapping your hands incorrectly is nearly as bad as not wrapping them. · Learn
Show up ten minutes early to your first class. Tell the coach it's your first time; they'll walk you through stance and the basics before drilling starts. · Action
By week two, order shin guards. Pad and partner drilling starts quickly in most beginner programs. · Buy
Expect to be sore in places you didn't know existed: your calves, your hips, your shins. That's the sport. Train twice a week in month one to recover properly. · Action
FAQ
Common questions
Do I need to train at a gym, or can I self-teach Muay Thai?
You can learn basics from YouTube, but Muay Thai's technique (particularly kicks, elbows, and clinch) is genuinely difficult to self-correct. A coach watching your stance and your hip rotation accelerates everything. If a gym isn't accessible, YouTube is better than nothing, but commit to at least a few in-person sessions when you can.
What glove size should I buy: 14 oz or 16 oz?
16 oz for most adults over 140 lbs doing bag and pad work. 14 oz only if you're lighter, or your gym specifically recommends it. The extra weight of 16 oz builds endurance and provides more hand protection. Don't let forum debates overcomplicate this.
How long before I can spar in Muay Thai?
Most gyms introduce light technical sparring around 4–8 weeks for students who attend consistently. Hard sparring (realistic intensity) is typically months away. Your coach will tell you when you're ready; don't rush it. The injuries you avoid by not sparring too early are worth waiting for.
Can I just wear regular athletic shorts to Muay Thai class?
Yes, for your first few classes. Athletic shorts work fine until you start throwing roundhouses regularly; then you'll feel them bunch and restrict your hip rotation. Thai shorts ($20–35) fix this immediately and are worth buying early.
How long does it take to get good at Muay Thai?
You'll feel competent on the heavy bag within a month. Actual sparring ability takes 3–6 months of consistent training. Being genuinely dangerous takes years. The good news: each phase is satisfying and the improvements are obvious.
Is Muay Thai safe for beginners?
Bag and pad work is about as safe as any impact sport. The injury risk rises with sparring, which is why good gyms delay it. Most beginner injuries are overuse (shin splints, sore wrists from poor wrapping) rather than contact injuries. Wrap your hands, use appropriate gloves, and don't skip the shin guards in partner drilling.
United States Muay Thai Federation — The national governing body for sanctioned Muay Thai competition in the US. Rules, rankings, and event listings.
ONE Championship — The world's largest Muay Thai and MMA promotion. Watch bouts for free on YouTube; studying technique at this level is educational even as a beginner.
Sean Fagan: Muay Thai Guy (YouTube) — The best English-language beginner YouTube channel for Muay Thai technique. Sean trained in Thailand and his breakdowns are accessible without being dumbed down.
Lawrence Kenshin Striking Breakdowns (YouTube) — Advanced technique breakdowns of elite fighters. Overwhelming for beginners, invaluable after 3–6 months when you can see what he's describing.
Evolve Daily — Written by coaches from one of the top Muay Thai gyms in Asia. Excellent technique library; search any technique and you'll find a clean breakdown.
r/muaythai — Active community. Use the technique-question threads and the gym-recommendation posts. Ignore the gear debates; they're endless and irrelevant at beginner level.
As an Amazon Associate, JustBeginning earns from qualifying purchases.
We may also earn commission from other affiliate programs linked on this
page. Editorial recommendations are independent; we don't choose
products based on commission rates.
Product prices and availability are accurate as of the date and time
indicated and are subject to change. Any price and availability
information shown on Amazon at the time of purchase will apply.
Our top pickVenum Challenger 3.0 Boxing Gloves - Black/Red


 Best starter