The snatch and clean-and-jerk are the two most technical lifts in sport. The gear list is short: a barbell with real rotating sleeves, bumper plates, and weightlifting shoes. The technique is genuinely hard, but most CrossFit gyms have all the equipment, and the community will coach you for free.
By Colin B. · Published June 12, 2026 · Last reviewed June 12, 2026
Shoes ($100-180), barbell ($150-250), and a 160lb bumper plate set ($180-250) are the core three. Add a belt and chalk to round out near $650.
We earn commission on qualifying Amazon purchases — see our
affiliate disclosure.
Price tiers and budget totals shown above are editorial estimates;
actual Amazon prices vary.
At a glance
Our top pick in each category
The fastest path through this guide — each best-starter pick by category.
Scroll for the budget and upgrade alternatives.
Train at a gym first, at least 2-3 months. Olympic weightlifting has a real technical barrier. Buying a full setup before you understand the movements is like buying race tires before your first driving lesson. Most CrossFit boxes and every dedicated weightlifting club have bars, plates, and platforms. Use theirs while you learn.
Weightlifting shoes are the first personal gear worth owning. Unlike bars and plates (which gyms always have), shoes are always yours. The elevated rigid heel changes your squat mechanics immediately; many beginners are genuinely surprised that shoes clicked their snatch where weeks of technique work hadn't.
Olympic weightlifting and powerlifting are different sports. Olympic lifting is the snatch and clean-and-jerk: speed, explosive power, and precise overhead positioning. Powerlifting is the squat, bench, and deadlift: maximum strength. The gear, programming, and community are distinct. You're here for the barbell overhead work.
The most consequential purchase on this list. Unlike a standard gym bar, a proper weightlifting bar has freely rotating sleeves (so the bar can spin independently of your hands during the snatch and clean, protecting your wrists). Shaft diameter matters: men's bars are 28mm, women's are 25mm. A mid-range bar with good bushing rotation is enough to learn both lifts correctly. The gap between a $200 bar and a $400 Eleiko is real, but you won't feel it until your technique is solid enough to notice.
Barbell — what's the difference?
A few common shapes, each making a different trade.
Men's Bar (20kg / 28mm)
28mm shaft, 20kg: the standard men's competition spec.
Weight
20kg (44 lb)
Shaft
28mm diameter
Length
2.2m
Best for Men, or anyone who prefers a thicker grip
Tradeoff Heavier bar makes overhead work harder for smaller-framed lifters
Proper rotating sleeves on a beginner budget. The 28mm shaft, quality chrome finish, and bushing rotation mean the bar behaves correctly during the pull and receive. Not an Eleiko, but learning good technique on this bar won't hold you back. Available in men's (20kg) and women's (15kg).
What we like
Proper rotating sleeves: the spec Olympic lifting actually requires
Chrome finish holds chalk well for hookgrip
Available in men's (28mm) and women's (25mm) spec
What to know
Bushing rotation won't match a $400+ bar, felt only at advanced loads
Sleeve finish wears faster than premium bars with heavy outdoor use
If you're not sure this sport will stick, a budget bar lets you discover that without dropping $250. The sleeves rotate, the shaft is 28mm, and it holds up to learning-weight loads. Upgrade when your technique is there and you're training seriously.
What we like
Gets you started without the full investment commitment
28mm shaft with standard IWF knurling pattern works with chalk
What to know
Stiff sleeves will feel rough on wrist turnover at heavier weights
Quality control varies; inspect on arrival for straightness
Eleiko makes the bars used at the Olympics. Needle bearings, a specific chrome sleeve finish, and the exact whip profile the sport was designed around. Buy this when you're training four-plus days a week, competing, or want to stop thinking about equipment.
What we like
Needle bearings make sleeve rotation as smooth as the sport requires
IWF-approved: identical spec used in international competition
Generational equipment; Eleiko bars outlast decades of heavy use
What to know
Expensive; only worth it once you're training four-plus days a week
Specialty dealer stock; not always available on Amazon
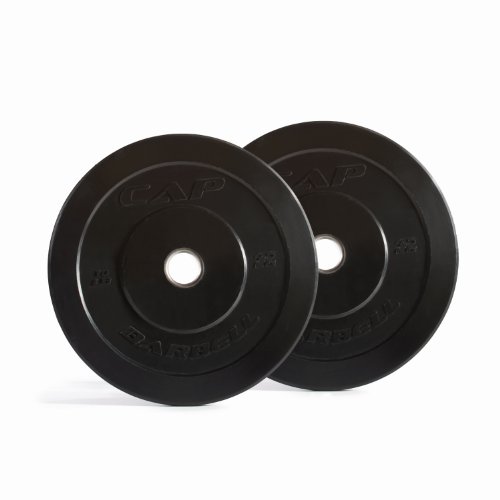
You will miss lifts and drop the bar from overhead. That's the sport. Bumper plates (thick rubber plates that bounce safely) protect your platform, your bar, and your wrists when things go wrong. Using iron plates for Olympic lifting is genuinely dangerous: they crack on drops, damage floors, and the impact can jar your joints. Bumpers are not optional. Start with a 160lb set: two 45s, two 25s, and two 10s covers most beginner combinations.
Best starter
REP Fitness
Black Bumper Plates (45 lb pair)
$199.99 as of Jun 22, 2026
★★★★★Our rating· In Stock
REP Fitness makes one of the most popular recreational bumper plates on Amazon. Solid rubber construction handles regular drops, precise collar fit, and well-reviewed for durability. Buy pairs to build your starter set: two 45s + two 25s + two 10s gives you a versatile 160-pound kit.
What we like
One of the best-reviewed recreational bumper plates on Amazon
Solid rubber handles regular overhead drops without cracking
Precise collar fit keeps plates from shifting mid-lift
What to know
Sold by pair, not as a set; requires multiple cart additions
Standard rubber, not hi-temp; avoid drops on bare concrete or asphalt
CAP is the entry point for bumper plates on Amazon. Reasonable quality at a fair price. The rubber holds up on drops, the collar fit is snug, and a full 160lb set often comes under $200. Not as durable as Rep or Titan long-term, but adequate for beginners.
What we like
A 160lb set often comes in under $200: best value entry point
Tight collar fit keeps plates where you set them
What to know
Strong rubber smell for the first week; air them out first
Durability drops in outdoor/UV exposure year-round
Titan's bumpers have a thinner profile than hi-temp rubber (more plates fit on the bar) and a more consistent, lower bounce that mirrors competition conditions. When you're working up to near-max weights, predictable bar behavior on drops matters.
What we like
Thinner profile fits more weight on a standard 17-inch sleeve
The single piece of gear beginners most consistently say changed their lifting immediately. Weightlifting shoes have a raised heel (typically 0.75–1 inch / 19–25mm) that opens up ankle mobility, lets you squat deeper, and keeps your torso more upright in the receiving position. The rigid sole transfers force directly to the platform instead of compressing like a running shoe. Most beginners notice the difference in their first session wearing them (not subtly, but in their ability to receive the bar in a proper squat).
Best starter
Reebok
Legacy Lifter II
$$$
★★★★★Our rating
The most-recommended entry shoe in the Olympic lifting community. The 22mm heel rise opens ankle mobility immediately, the wide toe box is forgiving while you're still dialing in foot placement, and the double strap locks your heel for overhead work. A shoe you can train seriously in for years.
What we like
22mm heel raise opens ankle mobility: the payoff beginners notice first
Wide toe box is forgiving while you're learning foot placement
Double strap plus laces locks your heel for the catch position
What to know
Runs large; size down a half size if between sizes
Heavier than a running shoe; takes a session or two to adjust
The affordable entry that Chinese national-team coaches and American beginners both use. Solid heel, single strap, and enough rise to improve your squat position. Not as refined as Reebok or Adidas, but perfectly adequate to learn both lifts correctly.
What we like
Under $100 and technically sound for learning both lifts
The heel spec is correct even at this price point
What to know
Velcro strap wears out within a year of regular use
Narrower fit than Reebok or Nike; not ideal for wide feet
The shoe Adidas-sponsored lifters wear at the Olympics. The injection-molded midsole, 21mm heel rise, and double strap give you the most precise, locked-in feel available. For serious competitors or anyone training four-plus days a week, this is the right answer.
What we like
Injection-molded midsole delivers maximum power transfer per lift
Double strap eliminates heel slip in the catch position
The competition standard for serious Olympic lifting
What to know
Rigid sole is uncomfortable to walk in; bring separate shoes
At $180+, overkill until you're consistently training four days a week
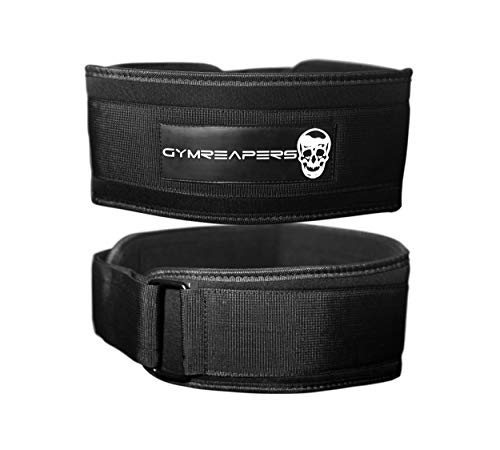
A weightlifting belt (typically 4 inches wide and the same width front to back) provides intra-abdominal pressure during max-effort lifts. Most Olympic lifters train beltless until they've built a core foundation and are working above 85% of maximum. The correct Olympic weightlifting belt is narrower and more flexible than a powerlifting belt, which allows full hip drive. Add it when you're starting to work at near-maximal loads, not before.
Best starter
Harbinger
4-Inch Padded Leather Belt
$35.99 as of Jun 22, 2026
★★★★★Our rating· In Stock
The standard starter belt for Olympic weightlifting. Narrow enough for full hip mobility, stiff enough to feel supportive, and available in sizes XS-XXL. Most lifters train beltless for months and reach for this when programming calls for heavy singles or doubles.
What we like
Uniform 4-inch width is correct for Olympic lifting hip mechanics
Available XS-XXL; measure your waist, don't guess
Stiff enough to feel supportive without a long leather break-in
What to know
Prong buckle takes practice to get on and off quickly mid-session
Leather stiffens in cold temperatures; give it a few sessions to soften
A solid nylon belt at a fraction of the leather price. The velcro closure is faster between sets, and it's stiff enough for training loads. A smart choice while you figure out whether you want lever, prong, leather, or nylon for serious work.
What we like
Under $40 and adequate for all but the heaviest training loads
Velcro closure is faster to cinch than a prong buckle mid-session
What to know
Less stiff than leather; reduced feedback at maximal effort
Velcro wears out after 1-2 years of regular, sweaty use
Chalk is not optional in Olympic weightlifting. The snatch requires a hookgrip (thumb under, fingers wrapped over) and without chalk, the bar rolls on sweaty hands. A $7 block lasts months. Liquid chalk is a reasonable alternative at gyms where block chalk is banned (most commercial gyms). Wrist wraps are optional for most training but useful once you're working heavy jerk repetitions or snatching near your limit.
Best starter
Primo Chalk
1 lb Bucket
$30.25 as of Jun 22, 2026
★★★★★Our rating· In Stock
Block chalk is the standard at every weightlifting club worldwide. Primo's 1-lb bucket goes on evenly, stays where you put it, and lasts months of regular training. If you're at a CrossFit box or dedicated WL club, this is what everyone else is using.
What we like
The worldwide standard for weightlifting grip, proven for good reason
A single block lasts months; the most cost-efficient item on this page
What to know
Banned at most commercial gyms; use liquid chalk there
Messy: you will chalk your shorts, the platform, and the floor
Wrist wraps stabilize the joint in the deep receiving position of the clean and jerk. Optional for most training but useful when programming calls for heavy jerk clusters or max-effort snatches. Remove between sets; they're support, not a permanent brace.
What we like
Stabilizes the wrist in the overhead receiving position
Removable between sets; no effect on warm-up weights
What to know
Leaning on them daily weakens natural wrist stability
Unnecessary for snatch until working near your personal limit
The snatch and clean-and-jerk are teachable, but not self-teachable. Here's what actually happens in your first three months, where beginners get stuck, and what separates the people who make it through from the ones who quietly return to the squat rack.
Olympic weightlifting has a reputation for being inaccessible: the two lifts are famously technical, the gear is specialized, and the community seems like it’s full of people who’ve been doing this for years. All of that is true, and none of it should stop you.
The snatch and clean-and-jerk are learnable. Most people who start with a competent coach can perform a recognizable version of both lifts within a few weeks. Making those lifts good (consistent, confident, and improving) takes months. Here’s what those months actually look like.
Month 1: Positions before weight
The single biggest mistake new Olympic lifters make is adding weight too fast. The barbell teaches you nothing if the movement pattern isn’t correct first. The positions you learn in month one (starting position, first pull, second pull, receiving position) are the positions you’ll be drilling for years. Getting them right at an empty bar matters.
The hookgrip is first. Before anything else, learn to hook. Your thumb wraps around the bar, your fingers wrap over your thumb. It feels wrong for two weeks. Then it feels normal. Then it feels like the only way. Don’t wait until you’re lifting heavy to switch; starting with the hookgrip from day one compresses the discomfort window to its minimum.
Overhead squat before snatch. The receiving position for the snatch is an overhead squat (bar locked out overhead, hips below parallel, weight through your heels). Most beginners discover in their first session that they can’t do this with a broomstick. That’s fine. It’s a mobility and positional strength issue, and it improves with consistent practice. Your coach will give you the right drills.
Clean from the hang before the floor. Learning the clean from the hang position (bar at mid-thigh) first isolates the most important part: the explosive hip extension and the catch in a front squat. Once the hang clean feels natural, adding the full pull from the floor is straightforward.
A month of work at light weights will feel frustratingly slow. It isn’t. The movement patterns you groove here are the foundation of everything that follows. Rushing past them doesn’t save time; it borrows time against a future correction debt that’s painful to pay.
Month 2: The bar starts to move
Somewhere in the second month, the bar starts to feel cooperative instead of adversarial. The positions are getting into muscle memory. You’re not thinking about where your elbows go; you’re starting to feel when the pull was right vs. when you were early.
The third-month snatch revelation. Most beginners have a session around week 6-8 where a snatch just goes: clean, smooth, caught in a deep squat without effort. This is the moment the sport hooks people. It doesn’t feel like lifting a weight; it feels like something much faster and stranger. Most beginners chase this feeling for years.
The transition period is real. Between a technically rough month one and actually competent lifting, there’s a frustrating middle zone where you know what correct looks and feels like but can’t reliably produce it. This is not a sign that you’re bad at this. It’s a sign that you’re a normal human learning a complex motor pattern. Stay consistent.
Weight selection: Add weight only when your coach says the technique is there, not when you think you can handle more. The bar will always feel lighter than your ego wants to lift. The correct response to a good set at 50kg is another set at 50kg, not jumping to 55.
Month 3: The snatch becomes yours
By month three, you should be able to perform the snatch and clean-and-jerk at training weights with consistent, reproducible technique. “Consistent” doesn’t mean perfect; it means you know what went wrong when a lift fails, and you can usually fix it on the next attempt.
Programming starts to matter. Random practice stops working as efficiently as structured programming. Most coaches at this level are running you through classic percentage-based programs. If your gym uses software or a specific program name, look it up. Understanding why you’re doing three sets of three at 70% on Monday and heavy singles on Thursday will help you train smarter.
The community opens up. Olympic weightlifting has one of the most welcoming communities in any technical sport. The people who’ve been doing this for years genuinely want beginners to succeed, partly because the sport desperately needs new participants and partly because teaching is how they think about their own lifting. Ask questions. Ask for form checks. Show up to watch local meets even before you compete.
Your first competition: Many coaches recommend entering a local meet within your first year, even if your numbers are modest. The experience of a sanctioned lift (the calls, the attempt clock, the crowd) is completely different from a training lift, and the only way to learn it is to do it. Entry-level meets are full of beginners and almost universally friendly.
The things beginners get wrong (and how to fix them)
They skip the coach. YouTube can teach you what correct looks like. A coach can see what you’re actually doing and the difference is irreducible. You cannot self-correct the things you can’t see. Find a coach for at least the first three months.
They add weight to cover technical problems. A heavy lift that’s technically wrong is harder to fix than a light lift that’s technically wrong. Ego loading early in the learning curve is one of the most reliable ways to build bad habits that follow you for years.
They train beltless technique for months and then wonder why their beltless numbers are lower than gym training. Start training without a belt and stay beltless for most training. The belt comes out for heavy singles and near-maximal attempts, not for warm-up sets.
They give up during the second month. The middle of the learning curve (where you know what good looks like but can’t reproduce it) is the hardest part. Almost everyone who makes it past month two sticks with the sport for years. The drop-off is almost entirely in the first eight weeks.
What to do at month four
If you’ve made it to month four with consistent coaching and regular practice, you are no longer a beginner. You’re an early-intermediate lifter with a motor pattern, a training history, and an opinion about whether you prefer the snatch or the clean-and-jerk. (Most people prefer one and work harder on the other.)
A few things that move the needle from here:
Enter a local meet. USA Weightlifting keeps a meet calendar by state. Local meets in the beginner age/weight classes are friendly, often held at CrossFit boxes, and a genuinely fun day.
Start a structured program. Greg Everett’s free programs at Catalyst Athletics are a good starting point. Many coaches write custom programs once they understand how you respond to training stress.
Add assistance work that supports the lifts. Overhead squats, front squats, Romanian deadlifts, and pull variations. Your coach will have opinions. The lifts improve when the supporting strength improves.
Save your money
What you don't need yet
Beginners get pressured to buy a lot of stuff that doesn't help them play
better. Here's what we'd skip on day one.
Competition bumper plates ($300+ IWF-spec) — Training plates work fine. Competition spec matters at sanctioned meets, not in your garage gym.
A $400+ Eleiko or Werksan bar — You'll learn on a mid-range bar. The difference only registers once your technique is dialed in.
A competition singlet — Required for sanctioned meets. Until you're actually competing, gym shorts and a t-shirt are fine.
Fractional plates (0.5kg/1kg micro-load discs) — Useful at intermediate and advanced loads. At beginner weights, you're adding 5-10kg at a time.
A built weightlifting platform ($400-600) — Horse-stall mats from Tractor Supply (~$50 total) absorb the same drops and cost a fraction.
Knee sleeves — For squatting heavy in powerlifting, yes. Olympic lifting involves more squatting but rarely benefits from sleeves until advanced loads.
First week
Your first seven days
A short, real plan to get from gear-on-doorstep to actually playing.
Find a CrossFit gym or USA Weightlifting club for a trial class. Use their equipment; don't buy anything yet. · Action
How is Olympic weightlifting different from CrossFit?
CrossFit incorporates the snatch and clean-and-jerk as conditioning movements, often at lighter loads and higher reps. Olympic weightlifting as a sport is about maximal load for a single lift; the training is slower, heavier, and more focused on perfecting one or two movements. Many people start with CrossFit and migrate to dedicated lifting. The gear is identical.
Do I need a coach or can I learn from YouTube?
You need a coach, at least for the first few months. Olympic lifting has movement patterns that are genuinely difficult to self-correct from video; a trained eye catches the things a mirror misses. One session a week with a good coach is worth more than five self-directed sessions. After 3-6 months of coached practice, the YouTube rabbit hole opens up usefully.
Why can't I use iron plates instead of bumper plates?
Iron plates crack and shatter when dropped from overhead. They also damage platforms, transmit impact through your joints differently, and sound like a car crash in any shared space. More fundamentally: Olympic lifting technique requires dropping the bar when a lift goes wrong. Iron plates make that unsafe. Bumpers are not optional.
How long does it take to do a real snatch?
Most people can perform a technically passable snatch within 2-4 weeks of regular coaching. A smooth, consistent snatch at meaningful weight takes 6-12 months. The clean-and-jerk comes faster. The bottleneck is almost always mobility and positional strength, not learning the movement pattern itself.
Do I need a home gym or can I train at a commercial gym?
Most commercial gyms are not suitable for Olympic lifting; they ban chalk, the floors aren't rated for drops, and the bumper plate selection is often nonexistent. A dedicated CrossFit box or USA Weightlifting club is the right environment. Home gym is ideal if you have space, but it requires the full equipment investment up front.
What total budget should I expect to start?
If you're training at a gym that provides equipment, your starter cost is just weightlifting shoes ($100-180) and chalk ($7). If setting up a home gym, expect $400-700 for shoes, a mid-range barbell, and a 160lb bumper set. Add a belt and flooring mats and you're closer to $600-800.
USA Weightlifting — The national governing body. Find sanctioned clubs, coaches, and local competitions. The club finder is the best way to find a coached environment near you.
Catalyst Athletics — Greg Everett's training resource: one of the most comprehensive English-language libraries of weightlifting technique, programming, and coaching notes. The free articles alone are worth hours.
Hookgrip (YouTube) — The definitive slow-motion competition footage channel. Watch elite lifters at multiple angles. Invaluable for understanding what correct positions actually look like in practice.
Clarence Kennedy (YouTube) — Elite lifter with unusually clear technical explanations. His snatch and clean-and-jerk breakdowns are better than most coaching books.
r/weightlifting — Active community for form checks, programming questions, and equipment advice. The wiki has beginner FAQs and program recommendations.
All Things Gym — Aggregator of competition footage, technique videos, and interviews from the international weightlifting world. A good place to watch top-level lifting and track international results.
As an Amazon Associate, JustBeginning earns from qualifying purchases.
We may also earn commission from other affiliate programs linked on this
page. Editorial recommendations are independent; we don't choose
products based on commission rates.
Product prices and availability are accurate as of the date and time
indicated and are subject to change. Any price and availability
information shown on Amazon at the time of purchase will apply.


 Best starter