Beginner's guide

So you're getting into rebounder fitness

A mini trampoline sounds like a toy until you realize NASA studied rebounding in 1980 and called it one of the most efficient forms of exercise. Joint-friendly cardio, lymphatic benefits you can't get standing still, and a workout that fits in 10 minutes in your living room. Here's what to buy and what to skip.

By Colin B. · Published June 14, 2026 · Last reviewed June 14, 2026

The 60-second version

If you only buy 3 things to start:

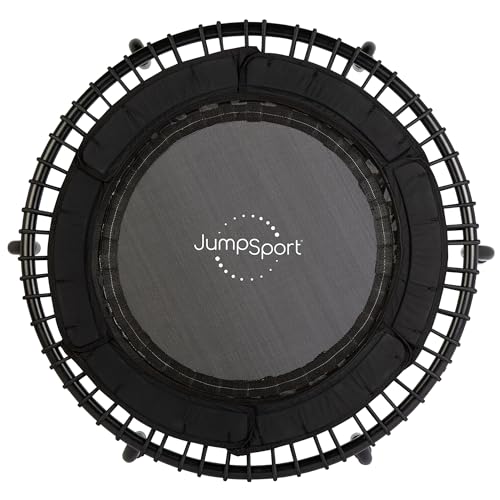
  1. JumpSport 250 Fitness Trampoline — The quality-to-price leader in spring rebounders. Built to last and smoother than budget models.
  2. JumpSport Stabilizer Handle Bar — Balance bar that makes beginning workouts less exhausting, lets you focus on form instead of balance.
  3. LA ACTIVE Non Slip Yoga Grip Socks — The only footwear you need. Grip socks give traction without deadening the bounce feel underfoot.
Budget total
$150
Typical total
$320
A quality spring rebounder plus stabilizer bar runs about $300. Add grip socks and you're fully equipped. Premium bungee models push $500-700 but last decades.

We earn commission on qualifying Amazon purchases — see our affiliate disclosure. Price tiers and budget totals shown above are editorial estimates; actual Amazon prices vary.

At a glance

Our top pick in each category

The fastest path through this guide — each best-starter pick by category. Scroll for the budget and upgrade alternatives.

CategoryTop pickPriceWhere to buy
ReboundersJumpSportJumpSport 250 Fitness Trampoline$$$ See on Amazon →
Stabilizer BarsJumpSportJumpSport Stabilizer Handle Bar$$ See on Amazon →
Workout FootwearLA ACTIVELA ACTIVE Non Slip Yoga Grip Socks$ See on Amazon →
Resistance BandsBodylasticsBodylastics Stackable Tube Resistance Bands$$ See on Amazon →
Protective MatsGorilla MatsGorilla Mats Premium Large Exercise Mat$$ See on Amazon →
Before you buy anything

A few things worth knowing first

Spring vs. bungee is the most important decision you'll make, and the one most people don't know about. Spring-frame rebounders (most models under $300) give a traditional bouncy feel. Bungee-cord models like Bellicon ($400-700) rebound with a softer, slower arc that puts dramatically less stress on knees and ankles. If you have joint issues, save up for bungee. If you're healthy and just want to start, quality spring is fine.

Check the weight rating before you order. Budget rebounders often cap at 220-250 lbs. The quality brands (JumpSport, Needak, Bellicon) rate their frames at 300+ lbs. This also affects longevity: a frame bouncing at 90% capacity fails faster than one with headroom.

You need at least 3 feet of horizontal clearance and about 9 feet of ceiling height. Most living rooms are fine. Ceiling fans are the enemy. Measure before you assemble anything.

The gear

What you actually need

people sitting on black metal chairs on brown rocky mountain during daytime

Photo by Memento Media on Unsplash

Rebounders

Your rebounder is the only piece of equipment that actually matters here. The rest is optimization; this is the workout. The fundamental choice is spring or bungee: spring-frame rebounders use metal coils, typically cost $60-300, and deliver a bouncier, higher-impact feel. Bungee-cord models use elastic loops instead of springs, creating a softer, nearly silent rebound that is easier on knees and ankles. If you have any joint sensitivity, save up for bungee. If you are starting from healthy, a quality spring model works well and costs 3-4x less.

Rebounders — what's the difference?

A few common shapes, each making a different trade.

Spring Frame

Traditional suspension; bouncy feel, most budget-friendly.

Suspension
Metal coil springs
Price range
$60-300
Noise
Moderate (spring squeak)

Best for Beginners, casual use, those wanting to try rebounding without a large upfront cost

Tradeoff More joint impact and noise than bungee; springs lose tension with heavy use

Bungee Cord

Softer, quieter bounce; gentler on joints, costs more.

Suspension
Elastic bungee loops
Price range
$300-700+
Noise
Near-silent

Best for Anyone with knee or ankle concerns, daily users, apartment dwellers

Tradeoff Significantly more expensive; replacement bungee sets add ongoing cost

JumpSport 250 Fitness Trampoline Best starter
JumpSport

250 Fitness Trampoline

$299.99 as of Jun 22, 2026

Our rating · In Stock

JumpSport is the benchmark name in spring-frame rebounders, and the 250 is where the quality jump happens. Arched leg design distributes weight more evenly than straight-leg budget models, and the safety enclosure frame keeps the mat edges locked in. At around $250, it costs twice the budget options, but it will outlast two or three of them. Replacement parts are actually available.

What we like

  • Arched leg design gives a smoother, more even bounce than cheaper frames
  • Safety enclosure keeps the mat edges from lifting during jumps
  • Replacement parts available; built to last a decade or more

What to know

  • About twice the price of budget spring rebounders
  • Stabilizer bar is a separate add-on purchase
Budget pick
Stamina

36 Inch Fitness Trampoline with Foldable Frame

$

Our rating

Under $60 and folds flat for apartment storage. Uses 30 tension bands instead of metal coil springs, so it's quieter than classic spring models and easier to fold up clean. Weight-rated to 250 lbs. A reasonable trial purchase before committing to a quality unit. Don't count on daily high-intensity use from it; treat it as a gateway rebounder.

What we like

  • Under $60 and folds flat for apartment closet storage
  • Tension bands run quieter than metal coil spring models

What to know

  • Shallower bounce arc than quality spring or bungee rebounders
  • 250 lbs weight limit; lower than premium brands
bellicon 39" Bungee Rebounder Upgrade pick
bellicon

39" Bungee Rebounder

$$$$

Our rating

bellicon is what serious rebounders keep coming back to. Bungee suspension means near-silent bouncing, a silky rebound arc, and far less stress on knees and ankles than any spring model. The frame is built to last decades, and the bungee cords are replaceable when they wear out. At $400-600 it is a real commitment, but the cost-per-session math works out over years of use.

What we like

  • Bungee suspension is near-silent, safe for apartments day or night
  • Lower joint impact than any spring model; important for knee health
  • Built to last decades with replaceable bungee cord sets

What to know

  • Starting at $400-600, costs 3-5x more than spring alternatives
  • Bungee cords need replacing every 2-5 years at additional cost

Stabilizer Bars

The stabilizer bar is the most underrated item on this list, and the one most beginners skip and later regret. It is a pole that anchors to your rebounder frame and gives you a handhold while you bounce, so you can focus on the workout instead of managing your balance. For the first few weeks especially, it is the difference between 10 focused minutes and 10 anxious ones. Most people use it through the first month and then set it aside as their coordination improves. Some keep it permanently for higher-intensity moves where freestanding balance would be a distraction.

JumpSport Stabilizer Handle Bar Best starter
JumpSport

Stabilizer Handle Bar

$111.99 as of Jun 22, 2026

Our rating · In Stock

Height-adjustable, dual-grip design with a foam-padded handle, built to attach to JumpSport frames without wobble. The adjustable pole fits adults from 5'0" to about 6'4" without modification. Most beginners use it for the first 4-6 weeks and then take it off. Leave it on as long as you need it; there is no shame in the assist.

What we like

  • Adjustable height fits adults 5'0" to 6'4"
  • Foam-padded dual grip lets you hold one or two handed
  • Removes the balance anxiety from your first weeks on the rebounder

What to know

  • JumpSport-proprietary fit; may not clip cleanly to other brands
  • Adds bulk in storage; pole doesn't fold flat
Budget pick

Universal Rebounder Stability Bar

$69.00 as of Jun 22, 2026

Our rating · In Stock

A universal-fit stabilizer bar that slips over most round-tube rebounder legs. Works with Stamina, Marcy, and most generic spring rebounders at about half the price of brand-matched options. Not compatible with JumpSport frames; JumpSport owners need the JumpSport bar above.

What we like

  • Universal sleeve fits most non-JumpSport round-frame mini trampolines
  • About half the price of brand-matched stabilizer bars

What to know

  • NOT compatible with JumpSport frames; check your brand first
  • May wobble slightly on non-standard leg diameters

Workout Footwear

You don't need special shoes for rebounding, which is why this category exists to save you from buying the wrong thing. Most experienced rebounders work out in grip socks or barefoot: the mat surface has enough give that the stiff sole of a running shoe works against you. Grip socks provide traction without deadening the bounce feedback underfoot. If you insist on shoes, a flexible minimalist cross-trainer with flat sole and low heel drop is the right call. Never wear thick-soled running shoes on a rebounder; the cushioned heel disrupts the natural biomechanics of bouncing and can throw off your balance.

LA ACTIVE Non Slip Yoga Grip Socks Best starter
LA ACTIVE

Non Slip Yoga Grip Socks

$22.99 as of Jun 22, 2026

Our rating · Only 4 left in stock - order soon.

The simplest answer to rebounder footwear. Rubber-dot grip pattern on the sole keeps you from sliding, thin-enough fabric preserves the bounce feedback underfoot, and they wash easily after sweaty sessions. A two-pack runs under $15. Most rebounders end up using these exclusively once they try working out in them.

What we like

  • Rubber-dot sole keeps you from sliding without deadening bounce feel
  • Under $15 for a pack; replace when grip diminishes

What to know

  • Rubber dots wear off faster with daily high-intensity use
  • Not warm enough for cold garage sessions in winter
Whitin Minimalist Barefoot Training Shoes Specialty pick
Whitin

Minimalist Barefoot Training Shoes

$$

Our rating

For rebounders who want foot protection without sacrificing bounce feel: thin flexible sole, zero heel drop, and a wide toe box that doesn't constrict mid-bounce. The flat sole means force transfers correctly on the trampoline mat. These also double as light gym shoes, making them more versatile than rebounder-only footwear.

What we like

  • Zero heel drop matches rebounder biomechanics better than any trainer
  • Wide toe box gives natural toe splay during jumps

What to know

  • Transition period required if you normally wear cushioned shoes
  • No ankle support; not for high-impact moves outside the rebounder

Resistance Bands

Resistance bands turn a lower-body cardio workout into a full-body session. Tube bands with handles let you do bicep curls, shoulder presses, and lateral raises while you bounce, keeping your heart rate up while your upper body works. After about a week it becomes automatic and you won't think about balance anymore. Loop bands are less useful during active bouncing (they work better for floor-based leg and glute work), so start with a tube-and-handle set for rebounder-specific use. Light to medium resistance is plenty while you're actively jumping.

Bodylastics Stackable Tube Resistance Bands Best starter
Bodylastics

Stackable Tube Resistance Bands

$49.97 as of Jun 22, 2026

Our rating

Stackable tube bands with padded handles mean you can dial resistance from 3 to 96 lbs by adding tubes, so you can start light while bouncing and add resistance as coordination improves. Anti-snap construction matters when you're using these overhead with momentum. Bodylastics has been in this market long enough that quality issues are engineered out.

What we like

  • Stackable from 3 to 96 lbs; start light and build resistance over time
  • Anti-snap design matters when using bands overhead in motion
  • Padded handles prevent chafing during longer sessions

What to know

  • Pricier than unbranded alternatives at equivalent spec
  • Multiple tubes require organization to keep untangled between sessions
Fit Simplify Resistance Loop Bands (Set of 5) Budget pick
Fit Simplify

Resistance Loop Bands (Set of 5)

$9.98 as of Jun 22, 2026

Our rating · In Stock

The classic entry-level loop band set. Better for floor-based leg and glute work than arms-up bouncing, but at under $15 for five resistance levels, worth having for warm-up and cool-down portions of a rebounder session. Most people end up with both tube bands and loop bands within a month.

What we like

  • Under $15 for five resistance levels; the easiest entry into bands
  • Latex-free options available for sensitive skin

What to know

  • Loop style tends to roll during jumping; better suited for floor work
  • Thinner bands in the set lose elasticity faster with daily use

Protective Mats

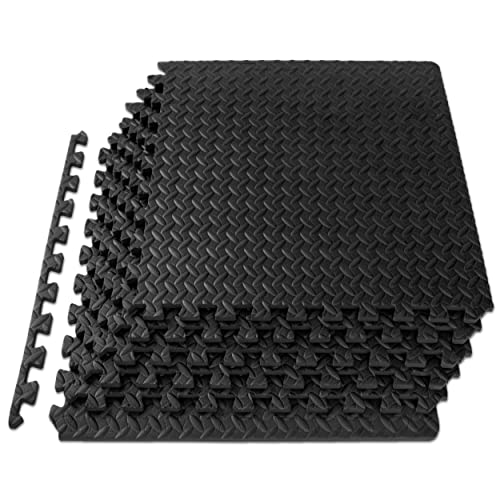
An often-forgotten purchase: what goes under the rebounder. The six to eight legs of a mini trampoline can scratch or dent hardwood floors with repeated impact, and the bouncing transmits vibration to the floor below, which matters in apartments. A thick rubber mat absorbs both problems. You want it to extend at least a foot past the rebounder's diameter on each side. Interlocking foam tiles are cheaper if you want to cover more floor area. Neither is exciting to buy, but your downstairs neighbor and your floor refinishing bill will thank you.

Gorilla Mats Premium Large Exercise Mat Best starter
Gorilla Mats

Premium Large Exercise Mat

$$

Our rating

A 6x4-foot premium rubber mat that extends well past a standard 40" rebounder on every side. Non-slip bottom stays put on hardwood and tile, and the 6mm thickness absorbs enough vibration that you can bounce without transmitting impact downstairs. Cleans with a damp cloth. This is the mat most home gym owners recommend and never replace.

What we like

  • 6x4 feet covers the rebounder footprint with ample clearance
  • 6mm rubber absorbs vibration; reduces noise transmitted to floors below
  • Non-slip bottom stays put on hardwood during intense bouncing

What to know

  • New rubber odor lasts 3-7 days; air out before use
  • About 14 lbs; not convenient to reposition daily
ProsourceFit Puzzle Exercise Mat Tiles Budget pick
ProsourceFit

Puzzle Exercise Mat Tiles

$26.99 as of Jun 22, 2026

Our rating · In Stock

Interlocking foam tiles let you cover exactly the area you need without buying a single oversized mat. Each tile is 24x24 inches, configurable around the rebounder legs to protect your floor. At $25-35 for a starter set, a smart choice for renters who don't want a permanent mat footprint.

What we like

  • Configurable tiles protect exactly the floor area you need
  • Under $35 to cover a full rebounder footprint

What to know

  • Foam compresses over time; less vibration-absorbing than rubber
  • Tiles can shift apart during intense bouncing without edge connectors
Going deeper

Your first month of rebounder fitness

The first session feels a little silly. By the end of month one, you'll understand why people keep a rebounder in the corner of every room they can.

Nobody takes their first rebounder session seriously. You step on, do a few tentative bounces, feel slightly ridiculous, and wonder if you made a mistake ordering this thing. This is normal. It passes.

By the end of your first month, you’ll have a workout that takes 20 minutes, fits in a corner of your living room, and is easier on your joints than anything else you can do that raises your heart rate the same amount. Here’s how to actually get there.

Week 1: Learn the bounce

Your first session should be short. Ten minutes. No goals beyond “get comfortable on the thing.”

Start with health bouncing: both feet stay in contact with the mat, you’re just shifting your weight up and down, a gentle rhythmic sway. This is not as boring as it sounds. It activates your lymphatic system, which has no pump of its own and depends entirely on movement to circulate. Even this minimal bouncing does something running on pavement can’t.

Once health bouncing feels natural (usually by session two), add small jumps where your feet actually leave the mat by a few inches. Keep your knees slightly bent on landing. Your body is figuring out the new physics of a flexible surface, and it needs a few sessions to calibrate.

If you ordered a stabilizer bar, use it. The point of a balance aid isn’t admitting weakness; it’s letting you pay attention to the workout instead of balance management. Most people stop needing it within 3-4 weeks.

What to expect this week: Your calves and ankles will be mildly sore after session one or two. This is the stabilizer muscles that steady you on the flexible surface, and they catch up quickly. By day four or five, the soreness is gone and you’ll be thinking about what to do with your arms.

Week 2: Add structure

By week two, you can start following a routine instead of improvising. YouTube has a decade of free rebounder content. Search “rebounder fitness beginner” and pick a 15-20 minute video. JumpSport’s channel and the Cellerciser community are both good starting points.

A basic session structure that works:

  • 3 minutes: health bouncing to warm up
  • 12-15 minutes: active movement (alternating legs, high knees, jumping jacks, twist jumps)
  • 3 minutes: health bouncing to cool down

Don’t add resistance bands yet. The goal this week is getting the active movement phases to feel fluid and automatic. Once your feet know what they’re doing, adding arm work is easy. Adding it before you’re stable just creates two problems at once.

Monitor your ceiling clearance. Most living rooms are fine, but ceiling fans are a real hazard. If you caught yourself ducking, either move the rebounder or remove the fan.

Week 3: Build intensity and add arms

This is when the workout starts feeling like a real cardio session. Your conditioning has improved faster than you’d expect, and 20 minutes at moderate intensity will actually challenge you now.

Add resistance tube bands if you have them. Hold one handle in each hand with the bands running behind your back, and do bicep curls, overhead presses, and lateral raises while you bounce. It sounds complicated but your body figures it out quickly. The result is a full-body session in the same 20 minutes.

Intensity options for this week:

  • High knees held for 30 seconds at a time (harder than it looks on a rebounder)
  • Twist jumps: rotate your hips left and right while your upper body stays square
  • Sprint bouncing: feet moving as fast as possible for 20-second intervals

Your heart rate will be meaningfully elevated by the end of these sessions. That is the point.

Week 4: Make it a habit

By week four, the rebounder has either become something you use or something that’s migrating toward the closet. The difference is usually scheduling rather than motivation.

The people who stick with rebounding tend to bounce at the same time every day, often first thing in the morning before decisions get in the way. Ten minutes of morning health bouncing is a lower bar than a gym trip, and the cumulative effect of daily short sessions adds up faster than weekly longer ones.

Signs you’ve actually built the habit:

  • You miss it when you skip a day
  • You’ve started watching things (TV, YouTube) while bouncing without thinking about the bouncing
  • You’ve had a session where you were genuinely out of breath

What to do in month two

If you’re here after a month, a few things worth adding:

  • Vary the routine. The rebounder adapts fast; changing the movement patterns keeps adaptation going. Try a yoga-style cool-down stretch sequence directly after bouncing, or add a 5-minute weighted vest session (lightweight, once you’re comfortable with the impact).

  • Consider the upgrade path. If you started on a budget spring model and you’re bouncing daily, notice whether your knees or ankles are complaining. That’s the signal that a bungee rebounder might be worth the investment. The difference in joint feel is not subtle.

  • Track something. Heart rate, session length, or even just a tally of days bounced. Tracking makes the habit visible and gives you something to maintain.

The rebounder won’t win any cool points at the gym. It sits in your living room and you look slightly goofy using it for the first two weeks. And then it becomes the thing you use more consistently than any other piece of fitness equipment you’ve ever owned, because the barrier to starting a session is zero.

Save your money

What you don't need yet

Beginners get pressured to buy a lot of stuff that doesn't help them play better. Here's what we'd skip on day one.

  • A weighted vest — Adds too much impact force for beginners on a spring rebounder. Build a consistent routine first; weighted vest work comes later, if at all.
  • A rebounder cover — Only useful for outdoor storage. A simple sheet handles indoor dust. Skip for the first year.
  • Expensive video subscriptions — YouTube has years of free rebounder content. JumpSport's channel and Cellerciser's beginner series cost nothing and cover everything you need for the first six months.
  • Multiple resistance band sets — One tube band set covers everything for the first three months. Add loop bands once you know which exercises you're actually doing regularly.
  • A Bellicon if you're just testing rebounding — The bungee premium is worth it for daily serious use. If you're not sure the habit will stick, start with a quality spring model and upgrade once you know.
First week

Your first seven days

A short, real plan to get from gear-on-doorstep to actually playing.

  1. Find a spot with at least 3 feet of horizontal clearance on all sides and 9 feet of ceiling height. Measure before you order. · Action
  2. Order your rebounder and a stabilizer bar together so they arrive at the same time. · Buy
  3. Order grip socks if you don't already own some. · Buy
  4. Watch one short beginner rebounder routine on YouTube before your first session. Ten minutes of familiarity beats ten minutes of guessing what to do with your arms. · Learn
  5. Start with 10 minutes of basic health bouncing on day one. Feet barely leave the mat; it's a gentle up-and-down. Your lymphatic system responds even to this. · Action
  6. Work up to 20 minutes by day 4 or 5. Rebounder conditioning builds fast because the cardiovascular load is efficient without being brutal. · Action
  7. Add resistance band arm work in week 2, not week 1. Get the bounce rhythm established first. · Action
FAQ

Common questions

How much ceiling clearance do I need?

Plan on 9 feet minimum from floor to ceiling. The rebounder mat sits about 9-10 inches off the floor, and a full jump adds another 12-18 inches at the peak. Standard 8-foot ceilings work for gentle health bouncing with feet barely leaving the mat, but you'll eventually catch a ceiling fan. If you have 8-foot ceilings, do health bouncing only and skip the jumping jacks.

What's the difference between spring and bungee rebounders?

Spring-frame models use metal coil springs and are the most common: $60-300, bouncier, and higher-impact. Bungee-cord models like Bellicon use elastic loops that create a softer, slower arc with far less joint stress. Bungee is notably quieter (no spring squeak), easier on knees and ankles, and typically built to last longer. They cost 3-5x more. If joint health is a concern, bungee is worth saving for.

Is rebounding actually low-impact? I have bad knees.

Spring rebounders are lower impact than running but still have meaningful joint load. Bungee rebounders are genuinely low-impact and are often recommended for people with osteoporosis or knee concerns. If you have a specific knee injury, check with a physical therapist first, but bungee rebounding is generally well-tolerated by people who can't comfortably run.

Can my apartment neighbors hear me bouncing?

Spring rebounders transmit noticeable vibration through the floor. Bungee rebounders are much quieter. A thick rubber mat under any rebounder absorbs a significant amount of impact before it reaches the floor below. Morning sessions on a spring rebounder without a mat will likely bother downstairs neighbors; evening sessions on a bungee model with a rubber mat probably won't.

How long should each session be?

Start with 10 minutes and work up to 20-30 minutes over your first two weeks. The cardiovascular efficiency of rebounding is real: 20 minutes of active bouncing delivers a meaningful aerobic session. Some practitioners do three 10-minute micro-sessions throughout the day instead of one long workout. Both approaches work.

Do I need special shoes?

No. Most experienced rebounders work out barefoot or in grip socks. The flexible mat surface benefits from foot contact rather than stiff soles. If you want shoes, choose a flat, flexible cross-trainer with minimal heel drop. Never use thick-soled running shoes on a rebounder; the cushioned heel disrupts the natural biomechanics of bouncing.

Going further

Where to next

Browse by category

Authoritative sources

  • NASA Rebound Exercise Study (1980) — The original NASA study comparing rebounding to treadmill running, published in the Journal of Applied Physiology. The research that launched the fitness community's interest in rebounders.
  • JumpSport Fitness YouTube — Free beginner and intermediate workout videos for JumpSport rebounders, applicable to most brands.
  • Cellerciser YouTube — Long-running rebounding channel with health benefits content and instructional technique. Good entry point for total beginners.
  • r/Rebounding — Active subreddit with gear comparisons, workout routines, and real-user reviews. Search the archives before posting a gear question; most have been answered.
  • Bellicon YouTube — Free workout classes ranging from 5 to 45 minutes. Useful even if you bought a different brand.