Stained glass is one of those crafts that looks museum-serious until you try it. Then you realize the fundamental moves, score, snap, foil, solder, are learnable in a weekend. Here's what you actually need to start the Tiffany (copper foil) method, and why the gear decisions that trip up most beginners are simpler than the forums make them seem.
By Colin B. · Published May 24, 2026 · Last reviewed June 8, 2026
A solid starter kit, oil cutter, foil supplies, basic soldering iron, and practice glass, runs $90–175. A grinder adds $80–130 and is optional for first projects but quickly becomes essential.
We earn commission on qualifying Amazon purchases — see our
affiliate disclosure.
Price tiers and budget totals shown above are editorial estimates;
actual Amazon prices vary.
At a glance
Our top pick in each category
The fastest path through this guide — each best-starter pick by category.
Scroll for the budget and upgrade alternatives.
Take a studio class first if one's nearby. A 2–3 hour intro class gives you hands-on time with a grinder, iron, and real glass, and you'll know immediately if the hobby clicks. You'll still want to buy your own tools afterward, a class doesn't block the purchase, it makes it smarter.
Decide on copper foil or lead came before spending anything. Copper foil (the Tiffany method) is the right answer for most beginners: more forgiving, works on small intricate pieces, and has vastly more tutorial support. Lead came is the classic cathedral-window technique, great for large geometric panels, but harder to learn without an instructor. This guide covers copper foil.
The glass cutter is your single most important skill tool, not the grinder, not the iron. A good score makes everything downstream easier. Don't buy the cheapest cutter you can find just to save $15.
Your cutter scores a shallow groove through the glass surface; you then snap along that score by applying pressure on either side. The quality of the score determines whether the snap is clean or ragged. The main choice is oil-fed vs. dry. Oil-fed cutters self-lubricate with every score and keep the carbide wheel sharp much longer, they're the default for stained glass. Dry cutters need manual oiling or the wheel dulls fast, particularly on textured and cathedral glass.
Glass Cutters — what's the difference?
A few common shapes, each making a different trade.
Oil-Fed Cutters
Built-in reservoir lubricates the wheel with every score. Cleaner lines, longer wheel life.
Lubrication
Automatic (reservoir)
Wheel life
Long, thousands of scores
Price range
$20–70
Best for Anyone committing to stained glass as a regular hobby
Tradeoff Costs more upfront; reservoir needs occasional refilling with cutting oil
The Toyo TC17B is the straight self-oiling cutter most stained glass instructors hand beginners on day one. Made in Japan, it self-lubricates with every score, keeping the carbide wheel sharp through an afternoon of practice cuts. Comfortable pencil grip, accurate enough for intricate patterns, and durable enough that you'll still be using it well after you've advanced past beginner work.
What we like
Self-oiling reservoir keeps the wheel lubricated on every score
Carbide wheel scores cleanly on cathedral, textured, and sheet glass
Trusted by instructors and hobbyists for decades
What to know
Reservoir requires proper cutting oil, WD-40 ruins the wheel
Straight grip isn't for everyone; some prefer pistol-grip ergonomics
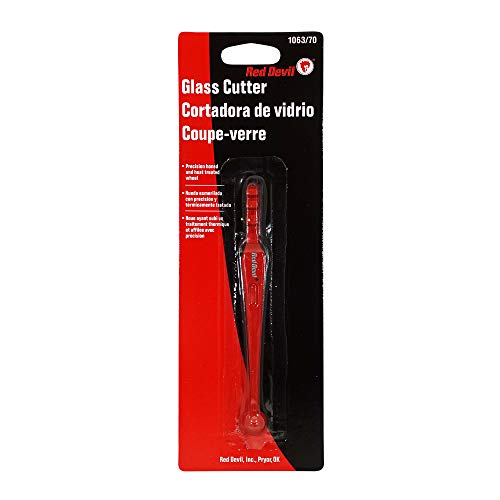
Under $10 and adequate for your first few sessions. It's a dry cutter, dip the wheel in cutting oil before each score and it works well enough to learn the basics. Once you've done a project or two and know stained glass is sticking, upgrade to a self-oiling cutter. You'll feel the difference immediately.
What we like
Under $10, low risk if you're testing the hobby first
Works fine with proper oiling technique for beginner straight cuts
What to know
Dry wheel dulls noticeably after a few sessions without diligent oiling
Not suitable for extended sessions or intricate pattern work
★★★★☆Our rating· Only 1 left in stock - order soon.
Once you're cutting for an hour or more per session, a pistol-grip cutter is a genuine ergonomic improvement. Toyo's pistol grip applies natural downward pressure without straining your wrist, you'll notice the difference after the first ten minutes. Same reliable self-oiling carbide wheel mechanism, better handle. Most serious hobbyists make this upgrade within six months.
What we like
Pistol grip reduces wrist fatigue during long cutting sessions
Same reliable Toyo carbide wheel and self-oiling mechanism as the TPL-1
Most popular cutter among intermediate and advanced hobbyists
What to know
Costs 3× the TPL-1, wait until you know you're sticking with the hobby
Pistol grip takes a session or two to adjust to if switching from straight
A glass grinder removes sharp edges and lets you shape curved pieces that can't be snapped by hand. You don't strictly need one for your first small geometric project, straight-line patterns can be cut and snapped without grinding. But the moment your design has any curve, the grinder is what makes accurate, consistent pieces possible. Most beginners realize they need one after their first project. Buying it up front saves a frustrating return trip to the store.
Best starter
Glastar
Super Star II Glass Grinder
$$$
★★★★★Our rating
The Glastar Super Star II is one of the most recommended entry-level grinders in the stained glass community. Generous work surface for holding larger pieces, a 1/8" diamond-coated bit that handles most beginner cuts, and a water reservoir that keeps grinding cool. Solid motor that handles a few hours of regular hobbyist use without complaint.
What we like
Generous work surface handles larger glass pieces comfortably
Diamond-coated bit resists wear under regular hobbyist use
Widely recommended and well-supported in the stained glass community
What to know
Larger footprint than competitors, needs dedicated workspace
Replacement bits cost $25–40 when they eventually wear out
Inland's WizCG is a compact, quieter alternative to the Glastar with a smaller footprint, the right choice if workspace is limited or you plan to grind for longer sessions. Solid diamond-coated bit and a build quality that holds up to regular hobbyist use without complaint.
What we like
Quieter motor than most comparable grinders
Integrated mirror lets you see your pattern while grinding curves
What to know
More vibration on aggressive grinds than the Glastar Super Star II
Slightly less work surface, not ideal for large panel pieces
Copper foil is the adhesive-backed tape you wrap around each piece of cut glass before soldering, it creates the characteristic lead-line look of Tiffany-style work and holds the assembly together. The 7/32" width is the right default for beginners: wide enough to give you a solid soldering surface, narrow enough to look right on most projects. You'll also need a burnisher (sometimes called a fid) to press the foil firmly against the glass edge so it doesn't lift during soldering.
Best starter
Venture
7/32 Inch Black Backed Copper Foil 36 Yards
$
★★★★★Our rating
Venture foil is the community standard, consistent adhesive that grips glass firmly without curling at the edges. The 7/32" width is right for most beginner projects: wide enough to handle minor alignment imprecision, not so wide that solder lines look clunky. A 36-yard spool gets you through several complete projects before you need to reorder.
What we like
7/32" is the correct default width for most beginner stained glass projects
Consistent adhesive grips the glass edge without curling or slipping
36-yard spool gets you through multiple complete projects
What to know
Tarnishes if flux contacts foil before soldering, order of operations matters
May need wider foil (1/4") for thicker specialty glass pieces
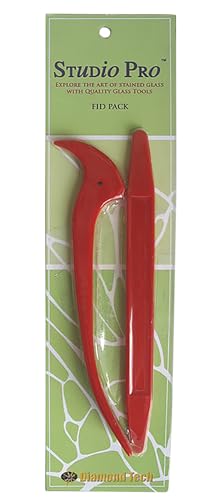
You can burnish foil with a fingernail, but a proper fid tool presses the tape flat against the glass face and edge in one smooth pass, faster, more consistent, and better adhesion. The Studio Pro Fid Pack gives you the right tools for folding and burnishing copper foil. Cheap, lasts forever, and noticeably improves foil work.
What we like
Burnisher and fid handle every stage of the foiling process
Consistent pressure improves foil adhesion compared to fingernail burnishing
What to know
Minor tool, experienced beginners can start with a fingernail
The rod is tricky to maneuver on very small curved pieces
Wattage matters more for stained glass than for electronics work. You need 80–100 watts to heat solder fast enough to flow smoothly without overheating the foil and glass below. A cheap 40W iron produces cold, lumpy joints that won't look right and won't bond properly. Flux is non-negotiable: it cleans the copper surface so solder flows instead of beading up. Solid-core 60/40 or 50/50 solder is the industry standard, it flows more readily than lead-free alternatives and produces a cleaner finish.
Best starter
Weller
SPG80L 80-Watt Stained Glass Soldering Iron
$$
★★★★★Our rating
Weller makes the workhorse iron for stained glass, and the SPG80L is specifically designed for the craft, 80 watts flows solder smoothly on copper foil without overheating the glass below. Fixed temperature removes one variable for new solderers, heats up in about 5 minutes, and the tip works well for running clean solder beads on narrow foil lines.
What we like
80W delivers enough heat to flow solder smoothly on copper foil
Fixed temperature removes one variable, no dial to overthink
Weller quality at an accessible price point for beginners
What to know
Fixed temperature, can't dial down for delicate work near glass edges
Heats up in ~5 minutes; plan to leave it on for your whole session
Solder is a consumable you'll go through quickly. Canfield 50/50 (50% tin, 50% lead) is the classic stained glass formula, slightly less expensive than 60/40, produces flat matte solder lines that suit traditional stained glass aesthetics, and is available at most craft supply stores. A 1-lb spool lasts through multiple beginner projects.
What we like
50/50 formula is the classic stained glass solder, affordable and proven
1-lb spool gets you through multiple beginner-sized complete projects
What to know
Flows at higher temperatures than 60/40, needs a fully heated iron
Matte finish isn't for everyone; 60/40 gives shinier solder lines
Without flux, solder beads up on copper foil instead of bonding, it's not optional. Novacan Regular is the community go-to: it cleans the copper surface, lets solder flow evenly, and rinses off completely with water after soldering. Apply a thin coat to each foiled section just before soldering and work quickly, don't let flux sit on foil for more than a few minutes.
What we like
Cleans copper foil so solder flows cleanly instead of beading up
Rinses completely with water, no solvent or special cleaner needed
Community standard, every stained glass tutorial assumes this product
What to know
Mildly acidic, must be rinsed off within minutes of finishing soldering
Small containers empty faster than beginners expect on first projects
Cathedral glass, transparent, smooth, light-transmitting, is the right starting material. You can see your score line clearly, it snaps cleanly along straight lines and gentle curves, and it forgives beginner technique better than specialty glass. Start with a sampler of multiple colors rather than ordering specific colors before you know what your project needs. Textured and opalescent glass are beautiful but score less predictably and punish a wobbly hand.
Best starter
Delphi Glass
Stained Glass Start-Up Kit
$389.99 as of Jun 22, 2026
★★★★★Our rating· Only 17 left in stock - order soon.
If you want to get started with a single order, the Delphi Start-Up Kit covers your first project: glass sheets, foil, flux, solder, and basic tools. A reliable shortcut past the decision paralysis of sourcing everything separately, Delphi is one of the most trusted suppliers in the stained glass world. A good option before committing to individual tool upgrades.
What we like
Multiple colors let you practice on real stained glass before buying in bulk
Cathedral glass scores cleanly, forgiving of beginner cut technique
Delphi is a trusted supplier with consistent quality and good selection
What to know
Batch-to-batch color variation, order extra mid-project if you find a color you love
Smaller pieces limit practice panel sizes before you need to reorder
Opalescent glass is partially opaque, it reflects light rather than transmitting it, giving finished pieces a richness that pure cathedral glass can't match. Wissmach makes reliable, consistent sheets. This is a specialty buy: order a single color you love after you're comfortable with cathedral cuts. Don't start here, opalescent glass is harder to score and less forgiving of beginner technique.
What we like
Reflects light for a richer look that transparent cathedral glass can't achieve
Wissmach quality is consistent, scores reliably once you have technique
What to know
Harder to see score lines, requires more experience than cathedral glass
Less forgiving of beginner technique; uneven scores produce ragged breaks
Glass cuts are serious, clean, deep, and sometimes not immediately obvious. Safety glasses are non-negotiable any time you're scoring or snapping glass; shards travel unpredictably. Cut-resistant gloves are essential when handling finished cut pieces, where edges are sharp enough to slice through skin without pressure. Don't improvise with thin latex gloves, you need at least ANSI A4 cut resistance. A rubber-backed cutting mat on your work surface prevents glass from sliding during scores.
Best starter
Uvex
Stealth OTG Safety Goggles
$42.00 as of Jun 22, 2026
★★★★★Our rating
The OTG (over-the-glasses) design works whether you wear prescription glasses or not. Wraparound coverage protects the sides, straight-fronted safety glasses don't stop shards that fly from breaking angles. Anti-fog coating stays clear near soldering heat. Uvex makes professional-grade eye protection for under $15.
What we like
OTG design works over prescription glasses or standalone
Wraparound coverage catches glass shards from oblique breaking angles
Anti-fog coating stays clear near soldering heat
What to know
Bulkier than standard safety glasses if you don't wear prescriptions
Side shields reduce peripheral vision slightly during close detail work
ANSI A4 cut rating, the minimum for safe glass piece handling. These fit closely enough to maintain dexterity while repositioning cut pieces, which is more than you can say for thick work gloves. The thin shell grips glass without slipping. Wear these when sorting, repositioning, and carrying finished panels, not while cutting, gloves interfere with cutter control and tactile feedback.
What we like
ANSI A4 cut rating, genuinely protective against sharp glass edges
Thin shell maintains enough dexterity to handle small cut pieces
What to know
Not for use during cutting, reduce tactile feedback and cutter control
Fit runs slightly snug, size up if you're between sizes
The first time you snap a clean piece of glass along a score line, something clicks. Here's what your first two days with stained glass actually look like, what to practice first, where you'll struggle, and when the process starts to feel like making real art.
Stained glass has a reputation as a fussy, specialist craft, the kind of thing you only do in a dedicated studio with an instructor watching over your shoulder. That reputation is wrong. The core technique is genuinely learnable in a weekend, and the first time a piece of colored glass snaps cleanly along your score line and slides perfectly into your pattern, you’ll understand why people get obsessed with this hobby.
This is what your first two days actually look like, from the first score to the last solder bead, with the things that trip up beginners and the things that aren’t as hard as they look.
Before you cut: setup and mindset
Stained glass is a physical craft. You’re using sharp tools on breakable material, and the quality of your concentration affects the quality of your cuts. Set up properly before you start.
You need a flat, stable work surface, a dedicated table if you have one, a piece of 3/4” plywood if you don’t. A rubber-backed cutting mat on top keeps the glass from sliding and gives you a slightly cushioned surface that helps with clean scores. Good lighting is non-negotiable: you need to see your score line clearly on the glass surface.
Have your safety glasses on before you touch glass. Not after you’re set up. Not once you’re ready to cut. Before. Glass shards from a breaking shot travel unpredictably, and you won’t anticipate the angle.
Your first session shouldn’t involve any pattern at all. Get a piece of scrap practice glass, cathedral (transparent) glass is easiest to start with, and just practice scoring and snapping until it feels natural.
The score-and-snap: the skill everything else depends on
The glass cutter doesn’t cut glass. It scores, it scratches a controlled groove through the surface tension, and then you snap along that groove by applying pressure on either side.
How to score: Hold the cutter between your index and middle fingers with your thumb underneath, like you’re holding a thick pen. Apply firm, consistent downward pressure and draw the cutter across the glass in one smooth pass from edge to edge. You’re not trying to carve deeply, just a shallow groove through the surface. You should hear a soft hissing or ticking sound as you go. Silence means the wheel isn’t biting; grinding means you’re pressing too hard.
Never go back and re-score a line you’ve already scored. One pass, edge to edge. If it doesn’t feel right, start fresh on a new area.
How to snap: Place your thumbs underneath the glass on either side of the score, and your fingers curled on top. Apply even upward pressure on both sides simultaneously. The glass breaks along the path of least resistance, the score, and the two pieces separate cleanly.
If the snap fails or the break wanders off your score line, the score was incomplete. A dull or dry wheel, too-light pressure, or stopping and restarting mid-score all produce incomplete scores. If your cutter is oil-fed, check that the reservoir is full. If you’re using a dry cutter, dip the wheel in cutting oil before every single score.
Practice this until you can reliably snap a line you scored. Fifteen or twenty practice cuts is not too many. This is the foundational skill, everything downstream depends on it.
From cut pieces to panel: foiling and soldering
Once you have a pile of cut pieces that match your pattern, the next phase is copper foil and solder, the two steps that turn individual glass pieces into a finished panel.
Copper foiling: Take each piece and center the edge against the adhesive side of your copper foil tape. Wrap the tape around the entire perimeter of the piece, overlapping slightly at the start and end. Then use a burnisher (or your fingernail) to press the foil flat against both the edge and the face of the glass, you’re making firm contact so the tape doesn’t lift during soldering. Foil every piece before you apply any flux.
Setting up for solder: Arrange your foiled pieces on your pattern (a light box under a clear acrylic sheet works well; a piece of paper on a flat surface works for beginners). Apply a thin coat of flux to the copper foil surfaces just before you solder, not earlier. Flux tarnishes copper on contact, and tarnished copper won’t take solder.
Soldering: Heat your iron fully before touching it to solder, 80W takes about 5 minutes. Touch solder to the iron tip, then run the iron along your foiled joints. The solder should flow smoothly into the joint and create a raised bead. Keep the iron moving, lingering too long in one spot will crack the glass below. Your first few beads will look lumpy. That’s normal. It takes a few passes to develop the rhythm of moving the iron fast enough to flow without dribbling.
Once the top surface is soldered, carefully flip the panel and solder the back. Then run one final pass on the front to smooth the beads.
Finishing: Immediately after soldering, rinse the panel with water and a soft brush to remove all flux residue. Flux is mildly acidic, if you leave it overnight, it’ll tarnish your copper and corrode the solder. Rinse thoroughly.
What you’ll fail at, and why that’s fine
Every beginner makes the same handful of mistakes. You will too. Don’t take them personally:
Incomplete scores that cause ragged breaks. The snap reveals whether the score was good. A wandering break means the score was too light, too dry, or too short. You’ll get a feel for the right pressure within a few dozen cuts.
Copper foil that lifts during soldering. You didn’t burnish firmly enough. Go back and press harder next time, the foil should grip the glass with no lifting edges before you apply flux.
Solder that beads up instead of flowing. Usually means the iron isn’t hot enough, the flux wasn’t applied, or the foil is tarnished. Let the iron reach full temperature, re-flux the joint, and try again.
Solder that won’t smooth out. You’re moving the iron too slowly and overheating the solder. Move faster and keep the tip clean by tinning it (touching a dab of solder to the tip) every few minutes.
Trying to cut curves by snapping. You can snap gentle curves by running the score along a curve and snapping in sections. Tight curves require a grinder. If you’re fighting a piece that won’t snap cleanly along a curve, the grinder is the right tool, not more force.
After the weekend
A few things that matter more once you’ve got a panel under your belt:
Get a grinder. If your first project was all straight lines, you haven’t felt the limitation yet. A glass grinder opens up any shape, circles, organic curves, irregular mosaic pieces. Most hobbyists say the grinder is the tool that unlocked the craft for them.
Take a local class. After a weekend of self-teaching, a 2-hour session with an experienced instructor will identify the specific habits holding your cuts back. Much more useful than a class before you’ve made any cuts of your own.
Join r/StainedGlass. Post your first panel. The community is genuinely encouraging and gives specific, useful feedback about what to work on next.
Save your money
What you don't need yet
Beginners get pressured to buy a lot of stuff that doesn't help them play
better. Here's what we'd skip on day one.
A lead came starter kit — The traditional cathedral-window method is worth learning eventually, but not on day one. Copper foil is more beginner-friendly and has far more tutorial support. Come back to came after your third or fourth copper foil project.
A glass kiln or fuser — Glass fusing is a completely separate discipline with different glass chemistry, different tools, and a different community. Don't confuse it with stained glass, they share the material, not the process.
A Dremel or rotary tool for glass — Sounds useful for shaping, doesn't work well on stained glass. A diamond-bit grinder is the correct tool for shaping; a Dremel leaves uneven edges and generates dangerous silica dust.
Patina solution — Black patina gives solder lines a traditional dark look and is a satisfying finishing step, but it won't improve your technique. Buy it after you've completed your first panel.
Expensive specialty solder — Standard 60/40 or 50/50 solid-core solder is what everyone uses. Specialty solder formulas are a niche upgrade that won't improve beginner work.
First week
Your first seven days
A short, real plan to get from gear-on-doorstep to actually playing.
Watch a 20-minute copper foil method walkthrough on YouTube before you touch glass. Understanding the full score-snap-foil-solder sequence before doing it makes day one much less confusing. · Learn
Practice scoring and snapping before attempting any pattern. Score diagonal lines across a practice sheet, apply pressure on either side of the score, and listen for a clean snap. A dull or dry score won't snap cleanly. Repeat until you can get consistent breaks. · Action
Look for a local stained glass studio or class. The Stained Glass Association of America maintains a directory. · Learn
SGAA Studio Finder · Stained Glass Association of America, studio and class directory
Start with a simple geometric beginner pattern, a rectangle or square panel with 8–12 pieces. Intricate patterns with many small curves are the wrong first project. · Action
FAQ
Common questions
Copper foil or lead came, which should I start with?
Copper foil (the Tiffany method). It's more forgiving, works for small and intricate pieces, and has far more beginner tutorial support. Lead came is the classic technique for large geometric cathedral windows and is worth learning eventually, just not on day one.
Do I really need a glass grinder?
Not for your very first project if you choose a simple straight-line geometric pattern. But the moment your design has any curves, a grinder is essential. Most beginners realize this after project one and wish they'd bought one earlier. If the hobby sticks at all, factor it into your budget from the start.
What wattage soldering iron do I need?
80–100 watts. Anything less produces cold, lumpy joints that don't bond properly. A 40W electronics iron is genuinely too weak for stained glass, the glass absorbs heat faster than a low-wattage iron can supply it. Don't use your electronics soldering iron here.
Is stained glass dangerous to learn at home?
Manageable with basic precautions. Safety glasses any time you score or snap glass, shards are unpredictable. Cut-resistant gloves when handling finished pieces. Good ventilation while soldering (solder fumes are real). Keep your workspace clean so you're not stepping on glass fragments. None of this is unusual for a craft hobby.
Where do I get stained glass besides a local art supply store?
Delphi Glass, Spectrum Glass, and your local stained glass studio supply shop are the best sources. Art supply chains rarely carry real stained glass in more than a few basic colors. Buying from a dedicated supplier gives you far more selection and usually better pricing per sheet.
How long does a first stained glass project take?
A simple 6×8" panel with 8–12 pieces takes most beginners a full weekend, 6–8 hours spread over two days. Cutting and grinding take longer than expected; soldering goes faster. Budget more time than you think for your first project and enjoy the process of learning.
Stained Glass Association of America — The national guild. Studio finder, class directory, and resource library for beginners through advanced practitioners.
Delphi Glass — One of the largest stained glass suppliers in the US. Excellent tutorials, project patterns, and buying guides alongside their product catalog.
Spectrum Glass — Major US glass manufacturer. Their Learning Center covers cutting technique, tools, and glass types in clear, beginner-friendly language.
r/StainedGlass — Active community. Post your first cuts for honest feedback, and read the wiki for beginner resources and supplier recommendations.
Blue Barn Glass (YouTube) — Clear, friendly tutorials covering the full copper foil workflow from cutting to finishing. One of the best free starting points for beginners.
Paned Expressions Studios (YouTube) — In-depth technique videos with a focus on quality and precision. More advanced than Blue Barn but worth bookmarking for once you have the basics.
As an Amazon Associate, JustBeginning earns from qualifying purchases.
We may also earn commission from other affiliate programs linked on this
page. Editorial recommendations are independent; we don't choose
products based on commission rates.
Product prices and availability are accurate as of the date and time
indicated and are subject to change. Any price and availability
information shown on Amazon at the time of purchase will apply.
Our top pickTOYO TC17B Straight Self-Oiling Glass Cutter


 Best starter