Silversmithing is the craft of shaping silver with a torch, hammer, and your own hands, then polishing it until it gleams. The tools are specific, the techniques are learnable, and the results are genuinely beautiful objects you made yourself. Here's what to buy first, and what to hold off on until you know you're staying.
By Colin B. · Published May 24, 2026 · Last reviewed June 17, 2026
Silversmithing has a real entry cost: torch, bench tools, metal, and pickle add up. Budget $300 for a functional minimal setup, $500 for something comfortable to work in.
We earn commission on qualifying Amazon purchases — see our
affiliate disclosure.
Price tiers and budget totals shown above are editorial estimates;
actual Amazon prices vary.
At a glance
Our top pick in each category
The fastest path through this guide — each best-starter pick by category.
Scroll for the budget and upgrade alternatives.
Take a class first if you can. Torch safety, pickle safety, and proper soldering technique are all genuinely easier to learn in person than from YouTube. A four-hour beginner workshop at a local makerspace or bead store will pay for itself in mistakes you don't make.
Start with fine silver or Argentium, not standard sterling. Sterling's copper content creates firescale, a purple-gray discoloration that appears when you heat it, and managing firescale is an extra skill beginners don't need yet. Fine silver and Argentium are more forgiving and solder more cleanly.
Don't buy a rolling mill yet. It's the piece of equipment everyone lusts after, it costs $300+, and you will not need it for your first dozen projects. Start with ready-rolled sheet from a supplier.
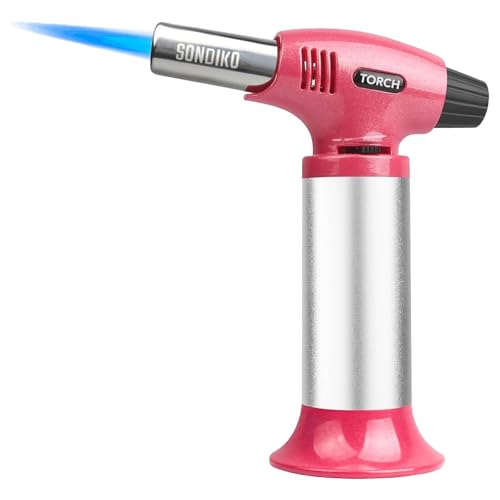
Your torch is the heart of the silversmithing setup and the purchase most beginners overthink. For fine silver and thin sterling, a butane micro-torch is completely adequate and the safest place to start: no hoses, no tanks, refills easily at any hardware store. Move up to propane or propane/oxygen when you're making larger pieces or working with thicker gauge metal. Safety comes before power here.
Torch Setup — what's the difference?
A few common shapes, each making a different trade.
Micro-Butane
Self-contained, no hoses. Best for fine silver and thin gauges.
Fuel
Butane canister
Max temp
~2500°F
Best for
Fine silver, thin sheet
Best for Beginners, thin-gauge work, apartment studios
Tradeoff Can't reach temperature for thick sterling or large castings
The Blazer GB2001 is the torch that shows up in nearly every beginner silversmithing recommendation, and for good reason. It runs on butane (refills at any hardware store), gets hot enough for fine silver and thin sterling, and doesn't require hoses or tanks. The flame is adjustable and consistent. Start here.
What we like
Runs on standard butane, refills at any hardware store
No hoses or tanks, safest and simplest torch setup for beginners
Adjustable consistent flame handles most beginner-scale silver work
What to know
Not hot enough for thick-gauge sterling or large pieces
Fuel runs out quickly on long sessions; keep a backup canister
When your work outgrows the butane torch, the Smith Little Torch is where most serious hobbyists land. Propane and oxygen inputs give much more heat and precise flame control. The interchangeable tips let you dial the flame from a whisper to a roar. Worth the cost once you're making multiple pieces a week.
What we like
Interchangeable tips from hairpin flame to broad bushy flame
Handles thick-gauge silver, gold, and complex multi-part pieces
The torch professional silversmiths actually use
What to know
Requires both propane and oxygen tanks, sourcing takes planning
Significantly more expensive than butane when you factor in tanks
A kitchen-style butane torch that works for simple silver soldering at a lower price point. The flame is less adjustable than the Blazer, but it gets the job done for basic join soldering and fine silver work. A reasonable option if you're testing the waters before committing.
What we like
Half the price of the Blazer, a low-commitment way to try torch work
Wide availability and cheap butane canisters everywhere
What to know
Wider less precise flame, harder to control on small jewelry pieces
Not designed for jewelry; you'll feel the limitation once you advance
The bench block is your most-used surface in silversmithing, and every piece of metal gets hammered, textured, or flattened on it. Get a thick, heavy steel block: it absorbs impact instead of bouncing it back at your hands. Pair it with a chasing hammer for texture work and a ring mandrel if you plan to make rings from day one.
Best starter
Eurotool
Steel and Rubber Bench Block, 4 Inch
$51.40 as of Jun 22, 2026
★★★★★Our rating· Only 19 left in stock - order soon.
Eurotool is the standard for jewelry bench tools and this 4-inch block is the right size to start. The steel surface handles all your hammering work; the rubber insert side protects delicate pieces when you need a yielding surface. Heavy enough to absorb impact without skating around.
What we like
Eurotool quality, surface stays flat and scratch-resistant long-term
4-inch size handles most beginner ring and pendant blanks
Heavy enough to absorb impact instead of bouncing back at your hands
What to know
Needs a sandbag or leather pad underneath; bare bench amplifies the clang
Surface pits over time if you use sharp-faced punches without care
If you plan to make rings, you need a mandrel; there's no substitute. This tapered steel rod lets you size rings, shape bands around the correct diameter, and true up rings after soldering. Get one with etched size markings so you can hit a target size.
What we like
Etched size markings let you hit a target ring size consistently
Smooth steel surface for shaping and truing rings after soldering
Standard tool in every silversmith's kit from day one
What to know
Springback means you form slightly smaller than target, normal step
Won't substitute for forming pliers on narrow-gauge wire rings
You need at least one chasing hammer for driving texture tools and forming metal, and a planishing face for smoothing. The Beadsmith set gives you serviceable starter hammers at a price that doesn't hurt. Once you're working seriously, you'll develop preferences, but this gets you moving.
What we like
Covers chasing and planishing faces for texturing and smoothing work
Lower price means you can experiment with hammer technique without regret
Handles are replaceable if you prefer a different grip style
What to know
Handles may loosen with heavy use; check monthly
Not precision-balanced like dedicated professional hammers
The jeweler's saw frame is how you cut precise shapes from sheet metal: curves, pierced designs, blanks for pendants and rings. It takes practice to get smooth cuts without snapping blades (and you will snap blades (that's part of it)), but it's one of the most satisfying skills to develop. Stock up on blades in the 2/0 to 4/0 range for most silver work.
Best starter
SE
3-Inch Adjustable Jeweler's Saw Frame
$14.99 as of Jun 22, 2026
★★★★★Our rating· In Stock
A solid traditional saw frame with adjustable throat depth, tension screw at top, simple to blade and use. The 3-inch depth handles most pendant and ring blank work. At this price you won't feel the sting of the inevitable beginner learning curve.
What we like
Simple tension adjustment; blade changes take under a minute
3-inch depth handles most beginner pendant and ring blank work
Low price means snapped blades feel like practice not waste
What to know
No spring-loaded tension system; you calibrate tension by ear and feel
Plastic parts on budget frames wear faster than all-metal versions
Once you're sawing regularly, the Knew Concepts frame is a genuine upgrade. Its spring-loaded jaw system makes blade changes nearly instant and the tension is consistent every time. The aluminum frame stays rigid without being heavy. Beloved in the professional jewelry community for good reason.
What we like
Spring-loaded blade tension, consistent and instant on every change
Loved by professional jewelers for reduced hand fatigue on long sessions
Aluminum frame is rigid and light, comfortable through a full build
What to know
Overkill until you understand saw blade tensioning on a standard frame
Premium price is hard to justify until you're sawing most sessions
You will snap blades while you learn: that's not a failure, it's physics. Buy a 144-pack upfront so each snap is a lesson, not a delay. Pike blades are the professional standard with consistent tooth geometry. Size #2/0 handles most silver in the 18-22g range, the right starting size for most beginner projects.
What we like
Pike blades are the professional standard, consistent tooth geometry
Assortment lets you match blade size to metal gauge
Bulk pack means snapped blades don't stop your session
What to know
Store flat: blades kink and are unusable if bent in storage
Finer blades (6/0) not included; source separately for very thin work
You can't start silversmithing without silver. Buy a small amount of 22-gauge sterling sheet to start, enough to practice cuts and basic forms without wasting expensive metal on early mistakes. You'll also need solder (buy easy, medium, and hard grades from day one) and flux to prevent oxidation during heating. These three things go together.
Best starter
uGems
Sterling Silver Sheet 22 Gauge Dead Soft, 3x1 Inch
$$
★★★★★Our rating
22-gauge dead-soft sterling is the ideal practice sheet for beginners, thin enough to cut and form by hand, thick enough to hold shape, and forgiving to solder. Buy a 6x1-inch strip or equivalent to start. You'll work through it faster than you think.
What we like
22g dead-soft is the most forgiving gauge for beginner cuts and forming
Standard gauge most tutorials and classes use, no translation needed
Dead-soft temper means it doesn't spring back unpredictably while forming
What to know
Sterling creates firescale under heat, requiring a finishing step
Silver prices fluctuate, buy what you need, not a speculative stockpile
★★★★☆Our rating· Only 5 left in stock - order soon.
Silversmithing uses three solder grades with different melting points, hard for first joins, medium for second, easy for final. Buy all three upfront. Using one grade for everything leads to re-melted joints. Flux prevents oxidation during soldering and is always used together with solder.
What we like
All three grades in one purchase, no mid-project sourcing gaps
Chip form makes precise solder placement easy at the joint
Flux included, flux and solder are always needed together
What to know
Hard medium easy grades look identical; label them the moment they arrive
Small amounts run out faster than you expect on your first few projects
Fine silver wire is one of the friendliest materials to start with, no firescale, easier to solder than sterling, and works beautifully for simple rings, pendants, and wrapped forms. A starter coil of 20g half-hard gives you enough to practice without a big silver spend.
What we like
No firescale, fine silver is the most beginner-friendly material
Works for rings, coils, and wrapped forms without sheet-cutting skills
Lower cost per ounce than sterling for raw practice material
What to know
Softer than sterling, finished pieces scratch more easily with wear
Not ideal for pieces designed to flex repeatedly or hold stones
After every solder session, your silver goes into pickle, a mild acid solution (sodium bisulfate, sold as Sparex) that strips flux residue and oxidation and restores the metal's clean color. Then polishing takes it the rest of the way. You need both, and you need them from the beginning, a polishing cloth and Sparex get you started for about $30 combined.
Best starter
Sparex
No. 2 Pickling Compound, 10 oz
$11.26 as of Jun 22, 2026
★★★★★Our rating· In Stock
Sparex is the standard pickle solution for silversmiths, sodium bisulfate granules you dissolve in water in a small slow cooker. It strips flux and oxidation in a few minutes without the fume risk of older acid pickles. A 10 oz container is enough to get through many months of beginner sessions.
What we like
Industry standard, dissolves flux and oxidation in 2-5 minutes warm
Far safer than nitric acid pickles used in older workshops
10 oz container lasts months of beginner use, enough to learn the workflow
What to know
Requires a dedicated slow cooker, don't repurpose a kitchen one for food
Keep steel tools out of the pickle or it will copper-plate your silver
The quickest finishing tool you'll reach for every single session. A polishing cloth pre-loaded with rouge compound removes tarnish and brings back shine in seconds. Use it between steps while you're still learning to use a tumbler, and keep one on your bench permanently.
What we like
Removes tarnish and brings up shine in under a minute, no setup
The piece you reach for to check your work in progress
Pre-loaded with compound, no mess, no mixing
What to know
Surface-level only, won't remove deep scratches or heavy oxidation
Gets sooty quickly on oxidized pieces, keep extras on hand
A rock tumbler filled with stainless steel shot and burnishing compound is the fastest way to get a professional mirror polish on batch pieces. Load it up, run it for two hours, and pull out shiny silver. If you're making multiple pieces at once, rings, pendants, earrings, a tumbler pays for itself quickly.
What we like
Two hours of tumbling produces a professional mirror finish on batches
Hands-off, load it and work on the next piece while it runs
Polishes rings pendants and earrings simultaneously
What to know
Rounds over textured details; texture after tumbling not before
Noisy; run it in a closed room or garage during the two-hour cycle
Silversmithing has a steeper learning curve than most maker crafts, but it rewards patience quickly. Here's what the first month actually looks like, from torch-lit to finished piece.
The first month of silversmithing is humbling in a good way. You’re learning to work with fire, acid, and precious metal simultaneously, and somehow it all comes together. The skills are real, the tools are specific, and the finished object at the end of week two is genuinely yours.
This is what that first month looks like, honestly, without the YouTube polish.
Week 1: Setup and first solder
Before you make anything, you need a place to make it. Silversmithing requires three distinct zones: a soldering station (fireproof surface, good ventilation, your torch), a pickle station (slow cooker + Sparex solution), and a bench for sawing, filing, and forming. In a small space these can all be on the same table, but they need to be separate setups. Hot silver going into a shared workspace causes problems.
Your soldering surface matters. A charcoal block or a magnesia soldering board is the right surface; both reflect heat back at your work, which helps bring the metal to temperature faster and more evenly. A ceramic tile works in a pinch. Nothing flammable.
The pickle pot is not optional. Every piece of silver you solder goes into the pickle immediately after; it strips the black oxidation and white flux residue and brings the metal back to clean silver. Set up the Crock-Pot and dissolve Sparex in water (always add granules to water, not water to granules) before you ever light the torch. You’ll want it ready within minutes of your first solder.
Your first exercise should be simple: a butt-joined ring. Cut a strip of silver, file the ends flat, bend it into a ring shape, solder the join, pickle it, and sand it smooth. No stones. No complex forms. Just a closed ring with one clean solder seam.
What you’re learning in that exercise: how to flux a join, how to position solder chips, how to read the heat (silver ready to flow solder looks like it’s about to move, a subtle ripple in the surface), how to quench and pickle, how to file without rocking. That’s the entire beginner workflow in one object.
Once you can make a clean solder join, you can make almost anything. Week two is about learning to cut shapes out of sheet metal and refine them.
The jeweler’s saw is the skill that rewards patience most directly. Blade tension and posture are everything: frame clamped between chest and bench pin, blade perpendicular to the metal, arm moving from the shoulder, not the wrist. You want the blade to do the work, not you. Most beginners grip too tight and snap blades within the first ten minutes. Loose grip, let the saw drop by gravity, guide it don’t push it.
Blade size to gauge: a rough starting rule is 2/0 blades for 18-20g sheet, 4/0 for 22-24g sheet. Finer blade = slower cut but cleaner edge on thin metal.
The file is the most underrated tool in the shop. A half-round file handles both flat surfaces and concave curves. Most beginner silversmiths don’t file enough; they think the piece is close enough and skip straight to sandpaper. Take the extra five minutes with the file. It’s faster than sanding away a lumpy edge.
Sandpaper progression: 220 → 320 → 400 → 600 grit. Each step removes the scratches from the previous step. Don’t skip grits; you’ll just move the scratches around. After 600, a polishing cloth brings up the shine immediately.
Your project for week two: a hammered disc pendant. Saw a circle (or close to it) from 22g sheet, drill a small hole near the edge for the bail, texture the surface with a chasing hammer, sand and polish. That’s five distinct skills in one object.
Week 3: Temperature and troubleshooting
By week three you’ll have a solder join that didn’t flow, or flowed somewhere it shouldn’t have, or left a gray-white bloom on the silver that doesn’t pickle away. These are normal problems, and each one teaches you something.
Solder that won’t flow almost always means the heat is in the wrong place. You’re heating the solder instead of the metal. The solder flows toward heat; if the metal is hot, the solder chip will chase it. Heat the metal at least an inch away from the join, then slowly draw the heat toward the join. Watch the flux: it bubbles, then dries, then flows glassy. That’s when you bring the heat to the join.
Firescale is the dark purple-gray discoloration in sterling silver that appears after heating. It’s not surface oxidation; it’s a deep layer of cupric oxide that forms inside the metal. It doesn’t always pickle away. To remove it, you either sand deep enough to get below it (tedious on large pieces) or use a depletion gilding technique: heat the silver to just below solder temperature, pickle, repeat four or five times. This depletes the copper at the surface and leaves a thin fine-silver skin that doesn’t firescale.
This is why many instructors start beginners on fine silver: no copper, no firescale.
Solder that flows in the wrong direction means you heated the wrong area. Solder flows toward heat, always. Once you understand this it’s a precision tool, not a mystery.
Week 4: Your first real piece
By week four you have enough skill to set yourself a project that requires planning: a simple ring with a bezel-set stone, a pendant with a stamped texture, or a pair of earrings with wire details. Something that requires more than one solder join.
Multi-join pieces use the three-grade solder system: hard solder for the first join (highest melting point, won’t re-melt when you add the next one), medium for the second, easy for the final join. This is the system that makes complex fabrication possible; each subsequent join fires at a lower temperature than the one before, so the finished ones stay put.
Every new silversmith hits the same handful of problems. None of them are signs you’re bad at this:
White crust on silver after soldering: unfused flux. It pickles away. Normal.
Solder balled up instead of flowing: metal wasn’t hot enough when solder was added. Heat the metal first, then bring the torch to the join.
Ring cracked when you tried to close the join: work-hardened metal. Anneal it first: heat to dull red (barely visible in a dim room), quench, pickle, try again.
Silver turned completely black: overheated or held at temperature too long. Pickle it; if the blackening doesn’t come off, that’s firescale (see above).
Saw blade keeps snapping: tension is off, or you’re forcing the blade around a tight curve. Slow down. Let the blade lead. Drill relief holes at tight corners before attempting to saw them.
What to do at month two
Once you’ve made a few complete pieces, the skill gaps become obvious. The things that will accelerate improvement most directly:
Work with others. A monthly open studio or a class with shared critique time is worth more than solo practice time.
Study a finished piece you admire. Really look at how the forms were made, where the joins are, how the texture was achieved. Reverse-engineering good work is one of the best ways to learn.
Learn to anneal deliberately. Most beginners only anneal when metal is already too hard to work. Learn to anneal preventatively, before a forming operation, not when the metal fights back.
Try a project above your level. A bezel-set stone or a piece with a hinge will force you to learn something you’d otherwise put off.
Save your money
What you don't need yet
Beginners get pressured to buy a lot of stuff that doesn't help them play
better. Here's what we'd skip on day one.
Rolling mill — The beautiful machine everyone wants. It thins, textures, and shapes metal; it costs $300-800. Buy it after you've completed a dozen projects and know exactly what you'll use it for.
Flex shaft tool — A Dremel on steroids for drilling, carving, and polishing. Useful eventually. For now, hand files do the same job more slowly, and slowly is fine while you're learning.
Stone-setting tools — Setting stones is a separate skill set from basic silversmithing. Learn to fabricate clean forms first, then add stone setting after you can solder reliably.
Centrifuge or vacuum casting setup — Casting is a completely different workflow from fabrication. Don't let it distract you until you've mastered the bench skills everything else is built on.
Full ventilation system — Important eventually. A box fan in a window handles flux fumes adequately for occasional home use. Upgrade to real ventilation if you're working more than a few hours per week.
First week
Your first seven days
A short, real plan to get from gear-on-doorstep to actually playing.
Look for a beginner silversmithing class at your local makerspace, bead shop, or community college. One session with an instructor changes how quickly you learn, especially torch safety and soldering technique. · Action
Set up your workbench before buying anything else, you need a heat-safe soldering surface (a charcoal block or magnesia board), a pickle station, and ventilation near a window. · Action
Make your first piece: a simple hammered disc pendant or a wire ring. Both use sheet or wire, a torch, and pickle, the full beginner workflow in one object. · Action
FAQ
Common questions
How much does it cost to get started in silversmithing?
A functional beginner setup (torch, bench block, saw frame, silver sheet, pickle, and solder) runs $300-500. Silver prices fluctuate, and the torch is the biggest single cost. You can start cheaper with a butane torch and minimal tools, or more expensively with a professional torch setup.
Do I need to take a class, or can I learn from YouTube?
YouTube is genuinely useful, but one in-person class is worth ten hours of videos for torch safety and soldering technique. The feedback loop of a real instructor catching your mistakes in the first session saves you weeks of bad habits. Take one class, then use YouTube for everything after.
What's the difference between silversmithing and jewelry-making?
Jewelry-making is a broad term covering beading, wire-wrapping, and stringing, none of which require a torch. Silversmithing is specifically the fabrication of metal jewelry using heat, forming tools, and solder. Silversmithing produces more durable, more complex pieces and has a higher entry cost.
Is fine silver or sterling silver better for beginners?
Fine silver (99.9% silver) is easier to solder and doesn't create firescale, making it more forgiving. Sterling silver (92.5% silver) is more durable and the standard for finished jewelry, but the copper creates firescale when heated that you have to manage. Most instructors start beginners on fine silver.
Is silversmithing safe to do at home?
Yes, with reasonable precautions: ventilation near a window, a heat-safe soldering surface, and careful pickle handling. The torch is the main safety consideration: a butane micro-torch is the safest starting point, and it's more than capable for most beginner work.
When should I buy a rolling mill?
After you've completed at least a dozen projects and have a specific use case in mind: thinning sheet, texturing metal, or making wire. A rolling mill costs $300-800 and is one of the most useful advanced tools, but it's completely unnecessary until you've mastered basic fabrication.
Rio Grande — The premier US supplier for professional jewelry tools, silver, findings, and solder. Their education section and YouTube channel are the best free silversmithing resource available.
Ganoksin Orchid Community — The most active online forum for jewelers and metalworkers. Search their archives for nearly any technique question, working professionals answer beginner questions here.
Halstead Jewelry Education — Wholesale supplier with an excellent free education section, technique guides, metal charts, and beginner tutorials written for the home studio.
r/jewelry (Reddit) — Active community with a sidebar wiki. Good for show-and-tell, technique questions, and finding local classes. Friendlier to beginners than trade forums.
Wubbers University (YouTube) — Search for beginner silversmithing tutorials, a wide range of instructors cover torch work, forming, pickling, and polishing at no cost.
As an Amazon Associate, JustBeginning earns from qualifying purchases.
We may also earn commission from other affiliate programs linked on this
page. Editorial recommendations are independent; we don't choose
products based on commission rates.
Product prices and availability are accurate as of the date and time
indicated and are subject to change. Any price and availability
information shown on Amazon at the time of purchase will apply.