Screen printing turns any flat design into a repeatable print on fabric or paper. A basic one-color home setup costs under $200, and you can print your first shirt in an afternoon. Here's what you actually need, and the decisions that matter.
By Colin B. · Published May 23, 2026 · Last reviewed June 7, 2026
A hinge clamp, one screen, squeegee, and water-based inks gets you to your first print for under $100. A proper tabletop press, 3–4 screens, and a full ink set runs $150–$250.
We earn commission on qualifying Amazon purchases — see our
affiliate disclosure.
Price tiers and budget totals shown above are editorial estimates;
actual Amazon prices vary.
At a glance
Our top pick in each category
The fastest path through this guide — each best-starter pick by category.
Scroll for the budget and upgrade alternatives.
Don't buy plastisol ink yet. Water-based inks clean up with water, work fine on cotton, and are far more forgiving for beginners. Switch to plastisol when you're doing dozens of shirts and need maximum durability.
Your first few prints will be bad, and that's the point. Budget $20 in cheap Gildan t-shirts specifically for practice. Learning to control ink consistency and squeegee pressure is a hands thing, not a reading thing.
Emulsion and screens are consumables. Each screen you coat and expose costs about $5–10 in materials and gives you anywhere from 50 to 500 prints depending on care. Factor this into your cost expectations.
The press is your biggest gear decision. At the entry level, hinge clamps ($20–30) attach to any table and hold your screen frame, simple, portable, and fine for one-color prints at low volume. A dedicated tabletop press adds better registration (so designs land in the same spot every time) and easier off-contact adjustment. If you're just testing the hobby, start with clamps. If you already know this will stick, the tabletop press is worth the extra $100.
Press & Frame — what's the difference?
A few common shapes, each making a different trade.
Hinge Clamp
Metal clamps bolt to any table and hold standalone screen frames.
Cost
$20–35
Setup
Any flat table
Registration
Manual
Best for First-timers testing the hobby before investing
Tradeoff Less repeatable registration; fine for one-offs, harder on long runs
Everything in one box: a 10x14 aluminum frame with 110-mesh screen, a squeegee, six water-based fabric inks, and an LED UV exposure lamp. It's the fastest path from zero to first print without sourcing five separate items. Speedball is the dominant beginner brand for good reason: quality is consistent and their materials work together.
What we like
Complete starter kit: frame, screen, squeegee, and 6 inks included
Speedball aluminum frame is reusable across hundreds of prints
110-mesh screen handles most beginner designs cleanly
What to know
Ink jars are small; budget separately for bigger color runs
The step up serious home printers make once they're doing 20+ shirts. The micro-registration system hits the same spot within a millimeter every print, and the arm locks firmly, no more creeping screen positions mid-run. Built from aluminum, not plastic. This is a tool you'll still use in five years.
What we like
Micro-registration keeps designs aligned across a full run
Aluminum construction: this press lasts decades
Off-contact adjustment dial included; most clamp setups lack one
What to know
Overkill for casual use; don't buy until you're committed
Heavy and not portable; this stays on your workspace permanently
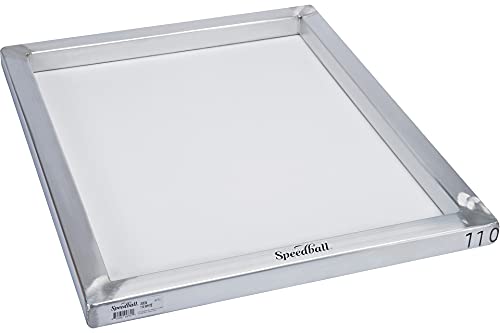
A screen is mesh stretched over a frame; you coat it with emulsion, expose a design onto it, then push ink through the open areas. Mesh count determines print fineness: 110 mesh for bold graphics and thick inks, 160 for sharper lines and smaller text, 230+ for halftones and photos. Most beginners start with 110 and never need anything else. Buy at least two screens so you can coat one while printing with the other.
Best starter
Speedball
110 Mesh 12x16 Screen Printing Frame
$31.49 as of Jun 22, 2026
★★★★★Our rating· In Stock
Pre-stretched aluminum frame with 110-mesh, the all-purpose starting point. Handles most beginner designs: text, logos, simple graphics. The aluminum frame won't warp like wood does when wet, and these reclaim and reuse cleanly with emulsion remover.
What we like
110-mesh covers 90% of beginner projects: bold text, logos, graphics
Pre-stretched aluminum frame won't warp or twist when wet
Reclaims cleanly for reuse across many different designs
What to know
Too coarse for halftones or fine detail under 6pt text
Buy two at minimum; you want one coating while one is in use
Same quality aluminum frame, finer 160 mesh. Opens up sharper line work, smaller text, and basic simulated-process printing. Not for your first week, but a useful second screen once you're past bold graphics and want more precision.
What we like
Finer mesh enables sharper edges on small text and detailed line art
Same Speedball frame, compatible with any standard hinge clamp
What to know
Floods slower with thick inks; needs extra squeegee pressure
Not necessary until you're printing detailed or multi-element designs
The two ink types are water-based and plastisol. Water-based inks clean up with soap and water, work fine on cotton, and cure with a household iron. That's what you start with. Plastisol is the commercial standard: more durable, more vibrant on dark shirts, never dries in the screen, but requires a heat gun or conveyor dryer to cure properly. Learn water-based first. Switch to plastisol if you need white on black shirts or are doing high-volume runs.
Best starter
Speedball
Water-Soluble Screen Printing Ink Set
$29.99 as of Jun 22, 2026
★★★★★Our rating· In Stock
Water-based, cleans up with soap and water, and the colors mix predictably. The set covers the primary palette and black, enough for most beginner projects. Air-dries to a soft hand feel on shirts, and heat-setting with a household iron is all the curing you need.
What we like
Cleans up with soap and water, no solvents or special cleaners needed
Iron-cures at home; no heat press or conveyor dryer required
Soft hand feel on fabric; wears comfortably after washing
What to know
Dries in the screen if you pause mid-run; can't step away
Less opaque on dark shirts than plastisol; best on white and light colors
A larger jar of Speedball black for when your starter kit runs out, which happens fast. Black is the workhorse of any screen printing setup and you'll exhaust the small starter jars in your first month. This keeps you printing without waiting on a reorder.
What we like
8 oz jar lasts through a full beginner learning run and then some
Same Speedball formula, consistent behavior with your starter set
What to know
Water-based only; not a substitute for plastisol on dark shirts
Still needs the same iron heat-set step as the smaller jars
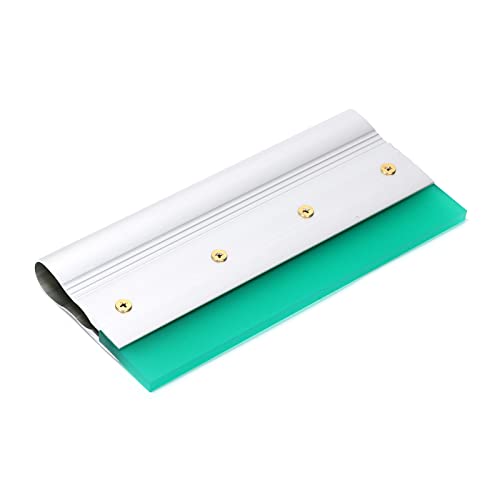
A squeegee pushes ink through the screen mesh and onto your substrate. The blade's hardness is rated in durometer: 70 durometer is the standard for fabric printing, firm enough to clear the screen cleanly but soft enough to conform to the shirt. Width matters: your squeegee should be slightly wider than your design. A 10–12 inch squeegee handles most home-printing work. If your kit's squeegee feels flimsy, a standalone upgrade makes a real difference.
Best starter
Speedball
8-Inch Neoprene Squeegee 70 Durometer
$17.99 as of Jun 22, 2026
★★★★★Our rating· Only 3 left in stock - order soon.
The right hardness for fabric, comfortable grip, and priced to buy multiple widths without regret. This is what comes in most kits; having standalone squeegees in different widths lets you match the tool to the design size.
What we like
70 durometer is the standard for fabric: right firmness for beginners
Comfortable wooden handle absorbs vibration better than aluminum
Cheap enough to buy multiple widths to match your design sizes
What to know
Wooden handle warps if stored wet; always dry after sessions
Blade wears over time; replace when it develops a groove
★★★★☆Our rating· Only 5 left in stock - order soon.
When wooden squeegees start flexing on wide pulls, the aluminum handle makes a noticeable difference: stiffer, straighter stroke, and far easier to clean. Same 70-durometer blade. Worth it once you're doing production runs or wide-format prints.
What we like
Aluminum handle eliminates flex on wide squeegee pulls
Easy to clean; no wood grain to trap dried ink
What to know
Heavier than wood; fatigues the wrist on long runs
Photo emulsion is the light-sensitive coating you apply to your screen before exposing a design. You coat the screen, dry it in the dark, then expose it through your design film; UV light hardens the emulsion everywhere except where the design blocks it. Wash out the unexposed areas and you have a stencil. The process sounds complicated but becomes routine after two attempts. You need emulsion, a diazo sensitizer (the catalyst), and an exposure source (sunlight works on clear days).
Best starter
Speedball
Diazo Photo Emulsion Kit
$29.99 as of Jun 22, 2026
★★★★★Our rating· In Stock
The most beginner-friendly photo emulsion available. The two-part system mixes easily, and Speedball's instructions are thorough enough that first-time exposures usually work. Exposes under direct sunlight in 3–8 minutes on a bright day; no UV lamp purchase required to start.
What we like
Two-part diazo system is reliable: most beginner exposures succeed first try
Exposes with direct sunlight; no UV lamp needed to start
Speedball's included instructions cover common beginner mistakes
What to know
Shelf life after mixing is 4–8 weeks; don't sensitize a whole jar at once
Requires genuinely dark storage to avoid premature hardening
An alternative to photo emulsion for hand-drawn designs. Draw directly onto the screen with drawing fluid, coat with filler, then wash out the fluid, leaving open areas wherever you drew. No film positives, no UV exposure, no darkroom. Ideal for one-off hand-lettered or illustrative prints.
What we like
No film positive, UV lamp, or dark room required; draw and print
Great for hand-lettered designs where imperfection is part of the look
What to know
Only for hand-drawn designs; can't reproduce digital artwork
Slower process; not practical for multi-run production printing
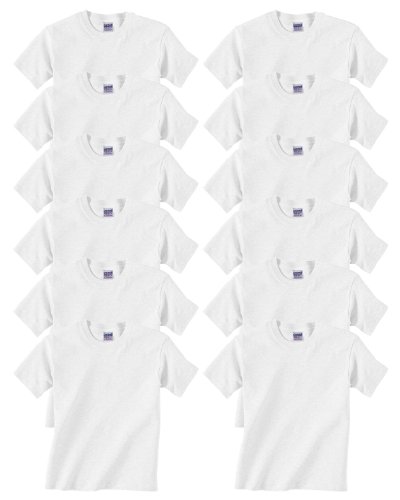
What you print on matters as much as how you print. Shirts for screen printing should be 100% cotton; synthetics repel water-based inks. For practice and bulk orders, Gildan Heavy Cotton is the industry standard: consistent sizing, accepts ink well, and cheap enough to write off the ones you ruin while learning. For anything you want to sell or give away, Bella+Canvas ringspun cotton is noticeably softer and holds color longer after washing.
Best starter
Gildan
Heavy Cotton T-Shirt Pack
$40.77 as of Jun 22, 2026
★★★★★Our rating· In Stock
The blank every screen printer learns on. Consistent weight (5.3 oz), predictable shrink, and cheap enough to buy in bulk for practice and production. 100% cotton takes water-based inks well, and sizing is reliable across colors. Buy a 12-pack; you'll ruin at least two or three while learning, and the rest are your inventory.
What we like
Industry-standard practice blank: every printer knows Gildan sizing
100% cotton accepts water-based ink cleanly with minimal bleeding
Cheap enough to use as sacrificial practice shirts without regret
What to know
Thicker, stiffer fabric; not the most comfortable shirt on its own
When your prints are good enough to sell or give as gifts, the shirt matters. Bella+Canvas 3001C uses combed ringspun cotton that's noticeably softer than Gildan, holds color better after washing, and lays flat under the screen without slipping. The upgrade that makes finished pieces look intentional.
What we like
Combed ringspun cotton; softer than standard blanks, holds color longer
Lays flat and consistent under the screen, reducing ink bleed
What to know
2–3x the cost of Gildan; for finished pieces only, not practice
More size variation across colors; check size charts per colorway
Screen printing has a reputation for being complicated. That reputation is earned: there are multiple steps, chemical processes, and real failure modes. But “complicated” and “hard to start” aren’t the same thing. The process is learnable in a weekend, and your second print will look dramatically better than your first.
Here’s what your first weekend actually looks like, decision by decision, mistake by mistake, with the things that matter and the things you’ll be tempted to worry about but shouldn’t.
Before you touch the screen: get your design ready
The setup work that pays dividends before you even open the emulsion bottle is your artwork file.
Screen printing is one-color-at-a-time. Your first print should be a single-color design on a white or light shirt; anything else is advanced. A simple logo, a text piece, a bold graphic. High contrast, solid shapes, no gradients.
Print your design onto a transparency sheet if you can. If you don’t have a transparency, print it on regular paper with a laser printer and apply a light coat of vegetable oil or baby oil to make it translucent enough to block UV. Let it dry before using.
Design size matters more than you think. Your design needs to fit comfortably inside your screen’s printable area; leave at least two inches of margin on all sides for the ink to flood without running off the edge. A 10x14 screen can print designs up to roughly 8x11.
Don’t spend hours on your first design. It’s going to be a test print. Pick something you like, keep it simple, and accept that you’re printing it on shirts you’re willing to ruin.
This is the step that intimidates most beginners, and it’s genuinely the most failure-prone part of the process. But it fails in predictable ways, and once you understand why, it becomes reliable fast.
Coating the screen: In subdued light (regular indoor lighting is fine; you’re not developing film), scoop a line of emulsion along the bottom edge of your screen. Hold the screen nearly vertical, and using a squeegee or the included coating scoop, pull the emulsion up the screen in one smooth, even stroke. Coat both sides. Work quickly. Let the screen dry in a dark place, inside a cabinet or dark room, face-down, for at least an hour, preferably overnight.
A few things that will ruin this step:
Coating in bright sunlight (premature hardening)
Uneven pressure (thick spots and thin spots in the emulsion)
Rushing the dry time (underdried screens print badly and wash out poorly)
Exposing the screen: Once dry, tape your design film to the coated side of the screen (the flat side, not the recessed side). Take it outside on a clear day, place it design-down on a flat surface, and weigh the film down with a piece of glass or a heavy book to keep it in contact with the emulsion. Expose for 3–8 minutes depending on sun intensity.
The exposure timing is the most variable part. Underexposure leaves the emulsion too soft; it’ll wash out in places you don’t want. Overexposure hardens the emulsion in your design areas, blocking ink. When starting out, aim for the middle of the range and adjust based on results.
Washing out: Immediately after exposure, take the screen to a sink or bathtub and spray it with lukewarm water. The design areas (where your film blocked the UV) will wash out, leaving open mesh for ink to pass through. The background areas will stay hard. If areas that shouldn’t wash out are washing out, you underexposed. If your design isn’t washing out cleanly, you overexposed or your film wasn’t opaque enough.
This wash-out moment is when you first see your design as a stencil. It’s a good moment.
Set your screen in the hinge clamps or press and tape a practice shirt to the platen (or to a flat board if you’re doing tabletop). Place the shirt so your design will land where you want it (center chest, usually).
Off-contact distance is the small gap between the bottom of your screen and the shirt surface, about 1/8 inch. This is why dedicated presses matter, but with a hinge clamp setup you can tape small folded pieces of cardboard at the edges of the screen to create this gap. Without off-contact, the screen sticks to the shirt mid-print and smears.
Scoop a line of ink above your design on the screen. Using the squeegee at a 45-degree angle, flood the screen (pull the ink across the design without printing, just filling the mesh with ink). Then make one or two firm print strokes, pulling the squeegee toward you with even pressure.
Lift the screen. Look at the shirt.
Your first print will probably have one or more of these issues:
Ink too thick or blobby: Too much pressure, or too many passes. One firm pass is usually enough.
Pinholes in solid areas: Underexposed emulsion, or design film wasn’t opaque enough. Reexpose next screen.
Edges are soft or smearing: Screen was touching the shirt (no off-contact gap), or the shirt shifted mid-print.
Design is faint or incomplete: Not enough ink, or squeegee angle too steep. Lower the angle and flood more generously.
Print the same design five times in a row. By the third print, your muscle memory will have the pressure dialed in. By the fifth, you’ll have a clean shirt and understand why each variable matters.
Curing: don’t skip this
Uncured water-based ink will wash out in the first laundry cycle. You need heat.
With a household iron: set it to cotton (high heat, no steam). Lay a sheet of parchment paper or teflon over your print. Press firmly for 60–90 seconds per section, moving the iron slightly to cover the whole design. The ink should feel dry and slightly raised when done. You’re trying to reach about 320°F; the iron gets there on cotton setting.
Let the shirt cool before handling the print.
An alternative if you have a heat gun: hover 2–3 inches above the print and move in slow circles for 60–90 seconds until the ink looks “set” (slightly glossy, not wet). Less even than an iron but faster for production runs.
Do a wash test after your first print. Wash the shirt in cold water, tumble dry on low, and check the print. If it cracks or fades significantly, you didn’t cure long enough or hot enough. Adjust for the next run.
This is the step most beginners forget about, and it’s what turns screen printing into an economical hobby rather than an expensive one.
Immediately after printing (before the ink dries in the mesh), wash the screen with cold water. Use a soft brush or your fingers to work the ink out of the open mesh areas. Don’t let ink sit in the screen for more than 15–20 minutes or it will partially dry and clog the mesh permanently.
Once the ink is out, you can reclaim the screen entirely by applying emulsion remover (also called screen stripper). Apply it, wait a few minutes, and scrub with a brush or pressure wash if you have one. The emulsion dissolves and washes away, leaving a clean mesh frame ready for your next design.
A reclaimed and recoated screen costs you a few cents in emulsion. A screen clogged with dried ink is trash. Rinse immediately. Every time. Build the habit in the first week.
What happens at the end of your first weekend
By Sunday afternoon, you’ll have printed 10–15 shirts. Some will be bad. Four or five will be genuinely good. One or two will be exactly what you wanted.
You’ll have learned what squeegee pressure feels like at different levels, how your specific emulsion behaves with sunlight exposure time, and why registration matters the second you try to reprint the same design on a second shirt.
None of this is theoretical anymore. The next time you coat a screen, you’ll do it faster and more confidently. The time after that, you’ll have opinions about ink viscosity. By the end of your first month, the process will feel like cooking a meal you’ve made before: sequential, predictable, and satisfying.
That’s the actual learning curve. It’s shorter than it looks from the outside.
Save your money
What you don't need yet
Beginners get pressured to buy a lot of stuff that doesn't help them play
better. Here's what we'd skip on day one.
A multi-color carousel press — Four-arm carousel presses run $400–800. Learn one-color first; multi-color registration is a different skill set.
A UV exposure unit — Sunlight works fine for beginners: 3–8 minutes on a clear day. Buy a dedicated unit when cloudy weather keeps interrupting your schedule.
A heat press or conveyor dryer — Water-based inks cure with a household iron on a teflon sheet. A $400 heat press is for plastisol and high-volume runs.
Pre-coated screens — Coating your own screens with emulsion is faster to learn than you think and costs a fraction of buying pre-coated.
Plastisol inks — Industry-standard but needs a heat gun or dryer to cure properly. Master water-based first, then switch if you need more durability.
First week
Your first seven days
A short, real plan to get from gear-on-doorstep to actually playing.
Order your starter kit, a pack of Gildan blanks, and the photo emulsion kit so everything arrives together. · Buy
Print a test on paper before touching a shirt. Tape paper to cardboard, slip under the screen, and pull a test stroke. It shows you ink coverage and squeegee pressure before you commit to fabric. · Action
Expose a screen using sunlight. Print your design onto a transparency film or laser-print on regular paper, tape it to your coated screen, and expose outside on a bright day for 5–7 minutes. · Learn
Print one shirt intentionally badly to feel the failure modes: too little pressure, too much, angle too steep. You learn more from controlled bad prints than from accidental ones. · Action
Learn to reclaim your screen after printing. Rinse out the emulsion while ink is still fresh. A reclaimed screen costs you almost nothing and gives you a blank canvas for the next design. · Learn
Print a 10-shirt run of the same design. Repetition builds consistent pressure, flood speed, and registration: the three things that separate clean prints from muddy ones. · Action
FAQ
Common questions
How much does it cost to start screen printing at home?
A hinge clamp, one screen, squeegee, water-based inks, photo emulsion, and a 12-pack of blank shirts runs about $80–100. A proper tabletop press, 3 screens, and a full ink set lands closer to $200–250. Either is a legitimate starting point.
Do I need a darkroom?
No, but you need to handle sensitized emulsion in subdued light. A room with the lights off and door closed is fine; you're not developing film. The screen needs to dry away from UV and be exposed quickly, but you don't need photographic-grade light control.
What's the difference between water-based and plastisol ink?
Water-based inks clean up with water, cure with a household iron, and feel soft on fabric. Plastisol is the commercial standard: more durable, more vibrant on dark shirts, never dries in the screen, but requires a heat gun or conveyor dryer to cure. Start with water-based.
Can I print multiple colors at home?
Yes, but it requires careful registration: lining up each color pass exactly. The simplest approach: print all of one color, let it dry, re-expose a second screen for the next color, and align carefully using registration marks. Master single-color first.
How do I cure water-based ink on fabric?
Set a household iron to cotton (no steam), place a teflon or parchment sheet between the iron and print, and press firmly for 60–90 seconds per section. The ink needs to reach about 320°F. Works reliably for water-based inks on cotton.
How many prints can I get from one screen?
Anywhere from 50 to 500+, depending on ink type, emulsion thickness, and how well you maintain the screen. Rinse the screen immediately after printing and it'll last much longer. Reclaiming and re-coating an aluminum frame is straightforward once you've done it twice.
Ryonet (YouTube) — The most comprehensive beginner channel in screen printing. Start with their 'How to Screen Print' series, step-by-step coverage of every technique from emulsion coating to curing.
Printavo Blog — Production-focused tutorials and guides. More relevant once you're past the first print, but their emulsion and ink guides are solid reference material.
r/Screenprinting — Active community, good for troubleshooting. Search before posting; most beginner questions have 20 answered threads already.
Jacquard Products (technique guides) — Ink manufacturer with free technique guides. Their discharge and specialty ink tutorials are authoritative references for intermediate techniques.
Screenprinting.com Blog — Supplier-run blog with practical guides on emulsion selection, mesh counts, and troubleshooting common print defects.
As an Amazon Associate, JustBeginning earns from qualifying purchases.
We may also earn commission from other affiliate programs linked on this
page. Editorial recommendations are independent; we don't choose
products based on commission rates.
Product prices and availability are accurate as of the date and time
indicated and are subject to change. Any price and availability
information shown on Amazon at the time of purchase will apply.
Our top pickSpeedball Advanced All-In-One Screen Printing Kit


 Best starter