Polymer clay is what happens when someone takes Play-Doh seriously. You condition it, shape it, and bake it in your regular home oven (no kiln, no wheel, no studio). Just a ceramic tile, a handful of tools, and whatever YouTube tutorial caught your eye. The learning curve is gentle, the results are instant, and the supply list is shorter than you think.
By Colin B. · Published May 24, 2026 · Last reviewed June 15, 2026
Clay itself is cheap: $15–25 for a starter set. Tools and a pasta machine add $30–75. You can start for under $50 and be well-equipped for under $120.
We earn commission on qualifying Amazon purchases — see our
affiliate disclosure.
Price tiers and budget totals shown above are editorial estimates;
actual Amazon prices vary.
At a glance
Our top pick in each category
The fastest path through this guide — each best-starter pick by category.
Scroll for the budget and upgrade alternatives.
Don't start with Sculpey III. It's the brand everyone recognizes and the one you find at grocery store checkout lines, but it cures brittle, anything rolled thin will snap. Start with Premo Sculpey instead. It's the same company, slightly more expensive, and dramatically more durable. This is the single most common beginner mistake.
You need an oven thermometer. Most home ovens run 25–50°F hotter than the dial suggests. Polymer clay bakes at 275°F (Premo) and starts degrading and off-gassing around 350°F. A $10 thermometer is the difference between a finished piece and a burned one.
A pasta machine changes everything. Hand-conditioning clay is tedious, and hand-rolling gives you uneven slabs. A dedicated clay pasta machine (don't use it for food after) costs $25–40 and makes the whole hobby faster and more satisfying. It's the one tool worth getting early.
The clay brand you choose matters more than any other gear decision. The main options (Sculpey, Premo, Fimo, Kato) look similar in the package but cure with very different strength and flexibility. For earrings, pendants, or anything that gets handled, you want Premo or Fimo. For chunky decorative pieces or practice, Sculpey III is fine. All are oven-bake at 275°F and work with the same tools.
Clay — what's the difference?
A few common shapes, each making a different trade.
Sculpey III
Softest and cheapest. Best for practice, not for thin jewelry.
Cure temp
275°F
Strength
Low, brittle when thin
Workability
Very easy, conditions fast
Best for Beginners exploring clay, chunky decorative pieces, kids projects
Tradeoff Snaps under stress, not for earrings or wearable jewelry
Premo Sculpey
Durable, flexible, workable. The everyday clay for serious beginners.
Cure temp
275°F
Strength
High, flexes rather than snapping
Workability
Moderate, warms quickly
Best for Earrings, pendants, figurines, most beginner projects
Tradeoff Slightly stiffer to condition; feels stiff if clay is cold
Fimo Professional
Firmest and most vibrant. For detail-focused earring makers.
Cure temp
230°F
Strength
Very high, dense, hard cure
Workability
Hard, pasta machine required
Best for Experienced makers, intricate detail work, production earrings
Tradeoff Stiff conditioning, not beginner-friendly without a pasta machine
Best starter
Sculpey
Premo Sculpey 12-Color Multipack
$15.47 as of Jun 22, 2026
★★★★★Our rating· Only 1 left in stock - order soon.
Premo is the sweet spot for anyone moving beyond dabbling. It cures stronger than Sculpey III (your pieces flex instead of snapping) and conditions to a smooth, workable consistency without getting sticky. Available in 2 oz blocks at any craft store, or grab a multipack to explore colors. If you only buy one thing on this list, make it good clay.
What we like
Cures flexible and strong, earrings and thin pieces don't snap
Smooth consistency that blends and layers cleanly
Available at Michael's, Hobby Lobby, and Amazon for easy restock
What to know
Stiffer out of the package than Sculpey III, needs conditioning
Individual 2 oz blocks mean buying many small packs for color variety
Sculpey III is the gateway pick: cheap, available everywhere, and comes in 60+ colors. The downside is it cures brittle: anything rolled thin snaps instead of flexing. Fine for learning to handle clay and making chunky pieces. Step up to Premo for anything you plan to wear or keep.
What we like
Cheapest way to explore colors and techniques without commitment
Softest polymer clay, easiest to condition by hand
60+ colors and always in stock at every craft store
What to know
Cures brittle, thin pieces snap instead of flexing
Not suitable for earrings, pendants, or any handled jewelry
Fimo Professional is the European standard used by serious earring and miniature makers. It cures harder and more opaque than Premo, with the most vibrant color saturation available. It's firmer going in (takes 5–10 minutes of conditioning) but produces finished work that looks unmistakably professional.
What we like
Most vibrant, opaque colors in the polymer clay category
Cures very hard, detail work holds sharper edges
German manufacturing quality, consistent block to block
What to know
Much stiffer than Sculpey brands, requires a pasta machine
True Colors set lacks metallics and neutrals, buy separately
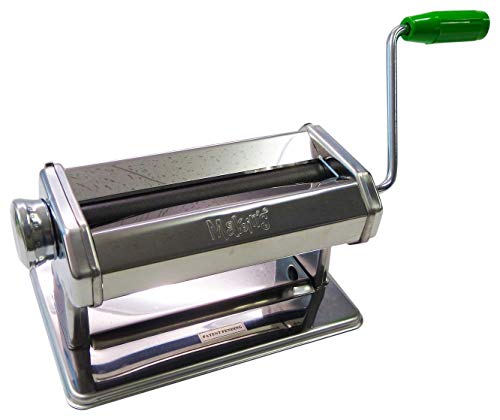
Conditioning (working the clay until it's pliable and air-bubble-free) is mandatory before every session. By hand it takes 10–15 tedious minutes per block. A pasta machine does it in 30 seconds by repeatedly folding and rolling clay through successively thinner settings. It also creates perfectly even slabs, which is impossible to achieve by hand. This is the single tool that makes the hobby feel effortless instead of frustrating.
Best starter
Makin's
Professional Ultimate Clay Machine
$49.99 as of Jun 22, 2026
★★★★★Our rating· In Stock
The polymer clay community standard. Nine thickness settings, stainless steel rollers that don't react with any clay brand, and a clamp that holds the machine to your table while you crank. The go-to recommendation in every polymer clay forum because it simply doesn't fail, and lasts for years.
What we like
9 thickness settings, from thick slabs to paper-thin sheets
Stainless steel rollers work with all clay brands without reacting
Table clamp included, stays put while you crank
What to know
Can't be used for food afterward, dedicate it to clay only
A $12 acrylic brayer is the right call if you're testing the hobby before committing to a pasta machine. It conditions clay by rolling (slowly), creates rough slabs, and works fine for chunky pieces where thickness doesn't matter. Switch to the pasta machine once you're making anything thin or precise.
What we like
Under $15, right entry cost for a hobby you're still testing
Won't leave texture marks the way wood or rubber rollers can
What to know
No settings, you can't reliably make even slabs
Hand rolling is slow and tiring with firmer clays like Fimo
You need three tools to start: a needle tool (fine details, cutting), a ball stylus (domed shapes, eye sockets), and a flat blade (clean slicing edges). Everything else is incremental. A good beginner kit covers all three and more for about $15. Add silicone clay shapers once you're doing figure work or smooth curved surfaces that fingerprints keep ruining.
Best starter
RUBFAC
Polymer Clay Sculpting Tool Kit 24-Piece
$
★★★★★Our rating
Everything you need in one kit, needle tool, ball stylus, loop and ribbon tools, clay shapers, mini rolling pin, and a starter set of small cutters. Generic brand, but the tools are solid for beginner to intermediate work. This is the starter kit we'd hand someone on day one without hesitation.
What we like
Every tool a beginner needs in one purchase, no gaps
Plastic handles hold up fine for polymer clay's light pressure
Cheap enough to replace if any piece breaks or goes missing
What to know
Handles look too similar, mark them so you can find the right one
No tissue blade included, buy a separate set for clean slicing
A tissue blade is the widest, thinnest, most flexible blade in the clay toolkit. It slices through a loaf of clay cleanly without distorting it, essential for millefiori canes, gradient blocks, and earring shapes where a clean, undistorted edge matters. You can use a craft knife, but you'll feel the difference immediately.
What we like
Thin flexible blade cuts clay canes without distorting the design
Multi-pack means you can replace without thinking when one dulls
What to know
Razor-sharp, genuinely easy to cut yourself if you're not deliberate
Dulls faster than a kitchen knife; plan to replace blades regularly
★★★★☆Our rating· Only 3 left in stock - order soon.
Silicone-tipped tools smooth clay without leaving fingerprints and blend seams invisibly. Once you've moved past basic shaping and you're doing face sculpts, figure work, or anything with smooth curved surfaces, a set of silicone shapers removes the limitations of fingertip work.
What we like
Smooth and blend clay without fingerprints, cleaner than bare hands
Multiple tip shapes handle corners, seams, and curved surfaces
What to know
Overkill for beginners doing simple earrings or geometric shapes
Stiffer tips don't grab clay as well as softer rubber shapers
Shape cutters are the reason polymer clay earrings are so TikTok-friendly, roll a slab, press a cutter in, and you have a perfect shape every time. Beyond cutters, texture tools (stamps and texture sheets) add surface depth to plain clay in seconds. Start with a geometric earring cutter set; add texture tools once you're comfortable with your clay consistency.
Best starter
PTFJZ
Polymer Clay Earring Cutter Set 76-Piece
$16.99 as of Jun 22, 2026
★★★★★Our rating· In Stock
A set of stainless steel cutters in the shapes earring makers actually use, teardrops, circles, arches, rectangles, crescents. Stainless cuts cleanly through fresh clay without dragging edges. These are the cutter shapes you'll see in every TikTok polymer clay tutorial.
What we like
Stainless steel cuts cleanly through fresh clay without dragging edges
Earring-specific shapes (teardrops, arches, circles) not cookie cutters
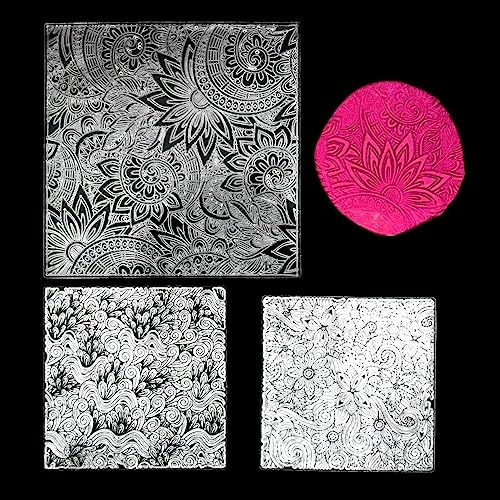
Texture sheets are silicone mats with raised patterns, press fresh clay against one, peel it off, and you have instant surface texture. Leaves, grids, terrazzo patterns, marble grain. The fastest way to make flat clay look intentional and designed rather than just shaped.
What we like
Instant texture, press and peel in under a minute
Reusable silicone, rinse off clay residue and use again
What to know
Pattern only transfers well to soft, freshly conditioned clay
Deep textures can tear thin clay sheets when peeling
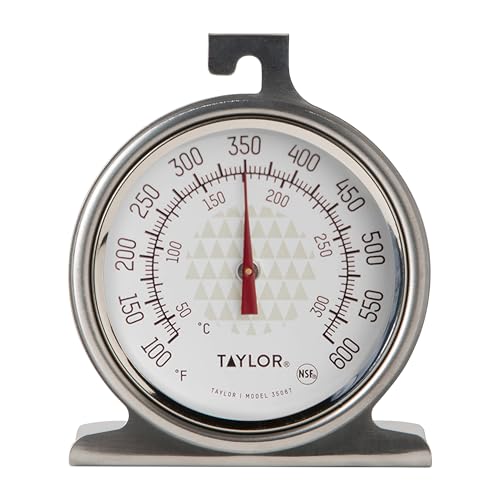
Three steps separate a baked piece from a polished one: sanding smooth (400 through 2000 grit), glazing for sheen and durability, and (most critically) an oven thermometer to confirm you're baking at the right temperature. Most home ovens run 25–50°F hot, which means your clay could be scorching without you knowing. The thermometer is the least glamorous item on this list and the most important.
Best starter
Taylor
Precision Products Oven Thermometer
$8.39 as of Jun 22, 2026
★★★★★Our rating· In Stock
Most ovens run 25–50°F hotter than the dial says, and polymer clay starts off-gassing and degrading above 350°F. A $10 oven thermometer is the most important safety purchase in this hobby. Put it in the oven, let it preheat fully, and trust the thermometer not the dial.
What we like
Tells you your actual oven temp, most ovens run 25–50°F hot
Prevents scorching and toxic off-gassing from overbaked clay
What to know
Reads slowly, wait the full preheat cycle before trusting it
No alert, you check it manually, not a connected sensor
★★★★☆Our rating· Only 5 left in stock - order soon.
Wet sanding is how polymer clay goes from matte and rough to glassy smooth. Start at 400 grit dry, move through 800 and 1000 wet, finish at 1500–2000 wet. The assortment pack gets you the full range without buying six separate packs. Sand under water, it prevents clay dust in the air and stops the paper from clogging.
What we like
Full grit range in one pack, 400 through 2000 covers the process
Wet sanding eliminates clay dust you don't want to breathe
What to know
Sanding by hand takes 10–15 min per piece, allow for it
Large sheets; cut into quarters for easier maneuvering on small pieces
★★★★☆Our rating· Only 3 left in stock - order soon.
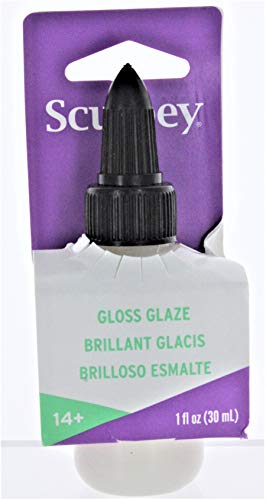
If you want shine without sanding (or after sanding), Sculpey's own glaze is the safest choice, formulated for polymer clay and won't stay tacky or react with the surface the way some generic glosses do. Brush on thin coats, let dry between each. Two coats on earrings protects them from daily wear.
What we like
Formulated for polymer clay, won't react or stay tacky like generic finishes
Adds durability against daily handling on earrings and pendants
What to know
Brush-on application leaves streaks if applied too thick or rushed
Gloss finish only, buy Sculpey Satin separately if you want matte
Polymer clay is one of the few crafts where you make something real in your first session. Here's what to do (and what not to do) across your first two days.
Polymer clay has a shorter runway to your first finished thing than almost any craft. You buy the clay, you watch a 10-minute YouTube tutorial, and two hours later you have something you made with your hands. That’s the hook, and it’s real.
The bad news is that a few beginner mistakes (wrong clay brand, wrong oven temperature, skipping conditioning) can make the whole first session feel like it failed when the clay itself was fine. This guide walks through your first weekend so you know what to expect and what to skip.
Day one: conditioning and your first shape
Before you touch a tool or a cutter, you have to condition your clay. This means warming it up, rolling it, and folding it repeatedly until it’s smooth, pliable, and no longer cracking at the edges when you fold it. Raw, unconditioned clay is stiff and will break apart in the oven. Conditioned clay bends.
Do this by hand to start: roll the block between your palms, flatten it against your work surface, fold it in half, roll again. Repeat until it stops cracking, usually 5–10 minutes for Premo. If it’s taking longer or your hands are getting sore, your kitchen is cold. Run the clay under warm (not hot) water for 30 seconds and try again.
If you have a pasta machine: fold the clay in half, feed it through the widest setting, fold, feed again. Do this 10–15 times on progressively thinner settings. The machine does in two minutes what your hands take ten to accomplish.
Your first shape should be simple. A flat disc, a small square, a rough sphere. Not a face, not an earring with precise cutouts, not a miniature anything. The goal of day one is to understand how the clay feels when it’s right, smooth, not sticky, holds its shape when you set it down.
Roll a slab about 3mm thick (about ⅛ inch) using your roller or pasta machine, then use a round cookie cutter or a glass to cut a circle. Press a texture sheet against it if you have one. Put it on a ceramic tile or sheet of parchment.
The bake: get the temperature right before anything else
Before your first bake, put an oven thermometer in your oven and let it preheat to 275°F. Check the thermometer after 15 minutes, not the dial, the thermometer. Most ovens run 25–50°F hot. If your thermometer reads 310°F when the dial says 275°F, adjust the dial down until the thermometer settles at 275°F.
This is not optional. Polymer clay at the right temperature produces flexible, durable pieces. At 325°F+ it discolors, gets brittle, and starts releasing fumes. Burned polymer clay smells distinctly wrong, if your kitchen smells acrid, your oven is too hot.
Bake your test piece at true 275°F for 30 minutes. Remove it, let it cool completely on the tile (it’s still flexible when hot), then bend it. It should flex without snapping. If it snaps, you either used Sculpey III (which is brittle, switch to Premo), underbaked it (add 10 minutes), or your oven ran cool (check the thermometer again).
Day two: cutters, texture, and finishing
Once you know your clay and oven are working, day two is about output. Roll a slab at a consistent thickness (the pasta machine’s #3 or #4 setting is good for earrings), use your earring cutters to punch out shapes, add texture if you want it, and bake.
The big mistake on day two is rushing the slab thickness. An uneven slab means some pieces bake to a different hardness than others, and thin spots crack. If you’re rolling by hand, check the slab by pressing it, it should feel the same thickness everywhere.
Sanding is the finish that makes things look intentional. After baking and cooling, sand your pieces under running water: 400 grit to remove surface roughness, then 800, then 1000. The piece will go from matte and slightly rough to smooth and almost glassy. Two coats of Sculpey Gloss Glaze (let each dry 30 minutes) adds durability and sheen.
The first time you sand a piece and then hold it up, you’ll understand why people get obsessed with this hobby.
Wrong clay brand. If your pieces are snapping at thin points, you probably used Sculpey III. Swap to Premo for anything you want to keep or wear.
Skipping the thermometer. Your oven dial is probably lying. The thermometer is not a nice-to-have.
Conditioning too little. If your clay is cracking in the oven or the finished piece is powdery, it was underconditioned. Condition more than you think you need to.
Fingerprints everywhere. Work with clean, slightly cool hands. A silicone clay shaper smooths over fingerprints on flat surfaces. Wet sanding post-bake removes the rest.
Expecting studio results in week one. The first batch will have fingerprints, uneven edges, and color decisions you regret. That’s the batch you learn from. Make a second batch immediately, the improvement is dramatic.
The things worth learning next
Once you’ve got conditioning and baking handled, three techniques open up the most possibilities:
Millefiori canes. You build a log of clay with a design inside (a flower, a geometric pattern, a face) and slice it thin to reveal the cross-section as a surface decoration. It’s the technique behind the intricate patterned beads you see everywhere. Takes patience to learn, produces work that looks impossible.
Blended color gradients (skinner blends). Two or more colors, rolled together through the pasta machine in a specific way, produce seamless blends from one color to another. Essential for ombre earrings and sophisticated backgrounds.
Surface applications. Mica powder brushed onto uncured clay creates metallic shimmer. Alcohol inks dropped on clay surfaces create marble effects. Liquid clay lets you collage images onto clay. Each of these is a separate technique with a separate learning curve.
You don’t need any of them in your first weekend. Condition the clay, bake it right, sand it after. Everything else follows from there.
Save your money
What you don't need yet
Beginners get pressured to buy a lot of stuff that doesn't help them play
better. Here's what we'd skip on day one.
Resin and UV lamp — Resin fills and coatings are an intermediate technique. Sculpey Gloss Glaze does the same job for beginners without the setup and safety requirements.
A dedicated clay toaster oven — Your regular oven works fine with a thermometer. A dedicated clay oven is a nice eventual upgrade, not day one.
Mica powder and pigments — Beautiful for metallic effects, but premixed metallic Premo is much easier to start with. Mica powders are a rabbit hole for after month one.
Polymer clay extruder — An extruder pushes clay through shaped dies to make uniform cords and tubes. Useful for advanced caning work, not needed in your first month.
Earring hardware (hooks, jump rings, pliers) — If you're making jewelry, you'll need these eventually, but buy them after you've successfully baked your first earring shape and know you're sticking with it.
First week
Your first seven days
A short, real plan to get from gear-on-doorstep to actually playing.
Order Premo Sculpey in a few colors you like. Two or three 2 oz blocks is enough to start. · Buy
Set up a ceramic tile or a piece of parchment paper on your work surface. Clay sticks to bare wood and desk surfaces. · Action
Condition your clay before every session: roll it, fold it, roll it again until it's smooth and warm. Stop when it no longer cracks at the fold. · Learn
Pick up a cheap oven thermometer and calibrate your oven. Bake a test piece at 275°F for 30 minutes before touching your real projects. · Buy
Bake your first test piece, let it cool completely, then bend it. If it snaps, your clay brand, temperature, or bake time needs adjusting. · Action
Sand your finished piece through 400, 800, and 1000 grit sandpaper under running water. The surface transformation will surprise you. · Action
FAQ
Common questions
What's the best polymer clay for beginners?
Premo Sculpey. Not Sculpey III (too brittle for thin pieces), not Fimo (too stiff without a pasta machine). Premo hits the sweet spot: soft enough to condition by hand, strong enough to survive wear. It's at Michael's, Hobby Lobby, and Amazon.
Can I use my regular home oven for polymer clay?
Yes, but always use an oven thermometer, most ovens run 25–50°F hotter than the dial. Polymer clay bakes at 275°F (most brands). Above 350°F it degrades and off-gases. Bake with a window open and don't exceed the manufacturer's temperature.
Do I really need a pasta machine?
Not on day one, but yes within the first month. A pasta machine conditions clay in 30 seconds instead of 15 minutes and creates even slabs you literally cannot make by hand. It's the single upgrade that makes the biggest difference. Budget $25–40 for one and don't use it for food afterward.
How do I keep fingerprints off my clay?
Work with slightly cooler clay (let it rest a minute after conditioning), smooth fingerprints with a silicone shaper or soft brush, or embrace light texture as part of the design. Wet sanding after baking removes the last traces on finished pieces.
Is polymer clay toxic or safe to use?
Properly baked at the correct temperature, it's considered safe for adults (ASTM D-4236 certified). Don't overbake, it can release irritating fumes. Don't eat it. Always bake with ventilation. The clay is non-toxic when used as directed; the fumes from scorched clay are not.
How long does it take to cure polymer clay?
Most brands: 275°F for 30 minutes per quarter-inch of thickness. Thicker pieces need more time; thin earrings cure faster. Underbaking produces brittle pieces; overbaking scorches the clay and releases fumes. An oven thermometer and a timer are your two most important tools.
The Blue Bottle Tree — The most comprehensive polymer clay tutorial site on the internet. Cindy Lietz has been teaching this craft for 15+ years. Start with her beginner series and stick with it.
KatersAcres (YouTube) — Friendly beginner-focused tutorials. Great first-project walkthroughs and clear technique fundamentals before you branch out.
r/polymerclay — Active community with a well-maintained wiki. Check the wiki before posting a basic question, almost every beginner question has been answered there already.
Polymer Clay TV (YouTube) — Cindy Lietz's video channel. Pair it with her website for the most structured beginner curriculum available anywhere.
Cool Tools for Schools, Polymer Clay Basics — Technical reference on conditioning, baking temperatures, and brand comparisons. Dry but accurate, good for troubleshooting why something went wrong.
As an Amazon Associate, JustBeginning earns from qualifying purchases.
We may also earn commission from other affiliate programs linked on this
page. Editorial recommendations are independent; we don't choose
products based on commission rates.
Product prices and availability are accurate as of the date and time
indicated and are subject to change. Any price and availability
information shown on Amazon at the time of purchase will apply.


 Best starter