Cosplay looks intimidating from the outside. The elaborate foam armor and hand-stitched gowns on Instagram took years to develop. Your first build doesn't need to. Pick one character, nail three recognizable details, and you're further along than you think. Here's what you actually need to get started.
By Colin B. · Published May 23, 2026 · Last reviewed June 3, 2026
Without a sewing machine, a first build runs $80–150 (foam, wig, paints). Add a machine and you're at $200–300, but it pays for itself on build two.
We earn commission on qualifying Amazon purchases — see our
affiliate disclosure.
Price tiers and budget totals shown above are editorial estimates;
actual Amazon prices vary.
At a glance
Our top pick in each category
The fastest path through this guide — each best-starter pick by category.
Scroll for the budget and upgrade alternatives.
Your character choice is your build plan. Before buying materials, find reference photos of your character from three angles. Every purchase should serve those references; this keeps you from buying foam in the wrong thickness or fabric in the wrong color.
You don't need a sewing machine to start. Foam armor over a thrift-store base garment is a completely legitimate first build. If your character is fabric-heavy, check whether a local library or makerspace has sewing machines you can use before buying one.
The sealing step is not optional for foam builds. EVA foam is porous. Paint applied directly will crack and peel within hours of wear. A layer of Plasti-Dip before painting is the difference between a costume that holds up all day and one that's visibly deteriorating by noon.
The gear
What you actually need
Sewing Machines
For fabric-based costumes (or any build where you're modifying garments, lining armor pieces, or sewing in attachment points), a sewing machine is what makes the work fast and clean. The Brother CS6000i is the recommendation you'll find on every beginner cosplay forum, and for good reason. The XM2701 is the entry option for builders not ready to commit; the Singer Heavy Duty 4452 is for working with thick materials like faux leather and denim.
Sewing Machines — what's the difference?
A few common shapes, each making a different trade.
Computerized
LCD stitch selector, preset patterns, automatic features. More to learn upfront, more capability.
Controls
LCD screen
Stitches
60+
Auto threader
Yes
Best for First-time sewers, fabric-heavy builds, builders who want built-in guidance
Tradeoff Slightly more to learn upfront; slightly more that can go wrong
The CS6000i is the go-to beginner machine in cosplay: 60 built-in stitches, automatic needle threading, a wide extension table for large fabric panels, and a walking foot that feeds foam-backed material without puckering. Handles everything a beginner needs and you won't outgrow it for years. Quieter and lighter than Singer's heavy-duty line, easier to learn than industrial machines.
What we like
60 built-in stitches covers every construction technique in cosplay
Auto needle threader saves time on frequent thread color changes
Comes with 10 presser feet including a walking foot for thick fabric
What to know
LCD stitch panel takes 30 minutes to learn; read the manual first
Not designed for sustained sewing through very thick faux leather
At under $100, the XM2701 does what you need for a first build: it sews, handles light-to-medium fabrics cleanly, and won't overwhelm you with settings. If you're not sure cosplay will stick (or if sewing isn't your primary technique), this is the sensible way in.
What we like
Under $100 and handles everything a first build needs
Mechanical dials mean fewer settings to learn and fewer failure modes
What to know
No auto needle threader, which is annoying for frequent color changes
Struggles with pleather or heavy interfacing; upgrade before tackling those
When your builds regularly involve faux leather, denim, and foam-backed fabric, the 4452 earns its name: 1,100 stitches per minute, a steel internal frame that stays in alignment through marathon sessions, and real authority through stiff layers. Upgrade here once you're building consistently.
What we like
Pushes through faux leather and thick interfacing without skipping stitches
Steel internal frame stays in alignment after months of consistent use
What to know
Louder and heavier than Brother machines; not for quiet apartment builds
Fewer built-in stitches (32 vs. 60+); covers basics but not specialty work
EVA foam is the backbone of cosplay armor, props, and structural pieces. It's cheap, light, and completely reshapes under a heat gun, so early mistakes are fixable. A mixed-thickness pack (2mm for detail work and appliqués, 6mm for main armor plates) covers 90% of what you'll build in your first few costumes. Worbla thermoplastic is the upgrade for pieces that need sharp, rigid edges and a smooth finish.
Best starter
The Foamory
EVA Cosplay Foam Sheet 6mm
$19.99 as of Jun 22, 2026
★★★★★Our rating· In Stock
The Foamory makes cosplay-specific high-density EVA foam (85 kg/m³), not gym mats repurposed for crafts. The 6mm thickness is the sweet spot for armor plates and structural pieces. A 14×39 inch sheet gives you enough to pattern and cut a full pauldron or chest plate. Also grab a 2mm sheet from the same brand for detail work; together they cover your first two builds.
s Finest Art Sheet Size M (29x19 Inch Sheet) Thermoplastic Material for Cosplay and Crafts
$$$
★★★★☆Our rating
Worbla heats with a heat gun, molds to any shape, then hardens to a rigid, sandable surface, far smoother and more durable than foam alone. Use it as a cap layer over foam armor to get clean, sharp edges and a finish that holds metallic paint convincingly. The medium 29×19 inch sheet gives you enough material to test it on a real piece before committing to a larger roll.
What we like
Heat-molds like foam but hardens to a rigid, sandable surface
Self-adhering; bonds to foam without additional glue
What to know
Pricey per square foot; reserve it for hero pieces, not full builds
Cools quickly; have your shaping plan ready before you heat it
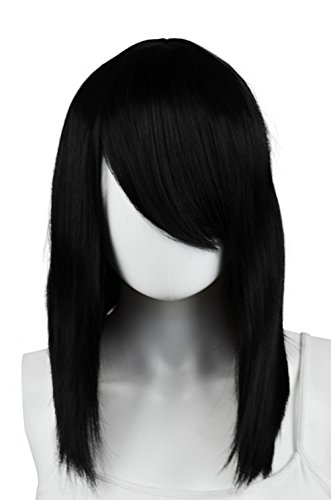
For most characters, your natural hair won't match, even if the color is close, the volume, part, and shape usually won't be. A good wig is often the fastest way to sell the character, and a bad one is frequently the first thing people notice. For beginners, a heat-resistant synthetic wig in the right color gives you something to style and trim without anxiety.
Best starter
Epic Cosplay
Theia Long Straight Wig (20 in)
$42.00 as of Jun 22, 2026
★★★★★Our rating· In Stock
Epic Cosplay makes wigs specifically for cosplay, and it shows. The Theia fiber is heat-resistant to 410°F (actual curling-iron temperatures), so you can style it without melting the fiber. A 20-inch length is versatile; trim down for shorter characters or layer extensions for longer ones. Available in dozens of colors calibrated for anime and game character palettes.
What we like
Heat-resistant to 410°F; tolerates actual styling tools, not just heat guns
20-inch length is versatile; trim down or layer for longer characters
Available in dozens of colors matched to anime and game character palettes
What to know
Still synthetic; bolder colors can fade after repeated heat styling
20-inch length may need extensions for very long-haired characters
When your build is foam-armor-heavy and the wig is barely visible, this is the sensible option. Under $20, pre-styled, and available in multiple colors. Not for close-up portrait shots, but entirely workable for a first convention experience where you're mostly wearing it, not photographing it.
What we like
Under $20, affordable for experimenting with multiple colors
Pre-styled and wearable straight from the package
What to know
Not heat-resistant; avoid styling tools with this fiber
Tangling is common on longer styles; keep a wide-tooth comb close
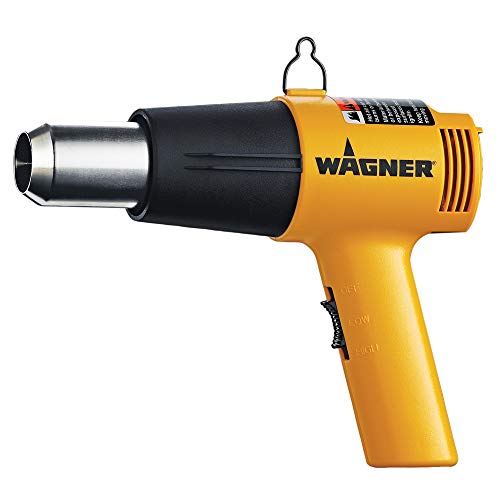
Two tools drive most foam construction. A heat gun is how you shape foam: hold it close, watch it soften, press it into the curve you want, hold until it cools. Done. Contact cement is how you bond foam pieces together: brush both surfaces, let them dry to tacky, press together once, and it's not coming apart. Get both before you start building.
Best starter
Wagner
HT1000 Heat Gun
$27.26 as of Jun 22, 2026
★★★★★Our rating· In Stock
Two temperature settings (750°F low, 1000°F high), a wide nozzle for broad foam shaping, and a stand that holds it upright hands-free while you position pieces. The standard entry-level heat gun in the craft community, affordable enough that you don't worry about using it heavily and reliable enough that you won't outgrow it for years.
What we like
Two settings: 750°F for thin foam details, 1000°F for thick plates
Built-in kickstand holds it upright hands-free while positioning pieces
Affordable and widely available; easy to replace if it fails
What to know
Cord limits reach; plan your workspace layout before starting
Nozzle stays hot for minutes after shutting off; don't pack it away immediately
★★★★☆Our rating· Only 16 left in stock - order soon.
The contact cement cosplayers, cobblers, and leatherworkers have used for decades. Brush both foam surfaces, wait five minutes until dry-to-touch, press together, and it's not coming apart. The TF (toluene-free) formula is far less hazardous than the original while retaining the same bond strength.
What we like
Permanent bond; glued foam panels survive a full 10-hour convention day
TF formula is significantly safer than original Barge without losing strength
What to know
Requires ventilation; not for rooms without airflow
Bond is permanent; dry-fit everything before applying cement
Paint won't bond to raw EVA foam. It needs a sealing layer first. Plasti-Dip is the most reliable option: two thin coats sprayed over the foam, let them cure, and your armor is now paintable with a rubbery flex that won't crack when you move. After sealing, regular acrylic craft paints work for most builds. Metallic spray paint delivers convincing armor effects with far less hand-painting effort.
Best starter
Plasti Dip
Multi-Purpose Rubber Coating Spray Black 11oz
$
★★★★★Our rating
The most-used foam primer in cosplay for two reasons: it seals the porous EVA surface so paint bonds properly, and the dried coat stays flexible, bending with the armor rather than cracking. Two light coats, let them cure, then paint. Black is the standard primer; use gray or white as a base coat under light-colored costumes.
What we like
Seals foam pores so acrylic paint bonds instead of flaking off with wear
Dried coat flexes with armor movement rather than cracking at bend points
Available in black, gray, and white to suit different base coat needs
What to know
Requires outdoor or well-ventilated use; fumes are real
Peeling off a cured layer is tedious; apply carefully over clean, dry foam
Under $15 for 18 colors, which covers almost every palette you'll need on a first build. Forgiving to mix, covers sealed foam cleanly in 2–3 coats, and doesn't cost enough to make you nervous while you're figuring out how paint behaves. Upgrade to artist-grade acrylics after you have a building style.
What we like
18 colors for under $15, covering most character palettes on build one
Mixes predictably and washes out of brushes before drying
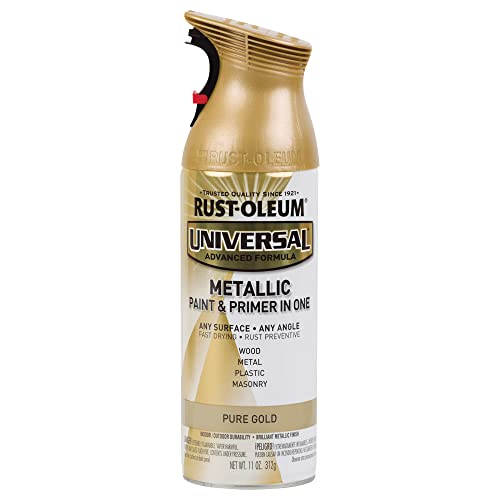
For armor that needs to look like actual metal, a metallic spray does in twenty minutes what takes an hour of dry-brushing to approximate. Pure Gold is the most versatile armor color. It reads as polished fantasy metal or aged warrior gear depending on your wash technique. The full Rust-Oleum Universal Metallic line also covers chrome, bronze, copper, and dark steel.
What we like
Metal finish in 20 minutes, more convincing than hand-painting for beginners
The first build is the hardest, not because cosplay is impossible, but because you're learning every skill at once. Here's what that actually looks like.
Cosplay has a reputation for being either extremely technical or effortlessly creative; neither of which helps you understand what your first actual build will be like. It will be slower than you expect, more problem-solving than artistic vision, and more satisfying than almost any other creative project you’ve finished. That sequence is pretty consistent.
This is what your first cosplay costume actually looks like, from character selection to the moment you wear it.
Choosing your character
The most important decision you make happens before you buy anything. Your character choice determines the techniques you’ll need, the materials you’ll use, and whether your first build ends up finished or abandoned.
The traps beginners fall into: choosing a character with 15 small distinct details that are all equally important, or picking someone whose costume depends on a technique you haven’t learned yet (like elaborate corset boning, or wig sculpting that takes multiple attempts to get right).
The better approach: choose a character with a strong silhouette. A recognizable shape from thirty feet away. When someone sees your costume at a convention, they should be able to tell who you are before they read your badge. Characters with distinctive armor shapes, bold color blocking, or iconic props tend to read well even when individual details aren’t perfect.
A good first character has:
One or two primary colors
At least one iconic prop or accessory that immediately signals who you are
Hair that’s manageable or close to your own (or a simple wig style)
Fewer than five distinct “zones” that need different treatments
Then find your reference photos. Front, side, and action: at least three. Print them or pull them up on a second screen while you build. Your references are your build plan.
The anatomy of a build
Almost every first costume follows the same structure: a base garment, one or two constructed pieces, and the finishing details that sell the character.
The base garment is whatever you’re wearing underneath everything else: a shirt, pants, bodysuit, or dress. Most beginners buy or thrift something close and modify it. “Modifying” means hemming, adding trim, changing buttons, or dyeing fabric. You don’t need to construct a garment from scratch on build one.
The constructed pieces are anything custom-built: armor plates, props, weapons, or specialty components like wings or horns. For most first characters, this means EVA foam. Foam is the universal cosplay building material, cheap enough to practice on, forgiving enough to fix mistakes, and versatile enough to become convincing armor, accessories, or props with the right sealing and paint.
The finishing details are what transforms a collection of pieces into a costume: the right wig, makeup, and final weathering or detailing that makes individual elements look like part of a cohesive whole.
Most first-timers underestimate how long finishing takes. Plan for it. The difference between an “unfinished” costume and a completed one is almost always in the finishing step.
Working with EVA foam
EVA foam is the skill worth investing the most time in before your first major build. The workflow is consistent across almost every armor piece or prop you’ll ever make:
Pattern → Cut → Shape → Assemble → Seal → Paint
Pattern: A flat piece of paper or craft foam that traces the shape you need. Before you cut into your good foam, work out the shape in cheap craft foam or cardboard. Everything in cosplay is easier when you have a pattern to work from.
Cut: Sharp craft knife or scissors. A dull blade tears instead of cuts. Replace blades frequently; cheap new blades are better than expensive worn ones.
Shape: Heat gun at medium distance, soft strokes. The foam becomes pliable within seconds; don’t overheat it or it’ll bubble. Press it against a curved surface (your leg, a ball, a curved form) and hold until it cools (ten seconds is usually enough). You can reheat and re-shape.
Assemble: Contact cement (Barge TF is the standard) applied to both surfaces, let dry to tacky, pressed together once. The bond is permanent, so dry-fit everything before gluing.
Seal: Two thin coats of Plasti-Dip, let each coat cure fully. This step is mandatory. Paint applied to raw foam will crack and peel with the first bend.
Paint: Acrylics for base coats and detail work. Metallic spray paint for convincing metal surfaces. Work in layers: a dark base, a lighter mid-tone, and a dry-brushed highlight makes foam read as dimensional even in photographs.
If your character is more fabric than armor, the same pattern-first logic applies. Find a sewing pattern that’s close to the silhouette you need (McCall’s and Simplicity both sell licensed character patterns; independent designers sell them on Etsy) and modify it rather than drafting from scratch.
For a first build, a few techniques get you very far:
Straight seams: The foundation of most garment construction. A machine-sewn straight seam with a 5/8″ seam allowance and pressed open makes any garment look finished.
Hemming: Folding and stitching the raw edge. Practice on fabric scraps until you can do it in a straight line; this is what makes a garment look complete rather than in-progress.
Installing a zipper: Intimidating the first time, unavoidable for most closures. The invisible zipper foot that comes with most machines makes this significantly less terrifying than it looks. Watch one short video specific to your machine model before attempting it.
The single most useful sewing habit for cosplay is pressing every seam with an iron as you go. It takes thirty extra seconds and makes everything look more finished. Almost no beginners do it on their first build, and almost every experienced builder considers it non-negotiable.
Wigs and finishing
A wig styled correctly for your character can carry a costume that’s otherwise rough around the edges. A wig bought in the wrong color or left unstyled undermines a costume that’s otherwise excellent.
For basic styling on a heat-resistant synthetic wig:
Use wig spray (or a light hold hairspray) before applying heat; it helps the style hold
Low heat, long slow passes; synthetic fiber melts if you linger too long in one spot
Test on the underside before styling the visible sections; you’ll feel how the fiber responds
Style while the wig is on a wig head, not in your hands. You need both hands free and a stable base.
For wigs that need volume (spiky characters, large dramatic shapes), backcombing and hairspray builds most of the structure. Got2b Glued is the cosplay community’s standard for hold, aggressive enough to maintain a spike for a full convention day.
Starting too late. Everyone does this once. Three weeks before your deadline is when you should be finishing, not starting. Double your time estimate on the first build.
Spending money instead of making decisions. Buying materials before you have a reference and a plan means buying the wrong thing at least twice. Decide first, then shop.
Making every piece equally important. A convention photo is taken from ten feet away. The pieces closest to your face matter most. The costume’s center of gravity for viewers is your head, then your torso. Spend your best effort there; the gauntlets and boots can be rougher.
Skipping the sealing step. The Plasti-Dip step on foam takes thirty minutes. The alternative is a finished costume that starts visibly deteriorating by hour three of a convention. Don’t skip it.
Comparing to professional builds. The costumes you see featured on r/cosplay or at major conventions represent years of skill development and dozens of builds. Your first costume is competing against other people’s first costumes, not their fifteenth.
What comes after the first build
Two things that dramatically improve the second build:
Document the first one. Take photos mid-build of techniques that worked and things you’d do differently. What patterns you made, what you learned about foam thickness for specific shapes, which paints covered well. Most builders don’t do this and then spend the second build re-learning the same lessons.
Go back to the craft. One targeted learning session between builds (an hour of watching how someone patterns a pauldron, or practicing free-motion stitching on fabric scraps) compounds fast. Cosplay skills transfer across every character you’ll ever build.
Your first costume will have visible seams, slightly mismatched colors, and at least one element that you know isn’t quite right. It will also get you stopped for photos at your first event, and the person who made it will understand something about building physical things that’s very hard to learn any other way.
Save your money
What you don't need yet
Beginners get pressured to buy a lot of stuff that doesn't help them play
better. Here's what we'd skip on day one.
An airbrush and compressor — Airbrushing creates beautiful gradients, but hand-painting with acrylics and a dry-brush technique gets you most of the way there on a first build. Learn the fundamentals before adding a $200 tool.
A 3D printer — Foam builds faster, lighter, and cheaper for most first costumes. 3D printing pays off for small rigid props with fine detail, not as the backbone of build one.
LED lighting — Convincingly mounted LEDs require wiring, battery planning, and diffusion work you won't have bandwidth for on build one. Leave a foam channel for them if you think you'll add them later, but don't install them yet.
Premium thermoplastics beyond Worbla — Worbla's Finest Art is already the upgrade step. Wonderflex, Fosshape, and Thibra all have specific use cases that make sense after you know your building style.
A dress form — You can pin fabric to yourself or prop up your base garment for a first build. Buy a proper form when you're making costumes for other people or working with complex draped pieces.
First week
Your first seven days
A short, real plan to get from gear-on-doorstep to actually playing.
Choose your character and collect at least three reference photos: front, 3/4, and action shot. Pin them where you'll see them while building. · Action
List the five most recognizable elements of the costume. Focus your entire first build on those. Nothing else. · Action
Find your base garment. A thrift store often has something close enough. You'll modify it, not build from scratch. · Action
Set a deadline: a convention, a photo shoot, or just a date three weeks out. Costumes without deadlines tend not to get finished. · Action
FAQ
Common questions
How much does a first cosplay costume actually cost?
It depends heavily on the character. A foam armor build over a thrift-store base runs $80–120. Add a sewing machine and fabric work and you're at $200–300 total. Don't count the sewing machine as build cost; it serves every future costume after this one.
Do I need to sew to cosplay?
No. Foam armor over a bought or thrifted base garment is a completely legitimate first build. Many experienced cosplayers built their first five costumes without owning a sewing machine. If your character is armor-heavy, you may not need to sew at all. The machine is an investment in future builds.
What character should I start with?
A character with one or two colors, a strong recognizable silhouette, and manageable hair. Avoid elaborate fabric draping and characters with many small specific details on build one. A simple character executed well photographs better than an ambitious one executed poorly.
How long does a first cosplay build take?
Expect 20–40 hours for a first foam armor build, 15–25 hours for a modified fabric costume. Almost everyone underestimates this. Start 3–4 weeks before your first planned wear, not the week before.
Why does paint peel off my foam armor?
Because EVA foam is porous. Acrylic paint applied directly will crack and peel with any movement. The fix is Plasti-Dip: two light coats sprayed over the foam before any paint. Once sealed and fully cured, acrylics bond well and flex with the costume.
Can I cosplay without going to conventions?
Absolutely. Many cosplayers build entirely for photo shoots, charity events, Halloween, or just because they enjoy the craft. Conventions are a natural deadline and a great social scene, but they're not required to participate.
Kamui Cosplay (YouTube) — Svetlana Quindt's channel. The most comprehensive foam-build tutorial library on the internet. Start with 'EVA Foam for Beginners.' She also has a published book covering her full workflow.
Punished Props Academy (YouTube) — Bill Doran's channel for prop building and foam construction. Excellent on texture effects and finishing, the step that separates 'looks like foam' from 'looks like metal.'
Evil Ted Smith (YouTube) — Foam patterning and construction. His method for getting a flat sheet to form complex curves is the clearest explanation of how foam armor comes together structurally.
r/cosplay — Active community with a solid wiki. The WIP Wednesday thread is a good place to get feedback on in-progress builds. Search for your character before buying materials; someone has almost certainly documented the build.
r/cosplayprops — More technique-focused than r/cosplay. Better for specific material questions, construction problems, and 'what should I use for X' decisions.
Arda Wigs — The most trusted wig brand in the cosplay community. Their color library is matched to anime and game character palettes. Worth ordering direct when wig accuracy matters for a specific character.
As an Amazon Associate, JustBeginning earns from qualifying purchases.
We may also earn commission from other affiliate programs linked on this
page. Editorial recommendations are independent; we don't choose
products based on commission rates.
Product prices and availability are accurate as of the date and time
indicated and are subject to change. Any price and availability
information shown on Amazon at the time of purchase will apply.
Our top pickBrother CS6000i Computerized Sewing Machine

 Best starter