Encaustic painting is one of the most tactile mediums in art: you work with molten beeswax, fuse each layer with heat, and build up surfaces with real physical depth. The gear list is short but specific (hot palette, wax medium, cradled panels, heat gun). Here's exactly what you need to start working in wax on day one.
By Colin B. · Published June 13, 2026 · Last reviewed June 13, 2026
Enkaustikos Academy Hot Cakes Set
— Enkaustikos Hot Cakes give you pigmented wax in artist-grade colors, ready to melt and paint without mixing anything.
The hotbox is the biggest single cost ($80-150). Wax medium and panels are consumable; budget $50-100 to start and replenish as you go.
We earn commission on qualifying Amazon purchases — see our
affiliate disclosure.
Price tiers and budget totals shown above are editorial estimates;
actual Amazon prices vary.
At a glance
Our top pick in each category
The fastest path through this guide — each best-starter pick by category.
Scroll for the budget and upgrade alternatives.
Don't use synthetic brushes. They melt on contact with hot wax, releasing plastic fumes and leaving residue in your work. You need natural bristle brushes only (hog or ox hair) for anything that touches molten wax.
Work in a ventilated space. Not 'open a window' ventilated, but 'fan blowing air out of the room' ventilated. Hot beeswax releases low-level fumes that accumulate in a closed studio. A respirator is optional for occasional sessions but smart for regular work.
Canvas doesn't work. Wax is heavy and rigid when it cools, and canvas flexes with humidity and temperature changes, which causes cracking and delamination within months. You need a rigid substrate: cradled wood panels.
The medium itself is beeswax combined with damar resin (a tree resin that hardens the wax and adds clarity). Pre-made encaustic medium is clear; pigmented encaustic paints are the same formula with real artist pigments mixed in. You can buy pre-mixed color blocks and get painting in minutes, or start with plain medium and tint it with oil-based pigment sticks for more color control. R&F and Enkaustikos are the two brands working encaustic artists consistently reach for. Oil sticks are a third option that unlocks custom colors once you understand how they interact with the wax.
Best starter
Enkaustikos
Academy Hot Cakes Set
$101.53 as of Jun 22, 2026
★★★★★Our rating· Only 1 left in stock - order soon.
Enkaustikos's Hot Cakes are small pigmented wax rounds that melt directly on a hotbox surface. The sampler gives you a range of colors plus clear medium, which covers every beginner exercise without mixing raw materials. Cleveland-based Enkaustikos has been making encaustic materials for working artists for decades; this is as close to an out-of-the-box start as the medium allows.
What we like
Pre-pigmented wax rounds melt directly on the hotbox, no mixing needed
Sampler format covers warm, cool, and neutral colors in one purchase
Enkaustikos formula trusted by working encaustic artists for decades
What to know
Individual round colors cost more per ounce than mixing from plain medium
Sampler sizes are small; replenish individual colors quickly once you settle
Plain encaustic medium is beeswax and damar resin, nothing added. You tint it by stirring in oil-based pigment sticks, which gives you total color control at a lower per-ounce cost than pre-mixed blocks. This is how many committed encaustic painters work once they move past the sampler stage. One pound of medium covers dozens of beginner sessions.
What we like
Lowest cost per ounce of any encaustic material; one pound lasts weeks
Mix with any oil-based pigment stick for custom color at any time
What to know
Requires extra step to add color; not ready to paint straight from the block
Oil sticks sold separately, adding to startup cost
Oil sticks are oil paint in solid stick form. A scrape of pigment stirred into molten plain medium gives you any color you want. Sennelier's basic 6-color set (yellow, red, blue, green, burnt sienna, white) covers the color mixing fundamentals without the commitment of a full assortment. Buy these once you've worked through a hot cakes sampler and want more custom color control.
What we like
High pigment load produces rich, saturated colors in molten wax
Wide color range lets you mix custom hues not available in pre-made blocks
What to know
Takes practice to incorporate evenly; streaks show if not fully mixed
Not a complete solution; still need encaustic medium as the base
The hot palette is non-negotiable: you need a flat, heated surface that holds wax at 180-220°F while you load brushes and work. Dedicated encaustic hotboxes are calibrated for this range and are the cleaner, more reliable choice. Many beginners start with a repurposed electric skillet (the kind meant for pancakes), which costs less but requires a separate infrared thermometer to dial in temperature. Either approach works; the difference is setup friction and how closely you have to monitor things mid-painting.
Hot Palette — what's the difference?
A few common shapes, each making a different trade.
Dedicated Hotbox
Purpose-built: uniform temp zones, clean brushwork from day one.
Temp range
180-220°F built-in
Surface
Flat aluminum
Thermostat
Calibrated for wax
Best for Anyone who wants to start painting immediately without calibration fuss
Tradeoff Larger upfront cost ($80-150); less available at local stores
R&F Handmade Paints has been making encaustic materials in New York since 1988, and their 12x12-inch heated palette is the flat aluminum surface the community keeps returning to. Set wax directly on it to melt, load brushes straight from the plate, and the calibrated thermostat holds 180-220°F through a full session. No adjusting; no checking. Just painting.
What we like
Calibrated thermostat keeps wax at exactly the right working temperature
Aluminum surface holds multiple wax colors in separate areas at once
No hot-spot issues common in repurposed electric skillets
What to know
Costs $80-150, the largest single purchase in the starter kit
Not portable; requires a stable, dedicated workspace surface
Half the price of a dedicated hotbox, the Presto 11-inch skillet heats to the right range and is the most commonly recommended alternative in encaustic communities. The catch: you'll want a separate infrared thermometer to confirm the surface temperature before you start painting. Functional and widely available, but expect a few extra minutes of setup each session.
What we like
Under $40 and available at any department or kitchen store
Large flat surface accommodates multiple wax colors simultaneously
What to know
No thermostat calibrated for wax; needs separate infrared thermometer
Wax is rigid when cool and heavy in layers. Canvas flexes as humidity and temperature change, which cracks and delaminates wax coatings within months. You need a rigid, porous substrate. Cradled wood panels are the standard: the cradle (a wooden frame bonded to the back) keeps the board flat under the accumulated weight of multiple wax layers. Ampersand's Encausticbord has a clay coating that bonds to wax better than bare wood. Plain cradled birch plywood works too but requires sealing with a coat of medium before the first layer.
Best starter
Ampersand
Encausticbord Cradled Panel, 11x14
$42.79 as of Jun 22, 2026
★★★★★Our rating
Ampersand's Encausticbord is the most-used panel in encaustic painting for one reason: its clay coating bonds to wax without any primer or prep. The cradled form keeps the board flat under multiple wax layers, and it comes in sizes from 4x4 to 24x24. Start with 6x6 or 8x8; small panels let you experiment without the commitment a large surface demands.
What we like
Clay coating bonds to wax without primer, eliminating a prep step
Available in sizes from 4x4 to 24x24 inches
Cradle back keeps panel flat under multiple heavy wax layers
What to know
Costs more per panel than plain birch; adds up for frequent painters
Smooth clay surface; use bare birch if you want visible wood grain texture
Bare cradled birch plywood is the DIY approach. Apply a coat of plain encaustic medium to seal the wood grain, let it cool, and then build up from there. It takes one extra prep step versus Encausticbord, but costs less per panel and is widely available. The uncoated surface creates a slightly different look from clay-coated boards, which some painters prefer.
What we like
Costs half the price of Encausticbord, especially in bulk packs
Uncoated surface creates a distinct look some painters prefer
What to know
Raw wood grain absorbs first layers unevenly; seal with medium first
Wax adhesion is slightly weaker on early layers than clay-coated boards
You need natural bristle brushes. Synthetic fibers melt in molten wax, releasing fumes and leaving plastic residue in your work. Hog bristle (the same hair used in oil painting brushes) survives repeated dunking in 200°F wax and holds a stroke well. Beyond brushes, a few palette knives let you scrape back layers, add texture, and transfer wax across the panel. Keep these brushes dedicated to encaustic; they cannot be cleaned with water or solvents, only paper-wiped between colors.
Best starter
Princeton
Catalyst Polytip Brush Set, 5 Piece
$49.95 as of Jun 22, 2026
★★★★★Our rating
Princeton's Catalyst line uses a synthetic-natural blend designed to withstand high temperatures, making these the best-tested brushes for encaustic among craft brush lines. A set with 2-3 flat sizes covers the range from broad wax coverage to detail passages. Far more durable in hot wax than standard synthetic brushes, which melt almost immediately.
What we like
Heat-tolerant fiber survives encaustic working temperatures
Flat shapes hold a good load of molten wax and release cleanly
Available in a set with multiple sizes for varied stroke work
What to know
Cannot be cleaned with water; paper-wipe between colors only
Less stiff than pure hog bristle; slightly different feel on the panel
★★★★☆Our rating· Only 3 left in stock - order soon.
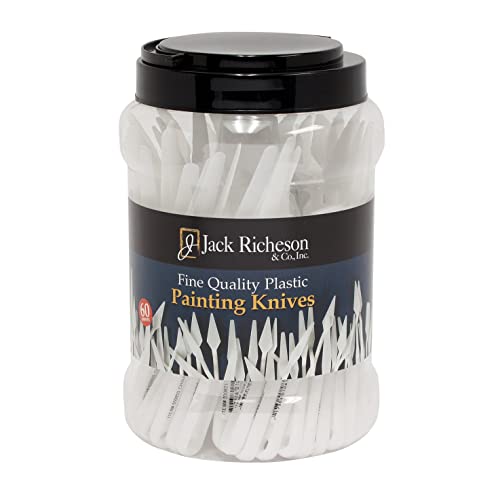
A set of flexible painting knives gives you the main tools for encaustic scraping and texture work: broad blades for scraping back full layers, narrow blades for incised lines, and flexible spatula tips for transferring molten wax. Jack Richeson's knives have real steel flex and hold their edge through temperature cycling without the pitting that affects chrome-plated versions.
What we like
Stainless steel handles repeated temperature cycling without corrosion
Lets you scrape back cooled layers to reveal color underneath
What to know
Not needed on day one; build wax-handling skill before reaching for the knife
Cheap chrome-plated sets pit and peel; stainless is worth the slight premium
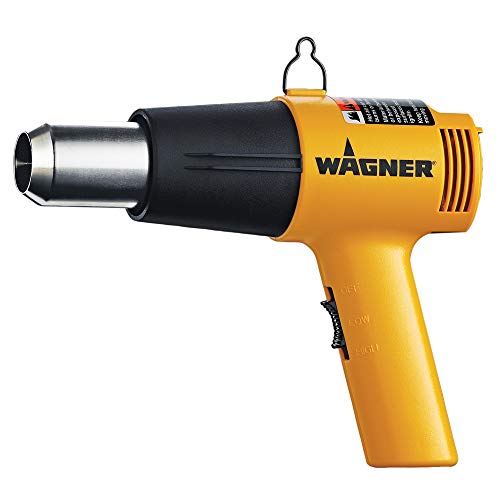
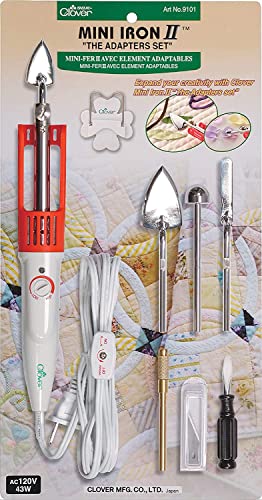
Every encaustic layer must be fused to the one below it with heat before the next layer goes down. Unfused layers look cloudy and eventually delaminate. A heat gun is the primary fusing tool: you sweep it a few inches above the surface until the top layer just begins to gloss and flow. A tacking iron (a small flat iron from the textile world) is the secondary tool for detail fusing and for creating smooth, burnished passages. Most encaustic painters use both; the heat gun for broad fusing, the iron for precision work.
Best starter
Wagner
Spraytech HT1000 Heat Gun
$27.26 as of Jun 22, 2026
★★★★★Our rating· In Stock
Wagner's heat guns are the encaustic community's default recommendation: a controlled wide cone of hot air that fuses wax layers without scorching. Set it to the lower heat setting and sweep it 4-6 inches above the surface until the top layer glosses. Quiet enough for a studio, durable enough for daily use, and available at any hardware store.
What we like
Wide cone of heat fuses a full brushstroke of wax in one smooth sweep
Variable heat settings match temperature to the wax type
Durable build; most Wagner guns outlast several encaustic projects
What to know
Requires constant sweeping motion; lingering scorches the top layer
Louder than a tacking iron; less comfortable in small spaces
★★★★☆Our rating· Only 14 left in stock - order soon.
A tacking iron from the quilting world, the Clover Mini Iron II has a flat tip with a variable thermostat. In encaustic, it fuses small areas with a precision a heat gun can't match: burnishing passages to a glassy finish, fusing edges, and working into tight corners. Most encaustic painters pick one up within the first few months.
What we like
Flat tip fuses small areas with precision a heat gun can't match
Variable thermostat controls exactly how much wax you reflow
What to know
Slow for large areas; pairs with a heat gun rather than replacing it
Takes practice to avoid dragging the iron into wax layers while fusing
Most beginners spend their first session fighting the temperature. Once you understand that wax has three states and you control all of them, the rest falls into place surprisingly fast.
Encaustic painting has been around since ancient Greece, but it fell off the radar for centuries until a revival in the 1990s. It’s still a niche medium, which means there’s almost no beginner infrastructure: no local classes at the craft store, no YouTube tutorials made for people who haven’t touched a hotbox before. You figure it out by doing.
That’s not a problem. Encaustic is actually one of the more intuitive mediums once you get past the first hour. The learning curve is real, but it’s specific and predictable.
Your first session: wax meets panel
The first thing you need to understand is what encaustic wax actually does at different temperatures. It has three states you work with intentionally:
Solid (cooled on the panel): the stable finished state. Fused layers here are durable and won’t budge.
Molten (on the hotbox at 180-220°F): fluid enough to load a brush and apply. This is your working state.
Smoking (above 220°F): wrong. Visible smoke means the temperature is too high. Turn it down.
Set up your hotbox (or electric skillet) and let it reach working temperature before you touch the wax. An infrared thermometer pointed at the surface tells you exactly where you are. Target 200°F to start.
Place a Hot Cake round or a small chunk of encaustic medium directly on the hotbox surface. It will melt in about 30 seconds. Load a flat hog bristle brush by pressing it flat into the molten pool and lifting. The brush should come up coated but not dripping.
Apply it to the cradled panel in a single stroke. Work quickly: wax cools fast, and a hesitant stroke leaves ridges. Cover the panel surface with a first layer in 2-3 minutes.
Step back and look at it. It will look cloudy, matte, slightly uneven. That’s correct. Now you fuse it.
The fusing ritual
Fusing is what makes encaustic work. Every layer must be fused to the one below it or the piece will eventually delaminate.
Pick up your heat gun. Hold it 4-6 inches above the surface and sweep it slowly across the panel in wide arcs. Watch the surface: it will go from matte to slightly glossy (that’s fusing) and then return to matte as it cools. That gloss-to-matte transition means the layer has bonded.
The common mistake is lingering. Two seconds in one spot at 700°F will scorch the wax and discolor it. Keep moving. If you see any browning, you’ve held too long in one place; scrape back that section and re-apply.
The rhythm is: apply a thin layer, fuse for 20-30 seconds, let it cool for 60-90 seconds, then apply the next layer. This cycling is the whole foundation of the medium. It feels slow at first. By session three it becomes automatic.
One layer fused with a heat gun is transparent. You can look through it into the layer below. This is what gives encaustic paintings their depth and the quality that makes people reach out and touch them.
Building depth: weeks two and three
The second week is where encaustic stops feeling like a craft project and starts feeling like a medium with real range.
Color layering: Apply a transparent layer of clear medium over a colored layer and the color deepens. Stack complementary colors at different depths and the painting shifts as the viewer moves around it. Encaustic rewards painters who think in terms of accumulation, not coverage.
Scraping back: Once a layer is fully cool (not just fused, but cold), you can use a palette knife to scrape it back. This reveals the layer below. Alternating warm and cool colors, then scraping through, creates effects that no other medium can produce. This is the technique that puts encaustic in the category of its own.
Incising: After scraping, you can draw lines into the cooled surface with a sharp tool or palette knife tip. Fill the incised lines with a contrasting color, fuse lightly, then scrape back flush. The lines remain. This is how most encaustic painters add linear elements without brush marks.
The third week is usually when the piece you’re working on becomes recognizably a painting rather than a texture experiment. That’s when most people get hooked.
Every beginner hits the same walls. Knowing about them in advance doesn’t prevent them entirely, but it makes them less disorienting:
Applying layers too thick: Encaustic layers should be thin enough to fuse in under 10 seconds of heat-gun time. Thick applications take longer to fuse, develop uneven temperature gradients, and can crack when cool. Thin, consistent layers build up faster and more reliably than you’d expect.
Skipping the fuse: It is tempting, especially when you’re in a creative flow, to apply the next layer before fusing the previous one. Don’t. Unfused layers bond weakly and will separate. The rule is absolute: one layer, fuse it, cool it, then the next.
Overheating with the heat gun: The scorch marks on a scorched layer can sometimes be scraped back, but not always. If you see the wax going brown, stop immediately, let it cool, and assess. Gentle passes at a greater distance are almost always better than aggressive close-range fusing.
Working on canvas: If you try canvas before getting proper panels, the first temperature cycle will show you why it doesn’t work. Wax cracks on any flexible substrate. This is one of the rules with no exceptions.
Not ventilating: You won’t notice the fumes accumulating, which is exactly why you need consistent ventilation from session one. Make it a habit, not a response to discomfort.
What to do at month two
After your first month you’ll have a feel for temperature, fusing rhythm, and basic color layering. A few things dramatically accelerate the next phase:
Find other encaustic painters. The International Encaustic Artists (IEA) has the most active online community for the medium, and local workshops show up through them. Working alongside someone who has three years of sessions under their hands teaches more in a day than a month of solo experimentation.
Try a scrape-and-reveal piece. Choose two strongly contrasting colors, lay them in alternating layers for 6-8 total layers, then systematically scrape back with a palette knife from the top. You’re essentially painting in reverse, discovering the image by removing material. Many encaustic painters consider this their primary mode of working.
Get comfortable with failure. Encaustic is one of the few mediums where you can always scrape back to a usable surface. A failed painting isn’t wasted material; it’s a working layer count that you can paint on top of. This is liberating once you internalize it.
Save your money
What you don't need yet
Beginners get pressured to buy a lot of stuff that doesn't help them play
better. Here's what we'd skip on day one.
A propane or butane torch — Torching is an advanced fusing technique that can vaporize wax and create fire risk. A heat gun does everything a beginner needs more safely.
Cold wax medium — Cold wax is a different product (oil paint thickener) often confused with encaustic. Don't buy it thinking it's a substitute. It's not the same medium.
Microcrystalline wax — A specialty finishing wax used for surface polish on finished pieces. Not needed until you have completed work you want to preserve.
Encaustic painting ribbons or wire tools — Specialty texture tools for advanced mark-making. A palette knife does the same job and teaches the basic skill first.
First week
Your first seven days
A short, real plan to get from gear-on-doorstep to actually playing.
Order an Enkaustikos Hot Cakes sampler so you have pigmented wax ready when everything else arrives. · Buy
Set up your workspace near a window or with a fan blowing air out of the room. Ventilation is not optional. · Action
Apply your first layer of wax, then fuse it with the heat gun until it just glosses over. Let it cool. That rhythm — apply, fuse, cool — is the whole foundation of the medium. · Action
Watch one beginner encaustic technique video before your first session. R&F and Enkaustikos both have free tutorials on their websites. · Learn
Can I use stretched canvas for encaustic painting?
No. Canvas flexes with changes in humidity and temperature, which causes wax to crack and delaminate within months. You need a rigid substrate. Cradled birch panels or Ampersand Encausticbord are the standard choices.
What temperature should the hot palette be set to?
180-220°F is the typical working range. Below 180°F the wax is too viscous to brush smoothly; above 220°F it begins to smoke and the fumes become more concentrated. If you're using an electric skillet, an infrared thermometer ($20-30) tells you exactly where you are.
Are encaustic wax fumes dangerous?
At working temperatures (under 220°F), the fumes from beeswax and damar are low-level but real. Good ventilation (a fan blowing air out of the room) makes occasional sessions safe. If you're painting daily, a respirator rated for organic vapors adds an extra layer of protection. Never superheat wax; visible smoke means the temperature is too high.
Do I really have to fuse every single layer?
Yes. Unfused layers bond weakly to each other and will eventually separate, especially if the piece is moved or the temperature changes. The rule is: apply a layer, fuse it until the surface just glosses over and then goes matte again, let it cool, then apply the next layer.
How many layers is normal in an encaustic painting?
Anywhere from 4 to 40, depending on the effect you're going for. Beginners often apply fewer thick layers; experienced painters build up many thin ones for depth and translucency. Each layer should be thin enough to fuse in under 10 seconds of heat gun time.
How much does a complete encaustic starter kit cost?
A practical starter setup (wax sampler, hotbox, small panels, heat gun, and brushes) runs $150-280 depending on whether you use a dedicated hotbox or an electric skillet. The skillet route gets you started for closer to $150; the hotbox route is $250-280 but removes a lot of the temperature-management friction.
R&F Handmade Paints — Tutorials — Free technique library from one of the field's founding encaustic suppliers. Layer-building, fusing, surface treatments, and finishing. Start here.
International Encaustic Artists (IEA) — The main professional organization for encaustic painters. Member gallery, workshops, and the most active encaustic community online.
Enkaustikos Technique Library — Step-by-step guides from the maker of Hot Cakes. Practical, product-neutral, and organized by technique level.
The Art of Encaustic Painting — Joanne Mattera — The standard reference book for the medium. Covers materials, surfaces, layering, fusing, and mixed-media approaches. More useful after a few sessions than before.
r/Encaustic — Small but active community. Useful for troubleshooting specific problems and seeing what beginners' work actually looks like at different stages.
As an Amazon Associate, JustBeginning earns from qualifying purchases.
We may also earn commission from other affiliate programs linked on this
page. Editorial recommendations are independent; we don't choose
products based on commission rates.
Product prices and availability are accurate as of the date and time
indicated and are subject to change. Any price and availability
information shown on Amazon at the time of purchase will apply.


 Best starter