Bead weaving rewards patience and delivers obsession. A single tube of seed beads and a needle opens a craft that spans cultures and centuries. Here's what you actually need to start weaving, and what can wait until you find your style.
By Colin B. · Published May 24, 2026 · Last reviewed June 18, 2026
Darice Bead Loom
— Darice bead loom: the classic beginner loom at a fair price, holds up through a hundred projects.
Budget total
$40
Typical total
$80
A loom, needles, thread, and a few tubes of quality seed beads come in under $80. The hobby gets expensive as your color stash grows. Start small.
We earn commission on qualifying Amazon purchases — see our
affiliate disclosure.
Price tiers and budget totals shown above are editorial estimates;
actual Amazon prices vary.
At a glance
Our top pick in each category
The fastest path through this guide — each best-starter pick by category.
Scroll for the budget and upgrade alternatives.
Don't buy a huge bead assortment first. A few tubes of quality Miyuki or Toho 11/0 seed beads in three or four colors teaches you more than a 1,000-color sampler. You want to practice stitches, not sort beads.
Loom or off-loom? Pick one technique to start. Loom weaving is grid-based and feels intuitive fast. Peyote stitch and brick stitch are off-loom techniques that unlock curved and sculptural shapes but take a bit longer to click. Most beginners find the loom wins the first week, then switch to off-loom once threading a needle is second nature.
Thread matters more than most beginners expect. Cheap thread tangles constantly, frays at the needle, and makes your first projects miserable. Spend a few extra dollars on Fireline or Nymo thread. It's not the exciting purchase, but you'll thank yourself every session.
Seed beads are the core material of bead weaving: tiny glass beads sized from 6/0 (the size of an apple seed) down to 15/0 (barely visible on the needle). For beginners, 11/0 is the standard: small enough to make real patterns, large enough to thread comfortably. Japanese seed beads from Miyuki and Toho are the gold standard: precisely sized, consistent hole diameter, reliable between lots. Czech seed beads are cheaper but vary more in size. The difference matters when weaving: uneven beads produce uneven patterns.
Best starter
Miyuki
Delica 11/0 Seed Bead Mix
$$
★★★★★Our rating
Delica beads are the benchmark for bead weaving: uniform cylinder shape, consistent hole size, and color that stays true across tubes. The mix format lets you practice patterns without committing to a single color palette. Every serious bead weaver owns Miyukis; starting here means your technique transfers directly when you advance.
What we like
Ultra-consistent sizing, fewer skipped beads when threading
Cylinder shape creates flat, tight fabric, ideal for pixel patterns
Dye lot-stable: color matches across tubes from the same run
What to know
Pricier than Czech or generic seed beads
Cylinder shape behaves differently from round beads, not interchangeable in patterns
Toho rounds are the other Japanese gold-standard bead, slightly rounder and often easier to thread onto a needle than Delicas, with a wide color range. Marginally cheaper than Miyuki and just as consistent. An excellent starting point if you want to practice peyote or brick stitch where round beads look more natural.
What we like
Rounder profile threads slightly easier for beginners
Huge color range, often more variety than Miyuki at the same price
Compatible with most seed bead patterns
What to know
Round shape produces a looser fabric texture than Delica cylinders
Less commonly stocked at local craft stores than Miyuki
Czech beads were the global standard before Japanese precision beads arrived, and they're still widely used in folk, tribal, and traditional beadwork. Slightly irregular (each one is a little different), which actually suits older patterns and lends character to organic designs. If you're drawn to Native American-inspired or folk-art beadwork, this is your starting point.
What we like
Classic material for folk and tribal-inspired beadwork traditions
More affordable than Japanese beads for high-volume practice
Warm, slightly organic color tones differ from Japanese precision beads
What to know
Sizing varies within and between tubes; this can disrupt count-based patterns
Less consistent hole sizes, meaning more threading frustration than Japanese beads
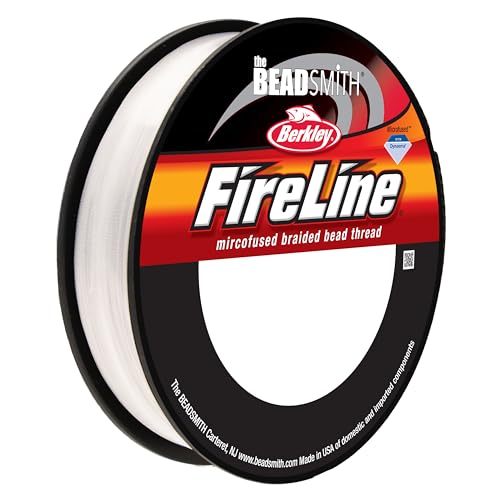
Thread is the invisible backbone of your work, and cheap thread will ruin your first projects. The main choice is braided fishing-line thread (Fireline, WildFire) vs. traditional nylon (Nymo, C-Lon). Braided threads are stronger, cut cleanly, and almost never tangle. Nylon is softer, easier to knot, and drapes better for flexible pieces. Most beginners do better starting with Fireline: it handles like a dream, runs easily through tiny holes, and holds up for decades.
Best starter
The Beadsmith
Fireline Crystal 6lb Beading Thread
$29.44 as of Jun 22, 2026
★★★★★Our rating· In Stock
Fireline is the default recommendation in every beading forum, book, and class: it's nearly impossible to tangle, doesn't fray when cut, and threads through the smallest 15/0 needle without a threading tool. 6lb crystal is nearly invisible in light-colored beads. This is the thread to start with, full stop.
What we like
Almost never tangles (night-and-day difference vs nylon for beginners)
Cuts cleanly with scissors, no fraying past the cut point
Crystal color disappears in most bead color combinations
What to know
Harder to knot than nylon; weave in ends rather than tying off
Nymo is the nylon thread most beginners encounter in craft stores, and it's a competent choice if you manage the tangles; wax it before use. Size D is the all-purpose thickness for most 11/0 to 8/0 work. Good for large projects where thread cost adds up.
What we like
Widely available and affordable, good for high-volume practice
Soft drape works well for flexible woven bracelets and necklaces
Knots and ties cleanly when finishing a piece
What to know
Tangles constantly without waxing; condition before every session
Frays with heavy use or repeated passes through the same beads
WildFire is a thermally bonded thread that resists fraying even more than Fireline: the coating is fused rather than braided. Slightly stiffer, which some weavers prefer for structural pieces like cuffs and beaded vessels. Once you know Fireline works for you, WildFire is the natural step up for projects that need to hold their shape.
What we like
Thermally bonded: even less fraying than braided Fireline
Excellent for structural pieces: cuffs, beaded bags, vessels
White color stays neutral under opaque and matte beads
What to know
Stiffer than Fireline, not ideal for soft-drape flexible pieces
Beading needles are long, thin, and much smaller-eyed than sewing needles; you need one that fits through a seed bead twice, since most stitches pass through each bead multiple times. Size 10 or 12 works for most 11/0 beads. Size 13 or 15 for the smallest 15/0 beads. Quality matters: cheap needles bend immediately, good needles flex and survive a full project. The John James English brand and Beadalon are the standard recommendations in every class and book.
Best starter
John James
Crafter's Collection Beading Needles, Pack of 10 in Assorted Sizes, Made in England
$11.41 as of Jun 22, 2026
★★★★★Our rating· Only 20 left in stock - order soon.
John James has made needles in England for over 200 years; these are the needles sold in every bead shop, cited in every beading book, and used by instructors worldwide. The size 10/12 assortment covers 11/0 and larger work. They flex rather than snap, thread reliably, and last longer than any other needle at this price.
What we like
Industry standard, used in every beading class and workshop globally
Flex rather than snap, more forgiving for beginners
Assortment pack covers the two most common project sizes
What to know
Needles still bend with heavy use; keep spares on hand
Smallest sizes (15) are extremely fragile; handle carefully
★★★★☆Our rating· Only 17 left in stock - order soon.
Big Eye needles have a split that opens the entire length as an eye: threading takes under two seconds. Not for tight weaving (the split center adds thickness), but perfect for stringing, pearl knotting, or any stringing project where threading the needle is your main frustration.
What we like
Threads in under 2 seconds, a game-changer for tired eyes
Great for pearl knotting, bead stringing, and macrame-adjacent work
What to know
Split-eye adds thickness; won't pass through 11/0 holes multiple times
Not suitable for off-loom weaving; use only for open stringing
A bead loom holds parallel warp threads under tension while you weave fill beads across with a weft thread and needle. The result is flat beaded fabric: bracelets, hat bands, watch bands. Looms make grid-pattern beadwork fast and intuitive: every row is horizontal, and you see the pattern emerge row by row. Off-loom stitches like peyote and brick stitch are more flexible for shapes, but slower to learn. If you've never beaded before, start on a loom and you'll have a finished bracelet in your first session.
Bead Loom — what's the difference?
A few common shapes, each making a different trade.
Loom Weaving
Grid-based weaving on a frame, fast to learn, great for bracelets.
Setup
Warp threads on loom
Result
Flat woven fabric
Curve
Low: bracelet in session 1
Best for Beginners wanting quick results; bracelets, bands, lanyards
Tradeoff Flat only; no tubes or sculptural shapes without finishing tricks
Off-loom needle technique; beads interlock in staggered diagonal rows.
Setup
Needle and thread only
Result
Flat or tubular fabric
Curve
Medium: takes 2-3 sessions to click
Best for Bracelets, tubes, shaped pendants, sculptural beadwork
Tradeoff Offset row logic feels counterintuitive at first; persist past session two
Brick Stitch
Rows stack perpendicular to each other, like laying bricks.
Setup
Needle and thread only
Result
Flat panels and fringe
Curve
Low-medium: intuitive grid logic
Best for Earrings, flat pendants, fringe work, geometric patterns
Tradeoff Slightly less stable for 3D or tubular shapes than peyote
Best starter
Darice
Bead Loom
$24.99 as of Jun 22, 2026
★★★★★Our rating· Only 2 left in stock - order soon.
The Darice loom is the recommendation in every beginner bead weaving tutorial: simple frame, metal coil spacers that position warp threads evenly, and a needle included. It makes 1-inch-wide fabric, which is perfect for bracelets. Finish your first bracelet in session one. That's what you want from a starter loom.
What we like
The go-to beginner pick, found in every craft tutorial and starter guide
Metal coil spacers position warp threads evenly with no adjustment
Needle included: ready to use straight out of the box
What to know
Width capped at ~1 inch: bracelets yes, wider panels no
Coil tension can loosen on long projects; tape the ends if warp threads sag
An adjustable wooden loom that handles pieces up to 3 inches wide: watch bands, belts, wall art. Solid construction, adjustable tension bars, and a slot system that keeps warp threads perfectly parallel. When you outgrow the Darice, this is where most weavers land.
What we like
Adjustable to 3 inches wide, opening belts, watch bands, small panels
Solid wood construction holds tension through long projects
Slot design keeps warp threads parallel without coil spacing
What to know
15+ minutes of setup, not pick-up-and-go like the Darice
A few small accessories make sessions go smoothly and prevent the bead-scatter disasters that discourage beginners. A flocked bead mat keeps tiny beads from rolling off the table. A compartment organizer puts your colors in view so you're not digging through bags. A good task lamp with daylight-spectrum light shows true bead colors and prevents the eye strain that comes from squinting at size 13 beads under warm household bulbs. None of these are expensive, and together they cost less than two tubes of Miyuki Delica.
Best starter
The Beadsmith
Beading Mats Set (3-Pack)
$8.99 as of Jun 22, 2026
★★★★★Our rating· In Stock
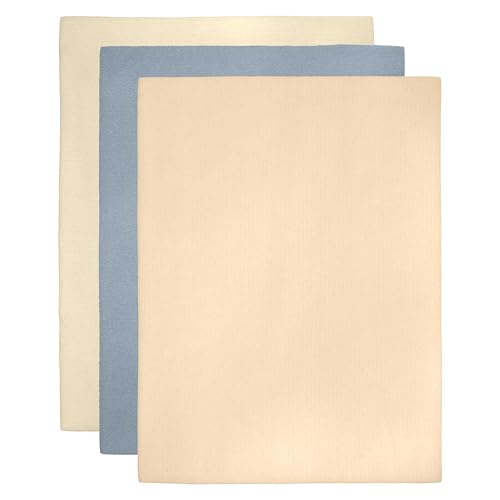
A flocked foam surface grips tiny beads so they don't roll off the table. This sounds minor until you've spent five minutes chasing a size 11/0 bead across a hardwood floor after a spill. Get one before your first session: it costs as much as a single tube of beads and will save your sanity on day one.
What we like
Flocked surface grips tiny beads so they stop instead of rolling
Soft enough to pick beads directly from the mat with a needle
12x17 inch size works on a lap tray or small workspace
What to know
Foam absorbs moisture; keep away from wet workspaces
A divided tackle box is how most bead weavers actually store their colors: clear lids let you see your inventory at a glance, and the compartments keep tubes from mixing. Plano's fishing organizers are tougher than craft-branded equivalents and cheaper. Buy two: one for your go-to colors, one for extras.
What we like
Clear lids let you find any color without opening every compartment
Tougher than craft-branded equivalents at a lower price
Stackable, so a growing collection stays off the desk
What to know
Not designed for beads: some compartments may be too wide for small tubes
Lids can pop open if dropped; don't carry full boxes in a bag
Threading a size 12 needle and distinguishing bead colors under a warm household bulb is how you get headaches and mistakes. An OttLite daylight LED shows true colors (critical when you're matching a pattern or building a gradient) and dramatically reduces eye fatigue. Most bead weavers say this is the one tool they wished they'd bought sooner.
Bead weaving looks fussy from the outside. Inside, it's one of the most meditative making hobbies you can find, and you'll have a finished bracelet by the end of your first session.
Bead weaving has a reputation for being fiddly and hard to start. That reputation is undeserved. The tools are cheap, the learning curve is gentle compared to almost any other fiber craft, and the feedback is immediate; in your first session, you will finish something you can wear.
What the craft does require is patience. Not the frustrated kind, the meditative kind. The repetition is the point. Understanding that early makes everything easier.
Session 1: Warp the loom, weave a bracelet
Start with a loom. The reason is simple: loom weaving is a grid. You stretch parallel threads (the warp) under tension, then weave fill beads across them (the weft) row by row. Every row is horizontal, every bead snaps into position, and the pattern emerges exactly as drawn. Off-loom stitches are more powerful in the long run, but loom weaving is correct in the most satisfying way from session one.
Here’s what session one actually looks like:
Setup the loom (15 minutes)
Cut warp threads twice the length of your project plus several inches on each end. A standard bracelet needs about 16 inches of warp. Tie the threads to the loom’s anchor bar, then stretch them along the metal coil spacers so each thread occupies its own groove. The coil keeps them evenly spaced. Knot the free ends to the other anchor. The warp should have gentle tension (not slack, not guitar-string tight).
Thread your needle and weave
Cut about 36 inches of Fireline thread and thread your needle. Tie the tail to the outer warp thread. Now pick up enough beads for one row (however many warp gaps you have: a 7-bead-wide bracelet needs 6 fill beads per row), slide them onto the thread, push the needle under the warp threads from below so each bead pops up between two warps, then pass the needle back through all the beads again from above. That second pass is what locks the beads to the warp. Pull snug.
Repeat. Each row takes thirty seconds once you have the rhythm.
Finish the bracelet
After your last row, weave the thread tail back through several rows to secure it. Slip the bracelet off the loom and knot the warp threads together in pairs. Trim the excess. You have a finished piece.
Once loom weaving clicks, try a swatch of flat even-count peyote stitch. This is the most popular off-loom beadwork stitch; it creates a dense, flexible fabric without any loom. The beads interlock in a staggered diagonal arrangement, like brickwork rotated 45 degrees.
The confusing part, for almost every beginner, is reading the pattern. In peyote, you pick up beads for rows 1 and 2 simultaneously in a single thread pass, then rows alternate: bead, skip a space, bead, skip a space. The bead you just added will be forced outward by the next row’s beads, and suddenly the fabric appears. Many people feel like they’re doing it wrong for the first ten minutes. They’re not; trust the process.
Flat even-count peyote in brief:
Pick up an even number of beads for your base row. These become rows 1 and 2.
String a new bead, skip the last bead of the base row, pass through the next bead up.
Continue: bead, skip, pass through. Each new bead sits in a “pocket” created by the previous row.
Turn at the end of each row and work back.
Don’t worry about following a pattern in week two. Just practice the stitch motion until it feels smooth. Peyote patterns will make sense once the stitch is automatic.
Week 3: Introduce brick stitch
Brick stitch is the other fundamental off-loom technique, and it’s slightly more beginner-friendly than peyote because the row-building logic feels more literal. You anchor each bead to the thread loops between the previous row’s beads, and the rows truly stack like bricks.
Brick stitch shines for earrings and flat geometric shapes; the stitch creates firm, stable panels that hold their shape without framing. It also makes fringe beautifully, since you can drop threads directly from the edge beads.
By week three, your needle threading is automatic, your tension is consistent, and you’re thinking in patterns. That’s when design starts getting fun.
The mistakes every beginner makes (and how long they last)
Snapping needles. Size 12 and 13 beading needles are genuinely fragile. You will break several. The solution is not to be more careful, but to keep spares in your kit and replace bent needles before they snap. A straight needle threads in one try; a bent needle threads in seven and then snaps on the eighth.
Uneven tension. Rows that bulge or pucker mean your thread tension isn’t consistent. Too tight = beads curl. Too loose = beads shift and rattle. The fix is deliberate: pull each row snug (not yanked) before starting the next. You won’t get this perfect in your first month, and that’s fine; tension becomes automatic with reps.
Running out of thread mid-project. Starting a new thread mid-piece looks intimidating but is standard practice. When you have about 6 inches of thread left, weave the tail back through three rows to anchor it, then start a new length from the same exit point. No knots necessary; the friction holds.
Bead scatter. One good spill of a tube of 11/0 seed beads teaches most people to work over their bead mat forever. The mat grips the beads; they stop where they land instead of rolling off the table.
What a full month builds
By the end of your first month:
You’ll have finished two or three bracelets on the loom
You’ll have a peyote swatch and probably a small flat piece (a pendant, a cuff panel)
You’ll know whether you prefer working from a pattern or making it up
You’ll have a small color stash (probably twelve to twenty tubes) sorted into the colors you reach for and the colors that were a mistake
You’ll understand the difference between Delica cylinders and round seed beads, and you’ll have a preference
The craft clicks differently for everyone, but almost everyone who gets past the first loom bracelet keeps going. The meditative quality of the repetition turns out to be addictive in the best way: hands busy, mind quiet, something beautiful growing one bead at a time.
Save your money
What you don't need yet
Beginners get pressured to buy a lot of stuff that doesn't help them play
better. Here's what we'd skip on day one.
A bead spinner — Useful for stringing large volumes of round beads fast, but you're picking individual beads for weaving; a spinner adds nothing to your first months.
Beading design software — Apps like BeadTool exist, but graph paper and pencil crayons are how most weavers design for their first year. Software is for when you're producing patterns for others.
A huge bead color collection — A bead stash grows fast. Start with ten to fifteen colors you genuinely like; you'll identify the real gaps after a few finished projects.
Specialty crystals and focal beads — Swarovski crystals and lampwork focal beads are beautiful, but they're an embellishment layer. Learn to weave cleanly first, then add accent beads.
Thread conditioner — Beeswax and Thread Heaven are genuinely useful for Nymo, but if you start with Fireline, you won't need conditioner at all, and the decision can wait.
First week
Your first seven days
A short, real plan to get from gear-on-doorstep to actually playing.
Order seed beads, Fireline thread, size 10/12 needles, and a bead mat so they arrive before the weekend. · Buy
Warp your loom before adding any beads. Getting warp tension even is its own skill; practice threading the loom empty first. · Action
Weave a simple two- or three-color stripe bracelet for your first project. No complex pattern, solid rows of color. You'll learn more finishing one bracelet than starting ten. · Action
Try a five-row peyote stitch swatch once the loom bracelet is done. Even a tiny sample tells you whether off-loom weaving appeals to you. · Action
Join the r/beadwork subreddit. Pattern PDFs are shared freely, beginner questions are welcomed, and the project photos will give you your next ten ideas. · Action
What's the difference between beadwork and jewelry-making?
They overlap but aren't the same. Jewelry-making usually means working with wire, metal findings, chain, and focal stones (the physical hardware of accessories). Bead weaving means using needle and thread to stitch tiny seed beads into fabric: bracelets, bags, sculptural shapes, wall art. The tools, materials, and communities are largely separate, though many people do both.
Do I need a loom, or can I start without one?
You can start without a loom using off-loom stitches like peyote or brick stitch. But most beginners find a loom gives them a finished piece faster; the grid logic is intuitive, and you'll have a bracelet in your first session. If you know you specifically want peyote or brick stitch, skip the loom. Otherwise, start with one.
What's the easiest bead weaving stitch for beginners?
Loom weaving is the most immediately intuitive: it's a literal grid. Among off-loom stitches, brick stitch is slightly easier to start than peyote because the row logic feels like building horizontal courses. Peyote is arguably more versatile once it clicks, but brick stitch wins the first-hour competition.
What size seed beads should I start with?
11/0 is the beginner standard. The number refers to how many beads fit in an inch of thread (about 11 per inch. Small enough to make real patterns, large enough to thread without magnification. Size 15/0 is more intricate but much harder to handle. Sizes 8/0 and 6/0 are larger and easier to thread but too chunky for most woven patterns.
How much does it cost to start beadwork?
Under $50 gets you a complete first kit: a Darice loom, a pack of John James needles, a spool of Fireline, and two or three tubes of Miyuki seed beads. The hobby's cost grows as you build a color stash, but that happens naturally over months. Don't pre-buy a huge assortment before you know what colors and patterns you gravitate toward.
Is beadwork hard on your eyes?
It can be, especially with 15/0 beads or in dim light. The fixes are a good task lamp (OttLite or any 5000K LED), taking breaks every 30–45 minutes, and not beading with a screen glowing nearby. Most people with proper lighting and regular breaks work comfortably for 2+ hours with no strain.
Beadwork Magazine (Interweave) — The flagship US beadwork publication. Projects, technique deep-dives, designer profiles. Back-issue archives are a goldmine of pattern ideas.
Fire Mountain Gems — Learning Center — Major bead supplier with an excellent free tutorial library. Covers loom weaving, off-loom stitches, finishing techniques, and repair in step-by-step format.
Beadaholique (YouTube) — One of the largest beading YouTube channels. Step-by-step tutorials for every skill level, well-produced, updated regularly. A reliable first stop for any technique question.
r/beadwork — Active subreddit. Project photos, pattern requests, technique help. Good for identifying what a particular stitch is called before searching for a tutorial.
Beading Daily — Interweave's free online hub. Free project downloads, video tutorials, and a technique library spanning peyote, brick stitch, loom work, and beyond.
As an Amazon Associate, JustBeginning earns from qualifying purchases.
We may also earn commission from other affiliate programs linked on this
page. Editorial recommendations are independent; we don't choose
products based on commission rates.
Product prices and availability are accurate as of the date and time
indicated and are subject to change. Any price and availability
information shown on Amazon at the time of purchase will apply.


 Best starter