Plant-based dye is one of the oldest crafts on earth — and one of the most rewarding to revive in a modern kitchen. You need fewer chemicals than you think, the colors are genuinely beautiful, and every batch is different. Here's what you actually need to start, and what to skip until later.
By Colin B. · Published May 24, 2026 · Last reviewed July 12, 2026
A dedicated stockpot, alum mordant, and a dye sampler kit gets you to your first batch for under $70. Add quality wool yarn and a full mordant set and you're closer to $130.
We earn commission on qualifying Amazon purchases — see our
affiliate disclosure.
Price tiers and budget totals shown above are editorial estimates;
actual Amazon prices vary.
At a glance
Our top pick in each category
The fastest path through this guide — each best-starter pick by category.
Scroll for the budget and upgrade alternatives.
Dedicate your equipment. Whatever pot, spoon, or strainer touches dye chemistry is retired from food use forever. This is why we tell you to start with a thrift-store stockpot before committing to a nice one. The chemistry is safe for you but permanently contaminates cookware.
Start with wool, not cotton. Protein fibers (wool, silk, alpaca) absorb natural dye with a simple alum mordant and hold color well. Cotton and linen are plant fibers and need a tannin pre-treatment before mordanting — a whole extra step. One month in, you'll be ready for cotton. For now, get a skein of undyed wool.
Alum first, everything else later. The natural dye world has a deep rabbit hole of mordants: iron, copper, chrome, tin. Chrome is toxic. Tin is caustic. Iron and copper shift colors in interesting ways but introduce variables you don't want while you're still learning basic ratios. Learn on alum — it's safe, produces bright colors on wool, and teaches you what properly mordanted fiber looks like.
The gear
What you actually need
Dye Pots
Your dye pot is the piece of gear you'll use in every single batch — mordanting, simmering dye, rinsing. Stainless steel is the right material for beginners: it's inert (doesn't affect dye chemistry), durable, and available at any restaurant supply store. The rule of thumb is 3 gallons of water per 4 oz of dry fiber, so a 16-20 qt pot handles a full skein comfortably. Buy something you're OK never using for food again — dye chemistry is safe for you but contaminates cookware permanently.
Dye Pots — what's the difference?
A few common shapes, each making a different trade.
Small (8–12 qt)
Test batches and 2oz fiber. Good if you're not sure yet.
Capacity
8–12 qt
Max fiber
~2–3 oz dry
Best for Sampling dyes, apartment kitchens, total beginners
Tradeoff Outgrown quickly — limits you to small experimental batches
Standard (16–20 qt)
A full skein with room to move. The size most dyers use.
Capacity
16–20 qt
Max fiber
~4–6 oz dry
Best for Standard yarn skeins, most beginner and intermediate projects
Tradeoff Heavier and slower to heat — gas burner helps for larger batches
Multiple skeins or fabric. Buy once the hobby takes hold.
Capacity
30+ qt
Max fiber
~12+ oz dry
Best for Fabric yardage, multiple skeins, experienced dyers
Tradeoff Needs a gas burner or outdoor setup — too big for most home stoves
Best starter
Farberware
Classic Stainless Steel 16-Quart Stockpot
$$
★★★★★Our rating
Thick-bottomed stainless that heats evenly and doesn't react with mordants or dye baths. The 16 qt capacity handles a full 4-oz skein with room for the fiber to move freely — crowding kills even dye penetration. Farberware's encapsulated base means no hot spots during the sustained gentle simmers natural dyeing requires. Dedicate this pot on day one and it'll last decades.
What we like
Thick stainless base heats evenly — no hot spots that scorch fiber
16 qt handles a full yarn skein plus mordant water with room to spare
Inert material won't shift your dye colors the way copper or iron pots can
What to know
Heavy when full — plan your workspace before you fill it
One-way commitment: dedicated to dye work once you start
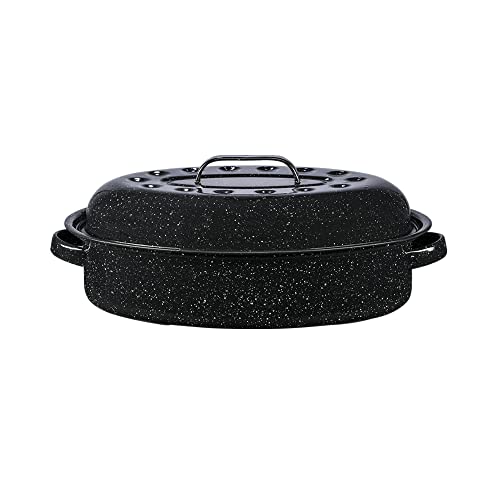
Graniteware (porcelain-coated steel) is traditional in natural dye studios. It's lighter than stainless, heats quickly, and works well for sampling. The 15-inch oval holds 3-4 quarts of dye bath — enough for small fiber samples while you're finding your feet. Check thrift stores first; these appear regularly for $5.
What we like
Lightweight and heats quickly — easy to manage on a home stove
Traditional dye vessel — graniteware is in every natural dye reference book
What to know
3–4 qt capacity limits you to small fiber samples only
Chipped enamel reacts with iron mordants — inspect before every use
When you're dyeing regularly and want to do full 6-oz fiber batches or multiple skeins in one session, the 20 qt moves you up without requiring an outdoor burner. Cooks Standard's aluminum-disc base distributes heat evenly — critical at the gentle simmer (180-190°F) that most plant dyes require.
What we like
20 qt handles 6oz fiber batches — skips the upgrade you'd need at 16 qt
Encapsulated base distributes heat evenly — no scorched mordant patches
What to know
Tall profile makes monitoring fiber movement harder — stir often
Mordants are metallic salts that bond dye molecules to fiber. Without them, most plant dyes wash out within weeks. Potassium alum is where everyone starts — it's the safest, brightest, and most forgiving mordant available. Iron and copper come later. They shift colors interestingly (iron darkens and 'saddens'; copper pushes toward greens) but add variables you don't want while learning basic ratios. Learn on alum. Add modifiers after your first ten batches.
Best starter
Organic Cotton Plus
Alum Mordant — Aluminum Sulfate 1 Lb
$12.06 as of Jun 22, 2026
★★★★★Our rating· In Stock
Potassium alum is the universal beginner mordant — safe without heavy PPE, produces bright colors, and doesn't shift your hues the way iron or copper do. Use at 10-15% weight of fiber. This 1-pound bag is a trusted Amazon-available supply and covers a full year of beginner-level dyeing at 10-15% WOF on 100g batches.
What we like
Safest mordant for beginners — no heavy PPE needed, mild to handle
Produces bright, clean colors without shifting hues
Botanical Colors is the gold-standard US supplier for dye chemicals
What to know
Too much (over 20% WOF) makes wool sticky — measure carefully
Iron after-baths are how you shift a gold madder to olive, a yellow weld to green, or a red to burgundy-brown. Used in tiny amounts (2-3% WOF) as a final modifier, not a primary mordant. Transformative and useful, but save it for your second month — use it too early and you won't know what's causing what in your results.
What we like
Transforms dye results — doubles your color range without new dye
Used at 2–3% WOF, so one container lasts years
What to know
Over-use hardens and weakens wool fiber — precision required
Add only in month two: complicates troubleshooting if used too early
Cream of tartar isn't a mordant — it's a mordanting assistant that brightens alum results and helps dye exhaust more evenly. Add at 6% weight of fiber alongside your alum. Available at any grocery store for $4 if you want to test before ordering. Anthony's food-grade version is clean and works fine for dye work.
What we like
Brightens and evens out alum results noticeably
Available at any grocery store — zero wait time to start
What to know
Not a mordant on its own — must be used alongside alum
Plant dyes range from kitchen-counter easy (onion skins, avocado pits) to complex chemistry (indigo vat reduction). For your first batches, plant extracts are more consistent than raw plant material — the color compounds are already extracted and measured, so you know what you're getting. Madder root extract gives warm reds and terracottas. Weld gives a clear, lightfast yellow. Indigo is in a category of its own: a blue that nothing else matches, but requiring a separate vat reduction process. Start with madder or a sampler kit; add indigo in month two.
Best starter
Natural Dye Kit
— Six All-Natural Plant Dyes for Wool
$$
★★★★★Our rating
A sampler of six standardized dye extracts with clear usage guidelines. For a beginner, this is the right way in: you learn consistent technique before introducing variables. Six colors (including indigo) cover your first several months of dyeing, and the included herbal mordant gets you started without a separate mordant order.
What we like
Lab-tested extracts give repeatable results — critical while still learning
Four colors in one pack: covers reds, yellows, and blues in a single order
Clear usage guidelines mean no guesswork on your first batches
What to know
More expensive per gram than raw plant material
Small pack sizes mean you'll reorder within a few months
Indigo is the only natural blue worth chasing — the blue of ancient Egypt, classic denim, Japanese katazome. No other plant dye gets there. It requires a vat (reduction, oxygen-free) that's completely different from direct exhaust dyeing. This Jacquard kit has pre-reduced indigo, reducing agent, and buffer — everything for your first vat.
What we like
Pre-reduced indigo — no fermentation or sodium hydrosulfite fussing
Produces the irreplaceable natural blue — no other dye comes close
What to know
Completely different process from mordant dyeing — do mordant dyeing first
Vat chemistry is pH-sensitive and finicky until you understand it
Madder root (Rubia tinctorum) is the oldest and most reliable natural red dye. Ground root powder is much cheaper than extract but requires longer simmering and more material — about 50-100% weight of fiber for a full shade. The warm reds, oranges, and terracottas you get from madder are genuinely beautiful and highly lightfast. A pound covers many batches.
What we like
Much cheaper per gram than extract — a pound covers multiple batches
Warm reds and terracottas are among the most lightfast natural dyes
What to know
Must not boil — temperature discipline matters for clean reds vs. brown
Requires more material than extract for equivalent shade depth
Not all fibers dye equally. Protein fibers — wool, silk, alpaca — are the easiest: alum mordant sticks naturally, and the color goes deep. Cellulose fibers (cotton, linen) require a tannin pre-treatment before mordanting, adding a whole extra step. For your first batches, use undyed wool yarn. Superwash merino is especially beginner-friendly because it won't felt if the temperature fluctuates slightly. Pre-scoured fiber is worth the small premium — skipping scouring is why beginners get patchy dye results.
Best starter
Knit Picks
Bare Stroll Fingering Weight Superwash Merino Yarn Hank
$
★★★★★Our rating
Bare Stroll is 80% superwash merino / 20% nylon, sold in 100g undyed hanks. The superwash treatment prevents felting even if dye bath temperature creeps past 190°F — crucial for beginners. The merino content takes natural dye beautifully; the nylon absorbs slightly less, giving a subtly heathered result. Small hanks keep early batches affordable.
What we like
Superwash-treated: won't felt at simmering dye temps — beginner-forgiving
Pre-scoured and consistent lot-to-lot for reliable dye results
Small 100g skeins keep learning batches affordable
What to know
Superwash process slightly reduces dye uptake vs. non-treated wool
Fingering weight takes longer to assess color depth visually
Silk is the fiber that makes natural dye look its absolute best. Mordanted silk takes color two to three times deeper than equivalent wool and stays vibrant for years. These ready-to-dye silk scarf blanks (15 x 60 inches) are the format you'll see in every natural dye book demonstration — your first dyed silk scarf will likely be your most treasured early result.
What we like
Takes natural dye deeper and more vivid than any other fiber
Lightweight habotai makes beautiful scarves from small dye batches
What to know
Can't exceed 180°F or use alkaline modifiers — temperature discipline required
Slippery when wet — tie loosely in figure-8 skeins before dyeing
Available at most craft stores, affordable, and 100% wool in a natural white that takes dye well. A workhorse beginner fiber — no prestige, completely reliable. The 8-oz skein is large enough for a full dye experiment and light enough to exhaust a bath in one session. Widely available locally if you need it today.
What we like
Available at most craft stores — no waiting for shipping
8-oz skein is plenty for a complete beginner dye experiment
What to know
Not superwash — can felt if overheated or agitated in the dye bath
Less consistent lot-to-lot than specialty yarn brands
Natural dye chemistry is gentle compared to synthetic dyes, but you're working with mordant salts, sustained heat, and occasionally steam. A thermometer tells you when you're at the right mordanting temperature, a scale gives you precise mordant ratios, and pH strips let you troubleshoot when colors come out unexpected. Budget $30-40 for this category and you'll have everything you need.
Best starter
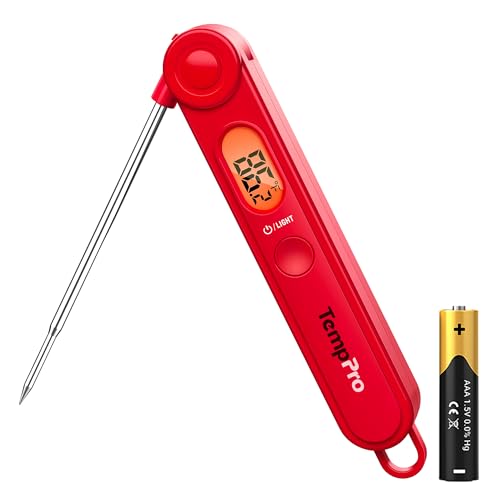
TempPro
TP03B Digital Instant Read Thermometer
$9.99 as of Jun 22, 2026
★★★★★Our rating· In Stock
Temperature is the variable that wrecks most beginner batches. Mordanting wool needs to stay at 180-190°F — above that, you risk felting; below 170°F, alum doesn't fix properly. A fast instant-read thermometer removes the guesswork. The TempPro TP03B (formerly ThermoPro) reads in 3-4 seconds, handles up to 572°F, and costs under $15. Use it for mordanting, dye baths, and cooling checks.
What we like
3-4 second read time — fast enough to track a dye bath without losing heat
Accurate to ±0.9°F — precise enough for mordant temperature windows
Under $15 — highest ROI tool in the natural dye kit
What to know
Probe must stay in water — touching pot bottom reads 30°F too high
No alarm — you're monitoring manually, not automatically
pH matters more than beginners expect. Wool prefers a slightly acidic bath (pH 4-6); conditions above pH 8 damage protein fibers. Indigo vats need pH 9-11. A pack of pH strips lets you check before you start and troubleshoot when colors come out unexpected. Not a daily need, but essential for indigo work and useful any time something looks off.
What we like
100 strips for ~$8 — covers a year of casual dye work
Essential for indigo vat maintenance and fiber-safety spot checks
What to know
Readings only accurate to ±0.5–1 pH unit — adequate but not precise
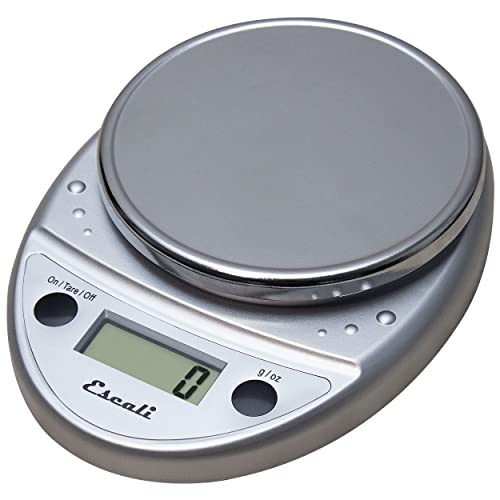
Mordant ratios are percentages of fiber weight — 10g alum per 100g dry wool. Without a scale, you're guessing, and guessing causes sticky wool, patchy color, and wasted dye. A digital kitchen scale with 0.1g resolution costs about $25 and removes the biggest source of beginner frustration. Weigh your fiber, weigh your mordants, weigh your dye extract. Your results become repeatable.
What we like
0.1g resolution — precise enough for mordant ratios at any batch size
Tare function lets you weigh chemicals directly in their container
What to know
11 lb maximum capacity — fine for fiber, not for weighing wet batches
Sensitive to moisture; don't position directly at the dye pot
You don't need a farm, a chemistry degree, or a whole studio. Here's what actually happens in your first four weeks — from the first mordanted skein to your first proper indigo vat.
Natural dyeing has a reputation for being complicated — chemistry, mordants, pH, fiber preparation. That reputation is mostly wrong. The basic process is: scour your fiber, mordant it with alum, simmer it in a dye bath. That’s it. You can do your first batch in an afternoon.
The complexity is real, but it comes later: when you want specific colors, when you’re working with cotton or linen, when you build a reduction vat for indigo. In your first month, you don’t need any of that. You need a dedicated pot, a bag of potassium alum, and some undyed wool. The rest is patience and heat.
Week 1: Your first mordant bath
Before your fiber touches any dye, it needs to be mordanted — treated with a metallic salt that opens the fiber and allows dye molecules to bond permanently. Without this step, most plant colors wash out within weeks.
Potassium alum (aluminum sulfate) is where everyone starts. It’s safe to handle without respirators or heavy PPE, available online for $10-15 a pound, and produces bright, warm results on wool. One pound will cover a year of beginner-level dyeing.
The mordanting process:
Weigh your dry fiber. Write it down — everything else is a percentage of this number.
Calculate 10-15% of that weight in alum (10-15g per 100g fiber). Measure it on a kitchen scale.
Dissolve the alum in a small amount of hot water in your dedicated dye pot.
Wet your fiber by soaking it in warm water for 20-30 minutes first — dry fiber dropped in hot water will shock-felt.
Add the wet fiber to the mordant bath, fill with warm water to cover.
Bring slowly to 180-190°F. Hold there for 45 minutes. Check your thermometer.
Remove from heat and let cool slowly in the bath — a slow cool helps the mordant exhaust completely.
Your fiber won’t look different after mordanting. That’s correct. The change is chemical, not visible. The difference shows up when you dye.
Madder root (Rubia tinctorum) is the oldest natural red dye in the world and the best introduction to exhaust dyeing. The warm reds, terracottas, and burnt oranges it produces are genuinely beautiful, and it’s one of the most lightfast natural dyes available — meaning results that last decades with proper care.
If you’re using extract powder (more consistent than ground root for beginners): use 10-20% weight of fiber for a medium shade, dissolved in hot water before adding your fiber. If you’re using madder root powder, use 50-100% weight of fiber and expect the process to take longer.
The critical rule with madder: don’t boil. Boiling shifts the color from warm red toward a flat brown. Keep your dye bath at 160-180°F. A thermometer is not optional here.
The dye process mirrors mordanting:
Dissolve your dye material in a small amount of hot water and add to your dye pot.
Add your pre-mordanted (wet, not dry) fiber.
Bring slowly to 160-175°F and hold for 45-60 minutes.
Cool slowly in the bath before removing — colors deepen during the cool.
Rinse gently in water of similar temperature, then cooler water progressively.
Exhaust your bath. After removing the main fiber, the bath has color remaining. Add an unmordanted skein — it’ll pick up a paler, softer version of the same color for free. This secondary exhaust is often one of the most beautiful results you’ll get all month.
Week 3: Explore what you have
By week three, you’ve mordanted and dyed at least one batch. Now push the palette without buying anything new.
pH shifting. Your madder bath sits at whatever pH your tap water has. Add a splash of white vinegar to lower the pH (more acidic = cooler, pinker reds on madder). Add a pinch of baking soda to raise it (more alkaline = browner, more orange). Document what happens. This is chemistry you can do with grocery store ingredients.
Iron modifier. If you ordered ferrous sulfate, try it now. After dyeing, dissolve 1-2% weight of fiber in hot water and briefly (5-10 minutes) simmer your dyed fiber in this iron after-bath. Watch the color sadden and shift toward olive or khaki. Rinse immediately. A little iron goes a long way — the effect is permanent.
Kitchen dyes. Onion skins (the papery outer layers — yellow and brown, not the white inner ones) give brilliant golds and yellows on alum-mordanted wool. Simmer them in water for an hour, strain, and add your fiber. Avocado pits and skins (save and dry them over a few weeks) produce a soft pink-mauve that requires no mordant. Black tea gives a warm tan on unmordanted fiber. None of this costs anything.
Week 4: Try indigo — and understand why it’s different
Indigo is the one dye that stands apart from everything else in natural dyeing. It’s the blue of denim, ancient Egyptian linens, Japanese katazome fabric. No other plant source produces it. And it works through a completely different process than what you’ve been doing.
Madder and weld are exhaust dyes — they dissolve in water and bond to fiber when mordanted. Indigo is vat-soluble — it has to be chemically reduced (have oxygen removed) to dissolve at all, then re-oxidizes to blue on contact with air as you pull the fiber out of the vat. This is why fresh-from-the-vat fiber looks greenish and then turns blue in front of your eyes as it oxidizes. It’s one of the most visually dramatic moments in the craft.
What this means practically:
No mordant. Alum-mordanted fiber will actually produce muddier results with indigo. Dye un-mordanted fiber.
Multiple short dips, not one long soak. 2-5 minutes per dip, remove, oxidize fully (15-20 minutes in air), then dip again. More dips = deeper blue.
Maintain pH 9-11 in your vat. Test with pH strips. Below 9 and the vat won’t work. Above 12 and you damage fiber.
If you bought the Jacquard Natural Indigo Kit, follow its instructions — the kit has pre-reduced indigo and handles the chemistry for you. Your first indigo session will feel like magic.
The mistakes everyone makes in month one
These are predictable. You will make at least one of them:
Shocking the fiber with temperature changes. Wool felts when there’s a sudden temperature swing combined with agitation. Move slowly: warm to warm, cool to cool. The golden rule is “no more than 10°F change per minute.”
Skipping the notes. You’ll get a color you love and have no idea how you got it. Weigh everything, write down percentages, note the temperature and time. Without records, every result is a one-off accident.
Opening the dye bath too early. Patience is the skill. The last 15 minutes of a simmer and the slow cool afterward are when the deepest color sets. Pulling fiber early consistently produces paler, less-even results.
Using too much mordant. Alum at 10-15% weight of fiber produces bright, clean results. At 25-30%, you’ll get sticky, unpleasant-to-touch wool that breaks down faster in wear. Measure.
At the end of month one, you’ll have a small collection of naturally dyed skeins and a notebook with the beginnings of your own dye recipe archive. That notebook is worth more than any product in the gear guide.
Save your money
What you don't need yet
Beginners get pressured to buy a lot of stuff that doesn't help them play
better. Here's what we'd skip on day one.
Chrome or tin mordants — Chrome is genuinely toxic and requires chemical disposal protocols. Tin is caustic. Neither is necessary — alum and iron cover 90% of what beginners want.
Plant foraging for dye material — Foraging is a wonderful second-year practice. In year one, use extracts with known color strength so your failures can actually be diagnosed.
A digital pH meter — pH test strips are precise enough for dye work. A $100 calibrated meter is a textile-lab tool, not a home studio necessity.
Woad or obscure historical dye plants — Woad (historically important blue) has been superseded by better indigo sources. Start with madder, weld, and a Jacquard indigo kit.
Industrial reduction chemicals (sodium hydrosulfite) — These are used in serious professional indigo work. The Jacquard pre-reduced indigo kit sidesteps all of this chemistry for your first year.
An outdoor propane burner setup — Your kitchen stove handles a 16-20 qt pot fine. An outdoor burner is a quality-of-life upgrade for when you're doing multiple batches per week.
First week
Your first seven days
A short, real plan to get from gear-on-doorstep to actually playing.
Order or find a dedicated dye pot — 16 qt stainless, new or thrift store. Mark it permanently 'DYE ONLY' with a paint marker. · Action
Order alum mordant and your first dye material — a sampler kit or madder extract. · Buy
Scour your fiber first. Simmer undyed wool in hot water with a small squirt of dish soap for 45 minutes. Rinse gently in water the same temperature — sudden changes felt wool. · Action
Mordant your scoured fiber with alum at 10–15% weight of fiber. Simmer at 180–190°F for 45 minutes. Cool slowly in the bath, then remove. · Learn
Run your first dye bath. Add mordanted fiber to warm dye bath, bring slowly to 180°F, simmer 45-60 minutes, cool slowly in the bath before removing. · Action
Exhaust the dye bath. After removing your main fiber, add a second batch of unmordanted wool — you'll get a lighter shade for free. · Action
Take notes. Write down fiber weight, mordant %, dye %, temperature, and time. This is the only way to repeat results you love. · Learn
FAQ
Common questions
Do I need mordants, or can I just use plant dye directly?
Most plant dyes wash out within weeks without a mordant — you'd get color that fades to nothing. Exceptions exist (black walnut, oak galls) but they produce dull shades. Alum mordant is safe, inexpensive, and takes ten minutes of prep. Don't skip it.
Why can't I start with cotton instead of wool?
Cellulose fibers (cotton, linen) need a tannin pre-treatment before mordanting, and even then, colors come out lighter and less saturated than on wool. Protein fibers (wool, silk, alpaca) take natural dye directly after alum mordanting. Learn the process on wool first, then apply it to cotton.
Are natural dyes colorfast — will they fade?
It depends on the dye. Madder, weld, indigo, and walnut are all highly lightfast and will outlast most synthetic dyes if mordanted correctly. Weak dyes (turmeric, hibiscus, red cabbage) are fugitive — they fade in sunlight within weeks. Start with lightfast dye sources and don't let anyone tell you natural dyes are always delicate.
How much does a dye batch actually cost?
A standard batch (100g wool, alum mordant, madder extract dye) runs $8-15 in materials once you own the equipment. The one-time equipment cost — a dedicated pot, scale, thermometer — is $50-80. After that, it's one of the more cost-efficient fiber crafts.
Can I dye with kitchen scraps like onion skins and avocado pits?
Yes, and they work better than you'd expect. Onion skins give vivid golds and yellows with just alum mordant. Avocado pits and skins produce a mauve-pink with no mordant at all. Black tea gives a warm tan on unmordanted wool. These make great first experiments because the material is free.
What safety precautions do I need at home?
For alum mordanting and most plant dyes: dedicate your equipment (never food use again), work in a ventilated space, and wear gloves when handling mordant powders. Alum is even used in pickling — it's quite mild. Iron and copper mordants require more care. Avoid chrome, tin, and strongly alkaline chemicals until you're experienced.
Botanical Colors — The most comprehensive English-language resource for natural dye materials, tutorials, and mordanting guides. Read their how-to-dye section before your first batch.
Wild Color by Jenny Dean (book) — The standard beginner and intermediate natural dye reference. Plant-by-plant recipes, mordant explanations, seasonal dye calendar. Worth owning in print.
Dharma Trading Co — Reliable US supplier of undyed fiber, fabric, and dye supplies. Good alternative source when Botanical Colors is out of stock.
r/NaturalDyeing — Active community. Best for troubleshooting ('my color came out muddy — why?') and seeing what experienced dyers are achieving.
Rebecca Desnos (YouTube / blog) — UK-based natural dyer with excellent plant-foraged dye videos. Her avocado pit dye video is the best introduction to mordant-free dyeing.
Slow Fiber Studios — In-depth video courses on plant-based dyeing. The indigo vat and woad tutorials here are among the best available online.
As an Amazon Associate, JustBeginning earns from qualifying purchases.
We may also earn commission from other affiliate programs linked on this
page. Editorial recommendations are independent; we don't choose
products based on commission rates.
Product prices and availability are accurate as of the date and time
indicated and are subject to change. Any price and availability
information shown on Amazon at the time of purchase will apply.
Our top pickNatural Dye Kit — Six All-Natural Plant Dyes for Wool

 Best starter