Rug tufting went from niche craft to TikTok obsession for a reason: you can make a genuinely impressive rug in a weekend. The learning curve is mostly in the setup: cut pile or loop pile gun? What frame size? Monk's cloth or warp cloth? Get those answers right and the actual making is pure flow.
By Colin B. · Published May 23, 2026 · Last reviewed June 7, 2026
The tufting gun alone runs $150–300. Add a frame, monk's cloth, yarn, and rug lock adhesive and you're looking at $270–420 to make your first real rug.
We earn commission on qualifying Amazon purchases — see our
affiliate disclosure.
Price tiers and budget totals shown above are editorial estimates;
actual Amazon prices vary.
At a glance
Our top pick in each category
The fastest path through this guide — each best-starter pick by category.
Scroll for the budget and upgrade alternatives.
The cut-pile vs. loop-pile decision matters more than anything else you'll choose. Cut pile guns sever the loops as they go, producing a plush, fluffy surface. It's easier to learn and what you see in most TikTok tufting videos. Loop pile leaves loops intact, creating a more textured, woven look. Start with cut pile unless your design specifically requires loops.
Frame sizing is the beginner trap nobody warns you about. Your frame needs to be at least 6 inches larger on every side than your finished rug so you have fabric to grip and tension. A 24x24 inch frame yields a rug up to about 12x12 inches. Sizing too small means you can't tension the cloth properly, and loose backing is the #1 reason beginners have loops pulling out.
Yarn weight must match your gun. Most AK-style tufting guns are designed for worsted to bulky weight yarn (weight 4–5). Super bulky jams the needle; fingering weight produces a pile too thin to look finished. Check the gun's spec before buying yarn, as this is one mistake that's annoying to undo mid-project.
The gear
What you actually need
Tufting Guns
The tufting gun is the heart of the hobby and the biggest gear decision you'll make. Electric tufting guns punch yarn through backing cloth at speed, far faster than a hand punch needle. The main choice is cut pile (needle cuts loops automatically, giving a fluffy surface) vs. loop pile (leaves loops intact, more textured look). Most beginners start with a cut pile gun; add a loop pile gun later if you want variety.
Tufting Guns — what's the difference?
A few common shapes, each making a different trade.
Cut Pile
Loops are cut automatically. Fluffy, plush, soft-underfoot surface.
Surface
Plush / shaggy
Difficulty
Beginner-friendly
Backing tension
Forgiving
Best for First rugs, floor pieces, classic tufted look
The AK-I is the entry-level cut pile gun that most first-time tufters start with, and for good reason. It handles worsted to bulky yarn, fires reliably, and is forgiving enough to teach you technique before you invest more. Cut pile means loops get snipped automatically, giving you that plush, shaggy texture most beginners are after. It's the gun you see in 90% of beginner TikTok tutorials.
What we like
Most popular entry gun, with tutorials and troubleshooting everywhere
Automatically cuts loops for a plush cut-pile finish
Compatible with standard worsted–bulky yarn weight (4–5)
What to know
Gets hot in extended sessions; needs rest breaks on large rugs
Not ideal for loop pile work; buy a dedicated loop gun for that
For loop pile work, this adjustable gun handles both cut pile and loop pile modes via a dial, giving you flexibility to explore both techniques with one tool. It's the most practical Amazon option for tufters who want to try loop pile without buying a separate gun. Buy this after completing a few cut pile rugs and wanting to branch into loop pile work.
What we like
Handles both cut pile and loop pile modes in one gun
Adjustable pile height dial for precise control
More versatile than a single-mode entry gun
What to know
Confirm listing is self-contained electric, not compressor-requiring
Loop pile mode is still unforgiving of loose backing tension
★★★★☆Our rating· Only 2 left in stock - order soon.
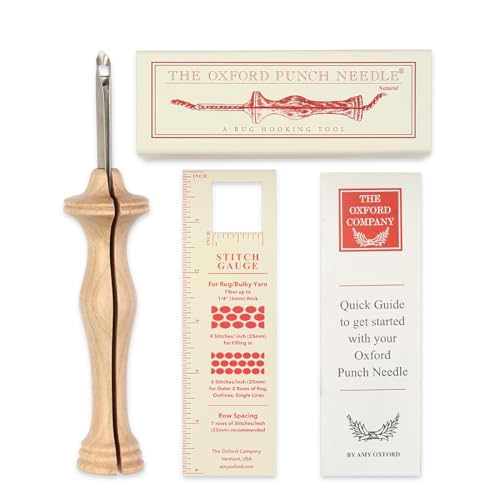
A punch needle is slower than a tufting gun but costs a fraction of the price, and it teaches you the core motion (pushing yarn through backing cloth) before you commit $200 to a gun. The Oxford Size 10 handles bulky yarn and works on monk's cloth. Perfect for testing the hobby on a small wall hanging before deciding whether to invest in a full tufting gun setup.
What we like
Under $40, the lowest-risk way to try rug tufting technique
Teaches the backing-tension and yarn-threading skills a gun requires
No power needed, so it's portable and quiet
What to know
Dramatically slower than an electric gun for any real rug size
Manual labor per stitch becomes exhausting past 12x12 inches
Your frame is what holds the backing cloth under tension while you tuft. Without tight tension, loops pull out, the surface waves, and your design warps. The rule of thumb: your frame should be at least 6 inches larger than your rug on every side. Stretcher bars (wooden bars that click together) are the most accessible starter option. Freestanding frames with legs are better for large rugs and all-day sessions.
Best starter
Falling in Art
Canvas Stretcher Bars (24x36 Kit)
$28.99 as of Jun 22, 2026
★★★★★Our rating· In Stock
Stretcher bars are the standard way to tension monk's cloth for rug tufting. This Falling in Art 24x36 inch kit includes four bars that click together, no tools needed. Large enough for a 14x22 inch rug with plenty of grip margin. Lightweight, storable, and easy to source in other sizes once your projects grow.
What we like
Click-together design: no tools, no building, just assemble and go
Modular sizing: mix lengths to make any rectangle you need
Lightweight and flat for easy storage between projects
What to know
Need staple gun to attach cloth (not included)
Can flex on very large rugs (36"+ sides); add a center brace
When you want to tuft large rugs (3 feet and up), or tuft standing instead of hunching, a floor-standing frame changes everything. NODOCA's 53.5-inch aluminum frame is adjustable for height, significantly more rigid under gun vibration than stretcher bars, and far easier on your back during long sessions. The setup you see in most serious tufting studios.
What we like
Handles rugs up to 4x6 feet with no additional support needed
Height-adjustable, so you can tuft standing or seated without back strain
Rigid under gun vibration, critical for loop pile accuracy
What to know
Significant footprint, needs a dedicated workspace area
High cost: overkill for your first few small projects
Primary backing is the fabric you stretch on the frame and tuft through. The two main options are monk's cloth (loose, open weave, the standard for cut pile beginners) and warp cloth (tighter, more uniform, better for loop pile and detailed designs). The cloth must be pre-washed before use to prevent shrinkage once the adhesive cures. Order significantly more than your rug size needs. You need 6+ inches of grip on every side.
Best starter
BESGEER
Monks Cloth for Rug Tufting 60" Wide (2 Yards)
$34.99 as of Jun 22, 2026
★★★★★Our rating· In Stock
Monk's cloth is the go-to primary backing for cut pile tufting; its open weave lets the needle pass easily and grips yarn reliably. BESGEER's 60-inch wide, 100% cotton version is sold in 2-yard pieces, plenty for a 14x18 inch rug with full grip margin. Pre-wash before stretching to prevent post-adhesive shrinkage that can warp a finished rug.
What we like
Open weave makes needle entry easy, very forgiving for beginners
60-inch width accommodates most home rug sizes without seaming
Affordable and available by the yard, easy to reorder
What to know
Frays aggressively at cut edges; tape or serge before use
Not ideal for loop pile; loops can pull through the loose weave
Primary tufting cloth has a tighter, more uniform weave than monk's cloth, making it better for loop pile work. Loops are far less likely to pull through. Also gives crisper edges on detailed geometric designs since the threads don't drift. If you're planning precision work or loop pile projects, start here instead of monk's cloth.
What we like
Tighter weave prevents loop pile from pulling through
More stable grid, so design lines stay where you draw them
Less fraying at edges than monk's cloth
What to know
More expensive per yard than monk's cloth
Stiffer, requiring more force through the gun needle
Yarn is where beginners make the most expensive-to-fix mistakes. Weight is everything: most AK-style tufting guns are spec'd for worsted to bulky weight (yarn weight 4–5). Go heavier and the needle jams; go thinner and the pile looks sparse. Cones are strongly preferred over skeins. You'll run out mid-rug with skeins and have to re-thread constantly. Wool makes the best-looking rugs; acrylic is cheaper and comes in more colors.
Best starter
Yarn Innovations by Burke Tools
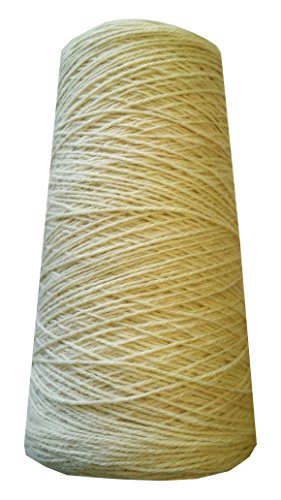
Rug Wool Yarn Cone 2.5 LB (Bulky Weight)
$75.95 as of Jun 22, 2026
★★★★★Our rating· Only 6 left in stock - order soon.
Rug wool has natural texture, durability, and produces rugs that look and feel like proper hand-tufted pieces. Bulky weight (weight 5) on cones is compatible with most AK-style guns and gives dense, satisfying pile coverage. The cone format means less re-threading mid-rug than skein-wound yarn. This is what finished rugs that photograph well are made from.
What we like
Natural texture and bounce, rugs feel premium underfoot
Cone format minimizes re-threading during long sessions
Durable on floor rugs: wool outlasts acrylic under foot traffic
What to know
Costs more per yard than acrylic; large rugs add up fast
Fewer vivid color options than acrylic; more muted naturals
PANDI EXPRESS sells 8-ply 100% acrylic yarn specifically on cones for tufting, at a price well below wool. It comes in a wide range of colors (great for bold geometric designs) and the cone format minimizes re-threading. Durability under heavy foot traffic is lower than wool, but for wall hangings or lower-traffic spots it's a great budget choice.
What we like
Much cheaper than wool, great for practicing color fills
Huge color range including vivid neons and saturated brights
Easy to find in big-box craft stores if you run out mid-project
What to know
Less durable than wool for rugs with regular foot traffic
Can pill or flatten over time on high-use floor pieces
For high-pile, ultra-plush cut pile rugs, super bulky roving yarn produces pile so dense it looks sculpted. Lion Brand Wool-Ease Roving (80% acrylic / 20% wool) gives you that lofty texture at a lower price than 100% wool. Great for accent pieces where pile depth is the whole point. Buy this once you know the process; it's at the upper limit of most entry tufting guns.
What we like
Ultra-plush pile depth; cut pieces look and feel luxuriously thick
80% acrylic/20% wool blend: plush feel at lower price than pure wool
Dense coverage means fewer passes needed to fill an area
What to know
Sold in 58-yard skeins not cones, so large rugs need many separate skeins
At the upper weight limit of most entry tufting guns
Tufting is only half the process. Once you finish the pile, you need to lock the tufts in place from the back with a latex adhesive (otherwise they pull out immediately), add a secondary backing fabric for structure and a clean finish, and trim or bevel the pile to even height. Most beginners skip or rush this step and are disappointed when their rug falls apart. Budget 24 hours for the adhesive to cure fully before handling.
Best starter
Roberts
3095 High Performance Carpet Adhesive (1 Gallon)
$29.00 as of Jun 22, 2026
★★★★★Our rating· In Stock
Roberts 3095 is the rug-lock adhesive used in almost every tufting tutorial online, the go-to standard. Pour it onto the back of your still-on-frame rug, spread evenly, let it cure 24 hours, and your tufts are permanently locked. One gallon covers roughly 16-20 square feet at a solid coat, enough for many rugs.
What we like
The industry-standard rug lock used in nearly every tutorial online
Flexible when cured, so rugs can roll and fold without cracking
One quart is enough for 3–4 beginner-sized rugs (12x12 to 18x18)
What to know
Strong fumes when wet, so ventilate well during application
Must cure 24+ hours before handling; patience required
Secondary backing gets glued over the cured adhesive layer, giving the rug a clean finished back, protecting floors from the rough adhesive surface, and adding non-slip grip that prevents sliding. Press this onto the adhesive while it's still slightly tacky, cut slightly smaller than the rug edge. Makes the finished back look professional instead of raw and sticky.
What we like
Gives the back a clean, professional appearance
Protects hardwood floors from the rough cured-adhesive surface
Adds light structure that helps rugs lie flat
What to know
Timing-sensitive; must press in while adhesive is still tacky
Non-slip properties minimal; add a rug pad under the rug
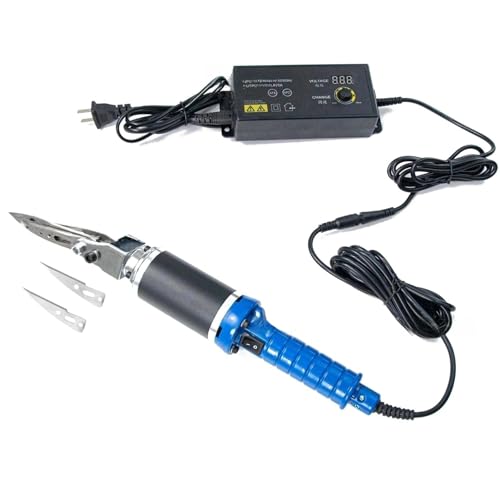
Electric Tufting Scissors, 110V Tufting Carpet Trimmer, Rug Shaver Clippers for Carving Modeling Detailing Cutting, Tufting Art Supplies, Adjustable Speed, 2 Pairs Blades
$$
★★★★☆Our rating
Electric carving scissors let you sculpt and level the pile quickly, trimming high spots, carving detail into the surface, or beveling color zone edges for a cleaner finish. Far faster than manual scissors for anything beyond a small rug. Not required on your first rug, but extremely satisfying once you're comfortable with the basics.
What we like
Motor-driven blade trims pile far faster than manual scissors
Levels color zone boundaries for a polished, graphic look
Makes quick work of final pile height equalization
What to know
Electric blade moves quickly; go slow until you know the speed
Not necessary for first rugs; manual scissors work fine early on
Rug tufting has a setup phase that trips nearly everyone up the first time, then a flow state once it clicks. Here's what actually happens, start to finish, on a first rug.
There’s a reason rug tufting took off on TikTok: the before-and-after is dramatic. A blank stretched cloth and a pile of yarn go in; a real, tactile, custom rug comes out. What the videos don’t show (the part that trips up nearly every first-timer) is the setup. Get the frame, cloth, and tension right and the rest is deeply satisfying. Get any of them wrong and you’ll spend your whole first session pulling out failed loops.
This is a real walkthrough of your first weekend, in the order you’ll actually do it.
Saturday morning: Build your frame and stretch the cloth
Before you can tuft anything, you need a stretched-tight primary backing. This takes longer than you think, and it matters more than almost anything else.
Start with your frame. If you’re using stretcher bars, click four bars together into a rectangle. For a first rug, aim for a frame at least 24x24 inches, large enough to yield a finished rug around 12x14 inches with room to grip and tension all edges. Lay the frame flat on a sturdy table or the floor.
Cut your monk’s cloth oversized. Your cloth should extend at least 6 inches past every edge of the frame. If your frame is 24 inches, cut a piece at least 36 inches in both directions. That extra cloth is your gripping surface, the cloth that gets stapled to the frame.
Pre-wash the cloth first. Monk’s cloth shrinks. If you skip the pre-wash, the fabric can contract after you apply the adhesive in finishing, warping your finished rug. Wash it in cold water, dry it fully, then stretch it.
Stretch it drum-tight. Start at the center of one edge, staple, then stretch to the opposite center edge and staple. Work outward from each center, alternating sides, pulling the cloth as taut as you can. The target: when you tap the cloth, it should sound and feel like a drum head with almost no give. A saggy backing is the single most common reason first-time tufts keep pulling out.
Saturday afternoon: Draw your design and learn the gun
With the cloth stretched, draw your design on the front surface with a Sharpie or chalk marker. Keep it simple for your first rug: a large letter, a bold geometric shape, or a simple animal outline. Complex patterns are for later, after you know how the gun moves. The Sharpie line won’t show on the finished pile.
Load the gun and do a test pass on the edge. Thread your yarn through the needle eye (most guns have a threading tool; use it), set the pile height to medium, and make a 3-inch test row on the edge margin of the cloth (the part you’ll trim off anyway). This tells you whether:
The yarn is feeding correctly (no jams, no skipped stitches)
The tension feels right (loops are consistent height)
You’re moving in the right direction (parallel to the warp threads of the monk’s cloth, not perpendicular)
The last point matters. You’ll feel when you’re moving across the grain: the needle fights you. Rotate 90 degrees and it glides. Always tuft parallel to the cloth grain.
Once the test passes look right, move inside the lines of your design and start filling. Use the natural motion of the gun: steady, even pressure, consistent speed. Don’t rush. The pile height is controlled by how slowly or quickly you advance. Slower means taller pile, faster means shorter. Find a rhythm and keep it.
Keep tufting. For a 12x12 inch rug, expect 2–4 hours of working time for a beginner. The fill is satisfying once you’re in it. You’ll watch the design come up from the cloth.
A few things to watch for as you go:
Loops pulling out: The most common issue. It means one of three things: (a) your backing isn’t tight enough, (b) you’re moving against the grain, or (c) the yarn tension in the gun is wrong. Check all three before assuming the gun is broken.
Uneven pile height: Usually from inconsistent gun speed. Slow, deliberate movement early on; you’ll develop a feel for the pace. When you’re done, you can shear the top to even it out.
Running out of yarn mid-color: Leave a 3-inch tail when you cut out, and leave a 3-inch tail when you thread in the new yarn. Those tails get locked in by the adhesive later and don’t need to be knotted.
When the pile is fully tufted, do a final look at the front. Any sparse areas? Fill them in now, while the cloth is still on the frame.
Sunday: Finishing (the step people rush and shouldn’t)
The finishing process transforms a tufted cloth into an actual rug. It takes most of a Sunday, and most of that time is waiting.
Apply rug lock adhesive to the back. Pour Roberts 3095 (or equivalent rug lock) onto the back of the still-on-frame rug and spread it evenly with a wide brush or gloved hand. You want a thick, even coat. Thin patches leave tufts that can still pull out. One quart covers roughly 4–5 square feet at a good coat.
Work in a ventilated area. The fumes when wet are real. Open a window or work outside.
Let it cure for 24 hours. Do not rush this. At 6 hours it looks dry; it isn’t. At 12 hours it’s mostly dry; the bond isn’t full strength. At 24 hours it’s done. The rug stays on the frame during this entire time.
Add the secondary backing. While the adhesive is still slightly tacky (around the 18-hour mark works well), press your secondary backing fabric onto the adhesive layer and smooth it flat. This gives the back a clean finish, protects floors from the rough adhesive surface, and adds light structural support. Cut it slightly smaller than the rug edge so it doesn’t poke out past the pile line.
Remove from the frame, trim, and carve. Once fully cured, remove the staples and peel the rug off the frame. Trim the extra monk’s cloth margins to about an inch past the pile edge, fold them under, and tack or glue them down. If you have carving scissors, now is when you level the pile height and bevel the edges between color zones for a sharper look.
The thing about your first rug
It won’t be perfect. The pile height will be uneven in places; there’s probably a corner where tension was a little loose. That’s fine. It still looks like a real hand-tufted rug, because it is one.
The second rug will be better, because you’ll tension the frame harder, move the gun more consistently, and apply the adhesive with more confidence. The third rug is when it actually starts looking like the things you’ve been saving to your inspiration board.
The skill is in the setup and the finishing. The tufting itself is the fun part, and by Sunday evening, you’ll have a rug you actually want to keep.
Save your money
What you don't need yet
Beginners get pressured to buy a lot of stuff that doesn't help them play
better. Here's what we'd skip on day one.
A projector for tracing designs — Useful eventually for complex photo-reference designs, but your first rugs should be simple freehand shapes. Learn the tool before the projector.
Both a cut pile and loop pile gun on day one — Learn one thoroughly first. Loop pile is harder and doesn't need to happen until you've done several cut pile rugs.
Rug carving scissors immediately — Kitchen scissors or fabric scissors work fine for leveling your first few rugs. Carving is an advanced finish, not a beginner step.
A lightbox or projector for pattern tracing — Draw your design on the cloth with a Sharpie. Simple shapes drawn by hand are the best teacher for your first rug.
Premium NZ wool on your first project — Learn the process on affordable acrylic before you commit expensive rug wool to a project where you're still sorting out tension and technique.
Rug binding tape or edge binding tools — You can finish your first rug edges by folding and gluing. Formal binding is a refinement for later once you know you love the hobby.
First week
Your first seven days
A short, real plan to get from gear-on-doorstep to actually playing.
Order the gun, frame bars, monk's cloth, yarn, and rug lock adhesive so everything arrives together. · Buy
Watch two or three 'my first tufted rug' videos on YouTube before you start. Seeing the full process from frame assembly to finished rug saves you a lot of confusion. · Learn
Pre-wash your monk's cloth before stretching it. Skip this and the cloth can shrink after adhesive cures, warping your finished rug. · Action
Cut the monk's cloth with at least 6 inches extra on every side of your planned rug dimensions, then staple it as tight as a drum to the frame. · Action
Draw your design on the cloth with a Sharpie before tufting. Simple shapes (a letter, a bold face, a basic geometric) work best for a first rug. · Action
Tuft parallel to the grain of the cloth. You'll feel when you're fighting the weave. Stop, rotate 90 degrees, and try again. · Action
Apply rug lock adhesive to the back while the rug is still on the frame. Spread evenly and let it cure a full 24 hours before removing. · Buy
After curing, press the secondary backing fabric into the still-tacky adhesive, let it dry, then remove from the frame and trim edges. · Action
FAQ
Common questions
How much does it cost to start rug tufting?
Budget $270–420 for the basics: an AK-style cut pile gun ($150–300), frame bars ($40–80), monk's cloth ($25–40), yarn ($30–60), and rug lock adhesive ($20–30). The gun is the majority of the cost and the one item worth spending on. The rest is consumable and affordable.
Should I start with cut pile or loop pile?
Cut pile. Cut pile guns automatically sever the loops as they go, producing a plush, fluffy surface and are far more forgiving of uneven tension. Loop pile requires near-perfect backing tension or loops pull out. Learn cut pile first; add a loop pile gun once you're comfortable with the process.
What size frame do I need for a 12x12 inch rug?
A 24x24 inch frame at minimum. You need at least 6 inches of extra cloth on every side to grip, tension, and staple. If your frame is the same size as your rug, you won't be able to tension the cloth properly and your loops will keep pulling out.
Can I use any yarn with a tufting gun?
No: yarn weight must match the gun's spec. Most AK-style cut pile guns work best with worsted to bulky weight (weight 4–5). Super-bulky jams the needle; fingering weight produces sparse, uneven pile. Check the gun's spec sheet and buy yarn that matches it exactly.
How long does a first rug take to make?
A 12x12 inch rug takes most beginners 3–6 hours of tufting, plus 24 hours for the adhesive to cure. The actual tufting is fast once you're moving. The time sink is setup (stretching, drawing the design), finishing (applying adhesive, secondary backing), and waiting for things to dry.
Is rug tufting hard on your hands and arms?
The gun vibrates continuously, which fatigues your grip over long sessions. Most tufters wear a padded glove on their dominant hand and take breaks every 20–30 minutes on large rugs. It's not painful in the way that repetitive-strain injuries are, but don't tuft for 4 hours straight on your first session.
Do I need rug lock adhesive, or can I skip it?
You cannot skip it. Without adhesive, the tufts will pull out of the backing cloth the moment the rug is removed from the frame. Rug lock is what holds the entire rug together. It's not optional.
r/Rug_Tufting — The most active beginner community. The wiki has buying guides, troubleshooting, and honest takes on which guns are worth the money.
Tufting Supply Co — One of the main US suppliers for tufting guns, frames, and monk's cloth. Their blog and YouTube channel have some of the clearest beginner tutorials.
The Weaving Loom (blog) — Detailed written walkthroughs for rug tufting from a fiber arts perspective. Good for understanding the why behind each step.
Hazel Tufting (YouTube) — One of the most-watched beginner tufting channels. Clear, slow, and practical, with good first-project walkthroughs and troubleshooting.
Tuft Love (YouTube) — Tutorial-focused channel covering beginner and intermediate projects. Good coverage of finishing techniques and frame setup.
As an Amazon Associate, JustBeginning earns from qualifying purchases.
We may also earn commission from other affiliate programs linked on this
page. Editorial recommendations are independent; we don't choose
products based on commission rates.
Product prices and availability are accurate as of the date and time
indicated and are subject to change. Any price and availability
information shown on Amazon at the time of purchase will apply.

 Best starter