Shibori is Japanese resist-dye: fold, bind, clamp, or wrap fabric before dipping it in an indigo vat. The patterns emerge when you remove the bindings, and they are never quite what you planned. Entry cost is under $120, and the craft has real staying power.
By Colin B. · Published June 17, 2026 · Last reviewed June 17, 2026
An indigo kit, PFD cotton fabric, rubber bands, and gloves gets you started for under $120. Most binding supplies are reusable across many sessions.
We earn commission on qualifying Amazon purchases — see our
affiliate disclosure.
Price tiers and budget totals shown above are editorial estimates;
actual Amazon prices vary.
At a glance
Our top pick in each category
The fastest path through this guide — each best-starter pick by category.
Scroll for the budget and upgrade alternatives.
Wash all fabric before dyeing. Even PFD (prepared for dyeing) cotton benefits from a hot rinse. Regular cotton from a fabric store needs a hot wash with a tablespoon of dish soap. Un-scoured fabric dyes unevenly, and the problem doesn't show until you remove the resist.
Indigo doesn't need a mordant. If you've done any natural dyeing with plant dyes, you're used to setting color with alum or iron first. Indigo works through vat chemistry, not mordant chemistry, and adding mordant to an indigo bath does nothing except waste your supplies.
A healthy vat looks greenish-yellow below the surface with a copper-purple froth on top. If the whole vat turns blue, it's oxidized and won't dye until you stir gently and wait 20-30 minutes for oxygen to clear. A blue vat is fixable. Most beginners think it's ruined and it isn't.
The gear
What you actually need
Indigo Vat Kits
Indigo dyeing works through reduction chemistry: the dye must be in a depleted (reduced) state to bond to fiber, then it oxidizes back to blue when exposed to air. Kits handle this by supplying pre-reduced indigo, soda ash for alkalinity, and a reducing agent in measured doses. For a first vat, use a kit. The chemistry is learnable, but troubleshooting a bad vat on day one is a rough introduction to the craft.
Indigo Vat Kits — what's the difference?
A few common shapes, each making a different trade.
Pre-Reduced Powder Kit
All chemistry done. Just add water and alkali. Best for a first vat.
Setup time
30 min
Kit includes
Indigo + soda ash + reducing agent
Sessions per kit
4-6
Best for Beginners who want to dye the same day
Tradeoff Higher cost per session than buying ingredients separately
Same compound as kits, lower cost, more mixing required.
Setup time
45-60 min
Extras needed
Soda ash + thiourea dioxide separately
Cost vs kit
~40% less per session
Best for Dyers who've run 3+ kits and want lower ongoing cost
Tradeoff More room for ratio errors without kit guidance
Fermentation Vat
Natural process using organic matter. Authentic Japanese method.
Setup time
4-5 days
Ingredients
Bran, lime, indigo — no synthetic agents
Maintenance
Daily feeding required
Best for Natural dyers seeking the traditional process
Tradeoff Long setup and daily maintenance; can crash without warning
Best starter
Jacquard
Tie-Dye Kit — Indigo
$$
★★★★★Our rating
Jacquard pre-reduces the indigo, which means you skip the fussiest chemistry step and go straight to dyeing. The kit ships with measured doses of indigo, soda ash, and reducing agent (everything a working vat needs, in ratio). Reliable for 4-6 full sessions per kit, and it works the first time without tweaking.
What we like
Pre-reduced indigo means no fussy vat reduction chemistry
Includes soda ash and reducing agent for a complete three-part vat
Jacquard quality control means the vat works on the first try
What to know
Instructions are minimal; better guides exist online
Kit sizes out at about 1-2 yards of fabric per session
★★★★☆Our rating· Only 7 left in stock - order soon.
Buying powdered indigo separately and pairing it with soda ash and thiourea dioxide costs about 40% less per session than an all-in-one kit. More chemistry to manage, but the same indigo compound. The right move once you've run a kit vat and know how a healthy vat should look and smell.
What we like
Lower cost per session than all-in-one kits when bought in bulk
Same indigo compound as expensive kits, just unmixed
What to know
Requires sourcing soda ash and reducing agent separately
No built-in ratio guidance; first vat may need troubleshooting
Once you've run 3-4 vats and know the chemistry works, buying pre-reduced indigo in bulk drops the cost per session significantly. At 8 oz you're set for a full season of dyeing without restocking. Same chemistry as the starter kit, just in bulk format without the disposable packaging.
What we like
Cheaper per session than individual kits at this volume
Same pre-reduced chemistry; no new vat skills required
What to know
Requires soda ash and reducing agent purchased separately
Powder degrades if stored poorly; seal tight and keep dry
Indigo bonds to cellulose fibers (cotton, linen) and protein fibers (silk) but won't touch synthetics. Look for 'PFD' (prepared for dyeing) on any cotton fabric: it's been scoured of the sizing and finishes that block dye from bonding evenly. If you can't find PFD, a hot wash with dish soap before dyeing does most of the same work. Polyester in any blend stays its original color and dilutes the finished pattern.
Best starter
To Dye For
Muslin, Fabric by the Yard
$
★★★★★Our rating
Prepared-for-dyeing muslin has been scoured of the sizing that blocks dye. Indigo bonds evenly across the surface without pre-treatment beyond a hot rinse. Cheap enough to experiment freely, forgiving of beginner technique, and versatile: cut it into scarves, pillow covers, or wall hangings.
What we like
PFD treatment means indigo bonds evenly, no pre-washing needed
Cheap enough to experiment freely without worrying about waste
Versatile: cut for scarves, pillow covers, or practice pieces
What to know
Plain muslin has no drama; silk gives richer, more luminous results
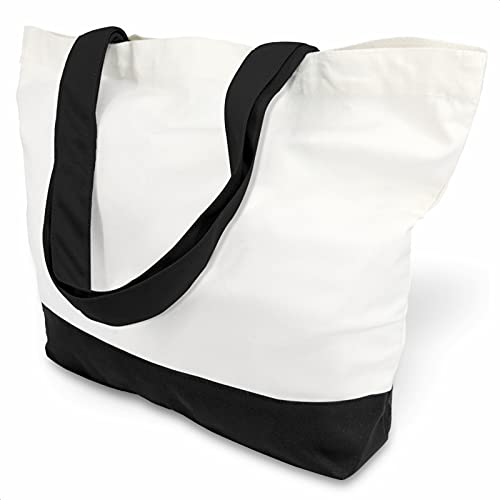
A pack of blank cotton totes is the lowest-stakes entry: pre-cut, pre-hemmed, and cheap enough that a bad batch doesn't sting. Thick cotton handles indigo as well as yardage does, and you end up with something usable. Good for a first session or for making gifts.
What we like
Pre-cut and pre-hemmed; you just fold, bind, and dye
Cheap enough to experiment without guilt or wasted yardage
What to know
Cotton-poly blends won't dye; check the label for 100% cotton
Tote proportions limit some folding techniques vs. flat yardage
Silk absorbs indigo more deeply than cotton, with a luminous quality cellulose fiber can't replicate. Habotai is the silk weight most shibori practitioners recommend for beginners: light enough to fold crisply, substantial enough to show clear pattern lines. Results look finished even on a first attempt.
What we like
Silk takes indigo with deeper, more saturated color than cotton
Lightweight habotai folds crisply for clean shibori pattern lines
What to know
Pricier per piece than cotton; harder to experiment freely
Requires careful handling when wet to avoid permanent creasing
Shibori divides into techniques based on how you create the resist: kumo (gather and bind with rubber bands for circular patterns), itajime (fold and clamp between boards for geometric shapes), arashi (wrap around a pole for diagonal stripes), and ne-maki (bind with thread for precise circles). Each produces a distinct pattern family. Start with kumo using rubber bands — it needs the least equipment and gives visible results fast.
Best starter
Alliance
Assorted Color Bands, 1 lb
$
★★★★★Our rating
Rubber bands are the foundational resist tool for kumo shibori. Different widths create different pattern densities; a variety pack lets you experiment with scale without buying more supplies. A 1 lb assortment is effectively a lifetime supply for most hobby dyers.
What we like
Wide size variety lets you test different pattern scales in one session
Reusable indefinitely — a 1 lb pack lasts years of dyeing
Foundational for kumo, ne-maki, and basic itajime techniques
What to know
Natural rubber degrades over time; check for cracking before use on silk
Thick bands leave deep pressure marks on delicate fabrics
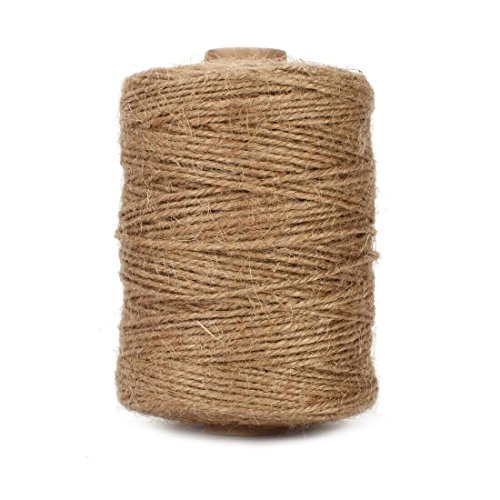
Twine is the traditional resist for arashi (pole-wrapped) shibori and produces the distinctive diagonal stripe pattern you see on most shibori cloth. It's cheap, biodegradable, and easier to cut off without nicking fabric than rubber bands. Get a large roll; arashi uses more than you'd expect.
What we like
Traditional material for arashi and ne-maki binding techniques
Cheap and biodegradable; 500 ft covers many sessions
What to know
Twine binding is more time-intensive than rubber bands
Can be tricky to cut cleanly without nicking wet fabric
Itajime is fold-and-clamp resist: fold the fabric accordion-style, sandwich between two matching shapes, and clamp with binder clips. These acrylic templates come in four sizes (1"-4") and produce the crisp geometric sunburst patterns most associated with Japanese shibori. Pair with binder clips from any hardware store — the templates are the expensive part.
What we like
Four template sizes produce different-scale geometric patterns
Acrylic edges stay crisp and produce clean resist lines after many uses
What to know
Binder clips or C-clamps must be sourced separately
Requires precise, even folding to get symmetrical results
Indigo will stain everything it touches, and unlike most craft dyes, it doesn't wash out of fabric, skin, or grout. Heavy nitrile gloves and a full-coverage apron are not optional. Work outdoors or in a garage on a surface you don't care about, and lay down newspaper or a plastic tarp before mixing your vat. The vat goes in any container that holds several gallons — stainless steel and food-grade HDPE plastic are the safe choices; avoid aluminum, which reacts with the alkaline bath.
Best starter
Venom Steel
Heavy-Duty Nitrile Gloves, 8 Mil (50-count)
$16.49 as of Jun 22, 2026
★★★★★Our rating· In Stock
Indigo stains your hands for 3-5 days without gloves. These 8 mil nitrile gloves are thick enough to hold up through multiple dip sessions and long-cuffed enough to protect your wrists when reaching into a deep vat. Thinner gloves tear when manipulating wet, tightly-bound fabric.
What we like
8 mil thickness withstands repeated use through a full dye session
Long cuff protects wrists when reaching into the dye vat
What to know
Slightly thicker and less tactile than latex gloves
Single-use design; you go through more gloves per long session
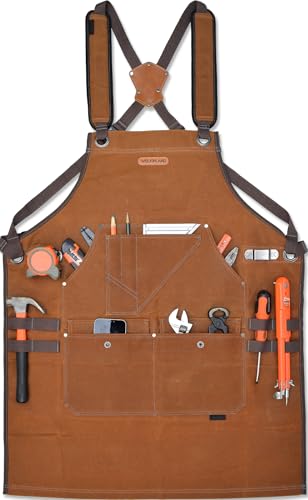
Indigo splashes, and it doesn't come out of regular clothes. A canvas apron is your second line of defense after gloves. The pockets keep binder clips, scissors, and twine within reach. Any full-coverage canvas apron works — the cheaper the better, since it will get permanently stained.
What we like
Full-coverage canvas protects clothes from dye splash and drips
Pockets keep binder clips, scissors, and twine within reach
What to know
Canvas stains permanently; treat it as a dedicated craft apron
Doesn't cover forearms when reaching into deep containers
Shibori has a short learning curve and a long plateau of refinement. Here's how to spend your first weekend: mix a vat that works, fold something interesting, and pull patterns you didn't plan.
The first thing most people learn about shibori is that the name covers about six different techniques — and the second thing they learn is that they only need to understand one to get started. Every shibori pattern is just some version of the same idea: resist the dye somewhere on the fabric, dip the fabric, reveal the pattern. The three variables are how you resist, how many times you dip, and what fabric you use.
You can produce genuinely satisfying results in your first weekend. The main failure mode is not mixing the vat correctly, which is fixable once you know what a working vat looks like.
The day before: mix your vat
A good indigo vat is a living chemical system. It needs time to stabilize after mixing, and a vat you’ve just prepared is more prone to oxidizing than one that’s rested overnight. The practical implication: mix your vat the evening before you plan to dye.
If you’re using a pre-reduced indigo kit, the instructions are on the packet. The basic version: dissolve the soda ash in warm water first, then add the pre-reduced indigo, then add the reducing agent. Stir gently around the edges of the container — never whip the surface, which introduces oxygen and deactivates the vat. Cover the container and leave it overnight.
What a working vat looks like: greenish-yellow below the surface, with a coppery-purple froth (called “the flower”) on top. The greenish color is the reduced indigo in its active, oxygen-depleted state. If the whole vat looks blue, it’s oxidized and won’t dye until it reduces again. To fix a blue vat, stir gently around the edges, add a small pinch of reducing agent, and wait 20-30 minutes.
The single most common beginner mistake is thinking the vat is ruined when it’s just oxidized. It isn’t. Be patient with it.
Prepare your resist pieces before you open the vat. Once you’re dyeing, your hands will be wet and your gloves will be on, and you don’t want to be folding fabric that way.
Kumo (gather and bind) is the right starting technique. Gather a section of fabric into a loose cone shape, then wrap it tightly with rubber bands from base to tip. The banded sections resist dye; the gathered peaks take it unevenly, creating the characteristic sunburst or pebble patterns. No special tools, no setup beyond rubber bands.
Make 5-6 test pieces in different configurations:
A full-length piece gathered at even intervals along its length
A piece folded in half, then the fold gathered and banded
A piece with a few loose gathers and wide-spaced bands
One piece with bands placed very close together
One piece with bands placed far apart
The differences between these pieces — how much fabric you gather, how tightly you bind, how many dips you do — teach you more about technique than any tutorial will.
Itajime (fold and clamp) is the second technique worth learning this weekend. Fold the fabric accordion-style into a square packet, then sandwich it between two identically-sized pieces of wood or acrylic and clamp tight. The clamped areas resist dye completely, leaving crisp geometric shapes. The shape of the block becomes the shape of the pattern.
Put on your gloves and apron before you open the vat. Indigo stains hands for 3-5 days.
Remove the flower from the surface of the vat (set it aside in a small bowl — you’ll add it back after each dip). Lower your first piece slowly into the vat, making sure it’s fully submerged. Hold it under for 2-3 minutes. Remove it slowly, letting excess dye drip back into the vat before you pull it clear.
Now watch it. The fabric will emerge green — the same greenish-yellow color as the vat. Over the next 5-10 minutes, as the indigo oxidizes in air, it will turn blue. This is one of the genuinely surprising moments in dyeing, and it stays surprising.
Each dip adds depth. One dip gives a soft, pale blue. Three dips give a clear medium blue. Five or more give the deep, saturated indigo you associate with Japanese textiles. For most first-weekend work, three to five dips is the target.
Between each dip, let the fabric hang and oxidize in air for at least 5 minutes before the next dip. Dipping too soon (while the fabric is still green) traps the reduced indigo without bonding and weakens the color.
After your final dip, rinse the fabric in cold water until the water runs mostly clear, then remove the bindings. The rinse before the reveal removes surface indigo that hasn’t fully bonded. The resist pattern emerges as the wet fabric opens up.
The reveal
Unwrapping each piece is the best part of shibori, and it’s consistently surprising even after many sessions. The patterns are never quite what you predicted — the variations in binding tension, the way the fabric folded, the slight differences between dips all produce results that feel genuinely handmade rather than mechanical.
Hang finished pieces to dry out of direct sunlight. Sunlight fades fresh indigo quickly.
Wash finished work in cold water with a gentle soap once fully dry. For the first few washes, wash dark pieces separately — some excess indigo will release in early washes. After three washes, the color stabilizes.
The skill that improves fastest with practice is consistency: producing the same binding tension piece after piece, folding at exactly the same intervals, dipping for the same amount of time. The variability in handmade shibori is beautiful up to a point; beyond that point, it’s just inconsistency.
A few things worth trying in your second and third sessions:
Arashi (pole wrapping): Wrap fabric diagonally around a PVC pipe, then bind the entire wrapped length with twine and scrunch it down toward one end of the pole. Dip the whole pole. The diagonal wrapping produces the characteristic stripe pattern. Arashi requires a second person to help with long lengths or a way to hold the pole upright in the vat.
Varying dip counts per piece: Make identical pieces and dip each one a different number of times — one dip, three dips, five dips, seven dips. This gives you a precise feel for how dip count affects depth, and the graduated set looks striking displayed together.
Different fabrics side by side: Dye identical patterns on cotton and silk in the same session. The color depth difference between the two is significant, and seeing it directly calibrates your material choices for future work.
Shibori is one of the few crafts where the more sessions you do, the more you realize technique matters more than supplies. The kit and the rubber bands stop being the limiting factor fast. What improves is your eye for pattern and your hands on the fabric.
Save your money
What you don't need yet
Beginners get pressured to buy a lot of stuff that doesn't help them play
better. Here's what we'd skip on day one.
Woad (another blue plant dye) — Produces similar blue through a similar vat process. Interesting for natural dye history but redundant when you're still learning indigo. Come back after 10+ indigo sessions.
Sodium hydroxide fermentation vat — Traditional Japanese vat using lye. Real safety implications with lye handling. A pre-reduced kit gives 90% of the result with 10% of the risk.
pH meter — pH strips are accurate enough for kit-based vat monitoring. A meter matters for fermentation vats, not for beginners running a pre-reduced setup.
Discharge paste or bleach resist — A completely different technique — removing color rather than adding it. Confusing to mix into a beginner practice. Learn the indigo vat first.
Soy milk mordant pre-treatment — Used with some dyes to improve uptake on plant fibers. Indigo doesn't need it. Skip this entirely.
First week
Your first seven days
A short, real plan to get from gear-on-doorstep to actually playing.
Order your indigo kit so it arrives before the weekend. While you wait, pre-wash all fabric you plan to dye in hot water with a splash of dish soap. · Buy
Designate a dyeing workspace outdoors or in a garage. Cover the ground with newspaper or a plastic tarp before you mix anything. · Action
Mix your indigo vat the evening before you plan to dye. A vat that's rested overnight is more stable than one you've just prepared. · Action
Prepare 5-6 test pieces using different resist techniques before your first dip: a few with rubber bands in different patterns, one folded and clamped with binder clips. · Action
Dip each piece 3-5 times, removing it between each dip to oxidize in air for 5-10 minutes. Each dip adds depth: one dip gives pale blue, five gives deep indigo. · Action
Unwrap your pieces and hang them to dry. The reveal — seeing the resist pattern for the first time — is the moment that hooks most people on shibori. · Action
FAQ
Common questions
Does indigo color fade?
Yes, and that's partly the point. Indigo fades from the outside in over time, softening toward lighter blue. This is considered beautiful — it's part of what makes shibori distinctive. Washing inside-out in cold water slows the fade. Many practitioners consider the aged look better than the original.
What fabrics work for shibori?
Cotton, linen, and silk all take indigo well. Synthetics (polyester, nylon, acrylic) won't dye at all. In a blend, only the natural fiber content takes color, producing a muted result. For the cleanest patterns, use 100% natural fiber fabric and look for 'PFD' on the label.
How hard is the chemistry?
A pre-reduced kit manages the hardest part for you. You mix three measured ingredients, add water, and the vat is ready in 30 minutes. The most common beginner mistake is over-stirring, which introduces oxygen and deactivates the vat. Stir gently around the edges, never whipping the surface.
How much does it cost to get started?
Under $120 for everything: an indigo kit ($40-80), binding supplies ($10-15), cotton fabric or totes ($15-25), and gloves plus an apron ($15-20). Most supplies are reusable, so ongoing costs drop to roughly $15-25 per session in kit replenishment.
What is the difference between the shibori techniques?
The main four: kumo (gather and bind with rubber bands — circular and sunburst patterns), itajime (fold and clamp between boards — geometric shapes), arashi (wrap around a pole — diagonal stripes), and ne-maki (bind with thread — precise circles). Start with kumo. It needs only rubber bands and gives clear results fast.
Do I need a special dye container?
No. Any food-grade container that holds several gallons works. A 5-gallon stainless steel bucket or large stainless stockpot is the standard. Avoid aluminum (reacts with the alkaline bath) and copper (contaminates indigo chemistry). Stainless steel and HDPE plastic are both safe.
Dharma Trading Co. — Go-to supplier for PFD fabrics, dyes, and textile craft supplies. Their free tutorials on indigo vat setup are better than most books and cover troubleshooting thoroughly.
Indigo Vat Tutorial (YouTube search) — Search 'indigo vat shibori tutorial' and filter to channels with multiple uploads. Vat setup and first-dip videos are especially useful for visual learners before session one.
r/dyeing — Active community for all fiber dyeing. The wiki covers troubleshooting a bad vat. Search before posting — most beginner questions have detailed answers already.
Natural Dye Workshop — Rebecca Burgess — Broader than shibori alone, but the indigo chapters are excellent and cover both vat chemistry and plant sourcing for dyers who want to go deeper into natural color.
As an Amazon Associate, JustBeginning earns from qualifying purchases.
We may also earn commission from other affiliate programs linked on this
page. Editorial recommendations are independent; we don't choose
products based on commission rates.
Product prices and availability are accurate as of the date and time
indicated and are subject to change. Any price and availability
information shown on Amazon at the time of purchase will apply.