Quilting looks intimidating until you realize the whole craft is just accurate cutting plus consistent sewing. The gear makes or breaks that accuracy, and most beginners overspend on fabric while underspending on the tools that actually matter. Here's what to buy, what to borrow, and what to ignore for your first dozen projects.
By Colin B. · Published May 23, 2026 · Last reviewed June 5, 2026
A budget machine plus basic tools gets you started around $200. A solid mid-range machine, quality cutting mat, rotary cutter, ruler, fabric, and batting typically runs $400–500.
We earn commission on qualifying Amazon purchases — see our
affiliate disclosure.
Price tiers and budget totals shown above are editorial estimates;
actual Amazon prices vary.
At a glance
Our top pick in each category
The fastest path through this guide — each best-starter pick by category.
Scroll for the budget and upgrade alternatives.
Your sewing machine matters more than your fabric. A cheap machine that skips stitches or can't maintain accurate tension will frustrate you out of the hobby before you finish your first project. Spend your budget on the machine first; you can buy fabric at a craft store for $3–5/yard.
A rotary cutter, self-healing mat, and acrylic ruler are the 'big three' of quilting cutting: they're co-dependent tools, so buy all three at once. Scissors are for trimming thread ends, not cutting quilt pieces.
Fat quarter bundles are the beginner quilter's best friend: 18×22-inch pre-cut fabric pieces in coordinated colors, sold as a set. They take the color-matching guesswork out of your first project entirely.
The most important gear decision you'll make. For quilting, you want a machine with a precise 1/4-inch presser foot option, decent throat space (the area between the needle and the body; you'll feed a bulky quilt sandwich through it), and consistent tension. Most beginner quilters are well-served by the $150–300 range. Don't buy a used machine at a garage sale for your first project unless someone you trust can vouch for its calibration.
Sewing Machine — what's the difference?
A few common shapes, each making a different trade.
Mechanical
Simple dials, no electronics. Reliable and easy to repair.
Stitch count
6–18
Computerized
No
Body material
Metal or plastic
Best for Quilters who want simplicity; straight-line patchwork projects
Tradeoff Manual tension takes practice; no walking foot in most budget models
Wide throat, more quilting stitches. Serious investment.
Throat space
9–12" (vs 6–7" standard)
Computerized
Usually
Price range
$500–$2,000+
Best for Quilters who've finished 10+ projects and want to quilt their own tops
Tradeoff Overkill until you're serious; many quilters send large tops to a longarm service instead
Best starter
Brother
CS6000i Computerized Sewing Machine
$$
★★★★★Our rating
The most consistently recommended beginner quilting machine for good reason. It comes with 60 built-in stitches including a 1/4-inch quilting stitch, an extension table for larger projects, and a walking foot. Computerized tension means you're not fighting a finicky dial, and Brother's customer service is excellent if something goes wrong.
What we like
Comes with walking foot and extension table, quilting-ready out of the box
60 built-in stitches including dedicated 1/4" quilting stitch
Computerized tension forgives the uneven pressure beginners apply
What to know
Bobbin case can pop loose mid-project; learn the click-in technique early
Plastic body feels lightweight compared to metal-chassis machines
Under $100, 6 built-in stitches, and a mechanical action that's genuinely reliable. Not a dedicated quilting machine, but competent for a first sampler or simple patchwork project. If you're not sure quilting will stick, buy this first and upgrade in a year when you know you're committed.
What we like
Under $100, lowest-stakes entry into machine quilting
Mechanical action is simple to maintain and easy to repair
Lightweight enough to carry to a quilting class or guild meeting
What to know
No walking foot included; buy one separately ($15–25) for machine quilting
Small throat space limits quilt sandwich size; awkward on larger quilts
★★★★☆Our rating· Only 8 left in stock - order soon.
When you're ready to spend real money, the Janome HD5000 is where experienced quilters land and stay. Metal body, consistent bobbin tension through thick seam intersections, and Janome's legendary reliability. Once you've finished 3–5 projects, you'll feel the difference immediately.
What we like
Metal chassis and internal components, built to last decades not years
Consistent bobbin tension through thick seam intersections
Janome is the brand serious quilters graduate to and rarely leave
What to know
14 lbs, not practical for classes or retreats without a rolling bag
All manual dials; no computerized features or automatic tension
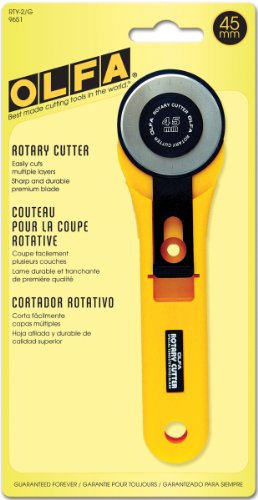
Accurate cutting is the entire foundation of quilting: a piece cut 1/8-inch off will create mismatched seams that cascade through your whole project. You need three things working together: a rotary cutter (a shielded razor wheel for fabric), a self-healing mat, and an acrylic quilting ruler. Buy all three at once. Scissors are for trimming thread, not cutting quilt pieces.
Best starter
Olfa
45mm Rotary Cutter
$22.17 as of Jun 22, 2026
★★★★★Our rating· Only 13 left in stock - order soon.
Olfa invented the rotary cutter and still makes the best ones. The 45mm size is the quilting standard: large enough for smooth cuts through multiple fabric layers, precise enough for tight angles. The blade guard closes automatically when you set it down, which matters because the blade is genuinely sharp.
What we like
Olfa invented the rotary cutter: blade quality is the category benchmark
45mm size cuts cleanly through 6+ layers of quilting cotton
Automatic blade guard closes when you set it down, a real safety feature
What to know
Replacement blades are an ongoing cost (~$15 for a 5-pack)
Default model is right-handed; left-handed version is a separate purchase
The 24×36-inch mat holds a folded yard of fabric flat, the minimum working size for quilting. Olfa's self-healing compound closes after every cut, keeping the surface smooth and your blade sharp longer. Get the largest mat you can store flat; you'll use every inch of it.
What we like
Self-healing surface extends blade life vs. cutting on cardboard or plastic
Printed grid lines double as a measuring reference during cutting
24×36" fits a folded yard of fabric, the practical working minimum
What to know
Warps in heat or direct sun; store flat, away from windows
Heavy; buy a small travel mat separately if you attend classes
The 6×24-inch rectangle is the quilting ruler most beginners buy first and most experienced quilters never stop reaching for. Yellow hash marks at every 1/8 inch show up on both light and dark fabric. The thick acrylic doesn't flex under rotary cutter pressure the way cheap rulers do.
What we like
Yellow marks on thick acrylic, visible on light and dark fabric alike
6×24" covers both strip cutting and block squaring in one ruler
Doesn't flex under rotary cutter pressure the way thin plastic rulers do
What to know
You'll eventually need a 12.5" square ruler too; budget $15–25 for it separately
Acrylic scratches if used as a surface; always cut on the mat, not the ruler
Quilting cotton is the standard starting fabric, woven tight enough to press crisp seams, light enough not to distort your blocks, and available in thousands of prints. Buy fat quarters (18×22-inch pre-cut pieces) or coordinated bundles for your first project; they eliminate the color-matching guesswork entirely. Buy at a local quilt shop when you can; the staff will help you coordinate colors, and the quality is consistently better than big-box store bolts.
Best starter
Moda Fabrics
Folk & Lore Fat Quarter Bundle
$$
★★★★★Our rating
Moda is the gold standard of quilting fabric, and their fat quarter bundles are coordinated by professional fabric designers; you don't think about color matching, you just pick a colorway you love. The quality is consistent batch to batch, which matters when you're cutting precise pieces from multiple fabrics.
What we like
Professionally coordinated colorways, no color-matching guesswork
Consistent quality from bundle to bundle across Moda's full line
18×22" fat quarters match most beginner quilt patterns out of the box
What to know
Pre-wash required; budget an extra hour before you start cutting
Bundles are curated; you can't swap individual prints for preferred ones
Kona Cotton is the quilter's default solid fabric: 200+ colors, a tight weave that holds seams cleanly, and available at virtually every quilt shop and online retailer. One or two Kona solids mixed with a print is the easiest way to make a pattern pop without overcomplicating your palette.
What we like
200+ colors make coordinating prints effortless, the quilter's standard palette
Tight weave holds seam allowances cleanly through repeated washing
Available everywhere; easy to source additional yardage consistently
What to know
Solid only; pairs best with a coordinating print rather than standing alone
Color names vary between retailers; check hex codes when ordering online
Moda Sister Bay Charm Pack 5-inch Squares (42 pieces)
$$
★★★★☆Our rating
Charm packs (42 five-inch squares from one fabric collection) are ideal for your second or third project when you want lots of variety without a day of cutting. The 5-inch size works directly with a large number of beginner-friendly patterns and the coordination is done for you by the designer.
What we like
Pre-cut to 5", skips all fabric cutting for compatible patterns
42 coordinated prints from one collection, curated to work together
Excellent for 'I can't decide' moments; the color decisions are made for you
What to know
Only works with patterns using 5" or smaller pieces
Can't be cut down further without losing compatibility with standard patterns
Batting is the middle layer of the quilt sandwich (between your quilt top and backing). It determines how warm, heavy, and puffy your finished quilt feels. Cotton batting is the beginner default: washable, not too thick, and stays flat while you're quilting it. For your first quilt, buy a pre-packaged batting sized to your project (throw, twin, queen) rather than buying off a bolt; you'll waste less and spend less.
Best starter
The Warm Company
Warm & Natural Cotton Batting Twin 72×90-inch
$34.95 as of Jun 22, 2026
★★★★★Our rating
Warm & Natural has been the quilter's batting default for decades: 100% cotton, pre-shrunk, and needlepunched so fibers don't beard through your quilt top over time. It lays flat while you're machine quilting it and washes without lumping or shifting. Just buy this for your first quilt.
What we like
Pre-shrunk 100% cotton, no pre-washing, no surprise shrinkage after gifting
Needlepunched fibers don't beard through quilt fabric over years of washing
Lays flat during machine quilting, no fighting the sandwich
What to know
Less lofty than polyester, a flat traditional feel rather than puffy
Pre-packaged sizing adds cost vs. buying off a bolt at a quilt shop
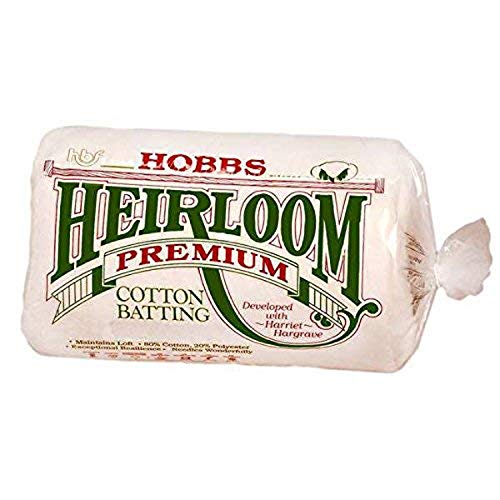
The 80/20 blend (80% cotton, 20% polyester) gives you natural drape and washability with a little extra loft from the poly. It's the batting that shows up most at guild shows because the slight puffiness makes quilting stitches pop visually, especially if you're planning to hand-quilt or enter a show.
What we like
Extra loft from the poly blend makes quilting stitches pop in show quilts
Handles like cotton but with slightly more warmth and body
Popular in guild shows and gifted quilts for its finished appearance
What to know
Gentle wash only; heat and agitation cause breakdown over time
Marginally harder to needle than pure cotton for hand quilters
Thread is an afterthought for beginners and a rabbit hole for experienced quilters. For your first project, any quality cotton-poly all-purpose thread in a neutral (cream, gray) is fine. Beyond thread, three notions matter most: long ball-headed quilting pins, a good seam ripper (you will use this more than you expect), and an iron or pressing mat for pressing seams flat after every row.
Best starter
Gutermann
Sew-All Polyester Thread 100m
$5.95 as of Jun 22, 2026
★★★★★Our rating· In Stock
Gutermann's Sew-All is what most quilters start on and what many never leave. Consistent weight, low lint (critical for machine tension across a long project), and available everywhere in hundreds of colors. Buy cream or light gray for your first quilt; neutral thread disappears in the seams.
What we like
Low lint keeps machine tension clean across a long quilting project
Neutral colors disappear in seams; cream or gray works for most first quilts
Available at every craft store; consistent quality batch to batch
What to know
100m spools run out fast on a lap quilt; buy two or three at once
Polyester can show slightly on cotton tops under close inspection
Ball-headed pins (sometimes called flower pins) don't roll off your cutting mat and are easy to grab with tired hands. Dritz's quilting pins are long enough to go through all three layers of a quilt sandwich, sharp enough not to snag fabric, and cheap enough to replace when they dull without guilt.
What we like
Ball heads don't roll off your mat; easy to grab with tired or cold hands
Long enough to pin through a full quilt sandwich without bending
Cheap enough to toss the whole pack when tips dull (and they will)
What to know
Ball heads catch on presser foot if left too close to seam allowances
100-pack sounds like a lot until you're basting a queen-sized quilt
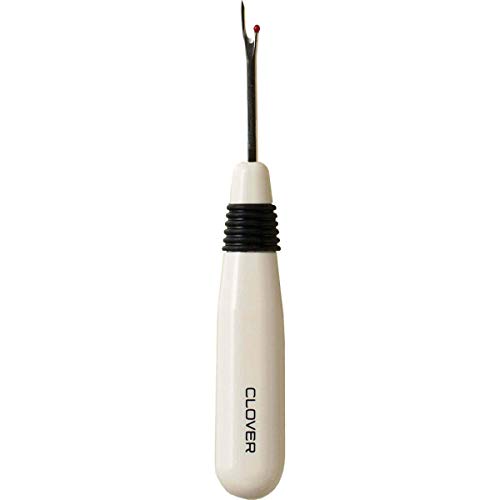
You will unpick seams. Everyone does, and most beginners do it a lot. Clover's ergonomic handle reduces hand fatigue on long ripping sessions, the blade is sharp enough to slice stitches without snagging fabric, and the cap's rubber tip pulls out thread snippets after ripping. It costs twice what a basic metal ripper does. It's worth it.
What we like
Ergonomic handle reduces fatigue on long, inevitable unpicking sessions
Sharp blade slices seams cleanly without snagging or pulling fabric
Cap has rubber tip for sweeping away thread snippets after ripping
What to know
Replacement blades are a separate purchase when the tip eventually dulls
Costs more than a basic metal-hook ripper for the same core function
Most people assume quilting takes years to learn. It doesn't, but it does demand more precision than most crafts. Here's what actually happens in your first four weeks, and what to do when it stops going smoothly.
Quilting has a reputation as a grandmother’s craft: slow, complicated, learned over decades. That reputation is mostly wrong. The actual skill floor is lower than people expect: you need to cut straight lines and sew consistent 1/4-inch seams. That’s the whole foundation. Everything else (color theory, complex blocks, free-motion quilting) comes later, on top of those two things.
Your first month is about building those fundamentals into muscle memory. Here’s what that actually looks like, week by week.
Week 1: Tools, fabric, and your first practice seams
Don’t start by cutting into your good fabric. Start by getting to know your sewing machine.
Load a bobbin. Thread the machine. Sew a few straight lines on a scrap of cotton. Feel how the machine responds to your speed. Notice where the 1/4-inch mark is on your presser foot (or on the needle plate). This is the seam allowance you’ll use for virtually every seam you sew in quilting, and precision here matters more than almost anything else.
Then press those practice seams with an iron. Most beginners skip pressing until later in the project and end up with wobbly blocks. Press every seam after you sew it, toward the darker fabric as a default, away from the direction of bulk at intersections. This one habit is the difference between blocks that lay flat and blocks that puff and distort.
When you’re ready for your real fabric, pick the simplest possible pattern. A nine-patch block (nine equal squares sewn in a 3×3 grid) teaches you everything you need to know about piecing in one small project. Cut your squares, sew them into rows, sew the rows together, press. A finished nine-patch takes about an hour once you’ve done a few. Make six of them and you have the start of a throw quilt.
Week 2: Your first full block and the seam allowance lesson
By your second week, you’ll have had a seam go wrong. Maybe your 1/4-inch wasn’t consistent and your block came out smaller than the pattern expected. Maybe you sewed two pieces the wrong direction and had to rip them out.
This is normal, and it’s when you learn the most important quilting skill: the seam ripper is your friend.
Unpicking a seam is not failure. It’s how quilters fix the inevitable. The trick is catching the mistake early, before you’ve sewn that wrong piece into six more blocks. Every session, lay your finished blocks flat and compare them. They should be the same size. If one is off by more than 1/4 inch, find out why and fix it now.
Practice block of the week: the half-square triangle (HST). You take two squares, sew diagonally across each one, cut apart, press open, and end up with two triangle blocks. The HST is in more quilt patterns than any other unit. Learning it now opens up hundreds of patterns that are otherwise inaccessible.
Cut HSTs a little larger than the pattern specifies, then trim them to size with your square ruler after pressing. That trimming step (the one beginners skip) is what makes HSTs that lay perfectly flat instead of slightly off.
Week 3: Assembling the quilt top
A quilt top is just blocks sewn together in rows, and rows sewn together. But the assembly phase is where precision from the first two weeks either pays off or compounds into a problem.
Nesting seams is the technique that makes intersections match: when you sew two rows together at a block seam intersection, press the seams of adjoining rows in opposite directions. They’ll lock into each other like puzzle pieces, and your intersections will be crisp.
Lay your assembled top flat on the floor every few rows and check that it’s square, not pulling to one corner, not rippling in the middle. A quilt top that’s slightly off-square isn’t ruined, but it’s easier to correct now than after you’ve basted all three layers together.
When the top is done, press it one final time with a hot iron and a little steam. Then step back and look at it. It’s going to look smaller than you imagined, and the colors will look different against your floor than they did against the bolt at the quilt shop. Both of these things are normal.
Week 4: The quilt sandwich and your first machine quilting
The quilt sandwich (top, batting, backing) is what you actually quilt. Assembling it is fussier than it sounds.
Lay your backing fabric on a flat surface, wrong-side up. Tape or clamp it flat. Lay the batting over it, smooth out every wrinkle. Lay your quilt top over the batting, right-side up. Now pin or baste through all three layers every 4–6 inches across the whole surface. This is tedious. Do it anyway. A poorly basted quilt sandwich shifts while you’re quilting it and creates puckers on the back that can’t be fixed.
For your first quilt, machine quilt in the ditch (sewing along the seam lines of your blocks). Set your machine to a slightly longer stitch length (3.0–3.5 mm instead of the default 2.5 mm for piecing). Use a walking foot if you have one; it feeds all three layers evenly. Start in the center of the quilt and work outward to push any remaining slack toward the edges rather than trapping it in the middle.
When the quilting is done, trim the batting and backing even with the quilt top using your rotary cutter and mat, then attach the binding. The binding is its own skill; there are 15 different methods, but the basic mitered-corner approach is well-covered in every beginner tutorial.
Uneven seams: Go back to practice seams on scrap. Sew 20 slow 1/4-inch seams. Feel where 1/4 inch falls under your presser foot and build the muscle memory.
Puckering on the quilt back: Usually from a poorly basted sandwich. More pins, tighter spacing, more time laying it flat before pinning. A walking foot prevents most of this mechanically.
Blocks that don’t line up: Measure each block before assembly. If one is consistently undersized, check your seam allowance; even 1/16 inch off per seam adds up across 6 seams in a row.
Tension problems (loops on top or bottom): Re-thread the machine from scratch, including the bobbin. 90% of tension issues are caused by improper threading.
Running out of steam mid-project: This is real, and it’s why experienced quilters recommend starting with a throw-sized project (not a queen). Finish something, even if it’s small. The completion is worth more than the ambition.
What to do at month two
Once you’ve finished one quilt (top, batting, backing, binding, washed and used) you’re no longer a beginner. You’re a quilter with one finish under your belt.
Here’s where most people go next:
Join a guild. Local quilting guilds meet monthly and range from 10 people in a church basement to 400-member organizations with a lecture series. The community accelerates everything; you’ll see techniques, get feedback, and avoid six months of figuring things out alone.
Try a block-of-the-month program. Many quilt shops run these: one new block per month, all designed to work together by year’s end. It’s a structured way to learn 12 new techniques in 12 months without having to choose what to learn next.
Upgrade your cutting tools. Once you’ve finished a quilt, you know exactly which cuts felt awkward. A 12.5-inch square ruler eliminates the need to fudge the squaring step; a half-square triangle ruler turns a two-step process into one.
Save your money
What you don't need yet
Beginners get pressured to buy a lot of stuff that doesn't help them play
better. Here's what we'd skip on day one.
A longarm quilting machine — Professional longarms start at $5,000+. For your first dozen quilts, send your finished top to a local longarm service ($40–80 for a throw quilt) or machine-quilt it yourself on a regular sewing machine.
Quilting design software (EQ8, etc.) — Electric Quilt and similar apps are genuinely useful eventually, but graph paper and colored pencils are enough for your first 5–10 projects. Learn to quilt before you learn to design.
A full ruler collection — A 6×24-inch rectangle and a 12.5-inch square will carry you through 20+ projects. Add specialty rulers only when a specific pattern requires one you don't have.
Specialty quilting thread (Aurifil 50wt) — Aurifil is wonderful: 50-weight cotton thread is low-lint and gorgeous. It's also $18–22 per spool. Gutermann all-purpose finishes just as many first quilts. Upgrade your thread after you upgrade your machine.
A walking foot (if your machine didn't include one) — Essential for machine quilting eventually, but hold off until you've finished at least two pieced tops. Many beginners send early quilts to a longarm service before needing to quilt their own.
First week
Your first seven days
A short, real plan to get from gear-on-doorstep to actually playing.
Pick one beginner-friendly pattern. The nine-patch block (nine equal squares in a 3×3 grid) or a simple strip quilt are the classic starting points; both finish quickly and teach the essential skills. · Action
Visit a local quilt shop to buy fabric. Tell them it's your first quilt and ask for a fat quarter bundle in a colorway you love. The staff will guide you; that's what they're there for. · Action
Pre-wash your fabric before cutting anything. Normal wash cycle, dry on medium heat, press flat with an iron. Skip this and your quilt may pucker on its first wash. · Action
Set your sewing machine to a 1/4-inch seam allowance and sew 20–30 practice seams on scrap fabric before cutting into your real project. · Action
Watch one beginner block tutorial on Missouri Star before you start. Their Quick Beginner Quilt playlist is the best free instruction available. · Learn
Budget $200–250 minimum: an entry-level machine, rotary cutter, mat, ruler, fabric, and batting. A mid-range setup (Brother CS6000i plus quality cutting tools and a coordinated fabric bundle) typically runs $400–500. The sewing machine is 60–70% of startup cost; everything else is modest.
Do I need a special sewing machine to quilt?
No, but you need a machine that can sew an accurate 1/4-inch seam. Most modern machines handle this with the right presser foot. Quilting-specific machines add wider throat space and a built-in walking foot, helpful but not required to start. The Brother CS6000i handles most beginner projects just fine.
What's the easiest quilt pattern for a beginner?
The nine-patch block (nine equal squares in a 3×3 grid) is the classic first pattern. Strip quilts and rail fence quilts are even simpler. Start there, finish one project, then move to half-square triangles. Missouri Star Quilt Co. on YouTube has the best free beginner tutorials.
Do I have to pre-wash my fabric?
Technically no, but practically yes. Quilting cotton shrinks 3–5% on first wash and dyes can bleed onto lighter fabrics. Pre-wash before cutting: run a normal cycle, dry on medium heat, press flat with an iron. Skip it and your finished quilt may pucker or bleed the first time it's washed.
Can I quilt without a sewing machine?
Hand quilting is a real tradition: the running stitch through all three layers is the original method. It's meditative and beautiful, but slow: a hand-quilted throw takes 40–80 hours of stitching. Most beginners start on a machine and explore hand quilting later if it appeals to them.
What is a quilt sandwich?
Three layers pinned or basted together before quilting: the quilt top (your pieced blocks), the batting (middle layer, provides warmth and loft), and the backing (usually a single piece of fabric on the reverse). 'Quilting' in the narrow sense is the stitching that holds all three layers together, by machine or by hand.
Missouri Star Quilt Co. (YouTube) — The most-watched quilting tutorial channel on YouTube. Jenny Doan's clear, enthusiastic instruction makes complex patterns accessible to beginners. Start with the Quick Beginner Quilt playlist.
The Quilt Show — Alex Anderson and Ricky Tims' subscription video platform. More in-depth technique coverage than YouTube; worth it after you've finished your first two or three projects.
r/quilting — Active, supportive community. Tuesday Show and Tell threads are great inspiration. Search before posting a beginner question; most basics are covered in the wiki.
National Quilting Association — The oldest national quilting organization in the US. Their annual show is the premier competition; their local chapter finder connects you with guilds in your area.
Quilts of Valor Foundation — If you want your first finished quilt to mean something, QOVF accepts donated quilts for veterans. Good motivation for finishing your first project.
Moda Bake Shop (Free Patterns) — Free quilt patterns designed specifically around Moda precuts (fat quarters, charm packs, jelly rolls). Every pattern is tested and photographed, the easiest place to find reliable beginner projects.
As an Amazon Associate, JustBeginning earns from qualifying purchases.
We may also earn commission from other affiliate programs linked on this
page. Editorial recommendations are independent; we don't choose
products based on commission rates.
Product prices and availability are accurate as of the date and time
indicated and are subject to change. Any price and availability
information shown on Amazon at the time of purchase will apply.
Our top pickBrother CS6000i Computerized Sewing Machine


 Best starter