Needlepoint is counted canvas stitching, think painting with thread. Unlike cross-stitch, you work on stiff mono canvas with wool or silk, and the finished piece is sturdy enough to upholster a chair or frame as an heirloom. Here's what you actually need to start, without the intimidating art-supply-store detour.
By Colin B. · Published June 17, 2026 · Last reviewed June 17, 2026
A starter kit runs $25-40. Add a scroll frame and good scissors and you're around $80. Designer canvases and silk thread come later.
We earn commission on qualifying Amazon purchases — see our
affiliate disclosure.
Price tiers and budget totals shown above are editorial estimates;
actual Amazon prices vary.
At a glance
Our top pick in each category
The fastest path through this guide — each best-starter pick by category.
Scroll for the budget and upgrade alternatives.
Start with a kit, not a blank canvas. A painted needlepoint kit removes the two hardest decisions (what to stitch, and which thread colors to buy). You just stitch. Save blank-canvas projects for after you've finished at least one complete piece.
Needlepoint is NOT cross-stitch. The canvas is stiffer, the needles are bigger, the thread is thicker, and the techniques don't transfer. If someone hands you a cross-stitch kit assuming it's the same thing, smile and set it aside.
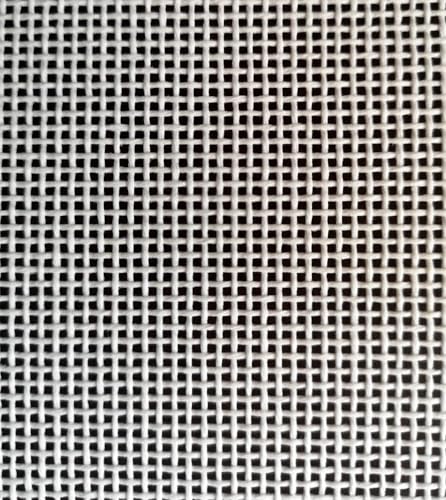
18-mesh canvas is the beginner standard. The 18 refers to holes per inch. Coarser counts (10 or 13) are easier on your eyes but produce chunky stitches. Finer counts (24+) are for advanced stitchers. Start at 18.
A kit bundles the painted canvas, pre-matched thread colors, and a needle into one package. For your first project, this is the right call: every color decision has been made for you, and you focus on technique. Dimensions and Janlynn both make reliable beginner kits. The painted design shows exactly where each color goes, no chart reading required. Blank canvas is for project two and beyond.
Canvas Kits — what's the difference?
A few common shapes, each making a different trade.
Painted canvas kit
Thread included, design pre-applied. Zero planning needed.
Canvas type
Mono or interlock
Thread
Included, pre-cut
Best for
First project
Best for Beginners who want to start stitching immediately
Tradeoff Limited to the kit's design; no creative freedom
Dimensions has been making needlepoint kits since 1958 and their beginner kits show it. The painted canvas marks every stitch position, thread comes pre-cut and color-matched, and the instructions actually explain technique. For a first project, this removes every variable except the stitching itself, which is exactly what you want.
What we like
Painted canvas shows exactly where each color goes, no chart needed
Thread pre-cut and color-matched, nothing to plan before stitching
Clear technique instructions suitable for total beginners
What to know
Design catalog is traditional; limited modern or pop-culture options
Often under $20 and a reliable second option when Dimensions' designs don't appeal. Same painted-canvas approach, decent included thread, and clear enough instructions. The right pick if you find a Janlynn design you love over a Dimensions design you're merely OK with.
What we like
Often under $20, the lowest entry price for a complete kit
Painted canvas same format as Dimensions, no chart needed
What to know
Thread can run short on large color areas; keep backup skeins handy
Instructions are less detailed than Dimensions' beginner kits
Zweigart is the European canvas standard used by professional needlepoint shops and designers worldwide. The right canvas when you want to work from a printed chart, transfer your own design, or paint your own. The 18-count mono canvas is the standard size; each mesh thread is clearly separated for accurate stitch placement.
What we like
Professional-grade canvas used by needlepoint shops worldwide
Works with printed charts, hand-painted designs, or your own art
True mono canvas blocks beautifully and holds shape after finishing
What to know
No design, no thread; requires full planning before first stitch
Sold by the yard; some waste is unavoidable on your first cut
Needlepoint thread is thicker than embroidery floss and comes in wool, cotton, and silk. For 18-mesh canvas, you typically use two plies of Paternayan Persian wool or a single strand of DMC pearl cotton. Persian wool is the classic choice: it covers canvas well, is forgiving on tension, and comes in hundreds of colors. Buy thread separately once you graduate past kit projects or when the kit runs short on a color.
Best starter
Paternayan
Persian Wool
$3.99 as of Jun 22, 2026
★★★★★Our rating· In Stock
The workhorse of needlepoint thread for over 50 years. Persian wool is three loosely twisted plies you separate to match your canvas count. Two plies for 18-mesh, one for finer canvases. Matte finish, takes dye beautifully, and over 400 colors. This is what fills every needlepoint shop and what every pattern assumes you're using.
What we like
Three separable plies let you match any canvas count precisely
400+ colors, most needlepoint patterns are written for this thread
Matte wool finish hides minor tension inconsistencies naturally
What to know
8-yard skeins are short; buy multiples of background colors
Wool can pill if you stitch with too long a thread or rush
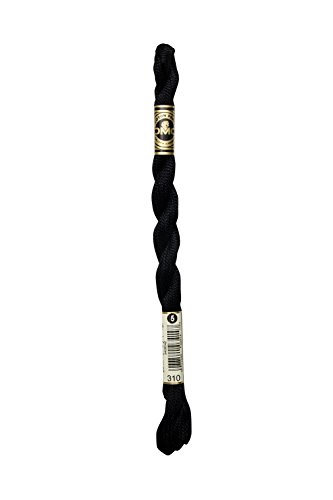
A single strand of DMC #3 pearl cotton covers 18-mesh canvas cleanly and costs less than wool. Good coverage, consistent twist, and available at any craft store in 500+ colors. A practical choice if you want to try needlepoint without ordering specialty thread online.
What we like
Available at Joann, Michaels, and online in 500+ colors
Single-strand simplicity, no separating plies needed
What to know
Slight sheen reads differently from wool in finished pieces
Less forgiving tension than wool; knots pull through more easily
Tapestry needles are blunt, pushing canvas threads aside rather than piercing them, which is why needlepoint doesn't prick your fingers the way sewing does. Size matters: use a #18 for 18-mesh canvas, #13 for 13-mesh, and #22 for 24-mesh. A needle too small shreds your canvas threads; too large and it distorts the mesh. Most beginners start with an assorted pack and sort it out from there.
Best starter
Clover
Gold Eye Tapestry Needles Assorted
$4.47 as of Jun 22, 2026
★★★★★Our rating· Only 17 left in stock - order soon.
Gold-plated eyes thread significantly more easily than steel (wool fibers don't snag on the smoother surface). Clover's needles hold their coating through months of regular use and the quality control is consistent. The assorted pack covers sizes 13-26 so you're ready for any canvas count from your first kit to future projects.
What we like
Gold-plated eye threads wool easily without snagging fibers
Assorted sizes cover every standard canvas count in one pack
Consistent quality; no bent or rough tips out of the box
What to know
Gold plating wears off eventually on high-frequency needles
Assorted pack includes fine sizes most beginners rarely use
★★★★☆Our rating· Only 16 left in stock - order soon.
Widely available at craft stores and perfectly adequate for getting started. Steel eyes require slightly more care threading with wool, but they work. Buy these if you need needles today and your local Joann or Michaels carries them.
What we like
Available at most craft stores for same-day purchase
Cheap enough to replace immediately if one bends or roughens
What to know
Steel eye catches wool fibers more than gold-plated alternatives
Quality varies by pack; occasionally a rough-edged tip sneaks through
Needlepoint canvas develops a strong diagonal pull as you stitch that distorts the piece over time. Working in a frame keeps even tension, produces more consistent stitch coverage, and reduces the blocking effort at the end. For beginners, a scroll frame is more forgiving than stretcher bars (which require tacking or lacing the canvas into place). A 10-inch scroll frame handles most starter kits.
Best starter
Nurge
Scroll Frame
$37.90 as of Jun 22, 2026
★★★★★Our rating· In Stock
A scroll frame holds the canvas under consistent tension without tacking or lacing. Roll unused canvas around the scrolls as you work down the piece; the tension stays even throughout. Nurge makes well-built frames at a fair price and the range covers most beginner kit sizes.
What we like
Canvas rolls onto scrolls without tacking or pinning
Consistent tension throughout, reduces distortion and blocking work
Reusable across multiple canvas sizes with the same frame
What to know
Adds significant bulk; less convenient for stitching on the go
Must match frame width to canvas width before ordering
The old-school method: four interlocking wooden bars form a frame, and you tack or lace the canvas to them. More setup than a scroll frame but they hold the canvas drum-tight and lay perfectly flat. Artists who frame their finished pieces often prefer stretcher bars because the work is frame-ready when stitching is done.
What we like
Holds canvas perfectly flat, ideal for projects you plan to frame
Inexpensive wood bars are reusable across multiple projects
What to know
Requires tacking or lacing canvas; more setup than a scroll frame
Fixed size; different projects need different bar combinations
Three accessories that genuinely improve the stitching experience: sharp embroidery scissors, a needle minder so you stop losing your needle in the couch, and a daylight lamp for sessions over an hour. Skip everything else until you've finished a project. The scissors are the one thing worth buying well from the start.
Best starter
Gingher
4-Inch Embroidery Scissors
$25.94 as of Jun 22, 2026
★★★★★Our rating· In Stock
Sharp, precise, and built to last decades. Gingher's small embroidery scissors cut thread cleanly at the canvas surface without drag. The blades stay sharp far longer than craft-store alternatives and the spring action holds up through all-day stitching. One of the few needlework tools worth buying for life from day one.
What we like
Blade stays sharp for years with proper use (thread only)
Spring action and grip comfort hold up in long stitching sessions
Cuts cleanly at the canvas surface without dragging or crushing
What to know
Will dull immediately if used to cut paper or fabric
Higher price than craft scissors; worth it, but the gap is real
A magnet that clips to your canvas and parks your needle when you set the work down. Sounds trivial until you've spent 20 minutes hunting a tapestry needle through sofa cushions. The magnets are strong enough to hold a needle securely through any canvas weight.
What we like
Parks needle on the canvas securely, never lost mid-project
Strong magnets hold through stiff interlock canvas and thick frames
What to know
Strong magnets can damage credit cards or phones placed nearby
Easy to pack away with the canvas and forget where you left it
Working on 18-mesh canvas under incandescent or overhead fluorescent light is surprisingly hard on your eyes, especially when distinguishing similar color values in thread. A daylight-spectrum LED lamp makes stitch placement obvious and extends how long you can comfortably stitch. The first non-essential accessory that actually earns its place.
What we like
Daylight spectrum shows true thread colors and mesh holes clearly
Reduces eye strain significantly during 2+ hour stitching sessions
What to know
Any daylight LED lamp works; don't pay a premium for the brand name
Bulky for travel; best kept at your main stitching spot
Needlepoint looks intimidating from the outside. It isn't. Here's what actually happens in your first sessions, what trips up almost every beginner, and when the whole thing clicks into something genuinely satisfying.
Needlepoint has a reputation for being a grandmotherly hobby. This is mostly wrong and a little right. Wrong because the technique is genuinely engaging, the materials are tactile in a way most crafts aren’t, and the finished pieces can be extraordinary. A little right because a lot of the good entry-point kits do feature flowers and birds. You can find darker, weirder canvases if that’s your direction.
Here’s what your first twenty hours actually look like, with the things that matter and the things you’ll be tempted to overthink.
Hours 1–3: One stitch, one area
Your first session has one job: learn the continental tent stitch. Everything else is secondary.
The continental stitch is a single diagonal stroke. Needle goes down through one hole and up through the hole one column to the left and one row up. Every stitch slants the same direction. That’s the whole move. You’ll do this ten thousand times across your needlepoint life, so it’s worth getting right early.
A few things that trip up beginners:
Thread length. Cut your thread to 18 inches, maximum. It feels short. You’ll rethread often. That’s fine. Thread that’s too long frays and pills against the canvas mesh before you use it up. Eighteen inches of healthy thread beats thirty inches of shredded wool.
Tension. The thread should lie flat and cover the canvas mesh without pulling the holes oval. Too loose and the canvas shows through; too tight and the canvas distorts. Aim for “snug, not strangled.” Your first few stitches will be inconsistent. By the end of your first session they’ll be better. By hour five they’ll be automatic.
Starting and ending knots. Don’t knot the thread on the back of the canvas. Instead, leave a 1-inch tail on the back and anchor it under your first few stitches. When you start a new thread, run the needle under existing stitches on the back for an inch before coming up to stitch. No knots, ever, on needlepoint.
If you’re working from a painted kit, the design areas are obvious. The background is everything else, and it’s usually the largest section of the piece. This is where beginners lose patience and where good technique shows most clearly.
Switch to basketweave for backgrounds. Basketweave stitch covers the same direction as continental but follows a diagonal path across the canvas, alternating up and down rows. It produces less canvas distortion than continental when filling large areas, which matters a lot at blocking time. The pattern feels confusing for the first 20 minutes. After that it becomes meditative. Basketweave is also faster per square inch once you have the rhythm.
How to tell which you’re doing: if you’re stitching horizontally across a row and then coming back, that’s continental. If you’re stitching diagonally up-right across the canvas and then diagonally down-right, that’s basketweave. Both make identical stitches on the front. The difference is on the back and in how much the canvas pulls.
Color order matters less than you think. Experienced needlepointers sometimes stitch the whole background first, sometimes the design. For a kit, stitch whichever areas feel easiest or most satisfying and build momentum. The canvas doesn’t care.
This is the part nobody warns you about. You’re past the novelty of the new technique, you’re not done yet, and the background feels infinite. Every needlepointer goes through this on every large project.
Three things that help:
Work in good light. Distinguishing between similar wool colors in dim light or under incandescent bulbs is genuinely hard and causes mistakes you’ll notice too late. A daylight LED lamp is the single most useful accessory for sustained needlepoint, not because it’s fancy but because it makes the work easier on your eyes and extends how long you can stitch comfortably.
Handle the piece by the edges. Oils from your skin can affect how wool takes dye over time, and the canvas edges are already raw. Keep a small cloth nearby to rest the canvas on and touch the stitched area as little as possible.
Stitch a consistent number of passes per session rather than pushing to finish areas. Trying to complete “one full background section tonight” leads to rushed tension and sore hands. Stitching for an hour and stopping mid-row is fine. The canvas will wait.
Hours 16–20: Finishing and blocking
When the last stitch is in, you’re not done. Blocking is what turns “a canvas covered in wool stitches” into a finished piece.
Here’s what happens: the diagonal pull of continental stitch accumulates across the whole canvas. Even with basketweave in the background, your finished piece will be parallelogram-shaped instead of square. This is normal and expected. Blocking fixes it.
How to block:
Dampen the back of the finished canvas thoroughly with a wet cloth or spray bottle. Get it damp, not soaked.
Lay it face-down on a foam surface (a sheet of foam insulation board from a hardware store works perfectly).
Pin one corner with a rustproof T-pin. Pull the opposite corner square and pin it. Do the same for the other two corners. Then work around the edges, pinning every inch or so, keeping the canvas square.
Let it dry completely (24-48 hours). Don’t rush this.
When you unpin, the canvas will be square and the stitches will look even and settled. This is why blocking matters. Before blocking, even excellent stitching can look a little rough. After blocking, the same piece looks finished.
Finish your first project (yes, all the way through blocking), then look at what you actually want to do next:
Stay with kits a little longer. A second or third Dimensions kit will teach you more about color and stitch coverage than any tutorial. Finish three complete pieces before deciding you’ve outgrown them.
Try a blank canvas. Order some Zweigart mono canvas and Paternayan wool, find a simple pattern online, and transfer it yourself. This is where needlepoint opens up into something more personal.
Explore other stitches. The American Needlepoint Guild’s stitch library and Mary Corbet’s Needle ‘n Thread have hundreds of variations on the tent stitch, including textured fills, diagonal patterns, and decorative stitches that can transform a background from flat coverage to something three-dimensional.
The twenty-hour mark is not the finish line. It’s the point where you have enough technique to actually make choices, and enough context to know which direction you want to go.
Save your money
What you don't need yet
Beginners get pressured to buy a lot of stuff that doesn't help them play
better. Here's what we'd skip on day one.
Silk thread — Beautiful but slippery and expensive. Learn tension control on wool first. Silk rewards technique that takes months to develop.
A hand-painted designer canvas ($80-150+) — Gorgeous, but finish one kit first. After one completed project you'll know whether needlepoint is your thing and what styles you actually want to stitch.
A magnifier stand — Good daylight lighting solves most of what people think they need magnification for. See if your eyes actually struggle at 18-mesh before spending money on optics.
Interlock canvas — Interlock holds shape better than mono but is harder to block and doesn't accept stitches as cleanly. Mono canvas is the beginner standard for good reason.
A blocking board — A sheet of foam insulation board from a hardware store plus rustproof T-pins does the same thing for under $10.
First week
Your first seven days
A short, real plan to get from gear-on-doorstep to actually playing.
Learn the continental tent stitch before anything else. It's the foundational stitch for all beginner needlepoint and the only move you'll use on your entire first project. · Learn
Start stitching from the center of the canvas and work outward. Keeps tension even and prevents you from running out of canvas on one side. · Action
Keep thread lengths short, around 18 inches. Longer thread tangles, frays against the canvas mesh, and wears out before you use it. · Action
Once you've filled a small area, learn the basketweave stitch for filling large background areas. It distorts the canvas far less than continental and is faster once you have the rhythm. · Learn
FAQ
Common questions
What's the difference between needlepoint and cross-stitch?
Different canvas, thread, and stitch. Needlepoint uses stiff mono canvas (typically 18 holes per inch) and thick wool or silk thread worked in a single diagonal stitch. Cross-stitch uses even-weave fabric like Aida cloth, DMC embroidery floss, and X-shaped stitches. They look superficially similar but the materials, technique, and finished weight of the piece are completely different.
How long does a needlepoint project take?
A small starter kit (5x7 inches) takes 10-20 hours for a beginner. A medium kit (10x10 inches) runs 30-60 hours. Background areas always take longer than you expect. Plan for a small project to take a month of casual stitching before it's finished and blocked.
What canvas count should I start with?
18-mesh (18 holes per inch) is the beginner standard. Fine enough to produce detailed work, large enough to see clearly without strain. Coarser counts (10 or 13) are easier on your eyes but produce chunky finished pieces. Canvas 24 and above is advanced territory.
Do I have to block a finished needlepoint?
Almost always yes. Blocking is wetting the finished canvas and pinning it square on a foam surface while it dries. The diagonal pull of tent stitch skews every canvas; blocking straightens it. Skip blocking and your finished piece will look crooked even if your stitching is perfect.
Can I use regular embroidery floss instead of wool?
For 18-mesh canvas you'd need to bundle 6 strands of DMC floss, and coverage is still less consistent than wool. DMC #3 pearl cotton (a single twisted strand) is a better cotton substitute on 18-mesh. Wool is the standard for a reason: it has natural spring that cotton and floss lack.
How much does needlepoint cost to start?
A Dimensions starter kit runs $25-35 and includes canvas, thread, and needle. Add a scroll frame ($20-30) and Gingher scissors ($20-30) and you're fully equipped for around $70-95. Costs grow as you move to designer canvases and specialty threads, but those are choices for later.
American Needlepoint Guild — The national organization. Chapters in most major cities. Membership gets you access to seminars, stitch guides, and the most knowledgeable needlepointers in your area.
Needle 'n Thread by Mary Corbet — The best free stitch library on the internet. Hundreds of stitches demonstrated on video. Search 'continental stitch' and 'basketweave stitch' to start.
r/Needlepoint — Active community. WIP posts, canvas sourcing help, and finishing questions. The wiki has solid beginner resources and a FAQ that answers the 'what canvas/thread do I need' question in detail.
NeedlePoint411 — Free stitch guides, technique articles, and finishing tutorials. Strong on the technical side: blocking, mounting, and framing finished pieces.
As an Amazon Associate, JustBeginning earns from qualifying purchases.
We may also earn commission from other affiliate programs linked on this
page. Editorial recommendations are independent; we don't choose
products based on commission rates.
Product prices and availability are accurate as of the date and time
indicated and are subject to change. Any price and availability
information shown on Amazon at the time of purchase will apply.


 Best starter