Squash is one of the most demanding racket sports in the world — played on a small indoor court, with a rubber ball, in rallies that demand constant lateral movement and explosive retrieval. The gear list is short, but a few decisions matter early. Here's what you actually need.
By Colin B. · Published May 15, 2026 · Last reviewed June 2, 2026
ASICS Gel-Rocket 11
— Court shoes with a non-marking gum sole — the one item you can't borrow from tennis.
Budget total
$100
Typical total
$200
Squash gear is mid-priced compared to tennis. A solid starter kit — racquet, balls, shoes, eye protection — runs $100-200. The ongoing cost is court time: $15-30 per hour at most clubs.
We earn commission on qualifying Amazon purchases — see our
affiliate disclosure.
Price tiers and budget totals shown above are editorial estimates;
actual Amazon prices vary.
At a glance
Our top pick in each category
The fastest path through this guide — each best-starter pick by category.
Scroll for the budget and upgrade alternatives.
Find a court before you spend a dollar. Squash requires an indoor four-walled court — you can't improvise one. Many large gyms (Lifetime, Equinox, YMCA, university rec centers) have squash courts. Most standalone squash clubs charge $15-30/hour for court time. Confirm there's a court within 30 minutes of you before buying anything.
Don't buy the double-yellow dot ball yet. Squash balls are color-coded by bounce, and the double-yellow dot — the tournament standard — is designed for long, heated rallies that warm the rubber to its working temperature. As a beginner, your rallies aren't long enough to heat it up, and it'll feel like hitting a rock. Start with a red dot or single yellow dot (more bounce, far more usable on cold courts).
Eye protection is strongly recommended and required at most clubs and all tournaments. The squash ball hits harder than most beginners expect, and your opponent's racquet backswing is always nearby in the confined court. ASTM F803-rated eye guards cost about $20 and prevent the kind of injuries that end seasons.
The gear
What you actually need
Racquet
A squash racquet is longer than a racquetball racquet but smaller and lighter than a tennis racquet — usually 125-150g and under 27 inches. The variables that matter for a beginner: weight (lighter is more maneuverable), balance (head-light is nimbler; head-heavy adds power), and string tension (lower tension is more forgiving). Stay in graphite, not aluminum — aluminum-frame budget racquets transmit harsh vibration into the wrist and elbow. A graphite or composite racquet in the $50-100 range is where you should start.
Racquet — what's the difference?
A few common shapes, each making a different trade.
Head-light balance
Faster swing, better control, easier on the arm.
Balance
Head-light
Swing speed
Faster
Power
Lower
Best for Beginners and intermediates — especially players transitioning from tennis or pickleball
Tradeoff Less inherent power; you generate pace with swing speed
120g, graphite construction, head-heavy balance that adds power without requiring a huge swing. Around $70-90. HEAD's Extreme line is specifically designed for club-level beginners and intermediates — the sweet spot is forgiving and the weight gives you free power while you develop technique.
What we like
Graphite frame at ~$80 is gentler on wrists than cheaper aluminum options
Head-heavy balance adds power without requiring a big swing
Forgiving sweet spot covers off-center contact
What to know
Factory strings run tight — worth asking a pro about restringing at 20-22 lbs
Around $45. Large 496cm² head, Wilson's standard squash frame, and a price point that makes sense while you're deciding if squash is going to stick. Not as refined as graphite, but adequate for your first months and widely available.
What we like
At ~$45, the right spend while you're deciding if squash will stick
Large head gives you more hitting zone to make contact
What to know
Less refined than graphite — more vibration feedback on mishits
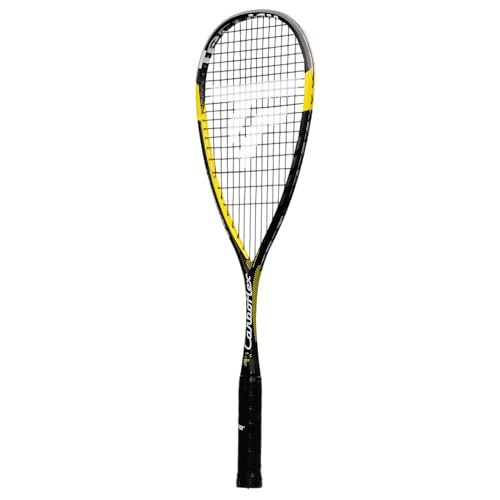
125g, 100% graphite, around $150. The racquet that most club-level players land on after a few months of serious play. Excellent control, clean feel, and Tecnifibre's string quality is genuinely better than the competition. Wait until your game is consistent before upgrading — but when you're ready, this is the obvious move.
What we like
100% graphite at 125g — refined feel that rewards clean mechanics
Tecnifibre string quality is genuinely better than the competition
What to know
Stiffer frame punishes mishits — not the right move until you have consistent technique
Squash balls are hollow rubber and they need to be warm to bounce properly. The dot color tells you how much bounce you get: more dots means more bounce, which means easier for beginners. The double-yellow dot (tournament standard) is designed for sustained, hard rallies that heat the rubber — as a beginner, your rallies aren't long enough to warm it, and it'll feel impossibly dead. Start with a single yellow or red dot. You'll graduate to double-yellow once your game has consistency and your rallies last more than five or six shots.
Best starter
Dunlop
Progress Squash Ball (3-pack)
$12.95 as of Jun 22, 2026
★★★★★Our rating· In Stock
The red dot — bouncier and easier to control before your rallies are long enough to warm up a tournament ball. Around $12-15 for a 3-pack. Dunlop makes the ball used at virtually every serious squash club and tournament in the world, so you're in good hands with the brand. Start here, switch to double-yellow once your rallies consistently hit 8-10 shots.
What we like
Extra bounce lets rallies develop before your game has consistency
Dunlop is trusted at every serious squash club and tournament worldwide
What to know
You'll outgrow it once rallies consistently hit 8+ shots — plan to upgrade
The WSF-approved tournament ball used on the professional tour and at virtually every club match. When your game has enough consistency for the beginner ball to feel too bouncy — usually 3-6 months of regular play — this is what your opponents are using. Buy it when you're ready.
What we like
WSF-approved — the ball used on the professional tour and at every club match
Low bounce rewards consistent shot-making and teaches proper warm-up habits
What to know
Feels like a dead rock until warmed by long rallies — wrong choice before 3 months in
Squash is played on a hard indoor court with explosive lunges, quick pivots, and constant direction changes. You need lateral support and a non-marking gum rubber sole — the last part is non-negotiable, because most clubs won't let you play with a black sole that marks the floor. Running shoes are dangerous: their soft, high heels roll your ankle on lateral cuts. Squash-specific shoes, tennis shoes, or indoor volleyball shoes all work; just make sure the sole is gum rubber.
Best starter
ASICS
Gel-Rocket 11
$$
★★★★★Our rating
Around $65. ASICS's entry-level indoor court shoe — non-marking gum sole, solid lateral support, and GEL cushioning that absorbs the shock of repeated lunges. The forefoot is reinforced for the forward slides squash demands, and it runs lighter than most court shoes at this price.
What we like
Non-marking gum sole passes court rules at any club
GEL cushioning absorbs the shock of repeated lunges
Lighter than most court shoes at this price point
What to know
Runs slightly narrow — wide feet should size up half a size
The court shoe we recommend across all our racket-sport guides. Non-marking sole, dependable lateral support, around $90. Works perfectly for squash if you already own a pair for tennis or pickleball — no need to buy again.
What we like
Solid lateral support and non-marking sole for any racket sport
Cross-over value if you already play tennis or pickleball
What to know
At ~$90, costs more than the ASICS beginner option with less cushioning
ASICS's serious indoor court shoe — gel cushioning, reinforced lateral support, and a proprietary outsole compound that holds up to 3-4 sessions per week without wearing through. Around $110-130. Worth the step up once squash is a regular habit and you start feeling foot or knee fatigue over long sessions.
What we like
Reinforced lateral support built for 3-4 sessions per week
Proprietary outsole holds up to heavy use without wearing through
What to know
$110-130 is hard to justify until squash is a committed weekly habit
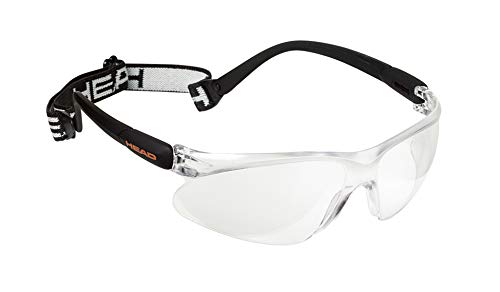
Squash clubs vary — some require eye protection, many don't (unlike racquetball, where it's nearly universal). But the squash ball hits harder than most people expect, and your opponent's backswing in a confined court is a real hazard. Most tournaments require ASTM F803-rated eye guards, and the casual clubs that don't often should. At $20, this is a cheap piece of insurance.
Best starter
HEAD
Impulse Racquetball & Squash Goggles
$12.91 as of Jun 22, 2026
★★★★★Our rating· In Stock
ASTM F803-certified eye protection rated for both squash and racquetball. Anti-fog and scratch-resistant polycarbonate lens, adjustable strap, and a low-profile design that doesn't restrict peripheral vision. The #1 best seller in squash and racquetball goggles on Amazon — there's a reason every club player knows this model.
What we like
ASTM F803-certified — meets the standard required at tournaments and most clubs
Anti-fog polycarbonate lens does not restrict peripheral vision
What to know
Can fog in very humid gyms — keep a cloth nearby between games
The ASTM F803-rated eye guard we recommend for racquetball too — works just as well for squash. Fits over prescription glasses, anti-fog coated, around $20. If you already own these for racquetball, they cross over perfectly.
What we like
Fits over prescription glasses — the key reason to pick Python over HEAD
ASTM F803-rated and cross-compatible with racquetball
What to know
Bulkier fit than the HEAD Impulse if you do not need prescription clearance
Two items that meaningfully improve comfort: an overgrip (squash handles run thin, and one wrap adds feel and absorbs sweat) and a wristband (indoor courts get hot fast, and sweat running down your forearm onto the grip causes slippage at the worst times). Both under $15 combined.
Best starter
Tourna
Grip Original Overgrip (10-pack)
$8.99 as of Sep 10, 2026
★★★★★Our rating· In Stock
Tried-and-true overgrip used in every racket sport. Apply one wrap to your factory grip on day one — it improves feel and prevents slippage as soon as your hands start sweating. Replace every 3-4 weeks of regular play.
What we like
Works across all racket sports — one 10-pack covers months of play
Absorbs sweat immediately and improves grip feel from the first session
What to know
Needs replacing every 3-4 weeks of regular play — a recurring but cheap cost
Squash courts get warm, and sweat running from your forearm onto the grip is a real problem in a fast game. A wristband catches it before it reaches your hand. Around $10.
What we like
Catches sweat before it reaches the grip — solves a real problem on hot courts
At ~$10, an easy add-on to any order
What to know
Purely optional — only worth it if you sweat heavily during play
Squash has a learning curve steeper than most racket sports. Here's what actually happens in your first four weeks — and what to focus on so you don't waste the time.
Squash is harder to start than pickleball or ping-pong. The swing is unusual, the ball is barely bouncy, the court is small and fast, and your opponent is in the way. Most beginners have a rough first session and a much better second one — which is the right pattern. The sport opens up fast once you have a few fundamentals, and by the end of your first month you should be able to rally, keep score, and lose gracefully.
Here’s what that month actually looks like.
Week 1: Making contact
The squash swing feels nothing like a tennis swing. In tennis you swing through a big arc with your whole arm. In squash, the swing is compact — a shorter backswing, wrist snap through contact, abbreviated follow-through. The reason is space: your opponent is behind you, the walls are close, and a full tennis swing will hit someone or something that isn’t the front wall.
The grip is a continental — same as tennis, like shaking hands with the racquet. Don’t change it, don’t think about it, just go.
The first thing most beginners notice: the ball doesn’t bounce. That’s because they’re using the tournament double-yellow dot ball, which is designed to be warmed up by long hard rallies. If you’re a new player, start with a red dot or single-yellow ball. More bounce, more usable, not cheating — it’s the right ball for where you are.
The most useful drill in week one: straight drive practice. Stand at the back corner, hit the front wall, let the ball bounce, hit it again. Try to keep it close to the side wall. Don’t worry about power — worry about consistency. Twenty consecutive straight drives, alternating forehand and backhand, teaches you more about the squash swing than an hour of reading.
Week 2: Court movement
Once you can hit the ball most of the time, the next skill gap becomes obvious: you have no idea where to stand.
Squash has a specific movement logic centered around what’s called the T — the intersection of the two lines on the court floor. After every shot, your job is to return to the T. It’s the position from which you can reach any corner of the court with the same number of steps. Players who don’t know this spend the whole game scrambling from wherever they ended up after the last shot. Players who know it always seem to have a little more time.
Moving to the T after each shot requires a specific footwork pattern that feels awkward at first: you hit the ball, you push off the foot nearest the ball, and you recover back to center. Lunge into the corner, recover to center. It’s a habit, not an instinct, and it takes a few weeks to feel natural.
The other movement concept that changes week two: court lengths. Squash is won by moving your opponent to one corner and then hitting to the opposite one. The easiest version of this for a beginner is the boast — a shot that hits the side wall first, then the front wall, dying in the opposite front corner. You can’t boast well yet, but you should understand why it exists: it forces your opponent off the T and creates the exact opening you want.
Week 3: Points and patterns
By week three you should be keeping score and playing actual games.
Squash scoring: most casual play uses PAR scoring — every rally wins a point, regardless of who served. Games to 11, win by 2. This is different from the old hand-out scoring you might see in older squash writing, where only the server could win a point. PAR is faster and friendlier. Use it.
The service: hit the ball off the front wall, landing in the service box on the opposite side. Ball must hit above the tin (the metal strip at the bottom of the front wall) and below the out line at the top. Underhand or overhand — both are legal. Find what’s consistent, not what feels dramatic.
In game play, notice that squash is fundamentally a game of length and width. Shots deep into the back corners are good; shots that die in the middle of the court are bad. A shot that lands in the back corner requires your opponent to play it from behind you, under pressure, with limited options. A shot that lands in the middle gives them everything.
The two shots worth developing in week three:
The straight drive: down the wall, dying in the back corner. The safest high-percentage shot in squash.
The crosscourt drive: hit diagonally, landing in the opposite back corner. Opens width, makes your opponent move.
Everything else — drops, boasts, lobs — comes later. For now: drive straight, drive cross, return to the T.
Week 4: Fitness and fatigue
You will have noticed by now that squash is exhausting. A 30-minute match of squash burns more calories than almost any other racket sport — the combination of sustained intensity, constant direction changes, and full-court coverage adds up fast.
Week four is often when the fitness gap becomes the game gap. You’ll rally comfortably for the first two games and then make unforced errors in the third because your legs are tired. This is normal and it improves quickly — squash-specific fitness (fast lateral movements, explosive lunges, sustained moderate aerobic load) develops rapidly with regular play.
The two fitness markers that matter for a beginner:
Can you rally for 30+ seconds without losing the thread? If not, work on consistency and aerobic base.
Can you lunge fully to the corner without your form collapsing? If not, the court movement drills in week two are what you need, not more gym time.
Most squash beginners plateau on technique, not fitness. If you feel unfit, you probably just haven’t developed the specific movement patterns yet — the fitness comes when the movement becomes automatic.
Every beginner makes the same mistakes. You’re not a special case:
Hitting the tin. The tin is the metal strip at the bottom of the front wall — anything that hits it is out. Beginners hit it constantly because they’re trying to be precise with angle and drop. Hit the front wall higher than you think you need to. The errors that cost you games are errors into the tin, not errors that fly out at the top.
Swinging too big. The squash swing is a wrist snap, not a shoulder rotation. If you feel like you’re throwing a punch from the elbow, you’re close. If you feel like you’re hitting a tennis ball, the swing is too big.
Standing in the middle of the court after a shot. The T is not the middle of the court; it’s a specific spot. But the principle is the same — get back to center after every shot, every time. Players who don’t do this are readable and tired.
Not warming up the ball. If you skip the 5-minute warm-up rally at the start of a session, the ball will behave like a dead rock for the first few games. Warm the ball up before you start competitive play.
What changes at month two
A few investments pay off dramatically around weeks 5-8:
One lesson. A squash-specific coach can see the thing you can’t — usually your backswing (too big), your grip (usually too tight), or your recovery step (usually skipped). One 30-minute session at around hour 10-15 of play fixes the thing that’s holding you back. This is more useful than another two weeks of self-correcting.
A regular hitting partner. Two players at roughly the same level, playing 2-3 times a week, improve faster together than either would playing pickup with strangers. Find one person. Show up consistently.
Graduating to double-yellow dot. By month two, your rallies should be long enough to warm the ball. Try the double-yellow dot and see how it feels — if it’s dead and frustrating, go back to the beginner ball for another few weeks. If it feels just a little slow, you’re ready.
You’ll still lose most of your games at month two. You should also be noticeably better than you were at month one. That’s the right pace.
Save your money
What you don't need yet
Beginners get pressured to buy a lot of stuff that doesn't help them play
better. Here's what we'd skip on day one.
A double-yellow dot ball on day one — It won't bounce properly until you're generating long, heated rallies — which takes months to build. The beginner-rated ball isn't cheating; it's the right tool for where you are.
A custom string job — Factory strings at standard tension are fine for your first year. Custom setups are for players who can feel the difference — which takes a while to develop.
Squash-specific apparel — Any moisture-wicking athletic shorts and t-shirt work. The 'squash-branded' gear is a premium for aesthetics, not performance.
A second racquet — Pros carry backup racquets in case strings break mid-match. As a beginner, strings will wear out gradually over months — you'll see it coming and can restring with plenty of warning.
A ghost training partner or shot-tracking app — Solo training apps can supplement practice, but you learn squash by playing squash. Real opponents teach you movement and court position faster than any solo drill, especially early on.
First week
Your first seven days
A short, real plan to get from gear-on-doorstep to actually playing.
Find an indoor squash court near you. University rec centers, large gyms (Lifetime, Equinox, YMCA), and standalone squash clubs are your best bets. · Action
Watch a professional squash match — Mohamed ElShorbagy, Ali Farag, or Nour El Sherbini are the marquee current names. The pace and angles are unlike any other racket sport, and watching 20 minutes of pro squash shows you the movement patterns you're building toward. · Learn
Book one lesson in your first two weeks. Squash has specific swing mechanics and court movement that are hard to self-teach. One 30-minute lesson pays off for months of better habits. · Action
FAQ
Common questions
How is squash different from racquetball?
Both are indoor court sports with a front wall, but squash uses a smaller, less bouncy ball, longer racquets, and a slightly smaller court. Racquetball rewards power; squash rewards precision, angles, and fitness. The scoring differs too — squash commonly uses PAR (point-a-rally) scoring where every rally wins a point. Many clubs have both courts and both communities.
What ball should I start with?
Start with a red dot or single yellow dot ball — it's bouncier and easier to control before your game has consistency. The double-yellow dot (tournament standard) requires long, heated rallies to warm up properly, and a beginner's rallies don't generate enough heat. There's no shame in the beginner ball; it's the right tool.
How much does it cost to play squash?
Court fees are typically $15-30/hour at most clubs. Your starter kit — racquet, balls, shoes, eye protection — runs $100-200. After that, the main costs are court time and replacing balls every few weeks of regular play.
Do I need lessons?
One or two lessons early on are genuinely worth it. Squash has an unusual swing arc and specific footwork that's hard to self-teach, and bad habits calcify quickly. Most clubs offer group clinics at $20-30/person — a good low-commitment entry point before you commit to private lessons.
Can I practice squash alone?
Yes — squash is one of the few racket sports where solo practice is genuinely productive, because you're hitting against a wall. Solo drills (straight drive targets, boast-and-crosscourt patterns) are how most club players build consistency between matches. It's not a substitute for play, but it's a real supplement.
Is squash hard to learn?
The basics are approachable in 2-3 sessions — you can rally and keep score. The depth is what makes it hard: movement, angles, reading your opponent, sustained fitness. Most players feel genuinely competitive after 3-6 months of weekly play. It's a sport that rewards investment.
US Squash — National governing body. Court finder, tournament calendar, ratings system, and junior programs.
PSA World Tour — The professional squash tour. Rankings, event schedules, and full match footage — some of the most watchable footage in any racket sport.
PSA World Tour (YouTube) — Free professional matches in full. Watch even 20 minutes and you'll understand why squash players talk about the sport the way they do.
SquashSkills — The most respected online coaching platform. Some content is free; most requires a subscription. Worth it once you've played 3-6 months and have enough baseline to absorb structured instruction.
SquashSkills (YouTube) — Free beginner coaching videos. Start with the swing fundamentals and footwork — they're among the clearest explanations available anywhere.
r/squash — Active, helpful community. Good for gear questions, court-finding in specific cities, and technique troubleshooting. More signal-to-noise than most hobby subreddits.
Squash Source (YouTube) — Technical coaching from experienced club-level coaches. Good for intermediate skill-building once you've got the basics from SquashSkills.
As an Amazon Associate, JustBeginning earns from qualifying purchases.
We may also earn commission from other affiliate programs linked on this
page. Editorial recommendations are independent; we don't choose
products based on commission rates.
Product prices and availability are accurate as of the date and time
indicated and are subject to change. Any price and availability
information shown on Amazon at the time of purchase will apply.

 Best starter