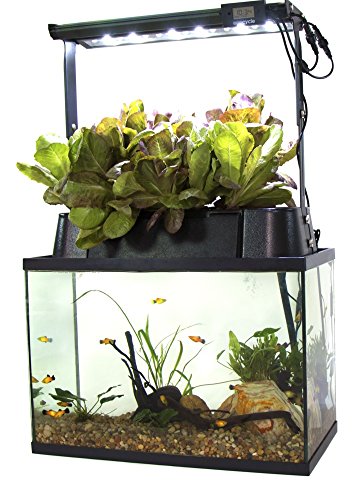
Aquaponics is part fish tank, part vegetable garden. Both sides run on the same water. Fish produce nutrients, plants clean the water, you get fresh food year-round. It takes more setup than most hobbies, but the payoff is a self-sustaining ecosystem on your counter or back porch. Here's exactly what to buy first.
By Colin B. · Published May 30, 2026 · Last reviewed August 7, 2026
A countertop kit runs $75–150. A full grow-bed system with tank, pump, media, and test kit lands $300–600.
We earn commission on qualifying Amazon purchases — see our
affiliate disclosure.
Price tiers and budget totals shown above are editorial estimates;
actual Amazon prices vary.
At a glance
Our top pick in each category
The fastest path through this guide — each best-starter pick by category.
Scroll for the budget and upgrade alternatives.
The biggest mistake beginners make is adding fish before the system has 'cycled.' The nitrogen cycle (where beneficial bacteria colonize your grow bed and convert toxic ammonia to plant-safe nitrates) takes 3–6 weeks. Skip it and your fish die within days. Test your water; don't guess.
Start small. A countertop kit teaches you the biology for $75 and saves you from spending $500 on a system you might not have time for. Most people who 'go big first' spend six months troubleshooting before anything runs smoothly.
Pick boring fish first. Goldfish, guppies, and tilapia are forgiving and cheap. Don't start with koi or expensive ornamentals until you understand how to manage water chemistry under stress.
The most important decision in aquaponics is which first system to buy. A countertop kit like Back to the Roots lets you learn the nitrogen cycle without a major investment: grow herbs above a 3-gallon fish tank and be harvesting within a few weeks. When you're ready to scale up, a media-bed system (clay pebbles in a flood-and-drain tray above a larger tank) is the backbone of most serious home setups. Don't jump to a large DIY build first: the biology is the hard part, and smaller systems let you master water chemistry before you're managing 50 gallons of fish.
Starter Systems — what's the difference?
A few common shapes, each making a different trade.
Countertop / Desktop
3–5 gallon tank with herb tray above. Best first step.
System size
3–5 gallons
Fish options
Betta, guppies
Plant capacity
Herbs, microgreens
Best for Absolute beginners, apartment growers, learning the nitrogen cycle
Tradeoff Very limited plant diversity; upgrades within a year for most growers
Plant rafts float directly on nutrient-rich water.
System size
20–100+ gallons
Fish options
Tilapia, catfish
Plant capacity
High-yield leafy greens
Best for Growers prioritizing plant yield; leafy greens grow fastest in DWC
Tradeoff More complex plumbing; not forgiving of water chemistry errors
Best starter
Back to the Roots
Water Garden
$$
★★★★★Our rating
The gold-standard beginner aquaponics kit: a 3-gallon fish tank with a wheatgrass and herb tray that sits on top. Everything included: organic seeds, fish food, water conditioner, and a betta fish coupon. Setup takes 30 minutes. The biology teacher's kit for adults. You'll grow microgreens in a week and understand the nitrogen cycle in two.
What we like
Complete kit: seeds, food, conditioner, and betta fish coupon included
3-gallon size stays manageable while you learn the nitrogen cycle
Grows microgreens in 7–10 days, a fast and satisfying feedback loop
What to know
3-gallon size limits you to herbs and greens, no room for vegetables
Not expandable; you'll want a bigger system within a year
Converts any standard 10-gallon aquarium into a flood-and-drain aquaponics system. Good option if you already have a tank collecting dust. The grow tray sits on top, the pump is included, and goldfish handle the chemistry as well as anything. Big enough to grow salad greens, basil, and mint simultaneously.
What we like
Converts any standard 10-gallon aquarium you already own
Big enough for real salad greens (not just wheatgrass)
Pump and grow tray included, just add tank and fish
What to know
Tank sold separately; budget an extra $15–25
Heavier nutrient load at 10 gallons; water changes more frequent
A proper media-bed setup with a 20-gallon fish tank, flood-and-drain grow bed, submersible pump, and full-spectrum LED light. Large enough for leafy greens, herbs, and cherry tomatoes at once. This is the system to buy if you're skipping the countertop phase and committing to a real garden from day one.
What we like
20-gallon capacity grows leafy greens and tomatoes simultaneously
LED grow light included, indoor-ready from the box
Flood-and-drain pump and grow bed arrive pre-configured
What to know
Requires a 4–6 week cycling period before adding fish
Premium price; only worth it if you're fully committed from day one
Your fish's survival depends on water chemistry: ammonia (from fish waste), nitrite, nitrate, and pH. In a new system, ammonia and nitrite spike before beneficial bacteria colonize the grow bed (this is the nitrogen cycle, and it takes 3–6 weeks). Testing every 2–3 days during this phase is not paranoia; it's what keeps fish alive. The API Master Test Kit covers all four parameters accurately and will outlast a year of regular testing. Strips are faster but less accurate, fine for routine checks once your system is established.
Best starter
API
FRESHWATER MASTER TEST KIT 800-Test Freshwater Aquarium Water Master Test Kit
$35.98 as of Jun 22, 2026
★★★★★Our rating
The standard test kit for aquaponics and freshwater aquariums everywhere. Tests the four parameters that matter (ammonia, nitrite, nitrate, and pH) with liquid reagents far more accurate than strips. Includes enough reagents for 800 tests. Every aquaponics beginner needs this, no exceptions.
What we like
Tests ammonia, nitrite, nitrate, and pH (the essential four)
Liquid reagents are far more accurate than test strips
800 tests included, lasts well over a year of regular use
What to know
Takes 5–10 minutes per full test; not instant like strips
Glass test tubes are fragile; keep out of reach of kids
Once your system is established, a digital pH meter is faster and more reliable than test drops for daily checks. The PH20 is accurate to ±0.1 pH, fully waterproof, and ships pre-calibrated. Use it for quick daily spot-checks; keep the Master Kit for full panels when something seems off.
What we like
±0.1 accuracy, better than liquid drops for routine daily checks
Waterproof and faster than test tubes for spot monitoring
What to know
Calibration buffer required every few months (minor ongoing cost)
Tests pH only; you still need the Master Kit for ammonia and nitrite
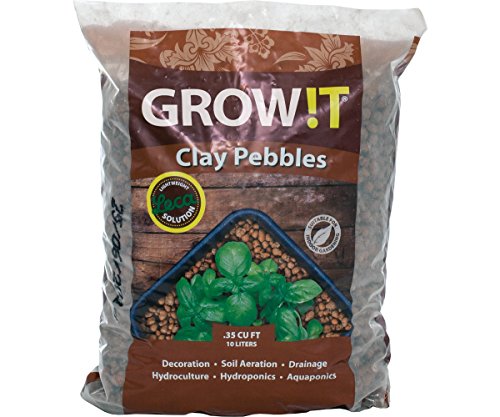
Clay pebbles (hydroton or LECA, lightweight expanded clay aggregate) are the near-universal choice for media-bed aquaponics. They're pH-neutral, drain freely, and provide enormous surface area for beneficial bacteria. One 4-liter bag fills a small countertop system; for a 20-gallon grow bed, plan on 50 liters. Rinse thoroughly before use; the fine clay dust will cloud your tank if you don't. Avoid pea gravel: it compacts over time and creates low-oxygen pockets that harm both plants and bacteria.
Best starter
GROW!T
GMC10L Clay Pebbles, 10L
$19.99 as of Jun 22, 2026
★★★★★Our rating
Hydroton-style LECA clay pebbles are the universal grow media for aquaponics, and GROW!T is the most trusted name in the category. pH-neutral, drains freely, and provides massive surface area for the beneficial bacteria your system depends on. Rinse with water before use until water runs clear.
What we like
pH-neutral and won't destabilize your water chemistry
Massive surface area for beneficial bacteria colonization
Reusable indefinitely; rinse and sterilize between crops
What to know
Must be rinsed thoroughly before use or tank will cloud badly
4L fills a countertop system; larger setups need the 50L bag
★★★★☆Our rating· Only 15 left in stock - order soon.
When you need more media than a 4L bag covers, this 50-liter bag is the economical choice. Same flood-and-drain drainage and bacteria surface area as GROW!T, at a lower cost per liter. Fills a full 20-gallon media bed with some left over. Rinse thoroughly the same as any clay pebble.
What we like
Lower cost per liter than smaller bags for large grow beds
Same reliable drainage and bacteria surface area as GROW!T
What to know
Slightly inconsistent pebble sizing vs. GROW!T (minor quality variance)
Heavy to ship; check that your grow bed can support the weight
Aquaponics needs two kinds of water movement: a submersible pump to lift water from the fish tank to the grow bed, and an air pump to keep dissolved oxygen high enough for fish, plant roots, and the bacteria that process ammonia. Underpowered pumps are one of the top reasons beginner systems crash; size your pump for at least 1–2x your tank volume per hour. A 200–300 GPH pump handles most 20–50 gallon setups comfortably. For aeration, a simple air stone and pump combination costs under $20 and is always worth adding.
Best starter
VIVOSUN
VS4 400 GPH Submersible Pump
$17.99 as of Jun 22, 2026
★★★★★Our rating
A reliable, quiet submersible pump that moves water from your fish tank to your grow bed. The 400 GPH model handles most 20–50 gallon setups comfortably. Includes multiple nozzle sizes and a flow-control valve so you can tune delivery to your grow bed without buying extra fittings.
What we like
Flow-control valve lets you tune water delivery precisely
Quiet enough for indoor use, no constant mechanical hum
Multiple nozzle attachments included, fits common tubing sizes
What to know
Impeller can clog on fine solids; add a pre-filter foam sock
Power cord is 6ft; measure tank-to-outlet distance first
★★★★☆Our rating· Only 8 left in stock - order soon.
Fish need dissolved oxygen to survive; so does the beneficial bacteria in your grow bed. An air pump and stone keeps oxygen levels healthy, especially at night when plants consume rather than produce oxygen. The Hygger dual-outlet model handles tanks up to 100 gallons and runs nearly silent.
What we like
Dual outlet handles tank and sump aeration simultaneously
Near-silent operation, fine for living spaces without noise complaints
What to know
Air stones clog and need replacing every 3–6 months
Requires airline tubing and check valves not included in the box
If you're growing indoors or in a low-light space, a grow light is not optional; most edible plants need 12–16 hours of light and won't thrive under ordinary room lighting. LEDs have replaced fluorescent tubes for home growers: cooler, more efficient, and full-spectrum. For a small countertop system (2–4 sq ft), a 45–100W LED is plenty. A larger media-bed setup needs 100–200W. Put the light on a timer; consistent day-night cycles are important for both plants and fish.
Best starter
MARS HYDRO
TS 600W LED Grow Light
$79.99 as of Jun 22, 2026
★★★★★Our rating· In Stock
The most popular beginner LED for small indoor systems. Full-spectrum, covers a 2x2 ft area at 18 inches, and runs cool enough to use indoors without heat issues. Draws only ~100W actual power despite the '600W' marketing label, efficient and well-priced for a small aquaponics setup.
What we like
Full-spectrum output handles both seedlings and mature plant growth
Runs cool, no ventilation needed for small indoor spaces
Good coverage for a 2x2 ft countertop or compact grow bed
What to know
Marketing wattage is inflated: ~100W actual, not 600W
No built-in timer; add a $10 outlet timer for light cycling
For a countertop herb garden near a window, these T5-style LED strips supplement natural light at a fraction of the cost of a panel light. Mount them under a cabinet directly above your plants. Each 2-foot strip covers one row of herbs; daisy-chain up to four for wider coverage.
What we like
Under $35 for a 4-pack, excellent coverage per dollar for herbs
Mounts directly under cabinets above countertop systems
What to know
Not bright enough for fruiting crops, herbs and greens only
Cable management gets messy when daisy-chaining multiple strips
When your system grows beyond a countertop, this 100W LED (true watts) covers a 3x3 ft grow area with Samsung LM301B diodes, the same chips commercial grow ops use. Built-in dimmer lets you adjust intensity from seedling to full production. This is the light serious home growers land on.
What we like
Samsung LM301B diodes, commercial grow quality in a home light
Built-in dimmer handles seedling through full-growth stages
What to know
Premium price; overkill until your system exceeds 4 sq ft
No built-in timer; still need a separate outlet timer
Aquaponics is unlike most hobbies: the first six weeks happen mostly while you wait. Here's the real timeline, and what to do at each stage.
Aquaponics has a timeline that surprises most beginners: the first month is almost entirely setup and waiting, and the second month is when things start feeling like a real garden. Knowing what to expect makes the patience much easier to hold.
Here’s what your first eight weeks actually look like.
Week 1: Build it and fill it
Set up your system before you overthink it. Place your tank, fill it with dechlorinated tap water (either use a water conditioner like API Stress Coat, or let the water sit 24–48 hours to off-gas chlorine), and add your grow media to the grow bed. Plant a few fast-germinating seeds directly into the clay pebbles: basil, lettuce, and radishes are good first choices.
Add your water pump, set it to run on a simple outlet timer (15 minutes on, 45 minutes off works for most media-bed systems), and let the water cycle for a day before you test anything.
What not to do this week: Don’t add fish yet. This is the single most common beginner mistake. The tank water is not ready for fish; there are no beneficial bacteria to process the ammonia fish produce, and the fish will die within days.
This is the phase nobody warns you about. The nitrogen cycle (colonizing your grow bed with the beneficial bacteria that convert fish waste to plant food) takes 3–6 weeks in a new system. You can’t rush it. You can only measure it.
Here’s what’s happening: fish produce ammonia as waste. Ammonia is toxic to fish and useless to plants. Two strains of bacteria convert it in sequence: Nitrosomonas convert ammonia to nitrite, then Nitrospira convert nitrite to nitrate. Nitrate is what plants use. Your grow bed is the home for both bacterial strains.
What to do during cycling:
Add a small ammonia source daily (a pinch of fish food left to dissolve, or a small amount of bottled ammonia, not bleach, not cleaning products)
Test with your API Master Test Kit every 2–3 days
Track ammonia, nitrite, and nitrate readings in a simple notebook or phone note
What you’re watching for: First, ammonia rises. Then nitrite rises as Nitrosomonas colonize. Then nitrate rises as Nitrospira colonize. When ammonia and nitrite both drop back toward zero and nitrate is climbing, you’ve cycled. This typically looks like a 3–4 week process.
Your plants will grow slowly during this phase; the nutrient supply is inconsistent. That’s normal. Don’t add fertilizer.
Weeks 5–6: Adding fish
When ammonia and nitrite both read below 0.25 ppm on two consecutive tests 48 hours apart, you’re ready for fish.
Start with fewer fish than your system can support. A common guideline for media-bed systems is 1 inch of fish per gallon of fish-tank water. For a 10-gallon tank, that’s two or three small goldfish (not eight).
Acclimate fish carefully: Float the sealed fish bag in your tank for 15–20 minutes so temperatures equalize. Then add small amounts of your tank water to the bag over another 15 minutes before releasing. The temperature and pH shock from going directly from pet-store water to your tank water can kill fish even in a perfectly cycled system.
Feed sparingly in the first two weeks: a pinch once daily, no more. Uneaten food rots, spikes ammonia, and undoes weeks of cycling work.
Weeks 7–8: First harvest
By week seven, herbs planted in week one are ready to harvest. Cut basil above a node (the point where two leaves branch), leaving at least two sets of leaves on the plant; it will regrow and produce continuously. Lettuce can be cut in the same way (cut-and-come-again harvesting).
The system should be finding its balance now: ammonia and nitrite stable near zero, nitrate slowly rising (indicating healthy plant uptake), plants growing visibly each week.
Things that are normal at this stage:
Some algae on tank walls and media (not a problem unless it’s excessive)
Minor pH fluctuations (0.1–0.2 units) day to day
One or two plants that didn’t germinate; replant those slots
Things that need attention:
Ammonia or nitrite spiking above 1.0 ppm: reduce feeding immediately, do a 20% water change
pH below 6.0 or above 8.0: this will stress fish and inhibit plant nutrient uptake
Fish gasping at the surface: oxygen deficiency; add an air stone and check your pump
The things that catch beginners off guard
Plants grow slowly at first, then fast. The first month is sluggish because the nutrient pipeline is still establishing. By months two and three, growth accelerates significantly. Don’t give up in week three because your lettuce looks stunted.
Fish die sometimes, and that’s not failure. Even experienced aquaponic gardeners lose fish occasionally. If you lose fish in the first two weeks, it’s likely a water chemistry problem; test immediately and adjust before restocking. If you lose fish after a stable period, look for oxygen deficiency, temperature swings, or disease.
The biology is the real skill. The gear matters, but it’s secondary. The growers who succeed are the ones who test their water regularly, notice when something is off, and respond early. A $5 bag of test solution is worth more than a $200 filtration upgrade.
What happens at month three
By the end of month two, a well-managed system runs with minimal intervention: feed the fish, top off evaporated water, and harvest. Month three is when most growers start experimenting: adding a second grow bed, trying fruiting crops, or upgrading fish density.
That’s also when the economics start to make sense. A well-stocked 10-gallon system can produce enough salad greens for one person indefinitely. Scale it up with a 30-gallon tank and a larger bed, and you’re producing vegetables that genuinely offset grocery costs.
Save your money
What you don't need yet
Beginners get pressured to buy a lot of stuff that doesn't help them play
better. Here's what we'd skip on day one.
A sump tank — Not needed until your system grows beyond 50–100 gallons. Learn the biology first.
Automatic bell siphon — Understand flood-and-drain cycles manually before automating them. Timer-controlled pumps work fine.
Expensive fish (koi, ornamental species) — Goldfish and tilapia teach identical water chemistry at a fraction of the cost and heartbreak.
Dosing systems (iron, potassium supplements) — Learn what your plants actually need before adding supplements. Deficiencies are diagnosable; don't guess.
UV sterilizer — Useful for controlling algae in mature systems, but irrelevant in your first 6 months.
First week
Your first seven days
A short, real plan to get from gear-on-doorstep to actually playing.
Order your starter system before deciding anything else. · Buy
How long before I can add fish to a new aquaponics system?
3–6 weeks. This is the nitrogen cycle: beneficial bacteria need time to colonize your grow bed and convert fish waste (ammonia) into plant-safe nitrates. Test every 2–3 days; when ammonia and nitrite both read near zero, you're ready. Rushing this step is the #1 reason beginner fish die.
What fish are easiest for beginners?
Goldfish and guppies are the best starting fish (hardy, tolerant of beginner water chemistry mistakes, and cheap to replace if something goes wrong). Tilapia are excellent for larger systems and grow fast. Avoid koi and expensive ornamentals until you've successfully cycled and maintained a system for at least six months.
What can I grow in an aquaponics system?
Leafy greens (lettuce, spinach, kale, chard), herbs (basil, mint, chives, cilantro), and fruiting plants (cherry tomatoes, cucumbers, peppers) all thrive. Root vegetables like carrots don't work well in flood-and-drain media beds. Start with fast-growing herbs and greens; the rapid results keep you motivated while the system stabilizes.
Do I need to do water changes in an aquaponics system?
Much less than a regular aquarium. In a balanced system, the plants consume the nutrients fish produce, and water evaporation is the main loss. You'll top off with dechlorinated water weekly and do partial changes (10–20%) every 1–2 months. A system with high fish density relative to plant biomass will need more frequent changes.
Can I run aquaponics indoors year-round?
Yes, it's one of aquaponics' main advantages over outdoor gardening. You'll need a grow light (12–16 hours daily), water temperature management for warm-water fish (68–82°F for tilapia), and adequate ventilation. Many serious home growers run basement systems that produce greens all winter.
How much does a beginner aquaponics system cost to run monthly?
Electricity for a small countertop system is under $5/month. A grow light running 14 hours daily adds $10–20/month. Fish food is negligible; a pound of quality flake food lasts months. Water costs vary by location. Most small systems run $15–30/month after the initial setup, which a good herb harvest can easily offset.
Backyard Aquaponics Forum — Long-running community forum. The best place for troubleshooting; search before posting, the answers are usually there.
r/aquaponics — Active subreddit. The wiki covers cycling, fish selection, and common problems. Best for quick questions and system showcase.
API Fishcare (water chemistry guides) — API makes the test kits most aquaponics growers use. Their water chemistry guides are accurate and beginner-friendly.
As an Amazon Associate, JustBeginning earns from qualifying purchases.
We may also earn commission from other affiliate programs linked on this
page. Editorial recommendations are independent; we don't choose
products based on commission rates.
Product prices and availability are accurate as of the date and time
indicated and are subject to change. Any price and availability
information shown on Amazon at the time of purchase will apply.


 Best starter