Backyard chickens are the hobby that looks simple until you're reading hardware cloth specs at 11pm and calculating square footage per bird. Here's the honest version: what to actually buy, what's overrated marketing, and the one coop sizing mistake every first-timer makes.
By Colin B. · Published May 27, 2026 · Last reviewed June 21, 2026
First-year costs vary wildly based on your coop. Budget $450 minimum for a real setup - most beginners spend $800-1,200 once feed, brooder, and supplies are factored in.
We earn commission on qualifying Amazon purchases — see our
affiliate disclosure.
Price tiers and budget totals shown above are editorial estimates;
actual Amazon prices vary.
At a glance
Our top pick in each category
The fastest path through this guide — each best-starter pick by category.
Scroll for the budget and upgrade alternatives.
Check your local ordinances before spending a dime. Many cities allow hens but ban roosters. Some cap the number of birds or require a permit. Search '[your city] backyard chicken ordinance' - five minutes now saves a lot of headaches later.
Start with 3-4 hens, not 8. 'Chicken math' is real - you'll want more birds than you planned. Start small, learn the rhythm, then add in year two when you know what you're doing.
Decide now: chicks or pullets. Baby chicks ($3-8 each) need 6-8 weeks of brooder care before they go outside. Pullets ($20-40 each) are near-adult hens that skip the brooder and start laying sooner. Chicks give you more breed selection and a longer laying life. Pullets are faster. Both are valid - just decide before you buy the brooder.
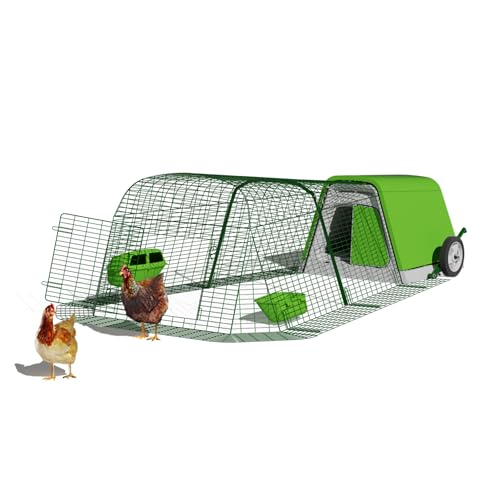
Your coop is the most expensive and most regretted purchase in this hobby. Most Amazon coops are sized for 2 birds while being marketed for 6, built from thin wood that rots after one wet winter, and designed by people who've never kept chickens. The real rule: 4 square feet per bird inside the coop, 10 square feet per bird in the run. Whatever the marketing says, cut the claimed bird count in half. Buy once, buy right - a coop that falls apart after one season means paying twice.
Coop — what's the difference?
A few common shapes, each making a different trade.
Compact (2–4 hens)
Small footprint; enough daily eggs for one or two people.
Coop floor
12–16 sq ft
Run
20–40 sq ft
Daily eggs
1–3
Best for Urban yards, renters, or trying chickens before committing long-term
Tradeoff Limited expansion room - hard to add birds without a new coop
Standard (4–8 hens)
The sweet spot - enough eggs, enough variety, manageable chores.
Coop floor
20–32 sq ft
Run
40–80 sq ft
Daily eggs
3–6
Best for Most beginners; a family's egg supply with room to spare
Tradeoff Larger assembly and higher upfront cost than a compact coop
Serious production - build a run or buy a walk-in kit.
Coop floor
32–60 sq ft
Run
80–150 sq ft
Daily eggs
6–12
Best for Homesteaders or serious egg sellers with yard space to spare
Tradeoff Substantial cost ($1,500-3,000+) and meaningful daily chore commitment
Best starter
Precision Pet
Hen Chicken Coop
$$$
★★★★★Our rating
One of the few Amazon coops that survives honest reviews: solid wood construction, pull-out cleaning tray, and a fully enclosed run that's actually predator-resistant. Marketed for 4-6 birds - realistically comfortable for 3-4. Tall enough that you can reach in to clean without dislocating your shoulder, which matters more than it sounds after the first month.
What we like
Pull-out tray makes coop cleaning a 10-minute job, not 45
Fully enclosed run top - essential protection against aerial predators
Solid build that survives multiple winters with basic upkeep
What to know
Sized honestly for 4 birds, not the 6 the listing implies
Wood needs weatherproofing annually to stay in good shape
Natura Peak Roof Brown Chicken Coop with Outdoor Run
$273.67 as of Jun 22, 2026
★★★★☆Our rating· Only 5 left in stock - order soon.
The most reliable of the budget coops. Trixie builds small-animal housing at scale and quality control is better than no-name brands at the same price. Good for 2-3 birds max, realistically. Smart starter for small urban yards or anyone not yet sure they'll stick with the hobby long-term.
What we like
Best quality control at the budget price point
Small footprint fits urban or rental-property yards
What to know
2-bird capacity in practice - don't let the listing mislead you
Thin wood won't survive more than 2-3 winters without sealing
The gold standard of small coops. Dual-wall insulated plastic keeps birds warm in winter and cool in summer, wipes down in minutes (no power-washing wood), and Omlet's run panels are predator-tested seriously. Expensive at $600+, but owners keep these for 15+ years. If you're committing to chickens, the math works.
What we like
Insulated plastic wipes clean in 10 minutes vs. an hour scrubbing wood
Predator-resistant run tested seriously against foxes and raccoons
What to know
$600+ is genuinely expensive for a 2-4 bird coop
Run is small - extension ($200+) essentially required for flocks over 3
Baby chicks can't regulate their own temperature for the first 6-8 weeks of life - they need external heat at 95°F in week one, dropping 5°F each week until they're feathered out. Traditional heat lamps work, but they cause coop fires with alarming regularity (check any chicken forum). Electric brooder plates mimic a mother hen: chicks crawl underneath, self-regulate, and face zero fire risk. Get your heat source ready before chicks arrive - you will need it on day one.
Best starter
Brinsea
EcoGlow Safety 600 Chick Brooder
$62.48 as of Jun 22, 2026
★★★★★Our rating· In Stock
No fire risk - that's the headline. Traditional heat lamps are the leading cause of coop and barn fires; read any chicken forum long enough and you'll find the horror stories. The EcoGlow mimics a mother hen: chicks crawl under the warm panel and regulate their own temperature naturally. It uses 18W instead of 250W, requires no hourly checks, and auto-adjusts height as chicks grow.
What we like
No fire risk - electric plates are dramatically safer than heat lamps
18W draw vs 250W - runs all day without meaningful electricity cost
Chicks regulate their own temp naturally, which improves hardiness
What to know
Higher upfront cost than a heat lamp ($50-70 vs. $15)
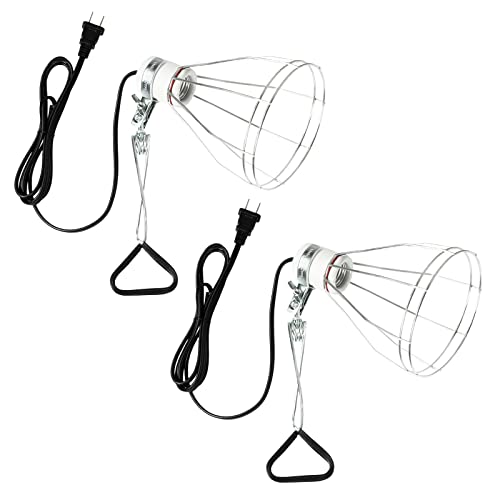
The traditional brooding setup: a ceramic clamp socket with a 250W red infrared bulb (sold separately), hung over the brooder. At $25-35 complete, it's the cheapest entry into brooding - billions of chicks have been raised this way. The tradeoff is real: heat lamps are the leading cause of coop fires. Use ceramic (never plastic), double-secure the fixture, and check it often.
What we like
Cheapest possible setup - $20-30 for the complete kit
Works for any batch size; just add lamps for larger brooders
What to know
Leading cause of coop and barn fires - treat this seriously
Burns at 250W all day; your electricity bill will notice it
Chicken feed isn't one-size-fits-all. Baby chicks (0-8 weeks) need chick starter: high protein (18-20%), usually medicated with amprolium to prevent coccidiosis - the parasitic disease that kills a significant percentage of unprotected chicks. Teenagers (8-18 weeks) can continue on starter or switch to a grower feed. Laying hens need layer pellets with added calcium for shell production. The single most common mistake: switching to layer feed too early. Layer calcium damages young kidneys - wait until hens are 18+ weeks.
Best starter
Purina
Start & Grow Medicated Chick Starter
$$
★★★★★Our rating
The brand every vet and most experienced keepers default to. Medicated with amprolium - a coccidiostat that prevents coccidiosis, the intestinal disease that's the #1 chick killer. You're not dosing your birds with heavy medication; you're blocking a specific parasite. The medicated version is the right default for most beginners whose birds will live on soil.
What we like
Medicated formula prevents coccidiosis - the #1 chick killer
Purina's quality control is the best in mass-market poultry feed
Crumble texture is easy for day-old chicks to eat immediately
What to know
Skip if chicks were vaccinated for cocci - medication cancels the vaccine
25 lb bags require a lidded bin to stay dry and rodent-free
When hens start laying (18-20 weeks), they need the extra calcium in a layer feed for shell production. Layena+ adds omega-3s via flaxseed, which passes through into your eggs. Backyard eggs already have 3-5x the omega-3s of store eggs - Layena+ pushes that higher. Not marketing fluff; measurable in nutritional testing.
What we like
Omega-3 enriched via flaxseed - measurable difference in your eggs
Pellet format reduces waste vs. crumbles for adult laying hens
Consistent calcium levels mean consistent, strong shell quality
What to know
More expensive than generic layer feed - the omega-3 premium is real
Pellet size can be large; young pullets (18-20 weeks) may prefer crumbles
If your chicks were vaccinated for coccidiosis at the hatchery - common with Marek's combo vaccine packs - medicated feed cancels the vaccination. Manna Pro's non-medicated starter is the right call in that case, and it's reliably available and priced lower than Purina. Ask your hatchery whether your chicks were vaccinated before deciding.
What we like
Right choice if chicks were vaccinated for coccidiosis at the hatchery
Lower price than Purina without sacrificing core nutrition
What to know
No coccidiosis protection - cleanliness management becomes critical
Less available at farm stores than Purina in some rural areas
Chickens will poop in open water within minutes of you setting it out. Traditional open font waterers require daily scrubbing and are a direct vector for coccidiosis. Nipple waterers - a simple tube with horizontal push-nipples - seal the water supply completely: birds tap a nipple to drink, nothing gets in. For feed: hanging feeders reduce waste significantly versus ground feeding and keep the feed dry. Get both set up before your chicks move in.
Best starter
RentACoop
2 Gallon Chicken Waterer with Horizontal Nipples
$39.95 as of Jun 22, 2026
★★★★★Our rating· In Stock
The upgrade that saves the most daily labor in chicken keeping. Traditional open waterers get contaminated with bedding and poop within minutes. Nipple waterers seal the supply - birds push a horizontal nipple to drink, nothing gets in. This 1-gallon version handles 4-6 birds for around $25. It pays for itself in 10 minutes of saved daily scrubbing.
What we like
Sealed design keeps water clean indefinitely - no daily scrubbing
Horizontal nipples reduce drip mess vs. vertical nipple systems
Under $30 for a complete ready-to-hang system
What to know
Requires a training period - dip their beak to the nipple 2-3 times
Needs a water heater or indoor overnights in sub-freezing climates
★★★★☆Our rating· Only 11 left in stock - order soon.
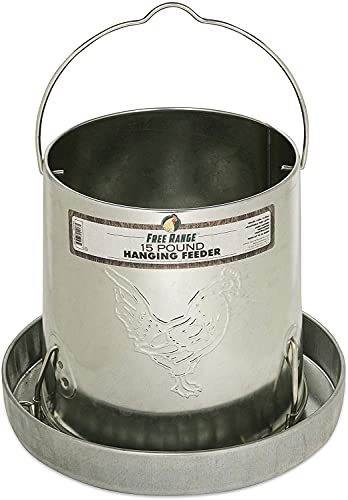
A simple, reliable hanging feeder - galvanized steel resists rust, has drainage holes so rain runs off instead of pooling and souring the feed. Hung at bird shoulder height (raise as they grow), it cuts waste by stopping birds from flicking feed onto the ground. The standard answer before you want anything fancier.
What we like
Galvanized steel resists rust for years of outdoor use
Hanging design keeps feed off the ground, cutting waste
What to know
Open top - wild birds and rodents access it freely overnight
Feed gets wet in rain without a covered run or roof above
Rodent-proof, weather-proof, and completely automatic. The treadle (foot pedal) opens the lid only when a chicken steps on it - no sparrow, mouse, or rat can get in. At $150+, it's a luxury item. But if rodents are already a problem in your yard (open feeders draw them fast), it pays for itself in saved feed and skipped pest control. Most owners say they wish they'd bought it from the start.
What we like
Treadle mechanism locks out rodents and wild birds completely
Feed stays dry and fresh - no molding between fill-ups
Worth the $150 premium if rodents are already visiting your yard
What to know
1-2 week training period before birds use it consistently
$150+ is expensive for a feeder - hard to justify until you see rodents
The deep litter method - adding fresh bedding on top and turning it occasionally, with a full cleanout every 6-8 weeks - is the easiest approach and produces excellent garden compost. Use large flake pine shavings: absorbent, compostable, and cheap at farm stores. Avoid cedar (the aromatic oils irritate chicken airways) and fine sawdust (chicks inhale it). For smell between cleanouts, Sweet PDZ is the one product that actually works - it neutralizes ammonia at the source rather than masking it with fragrance.
Best starter
Small Pet Select
Pine Shavings Chicken Bedding (141L)
$$
★★★★★Our rating
Large flake shavings are the gold standard for coop bedding: absorbent, compostable into excellent fertilizer, and easy to turn in the deep litter method. Small Pet Select's quality control is excellent - consistent flake size, no fine dust that causes respiratory issues, and ships in compressed bales that expand significantly. One bale covers a 4x6 coop with a full 3-4 inches of bedding.
What we like
Large flake absorbs moisture and odor better than fine shavings
Composts into excellent nitrogen-rich garden fertilizer
Dust-free quality safe for both adult hens and young chicks
What to know
Costs more per bale than bulk shavings at a farm store like Tractor Supply
Bulky bales - store in a dry covered space before opening
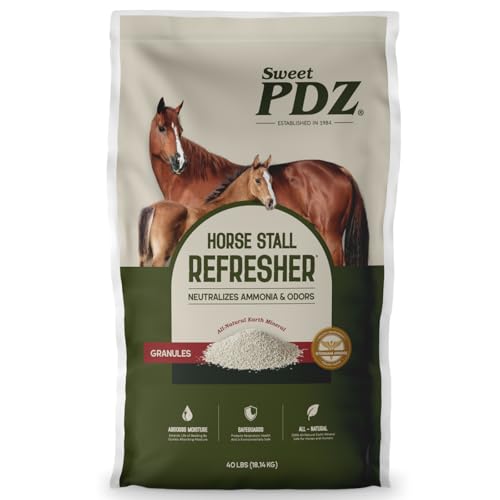
The best coop odor control product, and it's not close. Sweet PDZ is a naturally occurring zeolite mineral that adsorbs (not just absorbs) ammonia directly. Sprinkle under fresh shavings on the hot spots - under the roost bar is where 80% of the poop lands - and the eye-watering ammonia smell on a summer day drops dramatically. Safe for birds, adds no chemicals, composts fine.
What we like
Neutralizes ammonia at the source - not masking odor with scent
Safe for birds, composts cleanly alongside pine shavings
A 40 lb bag lasts months at normal coop use
What to know
Buy granular only - powder version creates respiratory dust
Additive only - doesn't replace regular full coop cleanouts
Pine Shavings Chicken Bedding, Coop and Brooder Supplies for Chickens and Baby Chicks, 2 Pack, 141L (282L Total)
$70.55 as of Jun 22, 2026
★★★★☆Our rating· In Stock
Compressed blocks look small but expand 3-4x when fluffed - one block covers a 4x6 coop with a full layer of bedding. Cheaper per cubic foot than pre-fluffed bagged shavings, much easier to store before opening. The go-to for anyone without a farm store nearby who doesn't want to pay premium shaving prices.
What we like
Expands 3-4x when opened - much more bedding than the size suggests
Cheaper per cubic foot than typical pre-fluffed bagged shavings
What to know
Harder to break apart than loose shavings - a pitchfork helps
Slightly dustier than premium shavings when first fluffed
Getting chicks is easy. Keeping them alive and thriving through the first two months is where the learning happens. Here's what to expect, what to watch for, and when to stop worrying.
Eight weeks. That’s how long it takes a fluffy, peeping ball of down to become a feathered, opinionated teenager ready to move outside. The brooder phase is where most beginner mistakes happen - not because it’s hard, but because nobody tells you what “normal” looks like. This is what the first two months actually look like, week by week.
Before day one: get the brooder ready first
The single most important rule of chick-keeping: your brooder must be set up, warmed, and running before your chicks arrive. Chicks are shipped as day-olds via USPS, often spending 24-36 hours in transit. They arrive cold, stressed, and thirsty. You need to put them somewhere warm immediately.
A brooder is just a heated, contained space. A cardboard box, a plastic storage tote, or a purpose-built brooder - any of them work for the first few weeks. What matters is the heat source and that they can’t escape.
The one thing that saves the most worry: choose an electric brooder plate (like the Brinsea EcoGlow) instead of a heat lamp. Brooder plates are the leading cause of not having a coop fire. Heat lamps work - billions of chickens have been raised under them - but they also cause fires when they fall, tip, or get bedding too close. Electric plates use 18 watts instead of 250, require zero hourly check-ins, and the chicks love them. Start there.
Set up the brooder 24 hours early. Get the temperature under the plate to around 95°F at the surface level. Have fresh water ready, have feed poured, and have a thermometer reading. Then go pick up your chicks.
Your chicks arrive and they are very small and very loud. Here’s what to do:
The first 30 minutes matter most. Dip each chick’s beak into the water - gently, just enough that they feel it. This teaches them where the water is and gets them hydrated after transit. Do this for every single chick before you put them all in together.
Read the chick pile, not a thermometer. The best indicator of whether your brooder is the right temperature is how the chicks behave:
Huddled directly under the heat source, pile-up style → too cold. Lower the plate.
Scattered to the edges, away from the heat, panting → too hot. Raise it.
Spread throughout the brooder, eating, drinking, running around → exactly right.
This is why brooder plates are better than lamps: the chicks can self-regulate. They crawl under when cold, emerge when warm. The thermometer is a backup, not the primary tool.
Feed and water are constant. Chicks eat and drink constantly for the first two weeks. Refill water every day, or more in hot weather. Keep feed available at all times - they don’t overeat. Use chick starter crumbles (medicated unless they were vaccinated at the hatchery). No treats for at least the first two weeks - their digestive system is still developing.
Expect mess. A lot of it. Pine shavings go everywhere. Waterers get poop in them by the second day. Change bedding every 2-3 days minimum. A wet, ammonia-smelling brooder causes respiratory problems.
Normal chick behaviors that look alarming but aren’t:
Sudden sprinting for no reason (“zoomies” - completely normal)
One chick lying flat, appearing dead, then bouncing up immediately (napping in unusual positions)
Chicks pecking aggressively at each other (sorting out hierarchy - watch for blood, but mild pecking is fine)
A lot of chirping (they’re chickens; they chirp)
Weeks 3–4: the feather explosion
Around day 14, you’ll notice pin feathers emerging along the wings. By day 21, your chicks look like miniature punk rockers - some feathers, some fuzz, extremely awkward. This is completely normal.
The temperature requirement drops 5°F each week. By week three, you’re targeting about 80°F under the plate. They’re also significantly more active and will start attempting escape from the brooder. Raise the sides or add a cover with ventilation.
This is also when you’ll notice pecking order establishment, and it will occasionally look violent. Chickens are not gentle with each other. As long as there’s no blood drawn and no single bird being isolated and pile-attacked, let them sort it out. The hierarchy they establish at three weeks will basically hold for life.
Brooder size matters more now. The rule of thumb: half a square foot per chick for the first month, one square foot per chick after. A 4-cubic-foot plastic tote works for four chicks through week three; by week five, you’ll need something larger or they’ll start cannibalizing each other (crowding causes feather-pecking, which causes blood, which escalates fast).
Grit becomes necessary. Once chicks start eating anything other than crumbles - if you give them any treat, any greens, any insects - they need grit (small stones that go into their gizzard and grind food). Chick grit is available at any feed store. Sprinkle it like salt over their feed a few times per week.
Weeks 5–6: the teenager phase
By week five, most breeds look fully feathered except for some patches of remaining fuzz around the head and neck. They have opinions, they have social dynamics, and they are increasingly loud.
Temperature-wise, they’re close to ready for the outdoors. If your outdoor temperatures are above 60°F during the day and above 50°F at night, they can start going outside during daylight hours. Don’t put them outside in the cold overnight yet - they still need the brooder for warmth until they’re fully feathered.
The hardening-off period: like hardening off seedlings, you want to expose chicks to outdoor temperatures gradually. Start with an hour outside in a sheltered spot during the warmest part of the day. Build up over a week until they’re outside all day. Watch them for shivering - if they’re shivering, it’s too cold.
This is also when the coop should be ready, cleaned, and predator-proofed. If you haven’t already, do a night inspection of the coop with a flashlight: look for gaps wider than half an inch anywhere in the run. Raccoons are stronger than you think and patient in a way that’s unsettling. Hardware cloth on every surface, including the floor if predators can dig.
Weeks 7–8: moving day
At 8 weeks, most breeds are fully feathered and ready to move to the coop permanently. Some cold-climate breeds need an extra week or two. The test: if temperatures won’t drop below 50°F overnight and the birds are fully feathered, they’re ready.
Transition tip: move them in the evening. Chickens have terrible night vision and are docile in the dark. They’ll wake up in the coop confused but settled, and by the second morning they’ll understand where home is.
The first night is the hardest for you, not them. You will be tempted to go check on them every 15 minutes. They’re fine. Check once, make sure everyone is inside and the door is latched, then go to bed.
Water freeze management starts now if you’re in a cold climate. Nipple waterers freeze; traditional fonts freeze. A heated water base ($30-50) is worth it - frozen water means no water, which means dead birds within 48 hours in winter. Add this before the first hard freeze, not after.
Every beginner worries about the same handful of things. Here’s the honest assessment:
“One of my chicks seems weak.” In a hatchery batch, one or two runts are normal. As long as they’re eating, drinking, and not being bullied into a corner, give them a week. If they stop eating or show labored breathing, that’s different - seek advice from BackyardChickens.com forums or a vet.
“They’re not laying yet.” If your birds are under 18 weeks, relax - they can’t. Most breeds start at 18-24 weeks. Don’t rush them.
“My eggs look weird.” First eggs from new layers are almost always weird: double-yolked, soft-shelled, tiny “fart eggs.” This is the system calibrating. It normalizes within a few weeks.
“Something dug under the coop.” If it’s just a shallow scrape, it’s probably squirrels or curious animals. If there’s a deep tunnel under the wire and you’re missing birds, that’s a digger - fox or raccoon. Hardware cloth apron buried 12 inches out from the run perimeter solves this permanently.
Save your money
What you don't need yet
Beginners get pressured to buy a lot of stuff that doesn't help them play
better. Here's what we'd skip on day one.
Automatic coop door opener — Nice for sleeping in, but at $100-200 it's a year-two purchase once you know you're committed to the hobby.
Egg incubator — You can't hatch eggs without a rooster, and you probably don't have one. Save this for year two when you're thinking about expanding the flock yourself.
Chicken saddles / hen aprons — These protect hens' backs from overzealous mating. Only relevant if you have a rooster - without one, they're just fabric decorations.
Fermented feed setup — Fermented feed improves gut health and feed efficiency, but it's an advanced technique. Master the basics of dry feed first.
Diatomaceous earth — Frequently oversold as a cure-all for mites. It helps when applied correctly, but get your setup solid before adding supplements to the rotation.
First week
Your first seven days
A short, real plan to get from gear-on-doorstep to actually playing.
Check your city's backyard chicken ordinance - search '[city name] backyard chicken ordinance'. Look for hen limits, rooster bans, and setback requirements from property lines. · Action
Decide chicks vs. pullets and source them. Local feed stores carry chicks in spring. Hatcheries ship them via USPS directly to your door. · Action
My Pet Chicken · Good breed selection with beginner-friendly breed descriptions
Set up your brooder BEFORE chicks arrive. You need heat, water, and feed ready on day one - chicks are fragile in transit and need to warm up immediately. · Action
Order your brooder heat source so it arrives before the chicks do. · Buy
Inspect your run for gaps bigger than half an inch. Hardware cloth (not chicken wire) should cover any opening - raccoons reach through chicken wire and pull birds through. Predator-proofing is the most skipped step and the most regretted. · Action
Tell your neighbors. A heads-up (and eggs once they start laying) keeps the relationship smooth in dense neighborhoods. · Action
FAQ
Common questions
How many eggs will I get per week?
A healthy laying hen produces about 5-6 eggs per week at peak production (spring and summer). Production drops in fall and winter as daylight decreases, and slows significantly after age 3-4. Four hens at peak production give a family more eggs than most can eat.
Do I need a rooster to get eggs?
No. Hens lay eggs regardless of whether a rooster is present - unfertilized eggs are the same thing as commercial eggs. You only need a rooster if you want to hatch chicks. Most urban ordinances ban roosters anyway due to noise.
What's the #1 predator threat for backyard chickens?
Raccoons, by a wide margin. They're smart, strong, and nocturnal - and they will reach through chicken wire and pull birds apart. Use hardware cloth (half-inch mesh, 19 gauge or heavier) on any opening in your run. 'Chicken wire' keeps chickens in but doesn't keep predators out.
When do chickens start laying?
Most common breeds begin laying at 18-24 weeks old. Production breeds (ISA Browns, Golden Comets) can start closer to 16 weeks. Heritage and dual-purpose breeds can take 24-30 weeks. You'll notice the comb and wattles redden noticeably about 2-4 weeks before the first egg.
How much does it cost per year after setup?
Feed runs $20-30 per month for 4-6 birds (around $300/year). Bedding adds $50-100. Vet visits are rare but possible. Total annual ongoing cost is typically $400-600 for a small flock - offset by eggs if you value them at store prices.
What breeds should a beginner start with?
For reliable egg production and calm temperament: Rhode Island Reds, Buff Orpingtons, and Barred Plymouth Rocks are the classic beginner trifecta. Black Sex-Links and ISA Browns lay more eggs but have shorter productive lives. Avoid Leghorns (flighty) and bantams (low production) for your first flock.
BackyardChickens.com — The largest backyard chicken community online. Not a gear guide - a forum. Search specific questions (breed comparisons, illness symptoms, predator identification) and read multiple threads.
The Chicken Chick - Kathy Shea Mormino — The best single-author resource for beginner chicken keepers. Well-cited, practical, and opinionated in the right ways. Her coccidiosis and deep litter articles are essential reading.
Meyer Hatchery Blog — Practical husbandry articles from a working hatchery. Breed guides, seasonal care, and chick troubleshooting - all grounded in actual flock management.
Purina Poultry Learning Center — Feed recommendations and life-stage guidance from the leading poultry feed brand. Vet-reviewed content on cocci, molting, egg production, and flock health.
State Extension Poultry Programs — State extension services publish free, peer-reviewed guides on backyard flock management. Search your state + 'poultry extension' for local breed and climate-specific advice.
My Pet Chicken Breed Selector — Filter breeds by temperament, egg color, climate tolerance, and production level. The most practical breed comparison tool for beginners choosing their first flock.
As an Amazon Associate, JustBeginning earns from qualifying purchases.
We may also earn commission from other affiliate programs linked on this
page. Editorial recommendations are independent; we don't choose
products based on commission rates.
Product prices and availability are accurate as of the date and time
indicated and are subject to change. Any price and availability
information shown on Amazon at the time of purchase will apply.