Colored pencil is one of the most forgiving mediums to start with: no mess, no drying time, portable enough to draw on your lunch break. The catch is that cheap pencils fight you, and the right paper makes a shocking difference. Here is what actually matters for your first year, and what you can skip.
By Colin B. · Published June 14, 2026 · Last reviewed June 14, 2026
A Prismacolor Premier 48-set and a pad of Bristol smooth paper gets you started around $50. Add a colorless blender pencil and a long-point sharpener and you are at $70. Upgrading to Faber-Castell Polychromos pencils runs $110-150.
We earn commission on qualifying Amazon purchases — see our
affiliate disclosure.
Price tiers and budget totals shown above are editorial estimates;
actual Amazon prices vary.
At a glance
Our top pick in each category
The fastest path through this guide — each best-starter pick by category.
Scroll for the budget and upgrade alternatives.
Do not buy a 72-count set from an unknown brand to start. Those cheap pencils have hard, gritty cores that resist blending no matter how much pressure you apply. A 48-set of Prismacolor Premier costs about the same and works dramatically better.
Paper matters more than most beginners expect. Colored pencil works by embedding pigment into the surface texture of the paper. Regular copy paper is too smooth; rough sketch paper fills too quickly. Smooth Bristol is the standard, and it is cheap.
Wax-based pencils (Prismacolor) and oil-based pencils (Faber-Castell Polychromos) behave differently. Wax blends easily and builds soft gradients fast; oil holds a point longer and takes more layers before waxing out. Start wax, then try oil once you know what you are chasing.
Your pencils are the most consequential purchase in colored pencil art. The medium is entirely about building transparent layers of pigment and then blending them, and cheap pencils have hard, gritty cores that resist blending no matter how hard you press. Professional pencils fall into two main types: wax-based pencils (like Prismacolor) blend effortlessly and forgive beginners; oil-based pencils (like Polychromos) are stiffer but hold a sharper point and do not wax out. Start with a wax-based 48-set. You will know within a few months whether you want to step up.
Colored Pencils — what's the difference?
A few common shapes, each making a different trade.
Wax-Based
Blends fast and smoothly. The default beginner choice. Best paired with a colorless blender pencil.
Core
Wax binder
Blending
Very easy
Lightfastness
Moderate
Best for Beginners, smooth gradients, tutorials that reference Prismacolor
Tradeoff Wax bloom after heavy layering; points more fragile than oil
Highest lightfastness, creamiest cores, and the highest price per stick.
Core
Premium pigment
Blending
Exceptional
Lightfastness
Museum-grade
Best for Serious artists doing finished work meant to last
Tradeoff Price is prohibitive for learning; buy open stock selectively
Best starter
Prismacolor
Premier Colored Pencils 48-Set
$31.72 as of Jun 22, 2026
★★★★★Our rating· In Stock
The go-to wax-based starter set for colored pencil. Thick, creamy cores blend and layer beautifully, and 48 colors is enough to mix nearly any hue you need. Tutorials on YouTube nearly always assume Prismacolors, so following along is easy. The one quirk to know: heavy layering can cause wax bloom, a slight white haze that wipes off with a soft cloth.
What we like
Waxy, creamy core blends effortlessly with a colorless blender
48 colors covers virtually every mixing base a beginner needs
Enormous tutorial library online defaults to Prismacolor
What to know
Wax bloom: heavy layers leave a white haze (wipes off with cloth)
Fragile cores break more easily than oil-based pencils when dropped
If you are genuinely not sure whether colored pencil will stick, this 72-count set costs under $20 and gives you enough colors to explore. The cores are softer and less consistent than Prismacolors, but they hold together for practice work and first studies. Graduate to Prismacolor once you are sure you like the medium.
What we like
Under $20 for 72 colors, genuinely enough to explore the medium
Decent for practice work before committing to premium pencils
What to know
Inconsistent quality; some colors weaker than others
Cores resist blending compared to Prismacolor at the same pressure
The upgrade most colored pencil artists land on. The oil-based core holds a point far longer than wax, takes many more layers before waxing out, and is significantly more lightfast. The switch from Prismacolor to Polychromos feels like jumping from a mass-market pen to a quality fountain pen: a real difference with a real adjustment period.
What we like
Oil core holds a point much longer than wax-based pencils
Takes far more layers before waxing out, enabling deeper realism
Significantly more lightfast than Prismacolor Premier
What to know
Stiff core takes adjustment if you are coming from Prismacolor
More expensive per pencil than wax sets (~$3 each open stock)
★★★★☆Our rating· Only 5 left in stock - order soon.
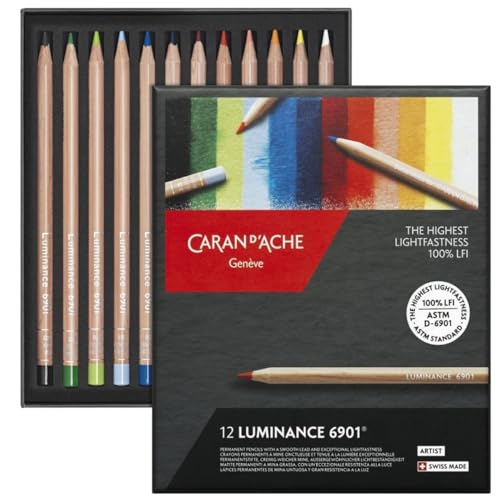
The benchmark for lightfastness in colored pencil: extraordinarily smooth and creamy, with a permanence rating that makes museum-quality work possible. A 12-stick set runs about $65. There is no reason to start here, but if the hobby takes hold, you will end up buying a few open-stock colors eventually.
What we like
Benchmark lightfastness: museum-grade permanence per stick
Exceptionally smooth and creamy, among the finest pencils made
What to know
Eye-watering price per pencil ($5-8 each for open stock)
Overkill for learning; the quality requires real technique to use
Colored pencil is surface-sensitive: the paper you choose changes everything. Too rough and your pigment fills the texture in two passes and goes nowhere. Too smooth and nothing sticks. Smooth Bristol is the standard for realistic colored pencil work because it has just enough tooth to hold many layers, and the surface is consistent pad to pad. Once you have the hang of white paper, toned tan paper opens up a different way of working: you can use both dark shadows and bright highlights (white pencil) in the same drawing because the mid-tone is built in.
Best starter
Strathmore
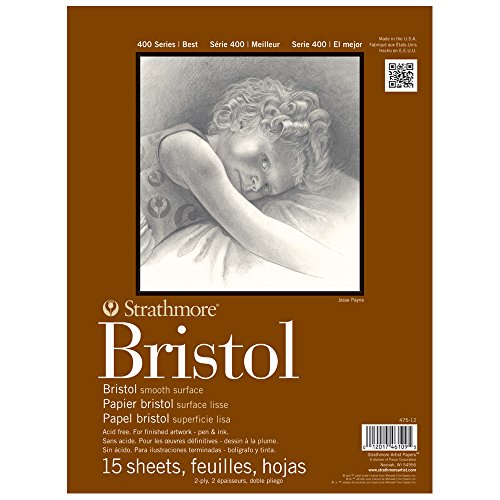
400 Series Bristol Smooth Pad 9x12
$11.88 as of Jun 22, 2026
★★★★★Our rating· In Stock
The reference standard for smooth colored pencil work. Just enough tooth to hold many layers without filling in two passes, and the weight (270 g/m2) means it does not cockle under heavy layering. Almost every colored pencil tutorial assumes you are working on Bristol or something equivalent. Start here.
What we like
Consistent smooth surface accepts 8-10 layers before filling
270 g/m2 weight resists warping under heavy pencil pressure
What to know
Pricier than generic drawing pads; cost adds up on large formats
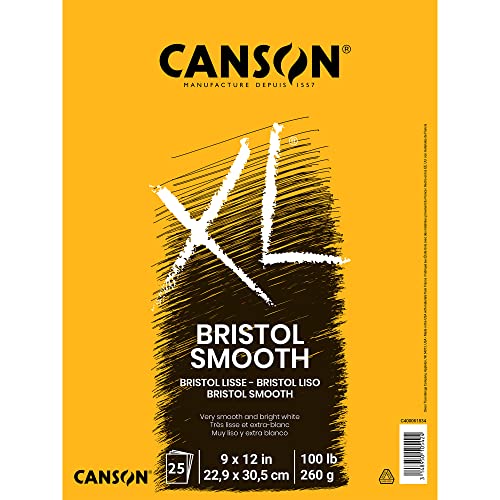
A step down in price from Strathmore 400, and a reasonable paper for practice work. The surface is marginally rougher, which means you will fill the tooth a bit faster on detailed passages, but it is still far better than regular drawing paper for colored pencil.
What we like
Meaningfully cheaper than Strathmore 400 for practice sessions
Still smooth enough to layer and blend properly
What to know
Rougher texture fills faster; not ideal for highly detailed realism
Less consistent sheet to sheet than Strathmore 400 series
★★★★☆Our rating· Only 2 left in stock - order soon.
Toned paper changes what is possible in a colored pencil drawing. On tan paper you use light pencils for highlights and dark pencils for shadows, with the mid-tone provided by the paper itself. The result feels more dimensional faster. Great for portraits and animals once you are comfortable working on white.
What we like
Mid-tone background lets you use white pencil for bright highlights
Warm tan flatters portraits and animal subjects naturally
What to know
Requires unlearning white-paper habits; color relationships shift
Less commonly available in larger sizes at local art stores
Blending is what separates colored pencil work that looks scratchy from work that looks polished. The two main approaches are dry blending with a colorless blender pencil (precise, forgiving, mess-free) and solvent blending with odorless mineral spirits like Gamsol (more dramatic, almost painterly). Start with the colorless blender. It is immediate and adds no new materials to manage. Once you have burned through a few drawings, try solvent blending for smoother gradients and richer color saturation.
Best starter
Prismacolor
Premier Colorless Blender Pencils 2-Pack
$9.99 as of Jun 22, 2026
★★★★★Our rating· In Stock
The simplest way to start blending wax-based colored pencils. Press the colorless core over your layers and the pigment softens and fuses without adding any color. It is precise (pencil-width control), completely mess-free, and works anywhere. Buy the 2-pack: the tip wears down quickly on textured surfaces.
What we like
Precise pencil-point control over exactly where blending happens
No liquids or cleanup: perfect for a portable drawing setup
What to know
Tip wears down quickly; sharpen often or use both ends
Dip a cotton swab in Gamsol, press it over your layers, and the pigment melts into a smooth, painterly wash in one pass. The transformation is dramatic: work that took ten careful layers suddenly looks like an oil painting. Works with both wax and oil-based pencils. A 4 oz bottle lasts years of casual use.
What we like
Transforms layered pigment into a smooth wash in one pass
Works on both wax-based and oil-based colored pencils
What to know
Requires ventilation, even for the odorless formula
Hard to control on first use; solvent spreads beyond the intended area
Colored pencil points matter more than in graphite work. A dull point lays down too much pigment in too wide a stroke, and a broken core wastes an expensive pencil. Cheap plastic handheld sharpeners grip soft wax cores too aggressively and snap them constantly. A two-step long-point sharpener (like the KUM Automatic) first strips the wood casing, then sharpens the core separately, giving you a longer, more controlled point with far fewer breaks. For high-volume use, a quality battery-operated sharpener with a helical blade handles soft cores without the drama.
Best starter
KUM
Automatic Long-Point Sharpener 2-Step
$7.76 as of Jun 22, 2026
★★★★★Our rating· In Stock
The standard recommendation from colored pencil instructors worldwide. The two-step design strips the wood casing in the first hole, then sharpens only the core in the second, producing a long clean point without snapping. It solves the frustrating breakage problem that makes cheap sharpeners useless for professional pencils.
What we like
Two-step design strips wood first, then sharpens core without snapping
Produces a longer, more precise point than single-blade sharpeners
What to know
Two-step process takes a moment to get used to
Blade dulls after heavy use; replacement blades available separately
★★★★☆Our rating· Only 11 left in stock - order soon.
A single-blade long-point sharpener that costs under $4 and does better than a random desk sharpener. You will waste slightly more core per sharpening than with the KUM, but it is a real long-point tool for a budget price. Good for practice pencils or sets where you are less precious about waste.
What we like
Under $4 and meaningfully better than a standard desk sharpener
Produces a real long point good for detail work
What to know
More wood and core waste per pencil than a two-step sharpener
No auto-stop; easy to oversharpen into a very fragile tip
A quality battery-powered sharpener that handles soft wax cores without breaking them, unlike cheap electric sharpeners that destroy Prismacolors on contact. The auto-stop prevents over-sharpening. Worth the price once you are working through pencils quickly during long sessions.
What we like
Auto-stop prevents the over-sharpening that breaks soft wax cores
Consistent results across wax and oil-based pencil brands
What to know
Batteries drain quickly with regular use; keep spares on hand
Bulkier than a pocket sharpener; not great for travel drawing kits
A light box lets you trace a reference sketch or printed photo onto your good drawing paper without ruining expensive Bristol by roughing out a composition in colored pencil (which barely erases). You sketch or print your reference on cheap paper, lay it on the light box, place your Bristol on top, and trace the lines lightly in colored pencil. It is not cheating: every professional illustrator uses one. You do not need one on day one, but most colored pencil artists add a light box within their first month.
Best starter
Huion
A4 LED Light Pad
$$
★★★★★Our rating
A4 size, USB-powered, thin enough to slip into a folder. The Huion A4 is the consensus recommendation for colored pencil artists who want a light box without spending $60. Brightness is adjustable, the surface is scratch-resistant, and it runs off any USB charger you already have.
What we like
USB-powered from any wall adapter or laptop charger
Adjustable brightness handles both light pencil sketches and printed photos
What to know
Light bleeds at edges on maximum brightness setting
The step-up option with a larger working surface, more even light distribution, and a build that does not flex when you press. If you work larger than A4 or do detailed tracing for hours at a time, the Artograph earns its higher price through better ergonomics and longer-lasting even illumination.
What we like
More even light distribution than budget pads; no bright hot spots
Rigid surface does not flex under drawing pressure
What to know
Pricier than budget pads for a tool used occasionally rather than daily
There is a real learning curve in colored pencil, but it does not announce itself. Your first drawing will be scratchy. Your fifth will start to loosen up. By your tenth, you will see what the medium can actually do.
Colored pencil rewards a counterintuitive approach. The beginner instinct is to press hard, cover ground fast, and reach for bright colors right away. The medium punishes all three of those instincts. The artists whose work you admire online built it up in dozens of light, patient layers. That gap between what you see and how it is actually made is the whole learning curve.
Ten drawings will not get you to that level. But they will get you past the frustrating early phase where the pencil scratches across the paper and nothing looks like you intended, and into a place where you can start to see what the medium can do.
Drawings 1 and 2: The pressure problem
Most beginners fill the paper tooth by the third pass. They press hard, lay down saturated color immediately, and then discover there is nowhere to go. The surface is full, the layers cannot build, and the drawing looks flat and overworked.
The fix is embarrassingly simple: use almost no pressure at first.
For your first drawing, pick something simple. An apple, a lemon, a single flower. Spend the first ten minutes doing nothing but value scales on a scrap of Bristol: draw a long rectangle and fill it from almost invisible to full saturation using only one pencil and varying pressure. Get the lightest touch you can manage at one end, and work slowly toward full pressure at the other.
Then apply that same restraint to the actual drawing. Six to eight light layers before you even think about pressing hard. That is the whole first secret. Let layers accumulate; they are doing work you cannot see yet.
Your first drawing will probably still look scratchy. That is expected. What you are building is the habit, not the result.
Drawings 3 through 5: Understanding what layers actually do
By the third drawing you can start thinking about what layering is actually for.
Colored pencil does not mix colors the way paint does. You cannot blend red and yellow on the pencil tip and get orange. Instead, you lay transparent layers of each color over each other and let the eye blend them optically. Red on top of yellow on top of a little brown produces a warm, rich orange that you could not get by pressing hard with one orange pencil.
This is where the medium becomes interesting: you are building depth, not filling area.
The practical technique for these drawings:
Start with the lightest colors. If your subject has yellow highlights and dark shadow areas, lay in the yellow first everywhere, then add orange on top of that in the mid-tones, then red in the darker areas, then maybe a cool dark blue-violet in the deepest shadows. Light first, darks last.
Warm shadows and cool highlights (or vice versa). Real objects have temperature shifts between their lit and shadowed sides. A warm-lit apple has cooler shadows. A cool-lit lemon has slightly warmer shadows. This is what makes a drawing feel like an object instead of a flat shape.
Do not skip the whole surface. Beginners tend to finish one area and move to the next. Instead, build the whole drawing together, layer by layer. Everything stays in proportion and no one area gets over-worked while another stays unstarted.
Your third drawing will probably look better than your first two in ways you can point to but not entirely explain. That is the right feeling.
Drawings 6 through 8: The colorless blender
Around your sixth drawing, add the colorless blender pencil to the process.
A colorless blender is a wax pencil with no pigment. Run it over a layered area and the wax fuses the pigment into a smoother, softer blend. The texture of individual pencil strokes disappears. The colors merge. What was scratchy becomes smooth.
Two things to know before you try it:
First, you need layers before the blender can work. Four or five passes of light color is the minimum. One heavy pass of color and the blender just pushes it around messily.
Second, the blender has a direction. Blend from light areas toward dark areas, not from dark toward light, or you will carry dark pigment into your lights. Go slowly and see what happens before you commit.
The colorless blender changes the character of what colored pencil can produce. Before it: a drawing that looks like a careful, skilled drawing in pencil. After it: something that reads more like a painting. The transition is genuinely startling the first time it works.
By drawing nine, you are probably frustrated that your proportions are off. The subject reads as a lemon but not quite that lemon. The eye looks like an eye but the lid shape is not right.
A light box solves this. Print or sketch your reference on cheap paper, lay it on the light box, put your Bristol on top, and trace the basic outlines lightly in colored pencil. You now have accurate proportions to work within.
This is not a shortcut past the skill of drawing. It is the skill of separating two problems. When you are figuring out proportions at the same time as learning layering and blending, you are doing too many things at once. The light box isolates the color-building problem so you can focus on it.
Tracing gives you the structure. Everything else, all the layering and blending and color choices, is still entirely your own work. Every professional illustrator uses some version of this process.
Drawing nine will feel more controlled than anything you have done before. That is the light box working. Drawing ten will feel like the first drawing you made with real intention.
Every beginner in colored pencil fails at the same handful of things. The list:
Pressing too hard too early. You will do this in your first five drawings. It is the most common mistake and the one that costs the most (the drawing cannot recover once the tooth is full). The only fix is reps and restraint.
Running out of paper. You will accidentally draw to the edge of the usable area before the drawing is done. Start smaller than you think you need to. A 4x6 inch drawing on Bristol is less daunting than a full 9x12.
Choosing too-ambitious subjects. A detailed portrait with hair, skin, eyes, and clothing is not drawing 1. A single piece of fruit is. Give yourself an easy subject for the first five drawings so you can focus on the technique, not on making a complicated thing.
Abandoning drawings too early. A colored pencil drawing at layer three looks bad. At layer eight it looks completely different. Stay in it. Finish drawings even when they look wrong at the halfway point, because the halfway point is supposed to look wrong.
Nobody who sees your work cares about the ones that did not turn out. Neither should you.
What comes after drawing 10
By drawing ten you will have real, specific questions. Questions about how to handle hair or fur (short directional strokes, layered). How to make skin tones look natural (more layers than you think, warm over cool). How to draw realistic eyes (build the iris in concentric rings, add white pencil last).
A few things that make the next ten drawings better:
Find a single subject to specialize in for a while. Portraits, animals, food, flowers: pick one category and draw it ten times in a row. The specificity of focus accelerates learning faster than variety.
Watch Lachri Fine Art on YouTube. Lisa draws in real time, layer by layer, explaining every decision. Watching an entire drawing from first layer to final blending is more useful than any finished-work tutorial.
Buy a few Polychromos pencils open stock. After twenty hours of Prismacolors, try a single Faber-Castell Polychromos in a color you use frequently. The difference in how it holds a point and takes layers will tell you whether oil-based pencils are worth the switch for you.
You are past the hardest part. The medium is no longer fighting you. It is just you and the paper now.
Save your money
What you don't need yet
Beginners get pressured to buy a lot of stuff that doesn't help them play
better. Here's what we'd skip on day one.
A 120-color mega-set on day one — You will use maybe 20 colors in your first 10 drawings. A giant set is confusing before you know what you are mixing. Start with a focused 48-set and buy open stock once you know what is missing.
Watercolor pencils — A separate medium with a completely different technique. Do not mix them into your learning until you have solid dry colored pencil fundamentals.
Fixative spray — Useful for sealing and protecting finished work, but not something you need while practicing. A sheet of glassine paper laid over your drawing protects it fine in the interim.
A drawing tablet or digital tools — Colored pencil has its own following precisely because it is tactile and physical. You do not need digital tools to be good at it, and they will not help you learn the medium.
A separate eraser for every color — One kneaded eraser handles all your lifting and correction needs for the first year. Specialty erasers are for advanced highlight techniques, not beginner mistake-fixing.
First week
Your first seven days
A short, real plan to get from gear-on-doorstep to actually playing.
Order a Prismacolor Premier 48-set and a pad of Strathmore 400 Bristol Smooth. · Buy
Watch a basic pressure and layering tutorial. Lachri Fine Art and Mimi Bondi on YouTube are both excellent starting points for beginners. · Learn
Do a value scale as your first exercise: draw a long rectangle, then fill it from very light to very dark using just one pencil and varying pressure. Learn what the pencil can do before adding color. · Action
Draw something simple from a reference photo: a piece of fruit, a flower, an eye. The goal is 50 deliberate layers, not photorealism. · Action
Try a 3-4 color gradient blend on a scrap of Bristol: lay two colors side by side and blend the overlap with your colorless blender. This is the foundational technique for everything else. · Action
FAQ
Common questions
Do I need to draw well before starting colored pencil?
No. Colored pencil is one of the most forgiving mediums for learning form and shading at the same time. The slow layering process builds observation skills naturally. Start with simple subjects like fruit or flowers and work from there.
What is the difference between wax-based and oil-based colored pencils?
Wax-based pencils (like Prismacolor) blend easily and are forgiving for beginners. Oil-based pencils (like Faber-Castell Polychromos) hold a sharper point and take more layers before waxing out. Most beginners start with wax and migrate to oil once they know what they are chasing.
Can I use regular drawing paper?
Technically yes, but smooth Bristol works dramatically better. Regular drawing paper has inconsistent tooth that fills quickly and is harder to blend on. Buy one pad of Strathmore 400 Bristol Smooth and the difference will be immediately obvious.
How long does it take to finish a drawing?
Simple subjects take 2-4 hours. Realistic portraits or animals with fine detail run 10-40 hours. The slow, layered build is part of the medium's character. Colored pencil is not a fast art form, which is also why the results feel so satisfying.
Can colored pencil mistakes be erased?
Partially. A kneaded eraser lifts light layers; a firm eraser like the Tombow MONO removes more. But you cannot fully erase dark or heavily layered areas. Plan your light values first and reserve bright spots before building up pigment.
What is wax bloom and how do I fix it?
Wax bloom is a white haze that appears on heavily layered wax-based work after a day or two. It is caused by the wax binder migrating to the surface. Wipe it gently with a soft cloth to remove it, or seal the piece with a light coat of fixative spray.
Lachri Fine Art (YouTube) — The most-watched colored pencil instruction channel. Lisa builds realistic drawings step by step and explains her technique layer by layer. Start here for basics.
Mimi Bondi (YouTube) — Excellent tutorials for beginners. Clear explanations of pressure, layering, and blending. Very approachable subjects and teaching style.
Colored Pencil Society of America — The major organization for serious colored pencil work. Their annual juried show is a great benchmark for what the medium is capable of at its highest level.
r/ColoredPencils — Active community with beginner advice, WIP critiques, and gear recommendations. Good for specific product questions and quick feedback on your work.
Colored Pencil Magazine — Online publication with technique articles, artist interviews, and step-by-step tutorials. Better suited to intermediate artists than absolute beginners.
As an Amazon Associate, JustBeginning earns from qualifying purchases.
We may also earn commission from other affiliate programs linked on this
page. Editorial recommendations are independent; we don't choose
products based on commission rates.
Product prices and availability are accurate as of the date and time
indicated and are subject to change. Any price and availability
information shown on Amazon at the time of purchase will apply.
Our top pickPrismacolor Premier Colored Pencils 48-Set


 Best starter