Kintsugi turns broken things beautiful. The Japanese art of repairing pottery with gold-lacquered joinery has a devoted Western following, and rightly so: it's meditative, genuinely gorgeous, and leaves you with something you'll actually treasure. Starter gear runs $60–150. Here's what's worth buying and what the marketing glosses over, particularly the authentic vs. epoxy question.
By Colin B. · Published June 12, 2026 · Last reviewed June 12, 2026
A decent synthetic kit with powder and brushes runs $65–90. Authentic urushi setups push $150–200 but are not necessary until you know you love it.
We earn commission on qualifying Amazon purchases — see our
affiliate disclosure.
Price tiers and budget totals shown above are editorial estimates;
actual Amazon prices vary.
At a glance
Our top pick in each category
The fastest path through this guide — each best-starter pick by category.
Scroll for the budget and upgrade alternatives.
The authentic vs. epoxy question is real, and here's the honest answer: if you're just starting, epoxy-based or synthetic lacquer kits are the right call. They cure in hours instead of weeks, are safe to handle without special precautions, and the results look genuinely beautiful. Real urushi lacquer is worth learning once you're committed, but it requires humidity control, weeks-long curing, and a skin-sensitivity test first.
Buy ceramics to break on purpose. Thrift stores are full of mugs and bowls for $1–3. Pick ones you actually like the shape of; the repair becomes part of the finished piece. Avoid bone china (it shatters into dust) and old lead-glazed pieces (safer to leave them broken).
Start with one clean crack. A mug dropped from six inches or wrapped in a towel and tapped with a mallet typically gives you one or two fracture lines, which is the ideal first project. Dozens of fragments are technically doable but genuinely hard. Save the puzzle-pieces for later.
The gear
What you actually need
Kits
A good starter kit includes adhesive (epoxy or synthetic lacquer), metallic powder, a mixing palette, and at least one brush. Skip bare-bones kits that omit brushes; sourcing them separately costs more than buying up to a complete kit from the start. The variants below settle the authentic vs. epoxy debate.
Kits — what's the difference?
A few common shapes, each making a different trade.
Modern Epoxy / Synthetic Lacquer
Fast cure (hours to one day), beginner-friendly, very good results.
Cure time
2–24 hours
Safety
No special handling
Price range
$20–60
Best for Beginners, decorative repairs, casual hobbyists
Tradeoff Not archival; joints may yellow or soften over decades
Authentic Urushi Lacquer
Weeks to cure, allergy risk, archival quality. For the committed.
Cure time
Weeks–months
Safety
Skin test required
Price range
$80–200
Best for Committed practitioners, heirloom and antique repairs
Tradeoff Time-intensive; unsuitable for those with urushi sensitivity
Best starter
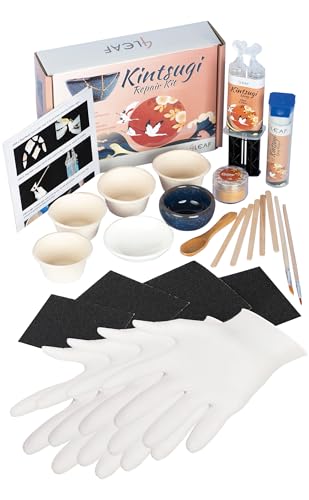
Kintsugi Repair Kit for Ceramics with Practice Bowls
$39.99 as of Jun 22, 2026
★★★★★Our rating· In Stock
The most complete starter kit on Amazon. Comes with epoxy adhesive, gold powder, mixing palette, brush, nitrile gloves, and two practice bowls designed specifically for learning the technique before touching anything you care about. Everything in one box for under $30. The practice bowls alone make this worth it: your first repair should not be on something irreplaceable.
What we like
Includes two practice bowls so you learn the technique risk-free
Complete kit: adhesive, powder, palette, brush, and gloves in one box
Under $30; the right price for a first attempt
What to know
Epoxy adhesive is not food-safe; decorative use only
Included brush is thin; upgrade to a liner brush for cleaner seam lines
Authentic urushi lacquer and real gold powder, supervised by a professional kintsugi artisan. Food-safe once fully cured, making it appropriate for tableware repairs. Requires humidity control, weeks-long curing, and a skin-patch test first (urushi can cause a poison-ivy-like reaction). The right kit once you're committed to doing this properly.
What we like
Genuine natural urushi lacquer and real gold powder: the authentic materials
Food-safe once fully cured; appropriate for tableware repairs
What to know
Requires weeks of curing per coat; 3–6 months for a complete repair
Urushi can cause an allergic skin reaction; always test before your first session
The powder is what makes kintsugi kintsugi. You press fine metallic mica into wet adhesive to create the gold seam. Kit-included powders work but are often coarser and limited to one color. A dedicated gold powder gives you a warmer, more refined shimmer. Silver reads cooler and more modern; bronze is rustic. Most beginners want gold; buy additional colors only if you find yourself wanting to vary the look.
Best starter
Jacquard
Pearl Ex Pigment Powder, Brilliant Gold
$9.52 as of Jun 22, 2026
★★★★★Our rating· Only 2 left in stock - order soon.
Jacquard's Pearl Ex line is the standard choice among kintsugi hobbyists who've moved past kit-included powder. Brilliant Gold is warm, fine-milled, and presses into adhesive cleanly without visible grain. A small 0.75oz jar lasts many repairs. This is what you buy when you want the seam to actually look like gold.
What we like
Fine-milled mica for clean, grain-free seams
Warm Brilliant Gold tone closer to traditional kintsugi aesthetics
Small jar covers 10–15+ repairs easily
What to know
Powder drifts; work on paper and keep the jar capped between steps
Single color; buy additional jars separately if you want silver or bronze
A 50g bag of warm gold mica powder specifically marketed for kintsugi and epoxy resin work. More volume than Jacquard's jar for a similar price, though slightly coarser grind. A smart buy if you want more powder to practice with before settling on a premium single-color option.
What we like
50g is a large volume for the price; plenty of powder to practice with
Marketed specifically for kintsugi and epoxy resin; correct application technique
What to know
Slightly coarser grind than Jacquard Pearl Ex; seams show more texture
Royal Gold tone reads slightly warmer-orange than classic kintsugi gold
You're applying adhesive into a hairline crack and pressing powder onto a seam 1–3mm wide. The brush needs to hold a fine point and deposit adhesive precisely. Most kit-included brushes are too short and too stiff. A proper liner or rigger brush (long, flexible bristles) gives you dramatically better control. The right brush costs $8–15 and is the single easiest upgrade you can make.
Best starter
Princeton Artist Brush
Princeton Heritage Series 4050 Synthetic Liner, Size 4
$9.99 as of Jun 22, 2026
★★★★★Our rating· In Stock
Princeton's Heritage liner holds a perfect point and releases adhesive evenly along a seam. The long-bristle liner tip gives you the reach and control to work in a continuous stroke along a crack without lifting. Durable enough to clean and reuse across many sessions. The brush kintsugi hobbyists recommend to each other consistently.
What we like
Long liner tip holds a sharp point through precise adhesive work
Synthetic bristles clean up easily without losing shape
What to know
Needs immediate cleaning after use; dried adhesive ruins the tip
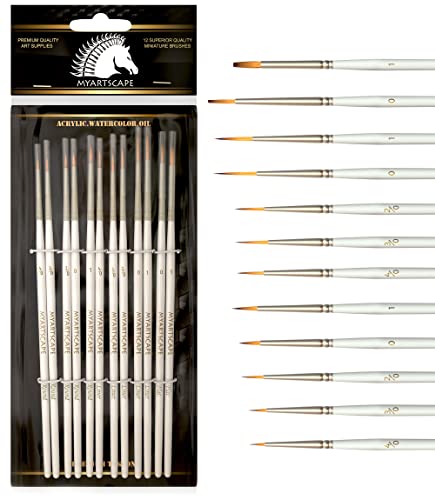
Twelve brushes across different tip shapes for under $12. The fine liner and spotter sizes are what you'll use for kintsugi; the others work for other craft projects. Quality is basic but adequate for the slow, precise work kintsugi demands.
What we like
12-piece set means one wrecked brush is not a problem
Liner and spotter sizes are both genuinely useful for kintsugi
What to know
Tips lose shape faster than Princeton-grade brushes
Short handles; slightly awkward for sustained work on a flat surface
Kolinsky sable holds more adhesive in the belly and has better spring than any synthetic brush. The size 2 round tip point is fine enough for hairline-crack work and the belly holds enough adhesive to work a longer seam in one pass. Expensive for a single brush, but it will outlast ten cheap ones.
What we like
Kolinsky sable spring gives tactile feedback no synthetic brush can match
Belly holds enough adhesive to work a full seam without reloading
What to know
Expensive for a single brush; overkill until you're doing serious work
Requires careful cleaning and reshaping after each use to maintain the tip
Three supporting items make a real difference: a disposable mixing palette (for adhesive batches without cross-contamination), painter's tape (to hold joins during cure without leaving residue), and wet-dry sandpaper to smooth fracture edges before repair and polish seams after. Combined cost under $20. Skip anything else until you've done five repairs and know what's actually slowing you down.
Best starter
Zenacolor
Paper Palette Pad, 50 Removable Sheets
$7.49 as of Jun 22, 2026
★★★★★Our rating· In Stock
Tear-off palette sheets let you mix small adhesive batches without cross-contaminating between sessions. Far better than a reusable palette when working with sticky epoxy or synthetic lacquer. Fifty sheets is a year's supply for most hobbyists.
What we like
Tear-off sheets mean no cleaning; fresh surface every repair
Painter's tape holds ceramic fragments in alignment during cure without leaving adhesive residue on the glaze. FrogTape's medium-tack version is the right grip for pottery: strong enough to maintain a join under light tension, gentle enough to remove clean.
What we like
Removes clean after cure without chipping adjacent glaze
Medium tack holds joins under light pressure through the cure window
What to know
Not a real clamp; complex multi-piece reassemblies need rubber bands or jigs
Long urushi cures need fresh tape replaced every few days
Start at 220 grit to smooth rough fracture edges before joining, finish at 1000–3000 to polish cured seams to a near-glass sheen. The full grit range is what turns a competent repair into a beautiful one on glazed pieces that catch the light. Forty sheets at multiple grits for under $10.
What we like
Full range from edge-smoothing (220) to seam polishing (3000)
Wet/dry sheets outlast standard sandpaper on smooth ceramic surfaces
What to know
Easy to over-sand on glazed surfaces; work in light, short passes at 220
Multiple sheets to keep organized; label the grits before you start
Kintsugi's reputation for patience is earned; the first repair is more forgiving than you think. Here's what actually happens, from breaking your first piece to holding a finished bowl with a gold seam running through it.
Kintsugi has a reputation as a philosophical practice as much as a craft. The idea (that broken things become more beautiful when you repair them honestly, with gold instead of hiding the damage) is genuinely compelling, and the Instagram feed of finished pieces is remarkable.
What the aesthetic doesn’t tell you is that the first repair is more accessible than it looks. The basic mechanics are learnable in an afternoon. The philosophy takes care of itself once the seam dries.
This is what your first weekend of kintsugi actually looks like, with the decisions that matter and the ones that don’t.
Before you start: the one real decision
The most important thing to decide before buying anything is whether you want an authentic kit (urushi lacquer) or a modern one (epoxy or synthetic lacquer).
Here’s the honest version: for a first repair, use modern synthetic lacquer. Not because it’s easier (though it is), but because authentic urushi requires you to manage humidity for weeks, risk a significant allergic skin reaction, and wait months before you can see the finished result. Those are real commitments, and they make no sense before you know if you love the craft.
Synthetic kits cure in hours. They look nearly identical to urushi at arm’s length. They’re safe to work with and beginner-forgiving. If you later want to graduate to authentic urushi, the skills transfer directly.
Day one: breaking and fitting
Start with something you wouldn’t mind breaking even if kintsugi didn’t exist. A $2 thrift-store mug or a bowl you’ve liked but not loved. The emotional stakes of your first piece should be low enough that you’re not afraid to experiment.
Breaking it intentionally takes more force than you’d expect. Wrap the piece in a kitchen towel and strike it once with a mallet, or drop it onto a hard floor from six inches. You’re aiming for one or two clean fracture lines. A single crack across a mug is the ideal first project.
Before you touch the adhesive, dry-fit the pieces completely. Hold the break closed with your fingers and look at how the edges meet. Understand which fragment goes first if you have more than two pieces. The worst kintsugi beginner mistake is applying adhesive, joining one piece, then discovering a third fragment that needs to go in between.
While you have the pieces apart, lightly sand the fracture edges with 220-grit sandpaper. You’re just smoothing out any sharp points and giving the adhesive something to grip. Ten seconds per edge, not a real sanding pass.
Day one: the repair
Mix your adhesive according to the kit instructions. Most synthetic kits want a small batch; the size of a pea is enough for a single crack. More is worse, not better.
Apply adhesive to both fracture edges with your brush. The brush matters here: a fine liner brush gives you control that a foam applicator or a thick brush won’t. You want a thin, even coat on each edge, not a thick bead.
Press the pieces together and hold with light, even pressure for sixty seconds. Wipe off any adhesive that squeezes out of the seam immediately, while it’s still wet. Dried overflow is much harder to remove and will show under the gold.
Tape the join to hold it in alignment while it cures. Painter’s tape (medium tack) works better than masking tape, which won’t leave residue on the glaze. Cross the crack with several strips perpendicular to the seam, and add one strip running along the length of the seam to prevent rotation.
Leave it undisturbed for as long as the adhesive manufacturer recommends before the next step. For most synthetic kits, that’s two to twelve hours.
This is the step beginners most often get wrong, usually by rushing.
The gold powder goes on during what’s called the tacky window, when the adhesive is past the wet stage but hasn’t fully hardened. What you’re looking for: the adhesive doesn’t transfer to your finger, but the surface still gives slightly when pressed. It feels like post-it note adhesive at its stickiest.
With your fingertip or a soft brush, press fine gold mica powder directly into the seam. You’re not painting it on; you’re pressing it into the adhesive, where it will anchor. Work along the length of the crack in short sections.
Apply more powder than you think you need. After it fully cures, you’ll buff off the excess, and what remains should be a clean, bright line. If you apply too little now, the seam will look spotty.
Let the adhesive cure completely, several hours more or overnight for best results, before buffing.
The finish
Once fully cured, gently rub the seam with a soft cloth in short strokes along the line of the crack. You’re removing powder that didn’t bond to the adhesive and polishing the gold that did. The seam should emerge clean, bright, and continuous.
If the seam looks sparse or uneven, you can apply another thin coat of adhesive with a brush, let it reach the tacky window, and add more powder. Multiple thin coats produce better results than one thick one.
Hold the finished piece at different angles in light. The gold seam will catch the light differently as you move, which is part of what makes kintsugi photographs so appealing. The damage isn’t hidden; it’s become the most interesting part of the object.
Applying powder too soon. The gold won’t stick if the adhesive is still liquid; it’ll just sit on the surface and be removed when you buff. Wait for the tacky window.
Using too much adhesive. Overflow that dries outside the seam is visible and hard to remove. Thin coats on both edges, pressed firmly together.
Rushing the cure. Most adhesives look set long before they’re truly cured. Buffing too early will drag adhesive out of the seam and leave gaps. Wait the full time.
Skipping dry-fit. If you have three pieces and apply adhesive to all three at once, you’ll race the cure trying to assemble them in order. Dry-fit first, then repair in stages, letting each join cure before adding the next piece.
Where the practice goes from here
The first repair teaches the mechanics. The second teaches you to recognize the tacky window without guessing. By the fourth or fifth, you’ll know how thin to make the adhesive coat, how much powder to press in, and when to leave things alone.
The craft deepens in two directions: toward authentic urushi (longer curing, humidity management, allergic reaction testing, with genuinely archival results) and toward more complex repairs (multiple cracks, missing fragments filled with adhesive-and-powder paste, asymmetrical joins that require careful staging).
Both are worth pursuing once you know the basics work for you. Neither is necessary on the first weekend.
Save your money
What you don't need yet
Beginners get pressured to buy a lot of stuff that doesn't help them play
better. Here's what we'd skip on day one.
A humidity cabinet (furoba) — Only necessary for authentic urushi lacquer. Epoxy and synthetic kits cure in open air just fine.
Real gold leaf or gold dust — Fine-milled mica powder is the standard, even for high-end modern kintsugi. Real gold adds significant cost without visible benefit at arm's length.
Japanese washi reinforcement paper — Traditional material for stabilizing joins before lacquering. Painter's tape does the same job for the first ten repairs.
Tung oil finishing topcoat — Adds sheen to authentic urushi repairs. Not applicable to epoxy kits and not necessary until you're doing multi-coat urushi work.
Antique or irreplaceable ceramics to start on — You will make mistakes on your first few repairs. Thrift-store finds are the right practice material. Save heirlooms for after you've done five successful repairs.
First week
Your first seven days
A short, real plan to get from gear-on-doorstep to actually playing.
Visit a thrift store and buy 3–5 affordable ceramics you like the shape of: mugs, bowls, small plates. · Action
Break one piece cleanly. Wrap it in a kitchen towel and strike once with a mallet, or drop it from 6 inches onto a hard floor. One clean crack is ideal. · Action
Order a starter kit so it arrives before the weekend. · Buy
Dry-fit your broken pieces before applying adhesive. Understand the assembly order (which piece goes first, which last) before you mix anything. · Learn
Complete your first repair. Apply adhesive to the crack edge, join, tape to hold, and leave undisturbed for the full cure time. · Action
Apply gold powder during the tacky window: adhesive not fully wet, not fully set. This timing is the craft's one real technique to learn. · Action
After full cure, gently buff excess powder with a soft cloth. The seam should read as a clean gold line, not a dusted smear. · Action
FAQ
Common questions
Is kintsugi safe for food-use dishes?
It depends on the adhesive. Authentic urushi lacquer is food-safe once fully cured and has been used in Japanese tableware for centuries. Modern epoxy and synthetic lacquer kits are generally not food-safe. For food-contact repairs, use urushi or label the repaired piece as decorative only.
What's the real difference between authentic and epoxy kintsugi?
Authentic kintsugi uses urushi lacquer from the urushi tree, requiring weeks of high-humidity curing and carrying an allergy risk for some people. Modern kits use epoxy or synthetic lacquer that cures in hours and is safe to handle without precautions. Results look similar to the untrained eye. For beginners, start with synthetic and switch to urushi when you're genuinely committed.
Do I need real gold?
No. Most kintsugi, including high-end modern work, uses fine mica powder in a gold metallic finish rather than actual gold leaf or dust. Real gold is available for purists but adds significant cost without a visible difference at arm's length. Mica powder is the standard and completely appropriate.
What ceramics are best to start with?
Standard pottery, stoneware, and earthenware are ideal. Bone china is brittle and shatters into very fine fragments that are hard to reassemble cleanly. Old lead-glazed antiques should be treated as decorative-only after repair and kept away from food. For practice, thrift-store stoneware mugs and bowls are perfect.
How long does a repair take?
With modern epoxy or synthetic kits: one to three days total including cure time. With authentic urushi: three to six months for a properly done multi-layer repair. Most beginners using a synthetic kit complete their first repair start-to-finish over a weekend.
Is kintsugi hard to learn?
The basics (apply adhesive, join, dust with powder, buff) are learnable in one session. The craft's real learning curve is patience: waiting for cure times, dry-fitting before committing, and resisting the urge to rush the powder step. Technical skill matters less than discipline.
Kintsugi beginner tutorials (YouTube) — Several dedicated channels walk through each repair step visually. Watching one repair from start to finish before you begin is worth 30 minutes of reading.
Furutodo (Hiroshi Nishihata) — One of Japan's most respected traditional kintsugi studios. Their materials and instruction reflect authentic urushi practice. The benchmark for what the craft looks like done properly.
r/Kintsugi — Small but active community. Good for showing repairs, asking material questions, and finding the honest answers on the epoxy vs. urushi debate.
As an Amazon Associate, JustBeginning earns from qualifying purchases.
We may also earn commission from other affiliate programs linked on this
page. Editorial recommendations are independent; we don't choose
products based on commission rates.
Product prices and availability are accurate as of the date and time
indicated and are subject to change. Any price and availability
information shown on Amazon at the time of purchase will apply.
Our top pickKintsugi Repair Kit for Ceramics with Practice Bowls

 Best starter