Royal-icing sugar cookies look impossibly delicate, and then you realize the skills are learnable in an afternoon. The entry point is cheap, the payoff is immediate, and TikTok has made the whole community surprisingly welcoming. Here's exactly what you need to get started, and what can wait.
By Colin B. · Published May 31, 2026 · Last reviewed August 7, 2026
A basic starter kit (cutters, meringue powder, gel food coloring, squeeze bottles) runs $50–75. The full enthusiast setup with an airbrush adds another $100–200.
We earn commission on qualifying Amazon purchases — see our
affiliate disclosure.
Price tiers and budget totals shown above are editorial estimates;
actual Amazon prices vary.
At a glance
Our top pick in each category
The fastest path through this guide — each best-starter pick by category.
Scroll for the budget and upgrade alternatives.
The most important skill is not about tools, it's icing consistency. Royal icing at flooding consistency (thin, like honey) vs. piping consistency (thick, like toothpaste) are what give you the flooded base and the raised details. You'll feel the difference on your first batch; no equipment purchase fixes a wrong consistency.
Start with squeeze bottles, not piping bags. Every beginner article talks about piping bags, but for the flooding technique that makes decorated sugar cookies look finished, a squeeze bottle gives you far more control. You can recap it, set it down, restart. Bags are unforgiving once filled.
Buy a good cutter set before anything else. Cheap plastic cutters warp in the oven, leaving cookie edges that buckle and stop the icing from flooding cleanly. Stainless steel cutters hold their shape and cut through cold dough without drag.
The cutter determines the edge quality of your cookie, which determines how cleanly your icing floods to the border. Cheap plastic cutters warp in cold dough and leave rough edges; stainless steel cutters glide through cleanly and hold their shape indefinitely. Start with a multi-shape set rather than individual cutters, you'll want variety to practice, and bundled sets cost far less per piece than buying shapes one by one.
Cookie Cutters — what's the difference?
A few common shapes, each making a different trade.
Stainless Steel Set
Durable, sharp edges. The right buy if you're committed.
Material
Stainless steel
Edge quality
Very sharp, holds shape
Lifespan
Indefinite
Best for Anyone decorating more than once, the only thing worth owning
The standard recommendation among serious cookie decorators, stainless steel, razor-sharp edges that cut cold butter dough cleanly, and deep enough sides that the dough releases without sticking. The 11-piece set covers the shapes you'll actually use: round, square, heart, star, and a mix of geometric basics. Made in Vermont.
What we like
Stainless steel holds sharp edges through years of use
Deep sides release dough cleanly, no warping or sticking
Made in the USA by one of the most trusted cutter brands
What to know
Handwash only, dishwasher dulls edges over time
Set skips specialty shapes, add those individually later
If you want to try the hobby before spending on stainless, Wilton's plastic holiday mini cutters are the best of the budget options. The 12 shapes give you enough variety to practice flooding, and the compact size makes them easier to handle for detail work.
What we like
Under $15, low-stakes way to try the hobby before committing
Wide variety of shapes in one pack for practicing flood coats
What to know
Plastic warps with repeated use and dishwasher cycling
Thinner edges leave slightly rougher cuts than stainless
Once you're deeper into cookie decorating, you'll collect individual cutters in specific shapes. Ann Clark's individual stainless cutters are the standard; the 3.5-inch round is endlessly useful as a base for painted and embossed designs.
What we like
Single shape lets you master flooding on one consistent canvas
Stainless quality, collecting multiples makes sense at this price
What to know
Individual shapes add up, set is better value until you know what you want
The fundamental royal-icing technique is two-stage: pipe a border around the cookie edge, then flood the center with thin icing. Squeeze bottles are the beginner's best friend for flooding, you can cap them between colors, restart without waste, and control the flow with simple pressure. Piping bags with metal tips come next when you want fine-line details and lettering.
Best starter
Wilton
Cookie Decorating Icing Bottle
$13.99 as of Jun 22, 2026
★★★★★Our rating· In Stock
The easiest tool for your first flood coats. Fill with icing, cap between uses, and control the flow with light pressure. Buy a few to run multiple colors at once without swapping mid-cookie. The silicone body gives you precise squeeze control that plastic bottles can't match.
What we like
Silicone body gives precise squeeze control for flooding
Cap-and-restart is far more forgiving than piping bags
Interchangeable tips, upgrade to fine tips without new bottles
What to know
Tips clog if icing dries, keep capped between uses
Once you're comfortable flooding and want fine-line details, you need real piping tips. PME's seamless stainless steel tips are what professional decorators use (they hold their shape, don't corrode, and the fine openings resist clogging. This set covers No. 1, 1.5, and 2) the sizes you'll use most.
When you're running multiple colors in detail work, disposable bags save cleanup time. Snip the tip to your desired opening, use, discard. A 100-count lasts through many decorating sessions and is far cheaper than premium reusables at this stage.
What we like
100 bags lasts months, no constant restocking
Snip-and-use means no coupler needed for quick work
Royal icing needs just two things: meringue powder and powdered sugar. The meringue powder path is safer than raw egg whites, more consistent, and shelf-stable. Gel food coloring is non-negotiable, liquid food coloring thins the icing and muddies the colors. Get a gel set with at least 8 colors and you can mix virtually any shade.
Best starter
Wilton
Meringue Powder (8 oz)
$
★★★★★Our rating
The standard meringue powder for royal icing, available everywhere, consistent results, and the 8-oz can makes dozens of batches. Mix with powdered sugar and water, adjust the ratio for piping vs. flooding consistency. One can lasts a beginner months.
What we like
No raw egg risk, shelf-stable and safe without cooking
Consistent results batch to batch, no guesswork
One can makes dozens of batches, great beginner value
What to know
Slightly more expensive than raw egg whites per batch
Icing sets completely hard, not for soft or chewy cookies
Gel paste is the only way to color royal icing without ruining consistency. AmeriColor's student kit covers the core palette (red, orange, yellow, green, blue, violet, brown, black) and the colors stay vivid in royal icing without thinning. A tiny amount colors a whole batch; these jars last a year of regular decorating.
What we like
Gel paste won't thin your icing, liquid food coloring destroys it
Vivid colors that hold saturation even in thick royal icing
Tiny amount goes far, one kit lasts a year of decorating
What to know
Black and red need more gel than other colors for full saturation
Small jars, easy to over-squeeze and add too much at once
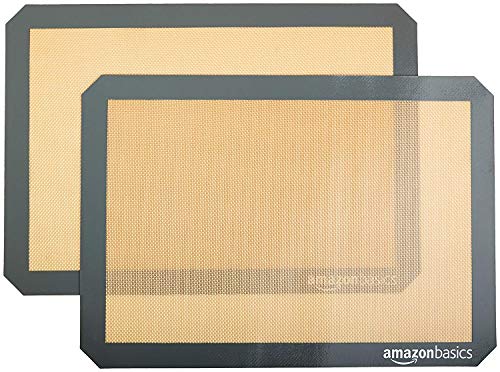
The decorated cookie is only as good as the cookie underneath. For royal-icing work you need a firm, flat, even sugar cookie, one that won't puff up in the oven and distort the shape. An adjustable rolling pin ensures even thickness (1/4-inch is the standard), and a silicone mat or parchment prevents sticking without adding excess flour that toughens the dough.
Best starter
Joseph Joseph
Adjustable Rolling Pin with Removable Rings
$75.53 as of Jun 22, 2026
★★★★★Our rating· In stock
The adjustable disc rings guarantee even thickness across your entire sheet, the most common beginner mistake is uneven dough that bakes some cookies thin and others thick. Set the rings to 1/4 inch and the guesswork disappears. Non-stick surface releases butter dough cleanly.
What we like
Adjustable rings guarantee even 1/4-inch thickness every time
Non-stick surface releases butter dough without extra flour
What to know
Handwash only, dishwasher loosens the disc mechanism
More expensive than a plain pin, overkill if you bake rarely
A silicone mat replaces parchment and keeps the cookie base consistent. The grid markings help with even spacing, nothing sticks, and it's reusable for years. Worth it once you're baking multiple sheets per session.
What we like
Reusable, replaces rolls of parchment over time
Grid markings make even spacing and sizing easy to judge
What to know
Bulky to store if you have a small kitchen
Slight silicone smell on first use, rinse before first bake
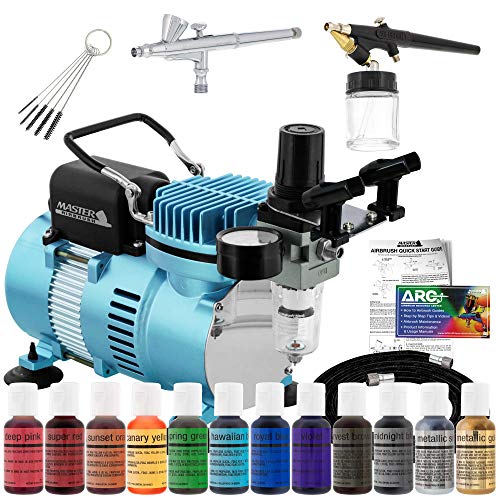
A food airbrush opens up gradient coloring, realistic shading, and metallic effects that are impossible with hand-piped icing. It's not a beginner's first purchase (you need solid flooding skills before it makes sense) but it's the tool behind the TikTok-quality cookies you're probably seeing in your feed. Aerosol color mists are the starter path (no compressor needed); a proper airbrush kit is the next level.
Best starter
Wilton
Color Mist Food Color Spray (3-Color Pack)
$
★★★★★Our rating
An aerosol food spray lets you try airbrushing effects with zero equipment. Shake and spray over dry royal icing for gradient backgrounds, metallic shimmer, and fast color coverage. Each can does dozens of cookies. Not as precise as a real airbrush, but the barrier to entry is nearly zero.
What we like
Zero setup, shake and spray, no compressor or cleaning needed
One can covers dozens of cookies for gradients and shimmer
What to know
Less precise than a true airbrush, best for backgrounds, not detail
Too close and wet icing bleeds, distance control takes practice
When you've outgrown aerosol mists, this brush-plus-compressor kit is the standard entry point for serious decorators. Comes with dual airbrushes, a quiet dual-fan compressor, and a 12-color food coloring set, everything you need to start. Precise, refillable, and the same type of setup used in professional cookie studios.
What we like
Refillable with any food-safe color, unlimited palette
Precise trigger control enables fine gradients and detail shading
What to know
Cleaning between colors is a real time commitment
Must use food-safe airbrush colors, standard craft paints are unsafe
Sugar cookie decorating looks like a skill that takes years. It doesn't. You can go from zero to a finished tray of decorated cookies in a single weekend, here's what that actually looks like.
Cookie decorating has a reputation for being an advanced skill. It’s not. The basics (flooding a smooth, even base coat) are learnable in a single afternoon with about $50 in supplies. What takes time is the refinement: clean lines, complex multi-color designs, advanced techniques like wet-on-wet marbling or airbrushed gradients. But “your first finished tray of nice-looking cookies” is genuinely achievable on day one.
Here’s what that first weekend actually looks like.
Day one: dough, cutters, oven
Before you can decorate cookies you need cookies, and the wrong cookie will ruin your decorating before you start. You need a no-spread sugar cookie recipe, one that holds its cutter shape through the whole bake without puffing up at the edges. Most standard sugar cookie recipes work; avoid ones with baking powder or extra leavening.
A few things that matter more than most tutorials admit:
Roll the dough cold. Chill the dough for at least 2 hours (overnight is better) before rolling. Cold dough handles cleanly, holds cutter shapes, and doesn’t stick to the rolling pin. Warm dough is a mess.
Roll to an even 1/4 inch. This is where an adjustable rolling pin earns its price. Uneven dough means some cookies bake faster than others, and the edges of thick cookies distort in ways that make flooding harder. 1/4 inch gives you a firm base that’s thick enough to hold icing without cracking when you stack the finished cookies.
Let them cool completely before decorating. This sounds obvious but most first-timers rush it. Even slightly warm cookies make the royal icing bleed at the edges and never dry flat. Two hours minimum; overnight is ideal.
The icing: piping consistency vs. flooding consistency
Royal icing is one recipe with two modes. You make one batch (meringue powder, powdered sugar, a little water) and then split it.
Piping consistency is thick, like toothpaste. It holds stiff peaks and keeps its shape. You use this for outlining the cookie edge and for any raised detail work, dots, lines, lettering.
Flooding consistency is thin, like honey. It flows and self-levels. You thin your piping consistency batch with water, a few drops at a time, until a line drawn through the bowl fades back into a smooth surface in about 10 seconds. That’s flooding consistency.
The technique is simple: pipe a border around the cookie with stiff icing, then fill the center with flooding icing. The border acts as a dam. The flood levels itself into a smooth glassy surface as it dries. When it works, it looks like colored glass, clean, flat, professional.
When it doesn’t work, the usual culprit is one of two things:
Flooding icing too thick: it stops short of the border and looks uneven. Add a few drops of water.
Flooding icing too thin: it flows over the border and drips off the edge. Start over with thicker icing.
The 10-second test is your calibration tool. Use it every time you mix a new color batch.
Squeeze bottles beat piping bags for beginners
Every beginner-focused article leads with piping bags. We’ll suggest the opposite for flooding: start with squeeze bottles.
Here’s why: piping bags are pressurized. Once you start squeezing, the bag keeps pushing. The pressure builds, you can’t easily pause, and if you set a loaded bag down it keeps oozing. For flooding (where you’re filling large areas and then stopping) a squeeze bottle is far more controllable. You squeeze; you stop. You set it down; it stops. You cap it and come back tomorrow.
Fill one bottle per color. For your first session, start with two colors, a base flood and one detail color. Four colors maximum for your first few batches; more than that and you’ll spend more time managing icing than decorating.
Your first decorated cookies
For your very first session, decorate something simple on purpose: a round cookie with one flood color and one detail color. No lettering. No wet-on-wet marbling. Just: pipe border, flood center, wait.
The drying time is the thing that surprises most first-timers. Let the flood coat dry completely before adding details. “Completely” means 4–6 hours at minimum; overnight is better. Touch the surface, it should feel hard and not tacky at all. If you add details on wet flooding icing, they sink in and blur.
Once the base is dry, you can add a second color on top: dots, lines, a name, a simple flower. This is where a fine-tipped squeeze bottle or a piping bag with a #1 or #2 metal tip starts to matter. The squeezing-with-control skill is what determines the quality of your detail work, and it improves fast with repetition.
Things that go wrong for everyone the first time:
Air bubbles in the flood: pop them immediately with a toothpick while the icing is still wet
Uneven edges where flood meets border: you moved too fast or the icing was slightly different consistencies, fix with a toothpick while wet
Detail lines bleed into the base coat: the flood wasn’t fully dry. Wait longer next time.
None of these are disasters. Most are fixable in the moment with a toothpick, and all of them improve on your second batch.
What comes after the basics
Once you’ve got one clean, flat, two-color cookie, the next techniques to learn, in roughly this order:
Wet-on-wet designs: add a second flood color on top of the first while it’s still wet, then drag a toothpick through both to create marbling, swirls, or heart designs. You have about 5–10 minutes while the base flood is still fluid enough.
Adding texture with a scribe: a scribe tool (or toothpick) lets you drag details through wet icing, pull hearts out of dots, create feathered patterns, blend color boundaries.
Layering dry over dry: once you’ve mastered a clean base flood, add raised detail work on top. Dots, lines, simple borders. The raised elements create dimension and make cookies look far more finished.
Food airbrush effects: after a month or so of hand-decorating, if you want gradients and metallic sheen, the aerosol Color Mist sprays are the zero-equipment starting point. Hold the can 8–10 inches away, spray in short bursts, and let the flood be fully dry before you spray.
The community is genuinely helpful, r/cookiedecorating and the YouTube channels in the gear guide below show techniques in real time in a way that no written tutorial can fully replace.
Save your money
What you don't need yet
Beginners get pressured to buy a lot of stuff that doesn't help them play
better. Here's what we'd skip on day one.
Cookie stamps and embossers — Beautiful results, but they work best on unfrosted cookies, a separate skill path. Learn flooding first.
Edible gold luster dust — Gorgeous finishing touch, but it goes on top of an advanced design. Master flat floods before worrying about sparkle.
Scribe tool set — A toothpick does the same job, drag flooded icing into hearts, pop air bubbles, blend colors. Buy after your second batch if you want a nicer handle.
Projector or light pad — Transfers designs via projection, useful for intricate custom work but completely unnecessary until you're decorating for clients.
Cookie decorating stand — Holds the cookie tilted toward you while you work. Nice, not necessary, a folded kitchen towel does the same thing.
First week
Your first seven days
A short, real plan to get from gear-on-doorstep to actually playing.
Make one batch of sugar cookie dough, any firm, no-spread recipe. Refrigerate overnight so it rolls cleanly. · Action
Order a starter cutter set so it arrives before your first bake day. · Buy
Watch one flooding tutorial on YouTube, specifically one that shows icing consistency side by side. That ratio between piping and flooding thickness is the key thing to internalize. · Learn
Bake your first sheet and decorate with a two-color flood, outline plus fill on a simple shape like a circle or square. Don't aim for a masterpiece. Aim to understand the icing. · Action
Let decorated cookies dry at least 4–6 hours (overnight is better) before stacking or packaging. Rushing the dry time is the most common beginner mistake. · Action
FAQ
Common questions
How much does it cost to start cookie decorating?
A basic starter kit (cutters, meringue powder, gel food coloring, and squeeze bottles) runs $50–75. You probably already have the baking equipment. The full enthusiast setup with an airbrush adds another $100–200.
What's the difference between flooding and piping consistency?
Piping consistency is thick, like toothpaste. It holds its shape for outlines and detail work. Flooding consistency is thin, like honey, so it self-levels into a smooth flat base. You make one batch of icing and thin part of it with water to get flooding consistency.
Can I use regular liquid food coloring instead of gel?
Technically yes, but we strongly recommend against it. Liquid food coloring thins your icing consistency and gives you weak, muddy colors. Gel paste food coloring gives vivid color in tiny amounts without changing the icing texture.
How long do decorated sugar cookies last?
Royal-iced cookies at room temperature last 2–4 weeks in an airtight container. The icing actually seals the cookie and extends shelf life. Don't refrigerate, condensation ruins the icing surface.
Do I need to pipe an outline before flooding?
For beginners: yes. A slightly thicker piped border acts as a dam that keeps the thin flooding icing inside the cookie edge. As you get confident, some decorators skip the outline and flood right to the cutter edge.
Is cookie decorating hard to learn?
The basics (flooding a flat color) are learnable in one session. Consistent clean results take a few batches. Advanced techniques like wet-on-wet designs, airbrushing, and fine-detail piping take months of regular practice.
Sweetopia — Marian's site, one of the original royal-icing decorating blogs. Deep tutorials on flooding, wet-on-wet, and template techniques.
Julia M Usher (YouTube) — Detailed technique videos from a professional cookie artist. Essential for understanding icing consistency and troubleshooting.
SugarBelle Cookies — Accessible beginner tutorials and seasonal designs. Great for first-timer inspiration and technique basics.
r/cookiedecorating — Active community for sharing work, asking technique questions, and getting constructive feedback on your results.
As an Amazon Associate, JustBeginning earns from qualifying purchases.
We may also earn commission from other affiliate programs linked on this
page. Editorial recommendations are independent; we don't choose
products based on commission rates.
Product prices and availability are accurate as of the date and time
indicated and are subject to change. Any price and availability
information shown on Amazon at the time of purchase will apply.


 Best starter